I am one of those types of people who need to eat every three hours or I get hangry (hungry + angry) and become a monster. It’s like I’m a totally different person, and I either go silent or lash out. Once I have a few bites of some clean-eating snacks, I can see straight again and all is well.
I remember when my sister and I were growing up, my father would make us keep granola bars in our bags/pockets/anywhere for easy access. Over the years, I’ve continued to keep food with me wherever I go and am not shy about making sure I get to eat frequently.
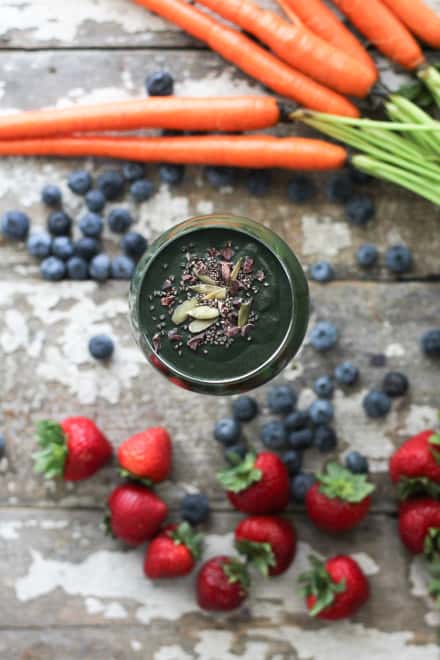
I know it’s worse when I’m stressed or battling adrenal issues, and fuelling my body continuously is just another tool to get my glow back!
Now that I’m more aware of what my body needs nourishment-wise and what it doesn’t need because of dietary restrictions/health problems, I’ve come up with some go-to snacks whether I’m at home or on-the-go.
Here are some of my favorite easy, nutrient-packed, clean-eating snacks:
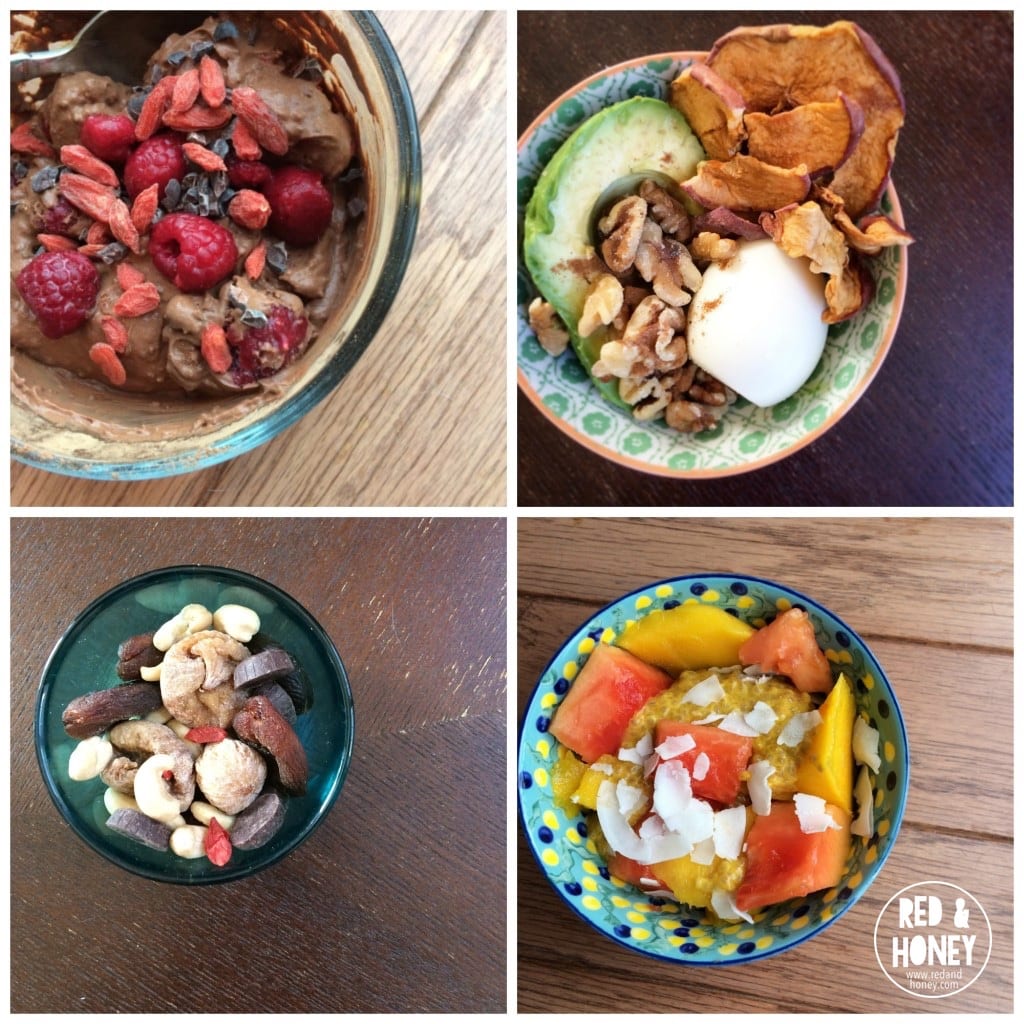
1. Stuffed dates – medjool dates are amazing by themselves, but stuffing them with tasty treats takes them over the edge
2. Plantains & avocado are an old stand-by. Use the plantain chips to scoop out the fresh from half of an avocado (sprinkle pink salt on the avocado for even more oomph)
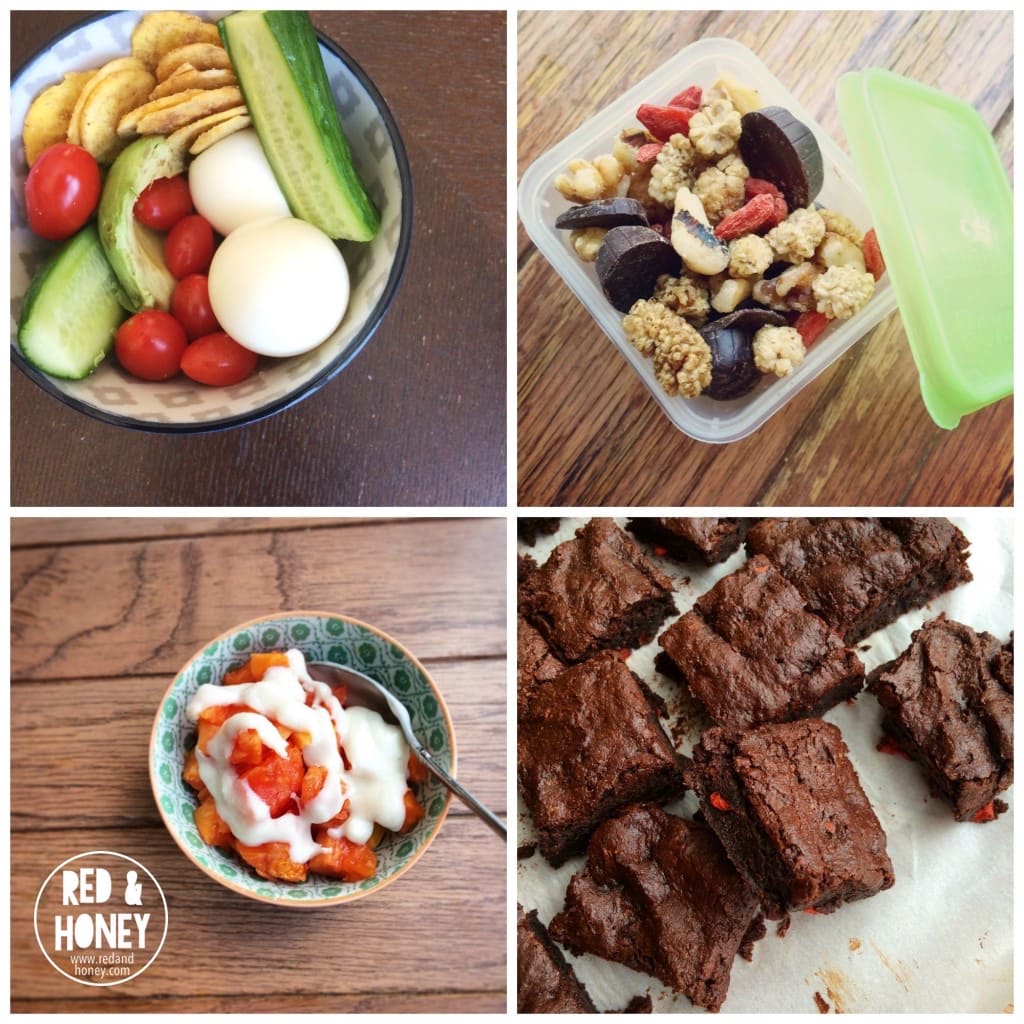
5. Hardboiled eggs + avocado, fresh fruit, plantain chips, cherry tomatoes, sliced cucumbers, and pink salt
6. Pumpkin bars – combine pumpkin, medjool dates, and cashew butter for a light, cake-y bar
7. Coconut yogurt powerbowls – I make my own coconut “yogurt” by blending up fresh coconut meat or coconut milk (full fat) from a can. Top with bananas, berries, seeds, dried fruit, nut/seed butters, cacao nibs, and more for a satisfying snack
8. Kale chips, apple chips, and plantain chips are great options for some healthy crunch
9. Trail mix of your favorite dried fruit, nuts, and seeds – I like mulberries, goji berries, walnuts, pecans, and chunks of 99% dark chocolate
11. Berries and cherries with seeds, cacao nibs, nut butter – I like to use frozen raspberries and cherries and top them with hemp seeds, cacao nibs, and a drizzle of tahini
12. Fresh papaya (or mango or pineapple) drizzled with coconut butter and sprinkled with cinnamon for a tropical twist
15 Delicious Ways to Use Chocolate Chips and a Big Enjoy Life Chocolate Chip Discount!
I shared this last year, but am re-sharing today to be sure you all see the awesome Enjoy Life Chocolate Chip deal happening right now!
It’s always fun this time of year to find discounts on my favorite Enjoy Life Chocolate Chips! Companies avoid shipping them out during the summer months because they arrive in the mail messy and melty. Therefore the price always goes up when it’s warm. But winter? Well, this is one reason to like winter. If we can’t enjoy warmth and sunshine, at least we can enjoy chocolate. (One must choose to seek joy in all circumstances.)
Why the Enjoy Life brand? Because they are soy free, dairy, and nut free. They taste just as yummy as any other brand, and we have the benefit of avoiding soy! I keep these on hand at all times!
Right now (but who knows how long this price and coupon will last??) you can get a 6-pack of the chocolate chips for just $18.60! That makes each package just $3.10 – and amazing price for these gems!
Want some chocolate chip recipes?
Malachi has been helping in the kitchen more lately, thanks to the Kids Cook Real Food course. At this point, he’s mostly motivated by dessert – as in, he would prefer not to “waste time” making boring ol’ scrambled eggs or ranch dip. I’m going to need him to get over that very soon, but to keep it light today I asked, “What do you want to make?” His answer? “FUDGE.”
Okay then.
I had him make this Peanut Butter Honey Fudge recipe, but with almond butter instead of peanut butter. It doesn’t get any easier than this 3-ingredient recipe. Though we’ve decided that the result tastes more like a Tootsie Roll than fudge. Still awesome.
Our other favorite recipes that include chocolate chips are:
There. I gave you 15 excuses to eat chocolate chips. Plus a lovely discount on my favorite brand of chocolate chips. Plus a lot of pictures to make you want chocolate right this minute. You’re welcome or I’m sorry – take your pick.
Some of the links in this post are my affiliate links.
Original article and pictures take heavenlyhomemakers.com site
As is always the case this time of year, I have absolutely no idea who is playing in the Super Bowl. If it mattered to my husband it would matter to me. But it doesn’t, so it doesn’t. Make sense?
What does matter to me is the fun night of fellowship we will have at our friend’s house during the game. Matt and I actually do enjoy watching the occasional game of football. The big buffet of fun foods never hurt my feelings either. I’m all about the dips at a Super Bowl party. I have several I’m thinking of making to share. Here are some of our favorites:
Black Bean Salsa – Five healthy ingredients, it’s like a flavorful meal all by itself.
Cream Cheese Salsa Dip – This is the easiest dip on the planet (2 ingredients!) and everyone loves it.
Easy Veggie Dip – Oh my cucumbers. This is the very best way to enjoy raw veggies. It stirs together in about two minutes.
Healthier Cheese Dip(a Velveeta/Rotel Knock-Off) – Who needs “processed cheese product” when you can have the real deal?!
Spicy Avocado Dip – My family devours avocados when we quickly mix this up. Hello, healthy goodness.
Easy Cheesy Bean Dip – This also only includes five delicious ingredients. Easy and healthy – that’s how I roll.
Hamburber Sauerkraut Dip – Even if you don’t like kraut, you will love this. It is incredibly good.
Cream Cheese Fruit Dip – This is like whipped heaven in a bowl, perfect with apples and strawberries.
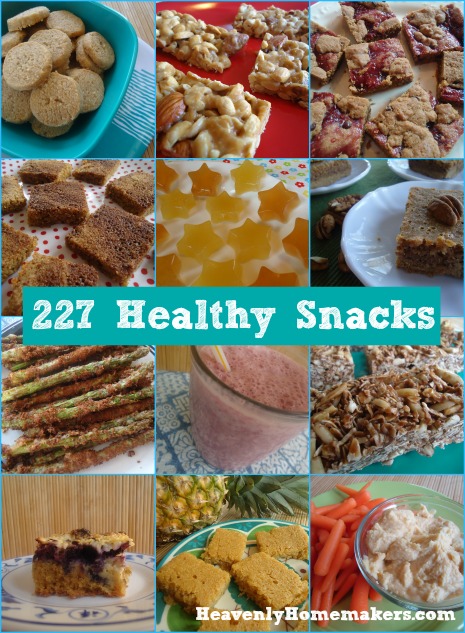
But there’s more! A big part of healthy snacking is healthy dipping. I love that dips can add nutrition as well as help us get the veggies down. In our newest eBook, 227 Healthy Snacks, we’ve included several new dip recipes like:
Super Easy Hummus
Green Chili Dip
Fresh and Quick Salsa
Spicy Sausage Chip Dip
Spicy Lentil Dip
Not only will you find these 5 awesome new dip recipes, you’ll find 222 more healthy snack ideas and recipes too. From bars to muffins to hearty cookies to fruit and veggie snacks, you will be totally equipped with loads of healthy snacks to keep your and your family full and nourished! Get all the details about this book here.
Grab your copy and start putting together these easy, healthy recipes!
Yesterday, I posted about 10 Chore Ideas for Toddlers. Today, I’m going to share some chore ideas for 4-year-olds.
Why 4-year-olds? Well, because I happen to have a 4-year-old right now. �� However, don’t feel like these chores are only appropriate for 4-year-olds. They’d probably work great for children of other ages, too.
3 Important Things to Remember
1. Children Need to Know What You Expect of Them
If you don’t show your children how to do a job well, you can’t expect them to know how to do it right. Before asking them to do a chore on their own, work alongside them a few times showing them specifically how to do it.
2. Don’t Expect Them To Do It Well–Especially At First
It often takes a lot of repetitive teaching, gentle correcting, and practice before a child can do a job well. Don’t expect perfection–especially when they are young. What matters is that they are putting forth effort and trying their best.
3. Praise 10 Times As Much As You Correct
It’s easy to want to focus on pointing out all the things a child does wrong and where they need to improve. Instead of dwelling on what they didn’t do right, focus most of your energies on praising those things they did well. Encouragement and affirmation go a very long way!
Teach Me to ServeLooking for more ideas for teaching children to serve? Get the Teach Me To Serve: 99 Ways Preschoolers Can Learn to Serve and Bless Others. This ebook includes 99 ideas for ways preschoolers can serve in the home, in your neighborhood, in the community, and in your church. Many of the ideas were very original and a number of them I highly doubt I ever would have thought of on my own.
Children at this age are probably able to dress themselves, brush their teeth, and comb their hair. If they aren’t doing these things on their own, I’d encourage you to start by teaching them those chores.
1. Pick Up Their Room — Make sure you show your child exactly what a clean room looks like. And if their room is really messy, I’d suggest working with them to clean it and giving them one specific project to work on at a time. Young children are often still learning the concept of staying on task, so you want to make sure you don’t overwhelm them by giving them too large of a task to accomplish then they are ready to tackle.
2. Vacuum — If you have a vacuum with an attachment, they can use the attachments on furniture or small areas in your home. Kaitlynn also can vacuum one room, with a little help from me.
3. Water Plants — Use a plastic watering can (we found ours at the dollar store or you can make one from a milk jug) to make it fun and easy for small hands.
4. Fold Washcloths, Hand Towels, Underwear, & Other Small Items — I often will sort these out from the big laundry pile and make a small pile for each child to fold, based upon their folding abilities.
5. Sort & Fold Socks — Sorting and folding socks can be a fun job for little people. And you can teach matching, colors, and counting with it, too.
6. Put Away Laundry — When the girls help with laundry, I have each of them put away their own laundry plus sometimes some towels. It’s amazing how much more quickly things get put away when multiple people are working together!
7. Dust/Wipe Down Surfaces — 4-year-olds are great at cleaning baseboards, small floor areas, wiping down cupboards, or dusting surfaces. If you have a feather duster, they might have fun trying that out, too!
8. Wipe Down Sink/Toilet — Cleaning wipes work especially well for young children to use. Or, you can spray some nontoxic cleaner onto a rag and let them wipe down the sink, toilet, or floor in the bathroom. Kaitlynn is also learning how to clean the toilet with the toilet brush, with my supervision.
9. Empty Trashes — 4-year-olds are usually big enough and strong enough to tie up the trash bag and haul it out to the garage or back door.
10. Wipe Down Door Handles — Give your child a cleaning wipe or a damp rag and have them wipe down all the door handles. This is a favorite chore at our house!
11. Clear the Table — Teach your children to clear their plates after each meal (our children are still working on doing this without needing to be reminded!)
12. Rinse Dishes/Load Dishwasher –A 4-year-old is usually old enough to stand on a chair at the kitchen sink and rinse nonbreakable dishes (be sure to remove the knives and other sharp or dangerous objects before letting them do this). They can also help to load silverware and other nonbreakable dishes into the dishwasher.
13. Simple Meal Prep — Kaitlynn has learned how to pour cereal/milk, make toast and peanut butter & jelly sandwiches, and pop popcorn on her own. She also often helps me when I’m cooking.
14. Set the Table — Teach your children how to set the table correctly from the time they are young–it’s a skill many adults still don’t know! ��
15. Mop — My dad got the girls child-sized mops for Christmas and they love them. And while Kaitlynn is still working on perfecting her mopping skills, she does a pretty good job at mopping a small area.
My Job Chart
Have you heard of My Job Chart? It’s a free, easy-to-use, online chore chart and reward system for organizing and motivating your kids to learn first hand how to Save, Share, and Spend.
We have used this program in the past when we had some children who were feeling unmotivated to do their chores. We were amazed at how well it worked and would definitely recommend it!
Looking for other age-appropriate chore ideas? You might find these chore lists helpful:
First thing in the morning, look into your child’s eyes. See the world and the twinkling of innocence. Hold his gaze and whisper affirmations, or even just a simple ‘I love you babe’. Follow his lead and cuddle, play, or whatever he wants, to start the day off with a solid connection between you.
2. One on One Time
Spend fifteen minutes a day with each child one on one. Make sure you leave room for chatting and sharing feelings and thoughts. Creative play is often the easiest way for this to happen. You don’t even have to leave the house. Whatever you do, be sure to spend the time focused solely on the child, and nothing else. No electronic distractions, no chores, no other people. It can be tough with more than one kid, but it can be done most days. While little ones nap, spend time with the older ones. While older ones amuse themselves, spend time with the little ones.
3. Get Down On the Floor
Connect on their level and physically get down to the floor to play legos, dollies, puzzles, or whatever they want. Even the simple act of my husband lying down on the floor brings giggles of delight as the 2 and 4 year olds proceed to crawl all over him and wrestle and play.
4. Fall Asleep Together
You may have a different sleep routine than us (we’re pretty attachment parent-ish), but there is just something so sacred about watching your little one’s eyes get heavy and flutter closed, breathing peacefully in the inimitable security that being in your arms or lying next to you provides. Even if you aren’t normally with your child while they fall asleep, let it happen every once in a while for the sheer magic of the moment. Plus – sleeping children are ridiculously adorable and heart-warming.
5. Let Them Do Grown-Up Things
Instead of always assuming they can’t do something, try letting them. Normally I keep my four-year-old away from sharp knives, but once in a while I’ll let him try cutting his own food (under close supervision, of course). He loves having tea because it’s a grown-up thing to do, he loves pressing the buttons on the debit machine when paying for things. When he wanted to move from the booster seat to a regular chair at the table we said yes, even though it was more messy. Letting your child know that you feel he is maturing and continually ready to try new things instills confidence and a healthy sense of pride, and will deepen his trust in you.
6. Pray Together
Pray together throughout the day about the things that concern your child. Be sure to also let him hear you pray for him. Don’t dumb it down – pray earnestly from the heart, modeling the way you want him to learn how to pray himself.
7. Ask For Your Child’s Help
My kids absolutely light up when I ask for their help with a task they enjoy, such as vacuuming, laundry, or anything in the kitchen. They will proudly dump ingredients, stir, or even just hold something for me in order to help me out. Helping doesn’t have to just be at home, either. It can anywhere, and is a great way to make a child feel needed and appreciated.
8. Accept Tough Emotions
Staying calm and loving through the ‘meltdown moments’ not only helps you be a better parent, it also teaches your child how to regulate and manage her own emotions. Empathize with the ‘negative’ emotions (I’m sorry you are so frustrated right now…etc), and be sure to allow your child to express anger, frustration, and sadness freely. Teach positive ways to express these emotions instead of rejecting them altogether (Don’t just bark at them to ‘stop crying’).
9. Talk Up, Not Down
Speak to your child as if he is intelligent. Answer questions simply, but don’t dumb down the information you give. Be aware of sparks of interest in things that your child may want to learn more about, and encourage it!
10. Assign Positive Intent
Whenever any undesirable behavior occurs, before you react, first stop and ask yourself if the child may have been acting from an unknown motivation and/or influence. Is the behavior fueled by an age-appropriate developmental stage? Is the behavior influenced by major life changes happening in the family, major milestones occurring, or simply fatigue or hunger? Maybe his emotional security levels are low or he’s having a bad day, and he just needs a hug. Try to give as much empathy and understanding as you desire when you don’t do the right thing.
11. Have Inside Jokes
We all have little special things that we do or say with our child to make them smile. Laughter is has an amazing ability to heal and bond a relationship. Share laughter together as often as possible.
12. Reconnect After Rough Moments
After I’ve spoken more harshly or unkindly than I should have or after we’ve had an intense time of discipling and teaching over some issue, I try to ensure that our connection is still strong and neither of us is holding on to any negativity. Apologies are made if necessary, and hugs, play, laughter, or even a simple squeeze does the trick.
13. Help Them Obey
If my child is having trouble obeying a command I’ve given (for whatever reason), I get up and help them. This is for things like me picking up the two-year-old, moving her hand to the blocks, gripping it with my hand on hers, and moving it to the bucket, or me physically moving the four-year-old toward the table if he won’t come on his own. It usually doesn’t take long before they are happily obeying on their own, and a nasty power struggle is avoided.
14. Say Yes
To painting even though it makes a mess, to eating watermelon in your underwear, to getting muddy after a downpour, and of course to splashing in puddles. Say yes to going to the park, to accepting help with chores even if you have to go back and re-do them. To reading the story ‘one more time’ even though you already said it was the last time. Say yes and smile and kiss that darling head again and again because you can.
***
Thanks for visiting Red & Honey. Please take a moment to join us on Facebook, or subscribe by email or RSS, using the buttons in the sidebar. I’d love to have you around!
Original article and pictures take redandhoney.com site
I live in the suburbs of a city of seven million people.
We rent the main part of a house in a solidly middle-class neighbourhood where it’s cool to recycle, sure, but anything beyond that is just plain weird. I am the weirdo of the neighbourhood, and I’m ok with that.
Being a city-dweller, I often lament my lack of wide open space and closeness to nature. I don’t have several acres and space for a humungous garden. I don’t have room for a chicken coop (plus, it’s illegal). I don’t even have my awesome clothesline hung up because I can’t figure out exactly where it could go.
Are you an urban dweller too? Whether you are in the heart of the city or in the commuter ‘burbs, city folk often find themselves pining away for more opportunities to tend the earth.
I often complain about my serious inability to really go all eco-friendly crazy crunchy mama because of the darn city bylaws and breathing-down-your neck neighbours and teeny-tiny yards, but in reality there are lots of ways that I can bust out of that typical suburban mold and get my hippie groove on.
Here are fourteen ways you can go green while living in the city. Fourteen ways to embrace the homesteading mentality of eco-friendliness, self-sufficiency, and slow living.
Some of these are things you can do despite living in the city, and some of them are things you can do because you live in the city. Embrace them all in their own way, and be proud of your city-dweller status!
1. Hang clothes
It’s simple, easy, and you can even do it without a clothesline! I am using a simple drying rack from Ikea until I figure out how to get my real clothesline strung up. Check out Stacy’s recent post on the many benefits of line drying your clothes! Save energy by reducing your dryer usage (and save money too!).
2. Reduce toxins into air with houseplants
Everybody knows that plants are great for the air, right? They have been scientifically proven to filter out a wide variety of nasty toxins. Unfortunately I am a serial plant-killer, but in the interest of eco-consciousness and an enthusiastic attitude, I am giving it another whirl. This one is doing well so far, plus my first-time-ever vegetable garden has sprouted, so I’m pretty well just singing the hallelujah chorus over here.
3. Use non-toxic, green cleaners
Don’t bother with the so-called eco-friendly stuff from the stores. Most of it is no good and if it is ok then it probably costs an arm and a leg. Get a spray bottle from the dollar store. Fill it halfway with white vinegar and halfway with water. Spray, wipe with a rag, the end. That’s all I use 98% of the time! If you need ideas for a specific type of cleaning, then check out Erin’s recent post for more ideas: 67 Homemade, All-Natural Cleaning Recipes.
4. Grow food
Have a garden, if you are able! It doesn’t have to be too complicated, and there’s nothing better than biting into a freshly-picked green bean that you grew yourself. Rewarding, delicious, and great for the environment. I have a small garden of about 10 x 6 feet, but if you don’t have a yard at all, you can always try container gardening.
5. Take public transit or walk
One of the greatest assets of city-living is the accessibility. My city has great public bus and subway systems (along with a really cool streetcar system downtown), which I have ridden many a time before. Bonus: they are the best places for people-watching. There are all kinds of interesting characters in big cities!
6. Adopt pets instead of buying
A city is usually well-stocked with pet stores, but they are also normally hubs for animal adoption services. We adopted “Mittens” our gentle, sweet cat from an adoption center within a local pet store. This helps give an animal a home that otherwise wouldn’t have one.
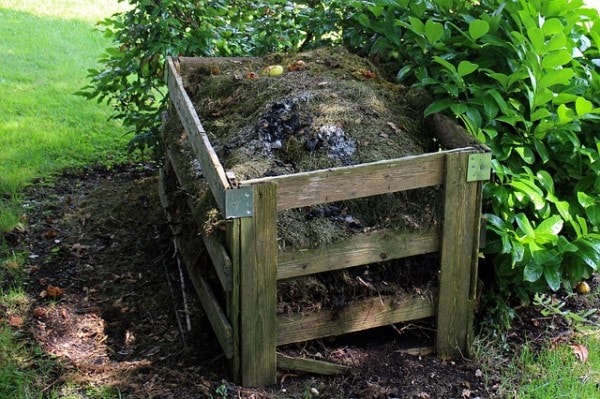
7. Compost
What could possibly be more eco-friendly than turning garbage destined for a landfill into luscious, rich soil instead? That’s the magic of home composting! It can seem intimidating at first, but it’s really quite simple, and can be done in any-sized yard. Check out this helpful guide over on my site on How to Start a Successful Backyard Compost.
8. Use kijiji/craigslist or consignment shops
I have gotten some pretty amazing deals on kijiji – everything from toys to a dishwasher, to the rental house we’re currently living in! I love buying second-hand and getting stuff for a fraction of the cost that still works perfectly fine.
I especially love consignment shops for my kids’ clothing. I save hundreds (if not thousands) of dollars every year! Buying second-hand is almost always the more eco-friendly choice, and there are thrift store, consignment shops, and kijiji listings in abundance when you live in the city. I buy clothes, shoes, outerwear, and more. (Anything but underwear and socks!)
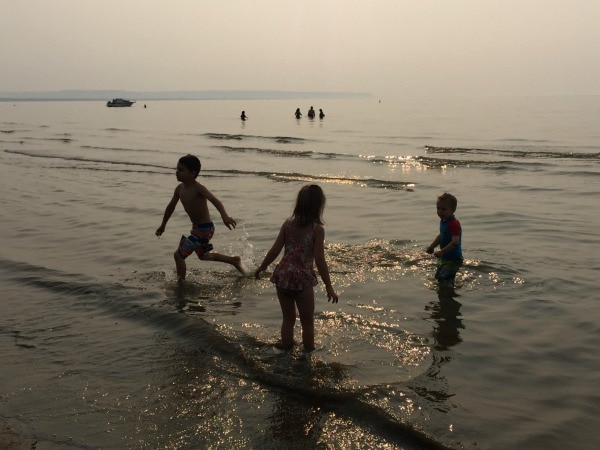
(This is what you get when you asked them to smile big. Or maybe they’re super excited about their 100% thrifted wardrobe. Either way they’re pretty cute.)
9. Share
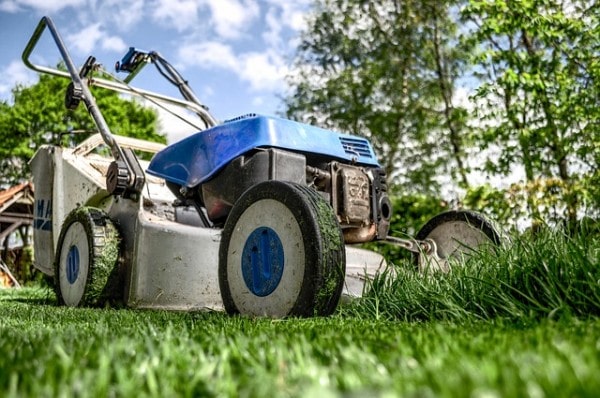
One area in which our culture is sadly lacking compared to other cultures is in the community mindset, especially when it comes to our possessions. Does it sound silly to anyone else to have 300 lawnmowers in a subdivision, each one mowing no more than 100 square feet of grass, once a week?
Why not have a shared lawnmower? Or shared gardening supplies? Combining this concept with something like kijiji can bring you all kinds of awesome finds, like folks willing to share kefir grains or kombucha scobies!
10. Buy local
There are lots of things you can buy local, especially if you find a great farmer’s market – fruits and veggies, meat, dairy, clothing, honey, toys, furniture, and the list goes on! When you buy local you help out the environment by not buying something that had to travel a long way causing air pollution and using fuel. Check your local farmer’s market, craft fairs, and local non-chain shops in your community.
11. Resist stuff
It’s easy to get sucked in to the fast-paced, highly consumeristic culture in the city, but what is the cost? The short illustrated film “The Story of Stuff” is worth every minute of the twenty it takes to watch it. It is compelling and engaging, and will show you just exactly why our culture’s obsession with “stuff” is harming our planet. If you’ve never seen it, I highly recommend it!
12. Experiences over things
One way to help reduce your consumption of the earth’s resources (especially cheaply made stuff in our throw-away culture) is to value experiences over things. Instead of a tangible item as a birthday gift, consider giving an “experience gift” such as concert tickets, passes to the museum, zoo, or park, a fun day at the beach, or even things like music lessons or summer camp.
These are all great gifts that don’t come with too much packaging, nor will they end up in a yard sale next summer! The possibilities are endless in the city!
13. Alternative energy
Dive into the world of renewable energy sources! This is an an area that I don’t yet know much about, but hope to learn. Solar and wind, geothermal, and community power are all fascinating ideas which are growing in popularity, and are totally doable in an urban setting! My city has a page set up to read more, or do a simple google search and start reading.
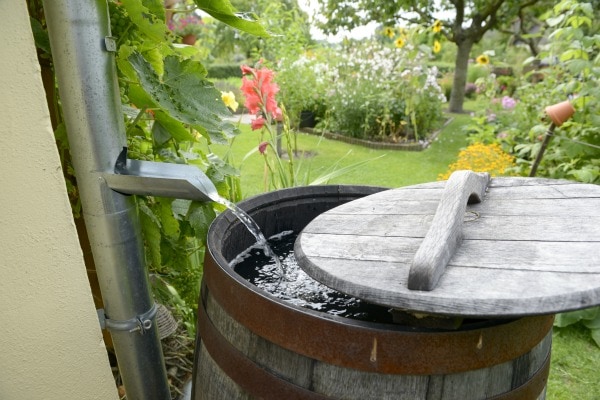
14. Collect rainwater
Like composting, it can be complicated, or it can be simple. There are expensive systems you can set up if you are really serious about it, but collecting rainwater can be as easy putting a barrel in your yard. The water you collect will be perfect for gardening and other outdoor uses, and it is the perfect way to use less from the tap.
According to this site with a tutorial, “A typical 40-by- 40-foot roof is capable of collecting 1,000 gallons of water from only one inch of rain.”
Wow! That’s pretty incredible. If you have a Berkey, you could even filter it for drinking water.
These are 14 ideas are just getting started. There are lots of ways to be an “urban homesteader”, embracing the mentality of simple, slow, eco-friendly living.
What ideas do you have for urban homesteading?
Original article and pictures take redandhoney.com site
I once was. My husband likes to remind me that he “thought he married a morning person” because we went on a mountain biking date at 5 am when we were dating. I told him that I was a morning person…until the boys came along.
And then, I stopped sleeping…sorta. Then I started sleeping again, and now there are those nights that someone wakes me up for something. So I sleep sometimes. And because of all the sleep disruption, I now am not a morning person. Maybe I’ll be one again, but not right now.
Having meals and goodies in the freezer really helps me get through the mornings, while still walking around with a foggy brain. Plus, these grab ‘n go or quick-to-reheat breakfast options really help me get everyone fed easily and quickly. Because getting 4 boys ready and out the door before 7:30 a.m. is CHAOTIC. Even with all my systems, strategies and organization, it’s still HECTIC.
One of our resolutions for 2016 is to take better care of ourselves. That is everyone’s resolution, right? But it can mean different things for each person. Whether your goal is eating better or including more natural products in your beauty routine or stressing less, we want you to have a beautiful 2016. It’s the year to be your beautiful you!
One of our favorite beauty resolutions is focusing on inner beauty because we all want that healthy glow. One of the best ways to do that: smoothies. Filled with good-for-you greens and fiber to keep you full, smoothies can also give you a dose of beauty antioxidants.
We plan on having more smoothies in the new year, to build stronger hair and glowing skin from the inside out. Here are some of our favorite beauty smoothie recipes, some tried and true, some brand new:
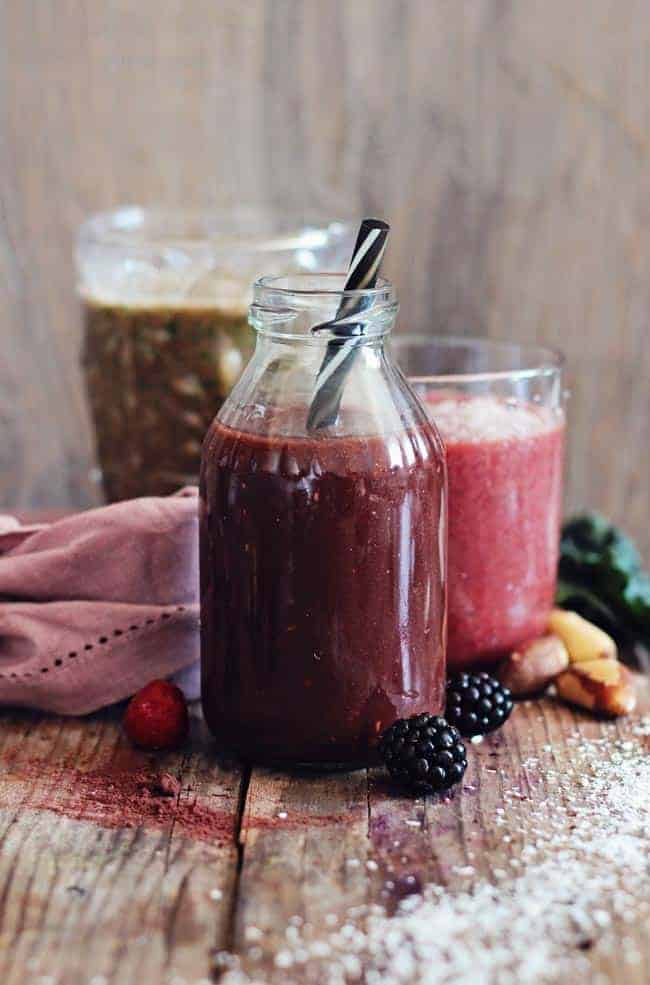
13 Beauty Smoothie Recipes
Summer Love Smoothie
Brazil nuts are packed with selenium which, combined with raspberries’ and coconut oil’s beauty benefits, helps protect skin from sun damage and retains its elasticity.
Nourishing for the skin at a cellular level, this smoothie is filled with vitamins, minerals, phytonutrients and antioxidants that make your skin and hair healthier.


