It’s easy to make homemade lip balm with just a few all-natural ingredients! A perfect stocking stuffer!
Are you looking for a last minute gift idea? I was inspired to make something that I think will be a sweet gift for a few friends. I wanted to try my hand at making lip balm. I had heard it was easy, and since I had many of the ingredients on hand because of my deodorant making experience, I thought I’d give it a shot. It was easy, and I LOVE how it turned out!
I just feel more comfortable with this simple recipe, which includes easy to find ingredients such as beeswax, cocoa butter, and vitamin E, than with store-bought varieties that contain a long list of ingredients that I can’t even pronounce. This lip balm is very moisturizing, and feels great on your lips! The friends that I’ve given it to have loved using it.
There are so many recipes for lip balm all over the internet. I tried out a few different recipes, and combined a few of them into my own recipe. I think it’s pretty foolproof…I had a very easy time making a few tubes at a time. If you want to make a whole bunch of them at a time, simply multiply this recipe to get the amount you need.
How to make your own lip balm
Ingredients:
1/2 Tablespoon beeswax
1 Tablespoon sweet almond oil or grape seed oil
1 Tablespoon pure cocoa butter
4 drops sweet orange oil
2 drops vitamin E oil
lip balm tubes
pipettes
patterned Duck brand duct tape or other stickers or labels if desired
Find the full instructions on my guest post over at Investing Love.
Of course, if you have food allergies, you may need to adjust your ingredients. You could try a different oil if you want to. If you are sensitive to fragrances or flavors, you can also just leave the sweet orange oil out.
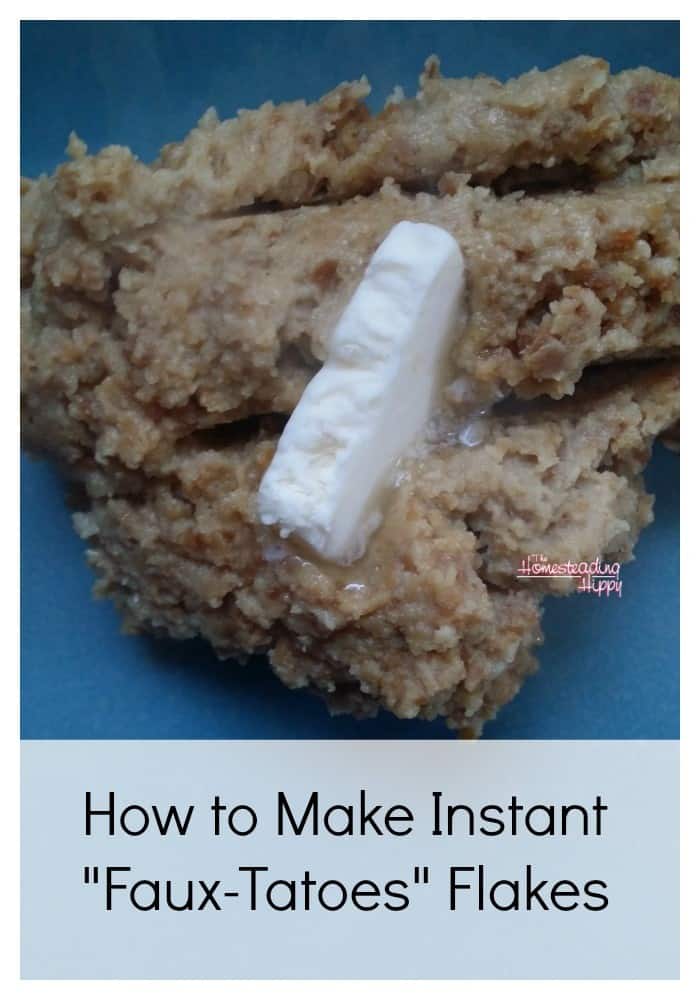
Are you watching your carbs or looking for a different way to store cauliflower from your garden?
Have I got the most awesome idea of all for you! Make your own instant fauxtatoes flakes! These are super duper easy to do, and will store in your pantry indefinitely! Great for a bug out bag as well, since they take up so little space.
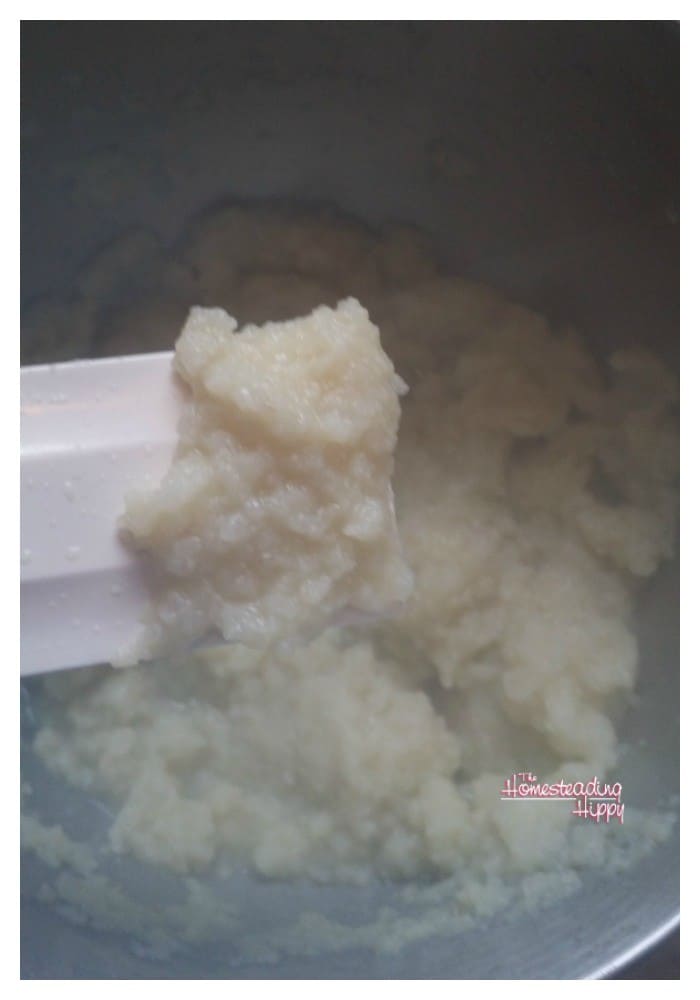
First, rough chop your cauliflower
I did 3 pounds, or roughly two large heads, for this. Cook in just a bit of water until tender. You don’t want to use oil, butter or seasonings since you are making this for storage. Any oils may cause it to go rancid quickly. Once it is super fork tender, place in a mixing bowl and whip like you would mashed potatoes. Since they are a watery vegetable, you really shouldn’t need to add any additional water, but if you feel you do, add it in small amounts at a time. You want the cauliflower to be as smooth as possible, but not overly watery.
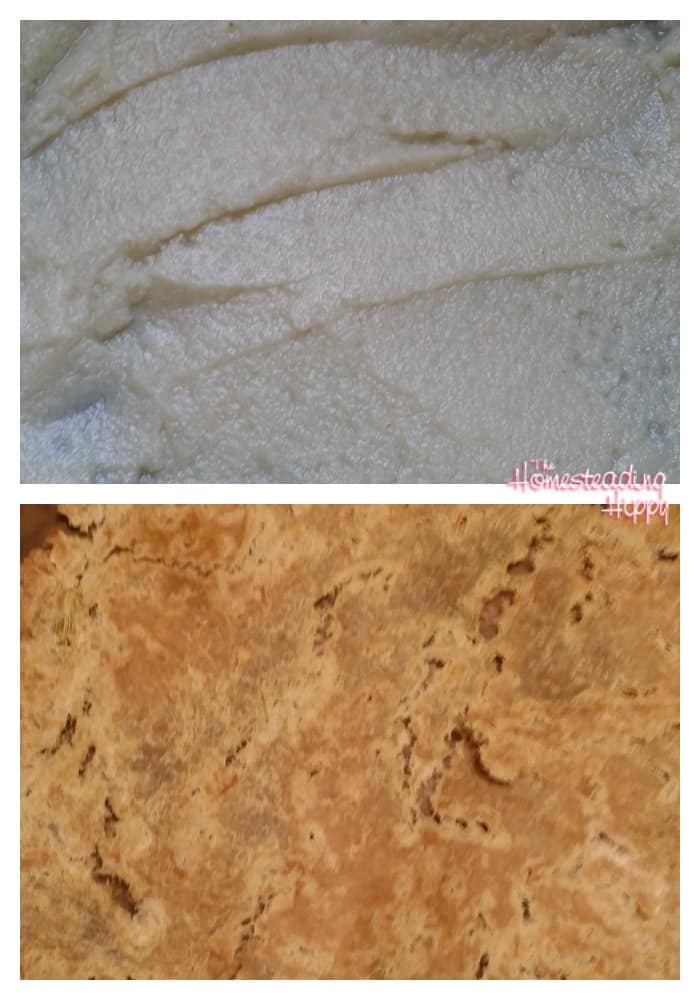
Spread the cauliflower mash on a dehydrator sheet.
I use my excalibur dehydrator and these sheets for them. You want to spread it rather thin. 3 pounds did fit on one sheet rather nicely, though. Place in dehydrator and turn it on to 125°. Allow to dehydrate for 6 hours and flip over. You want to make sure that the water is all gone from this. Once you have flipped it over, dehydrate for at least another 6 hours. I let mine go overnight at this point.
When it’s all dry, it’ll be a soft golden color and may come off in one full, brittle sheet.
Carefully break up into a blender and blend it down to a fine powder. The 3 lbs. of cauliflower will now take up about 1 cup of space in your pantry! Store tightly covered in a jar, or vacuum sealed bag for your bug out bag.
To use for fauxtatoes
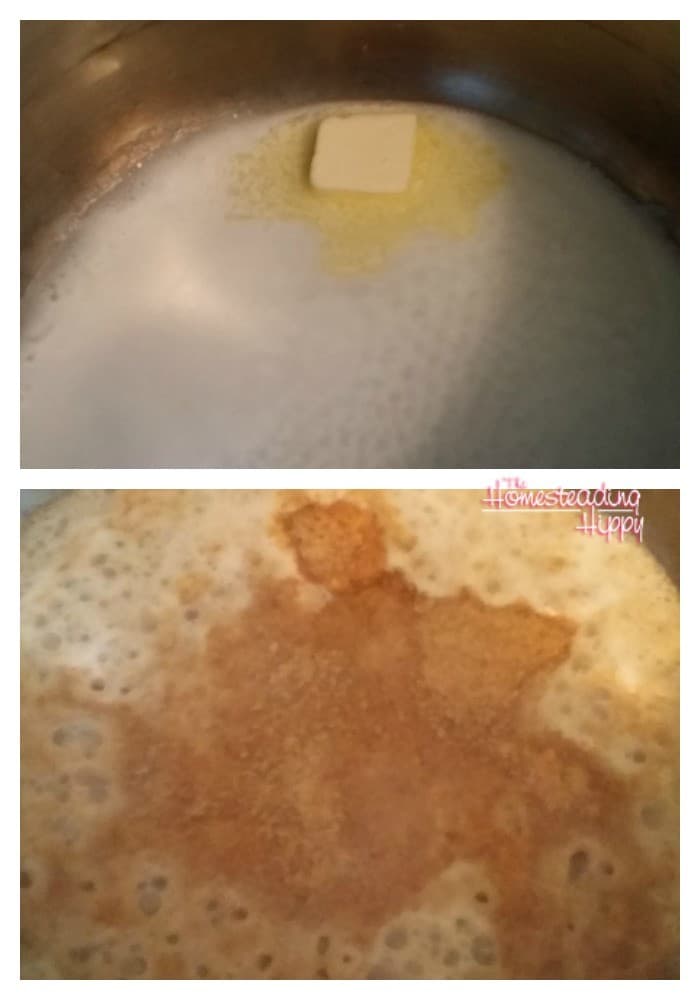
bring 1/2 cup of water, 1 Tablespoon milk of choice and 1 T. butter to a boil. Sprinkle evenly over the liquid 1/3- 1/2 cup of the powder, depending on how stiff you like them. I used 1/2 cup for mine. Season to taste with salt and pepper and stir. Dot with a bit of butter if you wish. The cauliflower taste WILL be magnified a bit, and they aren’t as white as if they were fresh made, but they still taste great!!
Original article and pictures take thehomesteadinghippy.com site
I breastfed (until my first daughter was almost 2 and still going with my second at 10 months), I made most of my baby food and snacks with all-organic ingredients and I started using more whole foods while cooking for my husband and myself as well. (Baby image by Tasa)
But there was still a step I hadn’t changed until recently–using a natural soap on my children’s skin. From day one of motherhood, I used a popular conventional brand’s head-to-toe body wash and shampoo.
Why change to an all-natural soap?
To be honest, I think I was so concerned about changing my family’s eating and other green living habits, that I ignored the fact that I was using a potentially toxic soap on my babies’ skin.
Yes–I said toxic.
The thought of changing one more thing overwhelmed me.
And I thought it would be much too expensive.
But the more I’ve researched natural living, the more I’ve realized the skin is our biggest organ—and it absorbs EVERYTHING.
“The truth is, when you consume toxins in foods, such as pesticides in fruit and vegetables, the enzymes in your saliva and stomach often break them down and flush them out of your body,” Dr. Mercola said. “Food also passes through your liver and kidneys, so the toxins that make it through are detoxified to varying degrees by enzymes before they reach the remainder of your body.”
But when toxins are absorbed through our skin, Dr. Mercola said, “they bypass your liver and enter your bloodstream and tissues — with absolutely no protection whatsoever.”
If I am careful about every little thing my children ingest, why wouldn’t I take the same care with what I put on their skin?
What’s really in baby soap?
Although many conventional baby washes tout themselves on being “all-natural,” tear-free solutions, the ingredients list all kinds of substances I cannot even pronounce. Check out this list of some controversial ingredients you can find in the leading brands:
In addition, I was horrified when I realized my 3-year-old’s bubble bath contained red #40, which can potentially lead to hyperactivity and lower IQ! (More about food dyes and children)
Will just bathing my children in this soap for a few years be enough to cause cancer and/or result in other harmful effects? I don’t know. That is not my point. My point is–If I can avoid ANY exposure to potentially harmful ingredients–even in small amounts–why wouldn’t I?
My children can put whatever they want to put on their skin when they are adults, but, for now, God has entrusted them to my care. I want to choose the very best for them—even if it’s not society’s norm.
If you are new to Vitacost, and want some easy options if you aren’t into DIY, you can get $10 off your first order through my link (first time customers only).
But my dilemma remained: If we were to afford to eat healthier, how would we be able to afford natural skincare products, too?
So I decided to start making my own.
Homemade Baby Wash/Shampoo
How to Make Your Own Homemade Safe Baby Body Wash. This stuff works so well and is sooo much better for baby!
I found variations of this recipe in different places on the internet, but I tweaked it to fit my liking. I also use a foaming soap dispenser because the consistency is really too thin if just using an old baby wash bottle. There are also many options available on Amazon. You might need to tweak this recipe depending on the skin type of your children, but here is what works for my family:
Mix ¼ cup of castile soap with ¾ cup of water. Mix in 8-10 drops essential oils. Pour everything in a foaming soap dispenser. That’s IT!
I use this soap to wash my daughters’ hair and body. I occasionally use it to wash myself, too—but my hair needs a little more cleaning oomph. (Anyone have a suggestion to a good natural alternative? I’m still looking!)
Warning: Do not get this in your child’s eyes. It is NOT tear-free. I sometimes just use warm water to wash my girls’ faces anyway. I recently read that newborns really only need to be cleaned with water anyway (it’s not like they’re out rolling around in the mud!).
How to Make Your Own Homemade Safe Baby Body Wash. This stuff works so well and is sooo much better for baby!
An added bonus
My whole family is actually now using this formula as hand soap. I found a little tutorial for making a cute foaming hand soap dispenser out of a canning jar, and with my hubby’s help (I am SO not crafty), we made one for each bathroom and the kitchen.
What baby soap do you use on your children? Share your recipe if you make homemade! If you still use a conventional soap, what is keeping you from making the switch?
Disclosure: This post contains affiliate links. See my full disclosure statement here.
*Disclaimer: This post is solely my personal opinion after spending hours of research on this subject. I hope I have laid out some facts that will spur you on to do your own research. I am in no way a medical expert, and you should always conduct your own research and consult your trusted medical professional before making decisions about your family’s health
Original article and pictures take www.kitchenstewardship.com site
Over the counter hand sanitizer usually has a high content of alcohol and can be very drying to your hands.
Of course, there is always the question of whether or not it’s really safe, as your skin absorbs whatever is put on it as well. Do you need another lecture or talk on the issues with trioclosan?
I like to have hand sanitizer with me, especially for the kids at TaeKwondo. They are on the same mats with their hands as their feet, and germs can spread like wildfire. Ugh! So, I have learned how to make my own and now I will share with you the recipe that I like the most for making your own hand sanitizer.
You’ll need just a few simple ingredients. That is per the usual around here. I don’t like to make things that are complicated, and I am sure that most of you don’t either. Keeping it simple, keeping it real is what I am about.
Anyway, gather these:
1/4 cup of pure water
(the citrus oil is the anti microbial part…if you don’t like the scent of grapefruit, you could use lemon, lime, or sweet orange and get the same results)
Now, for the difficult part.
Stand on your head, swirl around and say “clean hands for everyone” while cooking all the ingredients to a roaring 3000° degrees. Oh, wait…that’s a different recipe. Sorry about that. What you REALLY need to do is just combine all the ingredients in a glass spray bottle. Label with all the ingredients, and shake each time before use. To use, simple shake, and spray each hand one time. Allow to air dry. Store at room temperature. I actually have a bottle in my purse at all times for taekwondo, or trips the museums or such. I am not afraid of germs, but when you can’t wash your hands after touching something, it’s nice to be able to feel a bit cleaner.
BE SURE TO PIN THIS TO YOUR FAVORITE BOARD FOR LATER
Original article and pictures take thehomesteadinghippy.com site
Remember how busy last Saturday was for me? It was a crazy morning filled with broccoli blanching and valentine pancake making, then basketball gaming the rest of the day. This is why cooking dinner when I got home at 6:45 didn’t sound fun. Plus, you should (not) have seen how messy my kitchen was after the morning insanity when I was running late to serve concessions at the games, so I had to decide between washing dishes and getting dressed in actual clothes that weren’t pajama pants. I chose the latter. Everyone was grateful. But this choice meant that I came home to an exploded kitchen.
If ever there was an excuse to want frozen pizza, this one was it. We all have those times, right? We talked about this just last week. Some of you mentioned wishing you knew how to make your own frozen pizza, then others chimed in about how to do it, and since this has been on my list to tell you about anyway – I decided there was no better time.
So frozen pizza everyone: You can make them yourself. With real ingredients and whole foods, keeping your very own people and their preferences in mind. With little effort.
And all the mothers everywhere shed a tear.
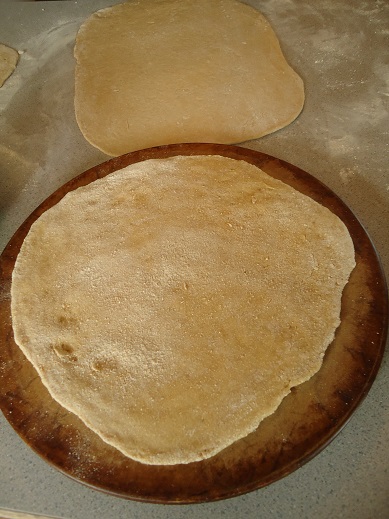
1. Mix up your favorite pizza dough. I suggest this very easy Whole Wheat Pizza Crustrecipe. I also suggest doubling or tripling or octupling (I was going for 8x there, how’d I do?) the recipe. It just makes sense to create only one mess in order to make several meals worth of pizza for your freezer.
2. Roll out the dough to your desired sizes, thickness, and shapes. Make personal sized crusts, make rectangle crusts to fit your pans, make circle crusts to fit your pans. Make whatever works best for your freezer, your oven, and your family.
Life is too short to roll dough perfectly.
3. Bake each crust in a 375° oven for 5 minutes (assuming you are using this crust recipe), then remove them from the oven. They will be only lightly baked at this point – just done enough to be perfect for preparing your pizza for the freezer.
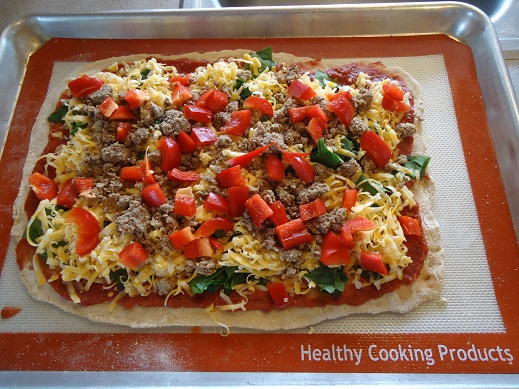
4. Top each pizza crust with toppings of your choice – any sauce, meats, cheeses, and veggies you like. Make a variety to suit your family’s preferences.
I topped this one with sauce, spinach, colby jack cheese, hamburger meat, and red peppers.
5. Wrap each unbaked pizza well with plastic wrap. (I like Natural Value Brand.) If it fits, you might also consider putting your wrapped pizzas into a 2-gallon size freezer bag for additional protection. (Be sure to reuse your freezer bags to get more bang for your buck!)
6. When you are ready to bake your frozen pizza, thaw it if you wish. Otherwise, just take it directly from the freezer, unwrap it, and put it on your baking pan. Bake in a 375° oven for 10-18 minutes or until the cheese is melty and perfect.
Aren’t you excited about how easy this is, about how much time this will save you, and how fun this will be to serve to your family?! It will be effortless to pull out some mixed greens and fruit to go with your pizza – so your meal prep on a homemade frozen pizza night will be nil!
I highly recommend making several pizzas for your freezer in one setting. If you’re going to mix up crust and make a little mess rolling it out, if you’re going to grate cheese, if you’re going to chop veggies, if you’re going to cook meat – you really might as well just hit it hard and get several pizzas stacked up in your freezer if you have the space.
In addition, consider prepping pizza ahead of time for a busy day and just keeping it in your fridge to bake at dinner time.
Now – go pin this time saving, money saving, health saving idea so that you won’t forget about it. :)
Ever tried making homemade frozen pizza? How excited are you to try this idea?!
Original article and pictures take heavenlyhomemakers.com site
Today”s Daily Tip: If you make a mistake and don’t meet your goal one day, don’t use “I’m off the wagon” as an excuse to stop. Get going again at the next opportunity and forget about the slip up!
Elderberry syrup is a natural and delicious way to boost immunity. At approximately $3 to upwards of $6 per ounce, store-bought elderberry syrup is convenient, but not easy on the wallet. Making your own syrup costs pennies compared to pre-made and it”s so easy to make. Just follow the recipe below! To learn more about elderberry and it”s properties look here.
Step 1: Gather ingredients
1/4 cup fresh, grated ginger
2 cinnamon sticks
1/4 cup cloves
4 cups filtered water
1 cup raw, local honey
** Elderberries can be found in your local health food / herb store or online { Mountain William Hill bietet ein perfektes online Casino die-besten-online-casinos.info , in dem man sich von der ersten Minute ab wohl fuhlt: so muss Gluckspiel ausschauen! 150% bis zu CHF 350 Willlkommensbonus 20 x Bonus online casino Einzahlung 97%mehr als 200Instant, downloadiPhone, Android, iPad, TabletEs gibt drei verschiedene Willkommensbonus Angebote, was auf den ersten Blick vielleicht zu Verwirrung fuhren kann. Rose Herbs, Frontier Natural Products Coop, or Amazon to name a few } **
Step 2: Simmer
With the exception of the honey, simmer all ingredients in a pot for two hours. Heating raw honey to temperatures over 145 degrees Fahrenheit destroys its beneficial properties.
Step 3: Strain
Using a cheesecloth strain elderberries to extract as much juice as possible from the berries. If you don”t have cheesecloth on hand (like I did) a fine mesh strainer works just as well, just use a spoon to press the berries and release their juices. Collect juice in a mixing bowl or mason jar. Discard berries.
Step 4: Sweeten
Add raw honey to extracted juice. You may find that warming the berry juice a little will help the honey dissolve faster but be sure the berry juice is 145 degrees Fahrenheit or less to decrease risk of destroying the nutritive and healing properties of the honey.
Step 5: Store
Store elderberry syrup in a clean, airtight, glass container in the refrigerator for up to 3 months. Mason jars, glass bottles or glass syrup dispensers are all great choices.
Have you made your own elderberry syrup? Share your experience with us!
Original article and pictures take modernalternativehealth.com site
How to Make Your Own Dried Boullion **You can listen to this post on our new podcast series**
Bone broth is so good for you in so many ways. Often referred to “Jewish penicillin”, making broth or stock is a quick and easy way to add healthy benefits to your diet.
Bone broth has been said to be healing to your gut, providing minerals and vitamins as well as cartilage that can help soothe aching joints. All you need is a crockpot, bones, some veggies like carrots, celery, onions and garlic and water and you are on your way to having all the bone broth you could drink.
However, making lots of bone broth can take up a lot of room in your fridge.
With all that I have going on in my fridge, I don’t have a lot of extra space to give up. I needed another way to have bone broth on hand at all times, yet still have the room in my fridge. After seeing this post on how to make boullion cubes, I wanted to try that. But, I still have to take up space in my freezer for them. Space that I just don’t have. So, hubby and I decided to try and dehydrate the broth and see how that works. Here is what we came up with.
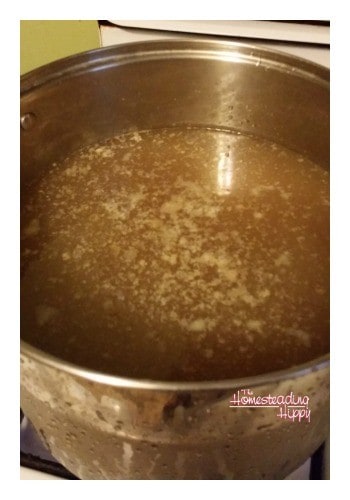
First, start with liquid broth. I have about 2 gallons in this pot here.
You’ll want to bring it to a boil, then turn the heat down to a simmer to keep the water boiling off. This process took about 6 hours to do for me.
You’ll see how much of the broth is just water, as it turns really dark and thick.
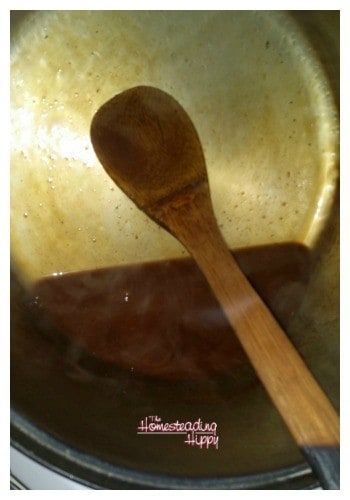
It’s almost a taffy consistency at this point, but still very liquidy in motion. If you were to taste this, it would be like concentrated heaven. Trust me on this.
Carefully pour the broth on to the dehydrator sheets/
We use the Excalibur dehydrator for just about everything around here and it was a very worthwhile investment. The sheets are amazing in that you can dehydrate more liquidy stuff like broth. Place in the dehydrator at 135°-140°. This is the longest part of the whole process. After 24-48 hours, you should be able to lift the broth off the sheet all in one piece. Flip this over and place back in the dehydrator for another 24-48 hours.
When your broth looks clearish, and is easily breakable, it’s done.
This took me a total of 4 full days in the dehydrator to complete. But, patience is a virtue, right? Once it reaches this point, place in a blender, food processor, or even coffee grinder. Blend up until a powder. Viola! It’s done! To use, add 1 Tablespoon of the powder to 6 ounces of hot water.
Be sure to pin this for later
Listen as we talk about the whole process and why we even did it here:
Original article and pictures take thehomesteadinghippy.com site
How to make your own deodorant – this recipe is all natural and very easy to follow!
Okay, so I’m going to go out on a limb here and say that this may be the most life-changing thing you ever read on this blog. Or maybe it won’t be, because maybe you already know this, but…you can MAKE your own deodorant. And it works. Really well.
I have tried sooooo many different all natural deodorants over the years: Tom’s, JASON, Origins, more Tom’s…the list goes on. And they would work for a while, and then stop working. Or it would work just great for normal situations, and then I would have a solo performance or some stressful situation, and it would so NOT work. Yuck.
One day I asked my friend what deodorant she used, and she said, I actually started making my own last month, and I love it. Now, I had heard about people mixing coconut oil and baking soda together and using that, but she was using an actual recipe and putting it in actual deodorant tubes.
For some reason this sounded a lot more civilized to me, so I order my tubes, and headed to Whole Foods to get my ingredients. There are a lot of recipes for deodorant on the web, and I read through quite a few before deciding to go with this one, with a couple of slight modifications.
Place the shea butter and the cocoa butter in a glass bowl and microwave for about 30 seconds until melted.
Stir in the arrowroot powder and baking soda. Add the oils and stir again.
Use a small measuring cup or small ladle to pour into a deodorant tube. This recipe will almost overfill the one tube, be careful! Let it solidify at room temperature, or if it’s a hot day, in the refrigerator.
Once solid, you can use it! I am amazed at how well this deodorant works for me. I have been using it for about six weeks and it’s amazing. Now if it’s hot outside, I do still sweat, but there is no odor whatsoever. I’ve even road tested it in a couple of stressful situations and it works very well! I chose to use arrowroot instead of cornstarch because I had read that for some reason it works better than corn starch, plus we do still avoid corn most of the time, so I had a bag of arrowroot on hand.
Anyway, I’m so happy with how this turned out, and it makes me want to make more of my own body products! How great is it to know exactly what you are putting on your body because you made it yourself! Lip balm is next on the list, then maybe lotion. Do you make any of your own bath and body products? Or, have you found a natural deodorant that works for you?
Ideas of fall conjure up adorable scarfs, warm apple cider, pumpkin and apple pie, and of course, every other pumpkin treat you can dream of. But, unfortunately for us, these delectable goodies bring more into us than happiness and joy. Our favorite drinks and desserts of fall are full of pesticides, hormones, excitotoxins, and all sorts of ghoulish additives.
How to Make Your Favorite Fall Treats {Healthy}
But, there is good news. We can make these treats not only tolerable, but healthy. Pumpkin is loaded with folate, magnesium, B6, vitamins C and E, riboflavin and potassium. So let’s not leave it out – let’s make it ourselves without the nasties.
Apples, another fall favorite, are typically sprayed with over 10 different pesticides each season, multiple times. In fact, apples top the “dirty dozen” every year, a list of produce with the most pesticides. Search your local area for organic apple orchard if you go apple picking, or ask the farmer which apples, if any, have low or no pesticides. Apples have vitamins A, B, C, E and K, as well as a wonderful serving of fiber. So let’s not forget about these, either.
Let’s go over what’s wrong with these fall favorites, and how you can quickly whip them up without whipping your immune system.
The holy grail of fall treats is the infamous pumpkin spice latte. Starbuck’s basically makes its yearly budget on this treat, and no wonder – because it. is. amazing. But, it also comes with a lovely 50 grams of sugar in a grande, high fructose corn syrup, caramel and lack of real pumpkin (although, there’s word they will add some of that this year).
Homemade Version
Ingredients
– 1 cup of milk of choice (almond, coconut, or raw cow milk)
– 2 tablespoons of cooked pumpkin (buy in BPA free can or make your own)
– 1 teaspoon of raw, local honey or maple syrup
– 3 teaspoons of your coffee of choice
– 1/2 teaspoon pumpkin pie spice blend (nutmeg, cinnamon, allspice, and cloves)
– Optional: add organic whip cream and sprinkle sea salt on top
Instructions
Slowly add your milk to your warm coffee and stir. Mix in your pumpkin, followed by your honey, vanilla, and finally spices. Enjoy!
Pumpkin Boxed Cookies and Cakes
If it comes in a box, you can guess it’s likely not good for you. The store shelves are lined with pumpkin cookie, cake, and bar mixes. Put down the hydrogenated oils, dyes, and preservatives, and try out these recipes.
Combine all wet ingredients in bowl, and mix thoroughly. In a separate bowl, combine all dry ingredients. Mix dry ingredients into the wet ingredients, and pour into a 8 inch round or square baking pan. Bake at 350 degrees for 25 minutes. Let cool, and enjoy!
– 1/2 teaspoon of cinnamon, 1/4 teaspoon of nutmeg, 1/8 teaspoon of cloves (or 1 teaspoon of pumpkin pie spice)
– Optional: 1 cup of your choice of nuts
Instructions
Blend all ingredients together, and roll into 1 inch balls on a parchment-lined baking sheet. Refrigerate for up to one hour, then keep in a sealed container in the refrigerator for up to one week.
Don’t Toss the Seeds!
Pumpkin seeds are extremely healthy and tasty. They have magnesium, manganese, iron and zinc, as well as an ample source of plant-based protein.
Sprinkle sea salt and pepper, or cinnamon on raw seeds. Roast at 350* for about 20 minutes, shake and turn over the seeds, and roast on the other side for another 20 minutes.
Apple Pie
Conventional apples are sprayed with 10-15 different pesticides, including neurotoxins, multiple times per year. Choose organic apples, or grow your own to avoid the harms of pesticides on your digestive and nerve systems.
– 1 1/2 cups of coconut oil, room temperature (below 70 degrees)
Instructions
Warm the honey, spices, and coconut or ghee in a saucepan. Once thoroughly melted, add diced apples. Let simmer on low for 30 minutes. As the filling simmers, prepare your dough by hand mixing the coconut oil into the paleo flour. Mince the flour between your fingers until small balls form. Add water slowly (verrrry slowly) until the balls make one entire ball. Refrigerate your dough for 15 minutes. Remove dough from refrigerator, and roll out on parchment paper for bottom crust, set aside. Allow your filling to cool, and pour into your crust. (This is where my mom would add a cup of sugar to the bottom and top of filling, and I will look the other way if you do so). Cut off the extras of your crust, and form a lattice top. Bake for 15 minutes at 375 degrees. Reduce heat to 350 degrees, and bake for another 30 minutes. Let cool, and enjoy with some coconut ice cream!
*If your crust tends to brown, cover with aluminum foil beforehand.
Apple Cider
The apple cider sold in stores is heavily processed, and misses many of the good parts of natural cider. Nonorganic apple cider contains many pesticides concentrated into the juice, not something you want in your littles. You can find organic apple cider, which will have no pesticides, but can also save some money and make your own!
Ingredients
– A bag (or 12) organic apples
– 1 tablespoon of pumpkin pie spice ( or 1/2 teaspoon of cinnamon, 1/4 teaspoon of nutmeg, 1/8 teaspoon of cloves)
– Electric juicer
Instructions
Juice your apples, and add spices. Heat on low for warm apple cider, or enjoy chilled!
You don’t have to completely miss out on the best pumpkin and apple fall treats. So, don that scarf, pick out your favorite boot socks, and try these healthy fall treat recipes!
What are your favorite fall treats? How have you made them healthy {or not}?
Original article and pictures take modernalternativehealth.com site