среда, 26 февраля 2014 г.

How to Use Aloe Vera and Essential Oils for Sunburn

How to Use Aloe Vera and Essential Oils for Sunburn
aloe vera, essential oils, lavender, sunburn

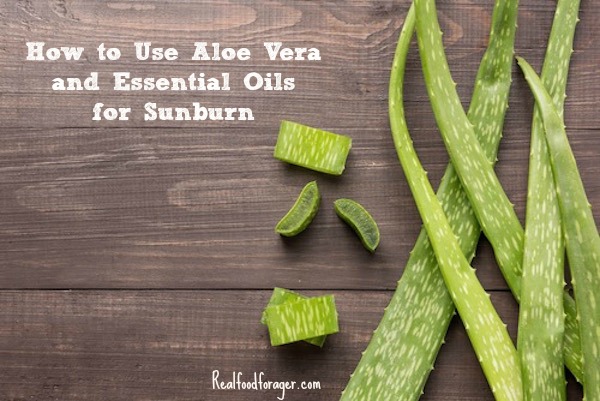
For some people it is a love/hate relationship with the sun – love the sun – hate the burn. Here’s how to use aloe vera and essential oils for sunburn.


When I was a teenager we used to lay in the sun for hours, in search of that glowing tan. My skin does tan well – however there was a time when I was in Florida, in the middle of the winter, and I got a bad sunburn. Thankfully, my wise great-aunt knew how to use aloe vera.


The worst part of the burn was on my chest and upper arms. I don’t want to date myself, but this was before anyone worried about skin cancer.


But blistering skin was painful, debilitating and a vacation spoiler, for sure.


Thankfully, my great-aunt was a woman into natural foods and herbs way before her time. She was in her seventies and practiced yoga and meditation every day and ate lots of raw vegetables. She had amazing vitality and flexibility. She was a great influence on both my mother and myself.


She took one look at me and walked me over to her windowseat full of house plants – pulled out the aloe plant – and told me not to worry.


She pulled out one of the longest leaves, cut a piece off, opened it so the gel was exposed and had me gently rub the gel all over the sunburn. She gave me the rest of the whole leaf that she pulled and instructed me to reapply the gel every hour or two.


I did it as she said and in 2 days the inflammation was way down, the pain was gone and my skin did not feel so stiff. I was able to enjoy my vacation again!


Benefits of Aloe Vera for Sunburn


Aloe vera from the leaf of the plant is primarily made up of polysaccharides and glycoproteins. The polysaccharides aid the skin in generating new skin cells and it helps repair the damage from the suns rays. It does this by forming a protective layer over the damaged skin.


Aloe vera continuously hydrates the skin by penetrating the deep layers of the skin – nourishing the cells with the over 150 vitamins, minerals and trace elements contained in the gel.


The glycoproteins are potent in their ability to relieve the pain and inflammation in the skin. Along with the glycoproteins are other substances that aid in reducing pain and inflammation, such as lidocaine.


Pure aloe vera gel has no chemical additives that you would find in some of the aloe products on the market today. Some of these additives can actually clog the skin’s pores and cause irritation to an already damaged tissue.


Importantly, aloe vera gel is also antibacterial and will help prevent a secondary infection. Aloe is incredibly soothing to sunburned skin.


aloe, sunburn


Aloe Vera for Sunburn


For sunburn, simply cut off a small portion of the leaf horizontally (about 1 – 2 inches), make another cut across the leaf to open it up, scoop out the gel or simply use the outer leaf as a holder and rub the gel onto the skin.


Leave the gel on and reapply every 1 – 2 hours for a new burn, less frequently as the burn heals. If it gets sticky, rinse the gel off with cool water and reapply.


Aloe vera can be mixed with lots of other helpful natural products for sunburn and other skin conditions such as eczema and warts. In these conditions, you would use the mixture over a longer period of time.


You can keep a plant growing inside, so you have easy access to this wonderful healing plant whenever you need it. These days, aloe vera leaves are available in most grocery stores.


As always, use your best judgment and if you think your burn needs medical attention, please do so first. See more of my disclaimer here.


Aloe Vera and Lavender Essential Oil for Sunburn


Once you use a natural product and find it works, it becomes easy to incorporate other products you can rely on for home remedies.


Lavender is gentle enough to use undiluted, yet it also has anti-microbial properties that make it helpful in combination with aloe vera for sunburn.


Lavender is also a lovely way to ease aching muscles in a warm bath with epsom salts. You can also simply rub a few drops into tight muscles or your temples for headache relief.


I use lavender in a coconut oil based cream to rub into my feet before bed. Incredibly, this helps with insomnia. A few drops on the pillow is another way to use lavender.


Lavender essential oil is great for relief of the inflammation in sunburn. Simply scoop out a tablespoon of the aloe gel and mix with 5 drops of lavender essential oil. The aroma is as soothing as the mixture.


Do you love to have effective home remedies at your fingertips?


Are you as Fascinated About Herbs and Essential Oils as I Am?


Seriously, just two items that I am interested in – the Cancer, Nutrition & Natural Healing eCourse by Sayer Ji, a $39.00 value and the The Thinking Parent’s Guide to Natural Remedies by Kresha Faber, a $17.99 value, together are way more than the super low price of The Herbs and Essential Oils Super Bundle! and you will get so much more!


Inspire Your Real Food Healing Journey with my FREE Grain-Free Meals e-Cookbook and Getting Started email series!


Original article and pictures take realfoodforager.com site

пятница, 21 февраля 2014 г.

How To Use a Rotation Diet for Food Allergies

How To Use a Rotation Diet for Food Allergies

This post may contain affiliate links which won’t change your price but will share some commission.


It can be tough to get kids to understand why a rotation diet is a good idea when they have food allergies. We give you ideas to get them on board.

This post is from contributing writer Mary Voogt of Just Take A Bite.


One of the hardest things about an allergy diagnosis is taking food away from your child.


“Sorry, no more yogurt for breakfast. Nope, no more butter on your muffin. Say bye-bye to that peanut butter sandwich.”


Then you break the news. You also have to rotate your food. The raisins you like to snack on every day? Now you can only eat them every four days. I hope you enjoyed that apple. You can’t have another until later this week.


This may sound like a joke, but it’s not. Using a rotation diet for allergies is one of the most important things you can do. It certainly does not make dealing with allergies easier, but it will help in the healing and prevention process. By rotating the food you eat on a four-day cycle you allow the body time to heal. It also prevents the development of new allergies, which is so common. Eating the same foods day after day when you have allergies is a recipe for disaster.


If you have never heard of or tried a rotation diet be sure to read about how it works and why it is critical for those with allergies!


So… just how DO you get your kids on board with this new way of eating?

Let them have control!


Sort of.


It can be tough to get kids to understand why a rotation diet is a good idea when they have food allergies. We give you ideas to get them on board.
How to use a rotation diet to help with food allergies, plus how to get your kids on board.

Whether your child is a teenager or a toddler it is important that they are part of the process, that they have a say in what they eat.


Do it together.


After my four-year old’s latest addition of allergies (some now potentially anaphylactic) he was pretty upset about all of the foods he had to give up…again (he’d taken a lot out, then been able to add some back, then the allergies got worse again partially due to our lack of rotation).


Then I told him we had to get back to a rotation diet. He wasn’t too happy about that either. And I felt overwhelmed trying to keep track of when he ate what.


So TOGETHER we planned out his rotation diet.


I started with a list of all of the food he could eat, categorized in food groups. Then we started adding foods from each group to all four days, making sure he had a say in what went together.


Make it fun.


To help us remember we made a place mat with his rotation diet. I printed the lists of food for each day on a piece of paper. He drew pictures (he can’t read quite yet) so he knows what is on the list.


It can be tough to get kids to understand why a rotation diet is a good idea when they have food allergies. We give you ideas to get them on board.
How to use a rotation diet to help with food allergies, plus how to get your kids on board.

The placemat stays at his spot at the dining room table. So whenever he is eating he can double check the list. He is learning at a very young age how to manage his own allergies and keep himself healthy instead of just having mom and dad dictate what he eats. I am enabling him to be in control of his health.


Now we can choose foods together. When he wants a snack on day one we check the list…strawberries! When it’s time for lunch on day three…teff crackers with Organic Sunbutter (they make other varieties, but some have added sugar and this one doesn’t).


I have turned something daunting into something fun.


I also keep a list for myself to help with meal planning. Since I have more than one rotation diet to keep straight (little sister has one, too) it is critical that I am organized. I keep the lists right in the kitchen so I can see them every time I prepare food for my kids. To get you off to a great start with your own rotation diet planning, I’ve created a simple, but very helpful, printable for you to use.


My son loves using his rotation diet placemat. It works well for a young child. He loved drawing pictures of the food. Stickers would work well too. A super simple way to make a place mat is to cover paper with clear packaging tape. It’s easy to clean! It could also be a chart on the wall.


An older child could use a chart or even keep track of their rotation diet electronically (I assume that’s what older kids do these days. Do they use paper and pencil anymore? I haven’t entered that phase yet!).


It can be tough to get kids to understand why a rotation diet is a good idea when they have food allergies. We give you ideas to get them on board.
How to use a rotation diet to help with food allergies, plus how to get your kids on board.

Kids in the Kitchen


An added bonus of allowing your child to take control of their food choices is that they take more interest in what’s going on in the kitchen! My son loves to help cook. The combination of doing the Kids Cook Real Food eCourse and working on a rotation diet has been such a blessing for us.


My four-year-old knows more about how food quality impacts your health, where food comes from and that there are so many more choices than chicken nuggets and hot dogs than most adults.


How many people do you know that regularly eat teff porridge, pumpkin yogurt, and spread lard on their muffins? My son does! He even calls the lard frosting when I add a touch of honey. Not to mention he will devour a pile of roasted purple cabbage or cauliflower before even touching the rest of the food on his plate. And almost always asks for seconds. He has developed a healthy appetite for a wide variety of foods.


At first, the struggle with allergies and rotating foods seems overwhelming. But there are so many blessings that can come from it.


Have you been hesitant to try a rotation diet? Have you heard of it before?


Whether you deal with allergies or not it is important to teach your kids about choosing healthy food, taking care of their bodies and eating a wide variety of food. Getting kids on board with a rotation diet can be really fun! Especially when you take the time to let them help you prepare the food.


It can be tough to get kids to understand why a rotation diet is a good idea when they have food allergies. We give you ideas to get them on board.

Looking for more information on a rotation diet? Mary breaks it all down in her post on how a rotation diet helps with allergies.


Need some help getting your kids to expand their diet and put an end to picky eating? Check out Mary’s book Why Won’t My Child Eat?! A rotation diet is just one of the many tools you can use.


Original article and pictures take www.kitchenstewardship.com site

вторник, 18 февраля 2014 г.

How To Treat Infant Reflux Naturally

How To Treat Infant Reflux Naturally
how to treat infant reflux naturally

by Kimball Young


Like most moms, I spent my pregnancies daydreaming about what my babies would be like. What would they look like? What would they be good at? Would they love to read, or sing, or dance? I imagined sweet, sleepy little infants who spent hours snuggling and cooing. What I didn’t spend time daydreaming about was infant reflux. I didn’t imagine myself sobbing in the furthest corner of the house holding a baby who had been screaming for hours on end.


I have 4 children and all 4 of them suffered from infant reflux.


I was on baby number three before I realized there are natural ways to treat reflux. These treatments worked much, much better than the treatments I tried with my older children. So much better, in fact, that when baby #4 began showing signs of reflux I was able to treat the symptoms so quickly and effectively that her symptoms were only present for a matter of days.


First, let’s address what reflux is and what it isn’t.


What Infant Reflux Is Not


Almost all babies spit up sometimes, so how do you differentiate between normal spit-up and reflux? The short version of the answer is this: If your baby appears happy and doesn’t seem to be in any pain or discomfort, it is likely normal spit-up and your child can be considered a “Happy Spitter”.


What is Infant Reflux?


The official term for reflux is Gastroesophageal Reflux Disease (GERD). Babies with true GERD are categorized as “Scrawny Screamers”. This may be a misnomer, however. GERD may cause your baby to undereat, because eating is painful causing your baby to become underweight (thus, the term Scrawny Screamer). GERD may also cause your baby to overeat, because sucking and swallowing may help keep the milk they drink down and the acid at bay. Common symptoms of GERD are:


  • Gagging, choking, coughing, bad breath, excessive hiccoughing, burping
  • Frequent spitting up or vomiting (if it’s projectile, it is more than GERD)
  • Fussiness and trouble sleeping

Severe GERD is categorized by:


  • Extreme fussiness and/or crying associated with eating
  • Refusing to eat/poor weight gain
  • Breathing problems
  • Back arching
  • Hoarseness, sore throat
  • Severe congestion/chronic sinus or ear infections
  • Spitting up blood or bile

General Advice for GERD Babies


These are the general tips you’ll likely hear if your baby is suffering from reflux:


  • Keep baby upright as much as possible, especially during and after feedings
  • Allow Baby to sleep on an incline
  • Feed your baby smaller, more frequent meals
  • Burp your baby thoroughly after each feeding

While I think these tips can be helpful for less severe cases of reflux, I haven’t personally found them to be particularly helpful for babies who are experiencing more severe reflux.


Advice You May Be Given, But Should Ignore


Some well-meaning doctors and friends may recommend you thicken your baby’s milk with infant cereal (either pumped breast milk, or formula).


There are several reasons this is a bad idea. First, thickening formula may lessen the amount of spit-up you’re dealing with, but it may not actually help with the reflux. The idea is that the cereal helps the milk to “stay down” in the stomach, but in reality what is likely happening is that Baby begins to experience Silent Reflux- reflux in which the stomach contents come up and Baby swallows it back down rather than spitting up. This can cause a pattern of Baby bouncing back and forth between diarrhea and constipation.


The second reason this is a bad idea is that there is mounting evidence that babies don’t have the proper enzymes needed to digest grains and should not be fed any grains until they reach at least 1 year old.


Natural Infant Reflux Remedies That Actually Work


  1. Healthy gut flora for baby. Some cases of infant reflux may be due to an overpopulation of bad bacteria. Adding in good bacteria in the form of probiotics will help to overrun the bad bacteria. Find a probiotic that is made especially for infants, like this one. Powdered probiotics can be given in a spoon with only a few drops of water, or can be added to pumped breast milk and given in a bottle. You can even apply the probiotics to your nipple and allow Baby to swallow it while breastfeeding.
  2. Nurse in a more upright position. Often, reflux is the result of Baby drinking too much milk too fast. If you’re breastfeeding and have forceful let down, make sure to nurse it positions that allow Baby to have better control of how much milk they’re getting. Try these positions. Read more here.
  3. Feed Baby from only one breast per feeding. Sometimes moms produce an overabundance of milk. If you’re one of those moms, nurse Baby on one breast only per feeding. This allows Baby to get both the foremilk (the more watery thirst quenching milk) and the hindmilk (the more rich, fatty, nourishing milk).
  4. Try an elimination diet. The most common triggers are dairy, soy, wheat, and eggs. Eliminate one food at a time and for at least a week. Your child may have an actual allergy to something you’re eating.
  5. Try Chiropractic Care. This one was the winner for my third baby. He screamed incessantly for the first 9 weeks of his life. Every other thing we tried helped a little, but he was still miserable. When he was two months old, we moved and I was able to try a different chiropractor than the one he’d been seeing and the results were instant and lasting. He stopped screaming during the adjustment, fell asleep and slept for 9 hours straight (he’d slept only 20-30 minutes at a time up until that point!) When he woke the next day he was happy and content.
  6. Hazelwood Reflux Jewelry. If you’re familiar with Baltic Amber teething necklaces, this suggestion won’t seem like a stretch. Hazelwood necklaces proved to be very effective at helping to ease the acidity related to my babies’ reflux. I ordered mine here.
  7. Babywearing. For me, this one is a no-brainer. Babies love to be worn. Choosing a carrier that allows Baby to be more upright with no pressure on the belly is ideal. The Ergo is a great option, and very comfortable for Mama. Other choices include the Baby K'tan and the Moby.
  8. Swaddling. All of my babies loved to be swaddled, but I noticed the two who had the most severe reflux did best when swaddled most tightly.
  9. Castor oil packs. Castor oil has amazing detoxing abilities, and can help flush the body of whatever is causing a problem. Castor oil can either just be rubbed on Baby’s belly several times a day or you can use the castor oil pack method. Dip a cloth (cotton, hemp, wool, or flannel- a cloth diaper would be perfect) in castor oil. Apply it to Baby’s belly. Wrap with plastic wrap (to contain messes from dripping oil) and cover with a blanket. Leave it on for 30-60 minutes, if possible. Then, give Baby a warm bath (make sure the water is filtered, I use this shower filter) with a few drops of lavender oil.

One Last Tip


Many babies who’ve dealt with reflux aren’t able to sleep well. Even once they are no longer experiencing reflux symptoms they may continue to be poor sleepers. This may simply be a result of never having had a chance to learn to sleep well. Once your baby seems to be free from symptoms of reflux, make teaching healthy sleep patterns a priority.


Kimball Young

Kimball started on her journey to real food and natural, holistic living 9 years ago, when her oldest child nearly died from an allergic reaction to peanuts. She is passionate about wholesome food, her family, and Jesus. Kimball is married to a Naval Aviator and together they are parents to 3 hilarious boys and a sweet baby girl. Their family is currently stationed in sunny San Diego.


Original article and pictures take theholisticmama.com site

пятница, 14 февраля 2014 г.

How to Treat and Prevent Bug Bites Naturally #DIYFriday

How to Treat and Prevent Bug Bites Naturally #DIYFriday

It’s not as hard as you think to treat and prevent bug bites naturally. Stay away from the harmful chemicals with these tips.


I love summer, and especially the evenings when things start to wind down and the air begins to cool. Sitting on the porch, watching the sun go down with a glass of tea or lemonade is relaxing. Pushing the kids on the swing or kicking a ball around is fun.


Smacking bugs off of my arms and legs every few seconds? Not so fun or relaxing! And the bites can be itchy, annoying, and just downright painful.


But I can’t stand to slather or spray nasty chemicals all over me or my kids to keep the bugs at bay. Most commercial insect repellants contain toxic chemicals like DEET, which the Environmental Protection Agency says to wash off immediately after returning indoors and not to breathe in.


That doesn’t sound like something safe to use for my family. Luckily there are many other ways to prevent getting those bites by protecting and/or nourishing your skin.


It's not as hard as you think to treat and prevent bug bites naturally. Stay away from the harmful chemicals with these tips.
Here are a few ways you can treat and prevent bug bites naturally.

Prevention Is Key


Of course, the easiest way to deal with bug bites is to not get them in the first place!


One simple way is to cover up. Wear lightweight clothing that covers your skin.


Believe it or not, my favorite method of preventing mosquitos is to invest in a bat box. No, really!


Our property has a pond on one side and a lake on the other. It used to be impossible for the kids to go outside and play without coming in covered from head to toe in bites, scratching and crying from the itchiness.


One day bats decided to nest in one of our buildings, and it was one of the best additions to our property as we are now practically bug-free! I know people who are afraid of bats or simply think they are a nuisance, but they are welcome at our house! They have made outdoor living enjoyable again.


Make a Homemade Insect Repellant


Try using a homemade bug spray to ward off bugs and insects. You might be surprised at how simple it is to prepare insect repellent! All it involves is shaking up a few ingredients together.


Here’s a great “Go Away Personal Bug Spray” from Dr. Julie Bates:


Go Away Personal Bug Spray

Use essentail oils


I love, love, love using essential oils to keep bugs away. I always have them on hand and use them for, well, pretty much everything! Try these:


Lavender, lemongrass, and thyme to keep chiggers, fleas, mosquitos, and ticks away.


Patchouli for gnats!


Basil, clove, Eucalyptus, lavender, and peppermint help keep flies at bay…


And my personal favorite, because I am deathly afraid…..peppermint for spiders!!! Lori, our Keeper of the Home social media expert, loves to sprinkle peppermint on cotton balls and place them around the house to ward off these terrifying pests. (I know: dramatic, right? Ever seen that image of a large spider right beside the red emergency button? Yeah, if that was up to me, we would all die!)


Ok, moving on!


Increase your Vitamin B


Before going on a camping trip, try increasing your consumption of vitamin B1 for a week or two. It is thought that the thiamin in vitamin B1 produces a body odor, undetectable to humans, that repels biting bugs, especially mosquitoes.


As always, you must be careful when taking vitamins so as not to consume too much. For more information see these articles:


If or WHEN you get an itchy bug bite…


Try plantain


Plantain is a well-known remedy for bug bites and has been used by herbalists for many years. The great thing about plantain is that it is a common lawn weed and can therefore be found in many areas.


Take a look below:


koth plantain

Have you seen plantain growing around your neighborhood…or in your yard? If not, it would be a good thing to plant in your own garden.


To treat bites immediately, fresh plantain can be chewed (to break down the plant), then held over the affected area for relief. It sounds gross, but it works!


Keep the plantain in place by taping with a band-aid or wrapping with gauze or a bandage.


Plantain has the ability to inhibit and reduce swelling as well as soothe pain.


If you’d like to be a little more dignified about it, make a plantain poultice or prepare some plantain salve in advance and keep it handy for when the need arises.


How to Make a Plantain Poultice

Essentially, the chewed up, fresh plantain is a poultice, but if you would prefer that chewing not be part of your herbal preparation, try the method below:

Combine 1/8 cup of water and 1/2 a cup of fresh plantain in a blender. Pulse until the mixture looks gloopy. The mixture should be moist but overly watery. It needs to hold together and not run all over the place. hold together If it is too watery, add more plantain. If it is not moist enough, add more water.

Apply the mixture to the bite so the affected area is generously covered. Keep in place with a bandage.


Plantain can be left on for many hours and is generally considered safe for all ages.


Make a Calendula salve


Calendula Salve is simple to prepare, but needs to be done so in advance of receiving any bites or stings.


Calendula contains soothing properties that will aid in healing most bug bites. It also has a myriad of other uses and is an excellent addition to any natural first aid kit.


To learn how to prepare your own Calendula salve and read more about its uses, see this post: How to make Calendula Salve and why you should.


Cut an onion


For a small sting or bite, slice an onion and rub the juicy side over the affected area. For a more serious or painful bite, tape a piece of onion over the area and leave it. It can stay on for a few hours.


Onion can reduce the pain and swelling of bites and stings from insects such as wasps, bees, ants, spiders, and mosquitoes.


koth onion

Slice some garlic


To reduce the itching and swelling form bug bites, slice a garlic clove and rub the affected area with the juicy side. Garlic can sting, so be very careful when using this method to treat bug bites. You may prefer to use this on adults instead of children (at least to begin with) and only rub the garlic clove over the bite a few times.


If the bite is large, you might consider using a garlic poultice instead.


Tap into those essential oils some more


Lavender is not only good for chasing off the bugs, but along with chamomile is commonly found in skin care products due to its soothing effects on the skin. They are calming to the skin and nerves and also act as anti-inflammatory, anti-septic and analgesics as well. Perfect for calming and nourishing your skin!


There are many other essential oils that like eucalyptus, basil, lemon balm and tea tree that work to reduce inflammation from bug bites as well as relieve the itching and stinging. Give them a try!


Make a baking soda paste


As a child this was my moms favorite go to recipe for bites and stings, simply mix baking soda and water into a pasty mixture and apply. Its a bit messy, but helps immediately! and doesn’t burn...Nowadays I go one step further and add lavender essential oil to this.


Another use for sunscreen


Have you seen our sunscreen recipe? It’s not just good for preventing burns… it turns out that, through six teenagers, we have learned that it is pretty much good for everything skin related….soothing burns and bug bites are at the top!


How do you naturally treat and prevent bug bites? Have any great tips to share?


Disclosure: This post contains affiliate links. When you buy through our links, we earn a small commission, which helps to keep this site going so that we can continue to offer free and useful content, so thanks!


Original article and pictures take keeperofthehome.org site

среда, 12 февраля 2014 г.

How to Transition Your Kids to a Gluten-Free Diet

How to Transition Your Kids to a Gluten-Free Diet
How to Transition Your Kids to a Gluten-Free Diet- These tips will ease children into eating gluten-free foods and start them on healthier eating habits.

There are times that families must make the choice to go gluten-free with their child and it can be a difficult transition or easy depending on how you go about it. Whether you are just trying to make better choices for your family or if there has been evidence of Celiac Disease, a gluten allergy, or a gluten sensitivity, you can take certain measures to make the transition a little easier for your child. A gluten-free diet can make a remarkable change and is a great way to go. Eating a gluten-free diet can also start your child out with healthy eating habits that will last a lifetime. If you need a little help getting started, check out these tips on How to Transition Your Kids to a Gluten-Free Diet.


How to Transition Your Kids to a Gluten-Free Diet


Don't let them hear a bunch of negativity. Have you ever noticed that children hear everything? They are great at decoding things too, so make sure that you don't over stimulate on the gluten-free talk. When you do talk about eating gluten-free use upbeat tones in your voice and make it seem like a great thing to do! You can even turn it into a game of sorts. Going gluten-free is scary enough of a change for us as adults so you can just imagine what it will sound like to your child. Keep the talk light and upbeat whenever you mention it.


Offer the same choices they are used to but with gluten-free options. There are plenty of gluten free options out there that your child is used to eating. If you have a mac-n-cheese or pancake kid don't just yank their favorite meals away. Keep them coming but offer them on a gluten-free scale. If you don't mention it to them there are chances are they won't even know the difference.


Prepare your own meals when you can. Although there are plenty of gluten-free products on the market they may not exactly be the healthiest choices for gluten-free. Get in the kitchen and make your own “from scratch” recipes and include your children in the making process. What kid doesn't like eating what they helped prepare?


Keep plenty of gluten free snacks on hand. What kid doesn't love a good snack now and then? Keep plenty of gluten-free cakes and snacks around for when they get the sweet tooth bug. It's always best to offer up fresh fruits and veggies as an alternative to sweet snacking, but sometimes kids just want an honest to goodness treat. There are plenty of options that are becoming available in the grocery store or better yet, learn to make your own at home.


Get the junk out of the house. It's much easier to go totally gluten-free as a family than for just one child who is having problems. If there are no gluten-free products in the home then it will be a whole lot easier to make sure your child stays away from them. Throw the junk out and buy some healthy choices for them to choose from.


Have snacks and food ready for on the road. It's easy to stick to a gluten-free diet when you are at home and have plenty of choices for them to choose from but on the road can be a whole other ballgame. Prepare for every outing with fresh fruit and gluten-free snacks that can keep them full until they get home. It's always hard to make better choices when out and about and thinking ahead can save you a lot of money and trouble.


I hope these tips have helped you transition your child to a gluten-free diet. Remember to be firm with your children on what they are allowed to eat. After all, you are the parent and the one in charge of helping them make good choices that will stick with them for the rest of their lives. It may take a little time at first and be somewhat difficult road, but it will be worth it in the end.


Kid-Friendly Gluten-Free Recipes:


Gluten-Free Cookies and Creme Rice Krispie Treats


15 Gluten-Free Lunch Recipes for Back to School


Gluten-Free Chili, Macaroni and Cheese Casserole


Gluten-Free Brownies


Original article and pictures take premeditatedleftovers.com site

понедельник, 10 февраля 2014 г.

How To Talk To Your Legislators About Vaccines

How To Talk To Your Legislators About Vaccines
Photo by Pixabay

By Danielle, Contributing writer


You may see the legislation and calls to action swirling around you regarding vaccines. You may want to share your story, but just don’t know where to start.


Talking to a legislator is intimidating, let’s face it. But, hearing from their constituents is the only way a legislator will know what they think, and how they want them to vote. You may think they won’t listen, or they will think that you don’t know what you’re talking about, but realize what they think they know. If you’ve made the decision to delay or to not vaccinate, you surely know more than the average legislator.


What they know is what the pharmaceutical companies have told them. Yes, those same old lies you read about online and wonder how someone could really believe that. Yes, they do.


Your job when talking with a legislator is much like when you talk to your friends about vaccines. You must be factual and sure in what you know, and round it out with your personal story. Over time, they start to see the fruit in your actions, the lies in propagating in doctor’s offices, and starting asking questions. It is the same with legislators.


So, study up, get your materials together, including the print out below, and make the appointment with your legislator. You can do it!


What Are the Big Points to Cover?


  1. Share your story. Share your story, including diagnosis, symptoms, and the financial and emotional cost of caring for a child with vaccine injury.
  2. Vaccine Injury Compensation Program”>Let them know that vaccine manufacturers have no liability. You would be surprised at how few legislators know this. Ask them why this would be, and what other industries allow this? Let them form their own conclusions, you are there to get the questions going.
  3. Tell them that the CDC has been accused of fraud. Congressman Bill Posey has asked for an investigation of whistleblower William Thompson’s admission that the CDC threw out data which showed a clear correlation of vaccines and autism.
  4. Show them the reporting. Pull statistics out of the VAERS database for their state and region. Many believe that vaccine reactions are “one in a million,” while the data shows otherwise.
  5. Display the CDC schedule from years past to today’s. Many legislators are out of touch with the current schedule of 70 vaccines given before age 18, 49 before Kindergarten. The CDC schedule in 1983 had only 11 vaccines before age 18. Ask them why, if vaccines provide life-long immunity, we need boosters three times.
  6. Show them the ingredients. Print out one of the vaccine package inserts and highlight the questionable ingredients, show them how much of an ingredient is given per vaccine.
  7. Remind them that doctors are compensated for fully vaccinated patients, and per vaccine given. Doctors are compensated per vaccine given (around $100 each), and per patient whom is fully vaccinated (around $400 per patient, depending on the insurance company). This creates a huge conflict of interest.
  8. Explain to them how vaccines are not causing outbreaks. How can children, without the disease, spread it? Explain the different strains of viruses and bacteria in vaccines, and how vaccines do not cover all strains. We are actually seeing outbreaks of the vaccine strain, as well as outbreaks of the other strains because they are becoming stronger as we vaccinate for the limited number of strains. The vaccine program, throwing off the bacterial and viral balance of our bodies, is causing the issues.There are many other topics to cover, so surely add ones which you are well versed. These topics alone will give the legislator much to think about. Be sure to tie in your personal story, personal feelings, and religious concerns, as well as any current legislation in your state.*If the legislative is Republican, Christian, or is pro-life, bring up the vaccines which contain aborted fetal tissue, and ask how these can be mandated on those who are pro-life?

    How To Talk To Your Legislators About Vaccines

    What Should You Bring?

    Don’t show up empty-handed. Bring our quick Print Out, with your notes added, to be sure you hit your main points. Leave with them the “More Resources” page so that they can look these items up themselves from reputable sources.

    Bring your contact information.

    – Bring studies, research, and articles.

    Bring a list of more resources, such as links to the VAERS database and the vaccine injury compensation program.

    – Bring any local legislation or specific data. Highlight the areas of which you have concern.

    More Tips on Talking to Your Legislator


I wish I could give you a hug, and chat over coffee about our experiences with legislators. This is not easy, and if you don’t like public speaking, you may be terrified. Remind yourself of these tips before you go, take a deep breathe, and look into the faces of those babies you so love. Remember why you are doing this.


  • – Become buddies before you go. Call your legislator and their aide to learn more about them. Google them and see how they vote, and what their stances on. Are you both interested in something? Bring it up!
  • – Set up an appointment when they are in their home office. Catching them when they are home leaves them, and you, much more relaxed. If you try to meet with them when they are in session, their minds may be elsewhere.

– Find legislation other than vaccines which you agree on. Look at the legislation which they currently sponsor, or have voted for. Share your opinions with them, and come alongside them to support the legislation. This helps them see you’re a person, not a vaccine-free alien.


  • – Relax. I know this is easier said than done, but remind yourself why you are there, take a deep breath, and talk to this person like you would a friend.

Grab our print out, go over what you will talk about, and book that appointment with your legislator!


Have you talked with your legislator about vaccines? What’s worked, and what hasn’t?


Original article and pictures take www.modernalternativehealth.com site

пятница, 7 февраля 2014 г.

How to Stir-Fry Lettuce the Easy Way #DIYFriday

How to Stir-Fry Lettuce the Easy Way #DIYFriday

Have you ever wondered how to stir-fry lettuce? It’s surprisingly easy and even better, it’s something my kids devoured! Here’s how, complete with pictures.


If you had asked me a few weeks ago, I would have never believed I would be sharing about how to stir-fry lettuce the easy way. But here I am…and here it is!


Last week, we had a guest in our home from China. Simon, long-time friend of my husband, stayed with us for the entire week. Luckily for me, he loves to cook and took a generous amount of time to teach me several authentic Chinese dishes.


As I watched our friend Simon move around our kitchen, the Chinese way of cooking seemed so simple. I shadowed him around like an eager student as he found items to replace a wok and the kinds of utensils he needed to create this super tasty stir-fry lettuce.


After testing it out for myself, EVERYONE should know how to stir-fry lettuce! Not only is it easy-peasy, but it's delicious (even the kids devoured it!).

Their ingredients are whole and simple, and even their technique of cooking may be straightforward. However, what I learned about the way they choose foods and even the foods they cook together was far from simple and still has me hungry to learn more!


For example, they will use a food’s attribute of “hot” or “cold” to help balance the body’s inner microbiome, which in turn helps detox and flush toxins and prevent disease. I’ve been on a detox/cleanse kick so this had my ears burning for more!


Think about it. We know peppermint is cooling from all those cute peppermint breath commercials that freeze everything. Horseradish fans know it’s warming.


But how do you know which fruits are hot or cold? Or which meats? It’s not based on color or temperature… And how do you know which are best for you?


I had certainly heard of yin and yang, but had not experienced it in such a profound or enlightening way. I also found that learning to apply this practice correctly is quite complicated! In fact, the more I learned while Simon was here, the more confused I became.


My biggest takeaway, though, was something that I already knew and from time to time need a reminder of …and I’m sure you do. too…listen to your body!


If it smells bad or tastes bad or makes you feel bad, chances are…you should avoid it. I’m not the same as my husband or any of my kiddos, so what’s good or bad for me isn’t necessarily the same for them. Listen, really listen, to what they tell you, too.


The technique I really stunk at


Instead of using a peeler, Simon taught me to peel ginger with the tip of a spoon. It took me five times longer and my hands really hurt by the time I was done, but only the peel of the ginger was removed. Impressive!


By the end of the week… and ginger in every recipe…I was maybe a little faster at the peeling, but tasting the ginger in every recipe was worth every bit of work!


After testing it out for myself, EVERYONE should know how to stir-fry lettuce! Not only is it easy-peasy, but it's delicious (even the kids devoured it!).
The surprise of stir-fried lettuce

I wasn’t surprised that we all loved Simon’s orange chicken or his fried rice, but his cooked lettuce left me flabbergasted. Seriously: my mouth was hanging open as I watched my children devour it.


Like most kids, ours tend to be picky about their greens. They all will eat broccoli, some even like peas, artichoke, and brussel sprouts, and even a salad, but cooked lettuce? No. Way.


I was feeling for Simon as he began prepping for this dish. I thought he was going to be disappointed when there were still lots of greens left on that beautiful platter. I knew I would eat it and my hubs is always game for anything, but the kids? I thought they might take a bite or two to be polite, but that would be all.


Nope. They ate it all. As I watched them going back for seconds, I was delighted with how pleasant they were and impressed with how far they would go to indulge Simon (they adore him)!


But it continued. They went back for thirds.


And in no time the platter was completely cleaned off.


And it was SO simple.


After testing it out for myself, EVERYONE should know how to stir-fry lettuce! Not only is it easy-peasy, but it's delicious (even the kids devoured it!).
Here’s how to stir-fry lettuce

What you need:


  • 2 heads green leaf lettuce quartered (I use romaine)
  • Coconut or olive oil (or any high heat cooking oil), enough to cover bottom of pan
  • 1 whole ginger about the size of your hand, chopped
  • 1 whole head of garlic, chopped
  • 1 tsp sea salt or to taste
  • 1/4 – 1/2 cup of water, if needed

What you do:


Rinse lettuce and cut it from the bottom in half and then each in half again


After testing it out for myself, EVERYONE should know how to stir-fry lettuce! Not only is it easy-peasy, but it's delicious (even the kids devoured it!).

Pour enough oil into pan to cover and turn on high heat and add ginger and garlic. Saute for one to two minutes then sprinkle salt over garlic and ginger.


After testing it out for myself, EVERYONE should know how to stir-fry lettuce! Not only is it easy-peasy, but it's delicious (even the kids devoured it!).
Add lettuce then turn down heat to medium and cook about 5 minutes adding a little water if needed. Lettuce will cook down dramatically.

Turn lettuce two to three times making sure to coat with the oil. Remove from heat and place on platter.


Pour oil, ginger, and garlic over lettuce.


After testing it out for myself, EVERYONE should know how to stir-fry lettuce! Not only is it easy-peasy, but it's delicious (even the kids devoured it!).
Have fun and let the kids try to eat it with chopsticks! (wish I had taken pictures of that :P)

What’s your favorite stir-fry treat?


Up Next:


I'm often asked how I make essential oil roller bottles (which people call "potions" or "mixes" just as often). Here are tips so that you…


Here's how you can make your own sunscreen...and have it as a safe, healthy, all natural alternative to what's sold in stores.


Ann Timm


Ann Timm considers herself blessed to be the wife of a Christ follower and mother to six amazingly cool kids. She strives to keep a happy, healthy home, although she openly admits to failing often. She loves to share her foibles and encourage other women on their journey to healthy living.


More posts by Ann Timm


Original article and pictures take keeperofthehome.org site

понедельник, 3 февраля 2014 г.

How to Stay Clean Without Showering Every Day

How to Stay Clean Without Showering Every Day
I definitely don't shower every day - in fact doing so dries my skin out. These tips and hacks are perfect for staying fresh and clean between shower days.

The other day I was listening to CBC radio in my van when I heard some disturbing news: in many parts of the world, we’re using up groundwater faster than it can be naturally replenished through precipitation. By the year 2040, experts are predicting major water shortages on many parts of the globe.


After more research I discovered that it’s mostly poor agricultural practices that are to blame, and it’s mostly occurring in the Middle East and North Africa. But it got me thinking a lot about our water use in general.


I was reminded that clean water is a precious commodity that we mustn’t take for granted, even here in Canada.


I’ve never before given too much thought to water consumption, focusing instead on reducing my consumption of more tangible things (i.e. “stuff”).


Water just seemed like something we couldn’t run out of. But this radio program compelled me to start thinking about how I can reduce our family’s water use, and start talking to others about the same.


There has to be enough clean water to go around, if we all learn to steward it well. I do not want to contribute to global water shortages in any way.


There are lots of things we can do. We can stop wasting water on lawns. We can say no to individually-owned pools and hot tubs in favour of community pools. We can stop buying and drinking bottled water.


Water should NOT be a commercial commodity, but a common good!


However, one of the easiest ways I feel I can reduce water overconsumption as an individual citizen is by showering less often. There is no way every single person on the continent needs to immerse his/her entire body in water every single day!


Without my current sense of urgency, I’ve actually already been working to reduce the number of showers I take. It varies throughout the year, but I typically shower 3-4 times a week. I think I could reduce that to two times if necessary.


Here are a few tips and tricks I’ve used to stay fresh and clean while reducing the number of showers I take. Maybe you’ll find them helpful, too!


How to Naturally Reduce Body Odour


We live in a culture obsessed with not smelling like we have bodies. We are pathological about deodorizing and re-odorizing our bodies, often in terribly unhealthy ways.


Fortunately, it’s not that hard to naturally reduce B.O. Healthy bodies don’t actually stink all that much, even with regular sweating, and without daily showers, antiperspirants, and commercial perfumes. Here’s how:


1. Switch to Natural/Homemade Deodorant


homemade deodorant

The first thing you can do is break your body’s dependence on antiperspirants and artificial fragrances, which actually make you more prone to stink in the long run.


When your sweat glands are used to being blocked up and oozing chemical fragrances, they can’t function the way they’re supposed to.


Ever since I made the switch to natural deodorant three years ago, I don’t start to smell nearly as quickly after application – I can often skip a day without noticing. Back when I used commercial deodorant, I had to be vigilant about applying every day or I’d start stinking by evening.


There are lots of homemade recipes out there: I use this simple baking soda, corn starch, coconut oil and essential oil recipe (adding beeswax in the summer to prevent melting).


Folks with more sensitive skin might prefer this recipe from Stories and Thyme, using bentonite clay. Crunchy Betty has a number of recipes you can try. I also know some people have had great success with those mineral salt crystals you can buy in health food stores.


Give it a try! You’ll be glad you did.


2. Use Magnesium Oil


I started using magnesium oil about a year ago for various reasons, but I learned that a happy side effect was less body odour! Most of us are chronically deficient in magnesium (read more on the subject from Wellness Mama), and balancing the minerals in your body can lead to all kinds of improvement in your health – better sleep, improved fertility, etc. It only makes sense that your body would be less stinky as well!


Interestingly, the best way to boost your magnesium is to absorb it through your skin. I make my own magnesium oil (check out Food Renegade’s post) and keep it in a spray bottle in the bathroom. I just apply a few spritzes to my skin (arms, belly) after most showers and rub it in. Simple!


How to Stay Clean Between Showers


So now you can go longer stretches without showering, because you have less body odour. But now it’s morning and you don’t feel totally fresh. What else can you do to look, feel and smell clean between showers?


For me, I’ve found that it’s mostly important to focus on underarms and hair to look and smell clean without getting my whole body soaking wet and scrubbed.


With a few quick steps, you can freshen up to face your day.


Step One: Change your Underpants


Sorry to even mention it. But it’s a really quick and easy way to immediately feel cleaner. And adding one more pair of underwear to the wash takes a lot less water than a full shower. Just sayin’.


Step Two: Wash Your Underarms


If you’re paranoid that your underarms will be smelly, just give them a quick wipe-down with a damp washcloth and a dab of soap. Insta-clean. Then you can go ahead and reapply your natural deodorant.


Step Three: Use Dry Shampoo on Your Hair


I’ve always tended to get oily locks pretty quickly. It has improved significantly since I switched to the no-poo method, but sometimes my hair still needs a quick clean-up between showers.


Dry Shampoo to the rescue!


(How to make DIY dry shampoo with just 2 ingredients)


Allow me to demonstrate with some visuals:


My hair on a bad no-shower day:


greasy hair (before)

I generally just apply it to my bangs, since my hair is so long – it would be a huge ordeal to get it all out effectively if I did my whole head. If you have shorter hair, you could probably pull off a full-head dry shampoo.


I apply a tablespoon or so of my dry shampoo to my bangs (standing over the sink) and rub it in. It looks kinda like this:


hair with dry shampoo

Then I brush and comb and shimmy my hair (still over the sink) until it’s all out.


I generally throw my hair into a sock bun on no-shower days and voila. You’d never guess my head was a big old grease-ball ten minutes ago.


Hair cleaned with dry shampoo

Congratulations for saving yourself a bunch of time, water, and energy! You just skipped a shower!


If you want, read more about the benefits of showering less here!


Original article and pictures take redandhoney.com site