As you are out and about this summer, keep these 5 natural tips for healing sunburns in mind before you reach for the bottle of lidocaine spray after getting burned.
This post contains affiliate links, FYI. Also, please note that I’m not a doctor, and the FDA hasn’t approved any of these remedies. Not that I’d care if they did one way or the other. This is only my personal experience – take it or leave it.
Summer is upon us, and it’s been in the upper 90’s/low 100’s for a couple weeks down here in the wonderful south. While I try to keep my kiddos out of the scorching afternoon sun, I need to be prepared to combat the inevitable sunburn. These tried and true tips to soothe and heal sunburns naturally are taken straight from a freckled, fair-skinned redhead who grew up in the Sunshine State – a.k.a. me – and who has had some too much experience with sunburns…
5 Natural Tips for Healing Sunburns
#1 – A Cold Shower
This is my first defense against a sunburn. As soon as possible after being burned take a cold shower. The water should be as cold as can be handled, but the pressure should not be too hard, in case you have blisters (you don’t want them to burst!). The cold water is soothing and helps to draw out the burn.
Gently pat dry dry after showering, or if possible, air dry.
If I can’t get to a shower and the burn is bad, simply soaking a washcloth in cold water and applying to the burn helps, as well.
#2 – Aloe
Aloe vera has long been known as a healer. Even though it’s usually just applied topically, it’s also known to heal when ingested.
Growing up, my mom’s natural go to for sunburn relief was always aloe. Even now, she has at least 15 plants under her carport and she generously snips off a leaf, fillets it, and applies the gel to my nieces’ and nephew’s burns. If you don’t have an aloe plant handy, you can find 100% aloe gelhere and use that.
#3 – Apple Cider Vinegar
Those of you who are real foodies probably already know that there are tons of uses for apple cider vinegar. But were you aware that treating a sunburn was one of them?
Yes, apple cider vinegar was one of my more recent sunburn healing discoveries. Soak a cloth or cotton balls in acv and gently dab on the affected area. Just like the cold shower, the vinegar will draw out the heat and help heal the burn. You could also fill a bathtub with cool water, add some apple cider vinegar to it, and give yourself a good soak.
Apple cider vinegar is pretty easy to make (I use this tutorial), but you can also buy it pretty inexpensively. Bragg’s is my favorite brand, you can buy it here.
#4 – Herbal Tea Bags/Compress
This remedy is especially helpfulif your eyelids have a sunburn(no fun). Simply steep an herbal tea bag (chamomile or green teas are good) in boiling water for a few minutes, then remove the bags and let them cool. Apply the cooled tea bags to your eyes. For larger burned areas, soak a washcloth in the cooled herbal tea and then apply.
#5 – Coconut Oil & Lavender EO
Just like apple cider vinegar, there are a million uses for coconut oil and lavender oil. When it comes to sunburns, coconut oil can be used alone, or with the addition of lavender essential oil. This combo has been my go-to for sunburn healing since moving down to the south. It’s easy to apply, and my kiddos don’t complain about it.
I use Plant Therapy essential oils for my kids, you can get it here.
Melt down about a quarter cup of coconut oil over low heat, then add in a few drops of lavender. Chill in the fridge, and gently rub a chunk of cooled coconut oil on the burn. The coconut oil will cool and heal and the lavender will heal and sooth. Win-win. Store leftovers in the fridge for the next unfortunate soul who gets burned.
Note: this combo is great for any burn, not just sunburn!
My favorite coconut oil is here, and here’s the lavender EO I use (just please don’t ingest it!).
When it comes to your backside, here's the bottom line: To lift your butt, you have to build muscle. “Building new lean muscle will help develop a backside with a natural well-rounded shape,” says Jillian Lorenz, co-owner of the Chicago-based women's strength studio Barre Bee Fit with Ariana Chernin.
This 5-minute strength training circuit targets the glute muscle from every angle to develop a perky, well-rounded shape. Whether you were born with a flat-as-a-pancake fanny or a derrière that seems to drop with every decade, we've got the perfect posterior plan for you—demonstrated by the creators themselves, Chernin and Lorenz.
TO DO THE WORKOUT: Perform 20 to 30 reps of each exercise with your right leg, switching from one move to the next without rest between the exercises. Complete all five moves with your right leg, and then do the circuit again with your left leg. Repeat for a total of two rounds per leg. To see the best results, follow the plan three times a week and pair it with a high-intensity interval training workout like this one to burn fat.
To start, get on all fours with your knees directly under your hips and your hands beneath your shoulders. Lift your right leg until it's parallel to the floor, toes pointed. Lift the legs a little higher and begin tracing the outline of the letter “P” (for Prevention, of course) starting at the base. Lower back 2 inches to the starting position and repeat.
Gail Reich
Targets: Upper outer side of glutes
Staying on all fours and keeping your right leg straight, cross it behind your supporting left leg, tapping the floor with a pointed toe. Squeeze your glute and lift your right leg so that it's in line with your right hip and parallel to the floor. Lower the leg to return to the tap. Be sure to keep your tailbone slightly tucked throughout the movement (don't arch your back).
Gail Reich
Targets: Center and upper glute
Start on all fours, your right leg pointed straight behind you. Lift your right leg 4 inches higher, keeping your hips angled down. Trace a box with your big toe clockwise, then reverse it and go counterclockwise. Try to create a deeper contraction with every box.
Gail Reich
Targets: Side hips through the meaty center of glute
As before, begin with hands and knees on floor, right leg extended. Swing your right leg out to the side, in line with your hip. Bend your knee, bringing your heel inward toward your body. Then kick back out to the side with a straight leg. Focus on squeezing through the glute.
Gail Reich Original article and pictures take www.prevention.com site
We explored tortillas, mayo, pancake mix, taco seasoning, and pizza. Today, we are going to explore 5 MORE foods to stop buying and start making at home.
BREAD
This is really an easy thing to make, once you get the hang of it. If you have never made your own bread before, you’ll be in for a heavenly experience! And, avoiding the HFCS and other additives that are in store bought bread makes this recipe a go to! You’ll never have to worry about running out during a winter storm, either. Just keep some flour and yeast on hand, and you can whip up a batch in no time! This recipe will make 2 large loaves.
2 cups warm water
1 T. dry yeast (or one packet)>
1/2 cup honey
1/2 cup coconut oil, or melted butter
1 tsp salt
4 cups wheat flour
2 cups white flour
Dissolve the yeast in the warm water.
Add the honey and oil and stir. Add the salt to the flour, and add in 2 cup increments while mixing. Knead by hand or mixer for about 10 minutes. Let rise in a warm place until doubled, about an hour. Punch down, and divide the dough in half. Shape into loaves, and place in two greased bread pans. Let rise a second time until doubled again.
Put the bread in a cold oven, and turn the oven on to 400 degrees. This helps give the yeast another “kick” and makes your bread more fluffy. Bake for 30 minutes from time you put the bread in.
Cool, and remove from pans. Enjoy!
*TIP allow the bread to cool for at least 30 minutes before you cut into it. This will avoid “weeping” and the bread will finish cooking during the cooling time.
BISCUITS
I used to love the convenience of opening up a can of biscuits.
My kids would argue over who got to “pop” the can open. Once I learned to make my own, I never bought another can. They are so light, and so easy to make! Here’s the recipe:
4 cups flour (you can use white, wheat, or a combination)
3 T. baking powder
1/2 tsp baking soda
4 T. cold butter
4 T. shortening (I use palm shortening)
*you could forgo the shortening all together and just use all butter, if you want*
2 cups buttermilk
2 eggs
Gently mix the dry ingredients together and cut the fat into it.
It’ll get crumbly, and you want pea sized crumbles. Mix together the eggs and buttermilk in a separate bowl and gently incorporate the wet ingredients into the dry. BE GENTLE! Pat out on floured counter until about 1/2 inch thick. Using a biscuit cutter, or other sharp end (not a glass!*) cut out your biscuits. Place on ungreased cookie sheet and bake in oven for 15-18 minutes until golden brown.
*TIPNow, as for why not a glass…I know you’ve heard everyone say that it’s okay, and best to use and all…but, truth be told here. It “seals” the ends up and you don’t get as high of a rise on your biscuits. Trust me. Try it for yourself. Next batch of biscuits you make, make 1/2 with a biscuit cutter or a sharp knife cutting them out and 1/2 with a glass and see which ones rise better for you. You can usually pick them up at a dollar store or Target pretty cheaply.
YOGURT
I have had people stare at me with this blank look when I tell them that I make my own yogurt.
You’d think I told them that I could trasmute base metals into gold! It’s really super easy to make your own yogurt, and I promise you’ll love it!
First, start off with milk.
I use raw, and whole milk is the best, but if you want to use skim I can’t stop you. Warm the milk gently in a pan until it reaches 145 degrees. You don’t want to leave it unattended during this time, as you will need to stir often to keep it from burning. Once it reaches that temp, turn off the heat and let the temp fall to 105 degrees.
Once it’s cooled, it will have formed a “skin” of sorts. Remove the skin and gently mix in 3 Tablespoons of starter yogurt. You can use store bought yogurt, but you need to check and make sure that it’s the plain kind and has the active cultures in it. That’s what you need to get your milk cultured. You can use any brand you want as long as it has the active cultures in it.
Pour into clean jars, and add a lid.
Place the jars in the dehydrator for 8-10 hours on 115 degrees. You can also set 2 large jars full of boiling water in a a cooler, add the yogurt next to the jars and shut the lid, undisturbed for 24 hours.
*TIP You can also use this to make your own frozen yogurt, instead of ice cream! Just as delicious and a great way to get more good bacteria in your guts!
CEREAL
The boxed stuff offers such things as convenience and ease of breakfast in the mornings, right?
Well, it also offers such things as GMO ingredients, HFCS and a host of preservatives. Making your own isn’t hard at all. As a matter of fact, make a batch of this on the weekend, and you’ll have easy breakfasts all week long! Alone in a bowl with milk, or as a homemade yogurt topping, and you can even make it into granola bars!
6 cups rolled oats
1 cup slivered almonds
1 cup shredded coconut (optional)
1/2 cup brown sugar
1/2 cup maple syrup
1/2 cup coconut oil
1 tsp. salt
2 cups dried fruit of choice
Preheat oven to 250 degrees.
Mix the dry ingredients, except fruit together, and add oil and syrup and stir to mix well. Place on a baking sheet and put in oven for 1 hour and 15 minutes, stirring every 15 minutes. Add fruit of choice, and store in covered container.
*TIP Granola is a personal cereal. You can switch out any of the ingredients, delete, add or whatever! Make it your own!
RANCH DRESSING
This is our family’s favorite for salads and dips.
A bottle of the store bought stuff only is about $1.50, but with the preservatives and MSG, I won’t feed that to my family. Making your own is so easy, too! Just a bunch of seasonings, some buttermilk and sour cream and you’re good to go! In a quart sized jar, just add:
1/2 cup dried chives
1/2 cup dried parsely
1/4 dried dill weed
1/2 cup dried onion powder
1/2 cup garlic powder
2 T. salt
1 T. black pepper
Mix together and store in an airtight jar for up to 6 months.
To use, simply add 2T. of the mix to 1/2 cup of buttermilk and 3/4 cup sour cream and mix well. Chill well before use (if you can wait) and use within a week. This recipe lasted me nearly 3 months before I had to make it up again, and I make ranch dressing nearly weekly.
*TIPforgo the buttermilk and mix 2 T. into 1 cup of sour cream for a delicious party dip!
Need some help getting back into the kitchen and cooking from scratch? Try this delicious collection of easy to make recipes to get you started!
Original article and pictures take thehomesteadinghippy.com site
5 Lessons We’ve Learned from Frugally Raising our Kids
My husband and I have three kids, and every time I hear reports about how much it costs to raise just one child these days, I wince a little (the latest data says close to a quarter of a million dollars per child). But then I remind myself that it doesn’t have to be that way.
Here are some lessons that I’ve learned as we try to raise our kids without spending too much money on them:
1. How to get creative with activities.
We don’t have our kids in more than one activity at a time (such as soccer, swimming, gymnastics, etc.), encouraging them to fully engage in where they are, and refusing to believe the lie that we have to push them too hard from an early age in order for them to succeed later on.
Instead, we watch Youtube videos of gymnastics or ballet, for example, and either follow along with a tutorial or turn it into a fun family activity as we pretend our living room is the summer Olympic games.
2. How to find enjoyment through experiences rather than things.
In the spaces of our lives that aren’t taken up by school, work, or activities, we tend to do things together. We will go for a family hike, take a “nature walk” down the street, make muffins, or play a board game together.
We own plenty of toys, but we also try to teach our kids that the most joy in life comes from relationships rather than objects, and model that through how we spend our time together.
3. How to find great second-hand deals.
If you look at your local library, they probably have a section where they sell their old books for a fraction of what it costs to buy a new book. I’ve bought books at our library for a quarter each, greatly expanding our home book collection.
We tend to buy board games at the local thrift store for two or three dollars rather than the fifteen or twenty they cost brand new.
I also find gently used clothes that are still on trend at thrift stores, a huge benefit when kids grow so quickly and need new clothes so frequently!
4. How to make lots and lots of lunches!
I make lunches every day, not just school days. If it’s a Saturday and I know that we’ll be out running errands over lunchtime, I think ahead and pack a quick lunch.
Stopping to eat out add up quickly and I would much rather take ten minutes to put things together at home than get stuck with a big bill because we all got hungry before we got home.
5. How to teach our children about money.
From a young age, kids can begin to understand basic money concepts. By watching the ways we save, spend, and give, they are learning how to do the same.
Our kids have 3 jars labeled “Spend, Save, Give.” When we give out allowance, the kids split it equally among the three jars. The “spend” money can be used however they choose, the “save” money is money they are saving for a specific item, and the “give” is to encourage generosity.
An additional benefit in many of our methods is that they tend to be more relationally geared, creating a special bond in our family as we do life together.
Raising a family can be quite expensive, but these are tactics that work for us as we try to be wise in how we spend money in the process.
Sarah is a mountain-loving, dark chocolate-eating, Frank Sinatra-listening, owie-kissing, truth-telling, freelance writer/blogger who seeks out a passionate life with her husband and two kiddos. She writes at The Jelly Jars.
Original article and pictures take moneysavingmom.com site
Disclosure: I have included affiliate links in this post.
When I first set out to write this “Safe in the Sun” series, I had all intentions of making and testing out my own sunscreen recipe and posting it here for you all to try yourselves!
Well, life happens. I’m a humbled homemaker, remember? I’m not perfect, and I simply ran out of time to “do it all” before Baby Girl arrives any.day.now!
And why re-invent the wheel anyway, when so many other amazing bloggers have some great-looking sunscreen recipes circulating around the web?
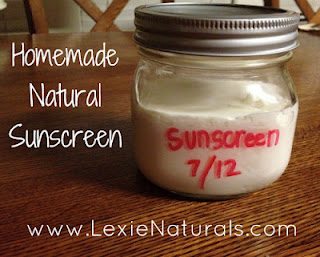
Making your own sunscreen is both frugal and healthy. Conventional sunscreens are full of toxins; homemade sunscreen is always best! Here are 5 awesome homemade sunscreen recipes!
Although I’ve enjoyed reviewing and using TruKid, Kabana and MelanSol (full review & giveaway coming tomorrow!) natural sunscreens, undoubtedly–if you have the time–the most frugal sunscreen is one you make yourself.
Here are some I hope to give a try…next summer.
Making your own sunscreen is both frugal and healthy. Conventional sunscreens are full of toxins; homemade sunscreen is always best! Here are 5 awesome homemade sunscreen recipes!
I love using Lexie’s homemade lotion bars, and I’ve been testing out her deodorant, so I have no doubts her sunscreen recipe is a winner. And she makes making it sound super simple.
Making your own sunscreen is both frugal and healthy. Conventional sunscreens are full of toxins; homemade sunscreen is always best! Here are 5 awesome homemade sunscreen recipes!
This one is unique in that it hardens like a lotion bar instead of a cream. It will melt in the sun, so make sure to apply indoors or keep in a cooler when outside.
If you’re interested in more DIY Beauty recipes, check out Mommypotamus’ DIY Organic Beauty E-Book. No need to sepnd hundreds of dollars anymore on beauty products once you get this book!
Making your own sunscreen is both frugal and healthy. Conventional sunscreens are full of toxins; homemade sunscreen is always best! Here are 5 awesome homemade sunscreen recipes!
I almost made this sunscreen last week. Why? Because I loved that I could get all the ingredients locally. Instead of having to order zinc oxide like the other recipes, this one calls for 1/4 cup of zinc-oxide based diaper rash cream! (And hey, I think I may still have some of that floating around the house from before we switched to cloth diapers and couldn’t use it anymore!) Depending on where you live, you may have to actually order some of these ingredients online (beeswax, cocoa butter, aloe vera gel, etc.), but I have access to everything I need for this one at my local health store.
The most unique of the bunch, in this post, Mary gives 8 different combinations using essential oils and carrier oils to protect from the sun!
Have you ever tried making your own sunscreen? What is your favorite homemade sunscreen recipe?
Making your own sunscreen is both frugal and healthy. Conventional sunscreens are full of toxins; homemade sunscreen is always best! Here are 5 awesome homemade sunscreen recipes!
**Disclaimer: I am not in any way, shape or form a medical professional. I am simply a mom who loves to research. Please conduct your own research and consult with your trusted health professional before making any decisions regarding your health. This blog is for entertainment purposes only.
Original article and pictures take thehumbledhomemaker.com site
Need some home remedies for a sore throat? Today, Stacy is giving five!
Sore throats are miserable, aren’t they?
Not being able to swallow comfortably and basically feeling that your throat is on fire . . .
That’s something I like to avoid. I’m sure you do, too.
As we head into cooler months, it’s likely that you or one of your family members will encounter a sore throat. Next time a sore throat comes your way, try one or more of the home remedies for a sore throat below to ease the pain:
Pineapple-Cayenne Gargle
It sounds horrid, but pineapple juice and cayenne are know to soothe a sore throat.
In Lalitha Thomas’ book, 10 Essential Herbs, she states that “cold pineapple juice makes a great base for an herbal gargle because the enzymes and acidity of the pineapple juice contribute to clearing the throat of bacteria and unwanted mucus.”
Cayenne also helps clear mucus from the throat as well as increasing circulation to that specific area, which will in turn help fight the infection.
To make a Pineapple-Cayenne Gargle:
Mix up to 1/8 teaspoon of cayenne with 1/2 cup of cold pineapple juice.
Gargle for 30 seconds and spit out. May follow with water, if needed.
Marshmallow Tea
Marshmallow root is excellent for soothing and lubricating a sore throat.
It’s easy to make a simple tea with marshmallow root. Drinking the tea warm adds another level of comfort to a sore throat.
To make marshmallow root tea:
Steep 3 teaspoons of crushed marshmallow root in 1 cup of boiling water for about 10 minutes. Strain out the herbs, mix in a little honey and sip.
This tea may be taken up to three times a day.
Lemon and Honey
One of the most well-known treatments for a sore throat is a warm lemon and honey drink. It’s well-known because it actually helps. Plus, it’s very easy to make.
Simply place one tablespoon of honey in the bottom of a mug, add the one or two tablespoons of juice of freshly-squeezed lemon juice and pour very warm water over the top to fill the mug. Gently stir to combine.
The honey will coat the throat, bringing some relief, and the lemon will help break up mucus.
If you’d like to pump up the antibiotic level of this tea, add a clove or two of freshly minced garlic. It will help kill the underlying cause of a sore throat.
Slippery Elm Bark
The mucilage in slippery elm bark coats the throat, providing relief for irritated throats and coughing. It is a common ingredient in many natural throat lozenges.
Besides soothing a sore throat, slippery elm aids digestion and stomach inflammation.
To be effective, slippery elm needs to stay in contact with the throat for a while. This can be achieved by slowly dissolving a throat lozenge in the mouth or gargling with a combination of slippery elm and water.
To make a Slippery Elm Gargle:
Brew a cup of slippery elm tea (follow instructions here using slippery elm bark for the herb), allow to cool and use as a gargle.
Or, mix 1 teaspoon of slippery elm powder with 1 cup of warm water. Stir to dissolve. Gargle throughout the day. May use gargle warm or cold.
If you’d like to make throat lozenges, this tutorial at Learning Herbs is straightforward and easy to follow.Thayer is a decent brand of throat lozenges if you’d like to purchase some instead of making them.
Warm ACV and Honey Drink
Apple cider vinegar (ACV) has many health benefits, one is soothing a sore throat. I love ACV so much that I drink it every day.
To make an ACV drink specifically targeted at reliving a sore throat, place 1 tablespoon of honey and 1 tablespoon of apple cider vinegar in the bottom of a mug, then fill with hot water. More honey can be added to taste, and also add a pinch of baking soda to cut the acid (if needed).
Sip throughout the day to reduce inflammation in the throat.
What do you use to relive a sore throat?
Original article and pictures take keeperofthehome.org site
During the summer when kids are out of school, it seems that parents find themselves scrambling to come up with creative and healthy snack options for their little ones. My #1 tip to help combat the “I’m hungries” is to do the prep work ahead of time so you aren’t caught (literally) with your hand in the cookie jar and nothing healthy to serve.
Below are some of my favorite simple snacks that Ellie and Frances are munching on this summer.
“While Ellie is a dipper, Frances loves a “hummus spoon.”
1. Hummus and veggies
What so many people don’t realize is that hummus is made from chickpeas and that by serving your kids (or yourself) Sabra hummus, you’re actually helping them meet their vegetable recommendations for the day because a bean is a vegetable. Unfortunately, Ellie and Frances aren’t great bean eaters in the traditional sense but they are obsessed with hummus–Frances literally eats “hummus spoons” for a snack. Thankfully, I don’t stress about them not meeting their recommendations for beans since I know they are getting 1/4 cup chickpeas (or about 1/2 serving of vegetables) from 2 heaping spoonfuls of hummus. This provide them with plant protein, fiber, and healthy unsaturated fat.
I love to let hummus be a vehicle food to help us eat better. I keep carrots and cucumbers prepped in the fridge so they’re always ready for dipping. We also like to spread hummus on whole wheat crackers or pretzels to up our whole grain and fiber requirements and I often swap it out for mayo on sandwiches or in chicken salad to add more protein to the meal.
2. Sweet and Savory Snack Crackers
Instead of a heavy sandwich that may fill your kids up before a meal, try sweet or savory snack crackers. With a little bit of prep work, it takes just a second to pull out the necessary ingredients and then your little helpers can get busy making their own stackers.
For savory crackers, I like to use a whole wheat cracker like a Triscuit and then top it with lean roast beef or low-sodium turkey, a small square of cheese and a pickle. To make a sweet version, I spread a graham cracker with peanut or almond butter and top with sliced strawberries or cherries.
Ellie and Maggie enjoying homemade strawberry yogurt pops for dessert.
3. Fruit and Yogurt Frozen Pops
I completely blew Ellie’s mind the other morning when I offered her a popsicle for breakfast. My child has a MAJOR sweet tooth and the though of having popsicles — especially in the morning!– totally threw her. She gave me the “is this a trick” look but I assure her I was serious and let her dive in.
Think about it though…if you take the yogurt she was already going to eat for breakfast, blend it up with some fresh or frozen fruit and a splash of milk or juice and freeze it into a pop, what’s so unhealthy about that? Whether you’re serving homemade pops for breakfast, snack, or as dessert, when you make them yourselves (in the same way you would your smoothie), you win cool parent points and you can feel good knowing they’re adding protein, calcium, fiber, and other essential nutrients to their day.
Have trail mix, will travel. Avoiding a full-out case of the hangries with some homemade trail mix at a recent doctor’s appointment.
4. Homemade Trail Mix
Premade trail mix at the grocery or convenience store can be expensive and often filled with less-than-stellar ingredients. I like making my own mix at home using what I have on-hand like stove-popped popcorn, whole grain cereal, mini chocolate chips, raisins, almonds, and sunflower seeds. Trail mix is a fantastic snack option because you can let your child customize with his or her favorites, you can control the portion of each ingredient that goes into the mix (meaning more popcorn and fewer chocolate chips), and it is a good way to use up the bottom-of-the bag cereal or other foods that may not measure out to an entire portion breakfast or snack portion on its own.
I try to keep some variety of trail mix in my purse or diaper bag at all times because (like in the picture above) you never know when a routine 30-minute doctor’s appointment is going to turn into a 3-hour wait/hunger fest.
5. Cut Fruit
This may seem so obvious but if there is a whole cantaloupe, mango, pineapple or watermelon sitting on the counter, the likelihood of us eating it is much slimmer than if the pieces were already in chunks, in a bowl, and in the fridge. Just today I filled a bowl full of watermelon cubes and brought it outside to the girls for a snack while they were playing outside with their babysitter. It took literally a minute to make their snack and I felt good that they were eating something nourishing and hydrating on such a warm day.
By taking just a few minutes on the weekend or in the evening before beginning the next day to prep your healthy foods like fruits and vegetables, you’re more likely to reach for those when hunger strikes.
Do you have a favorite snack you serve your child? I would love to hear about it–I’m ALWAYS looking for new ideas! Here’s another one of my favorites:
Have we connected on social media? If not, make sure to follow me on Facebook, Pinterest, and Twitter to keep up with more ideas for kids lunches, family dinners, and general nutrition for the entire family.
Disclosure: I was compensated by Sabra to write this post, however, I’m a huge fan of the product and was thrilled to share my own thoughts about why it is a healthy snack for kids.
Original article and pictures take www.holleygrainger.com site
I may receive a commission if you purchase something mentioned on this page. See more details here.
Though there’s no doubt that technology has changed our lives for the better, too many of us are spending the vast majority of the day staring at one screen or another. Computers, smartphones, tablets, televisions — fixating on these screens has become second nature. This, combined with the normal stressors of life, has led to a nation of overwrought, overstressed human beings. It’s time to (figuratively) pull the plug and make a concentrated effort to spend at least an hour a day engaging in some low-tech, stress-relieving activities.
Here are five ways to do just that:
Color
Coloring isn’t just for kids anymore! If you’ve been to a book or craft store in the last couple of years, you’ve no doubt noticed the proliferation of coloring books aimed at adults. There are a few reasons why coloring is making a comeback, but most experts point to its stress-relieving qualities as the force behind its popularity.
In an interview with the Huffington Post, psychologist Gloria Martínez Ayala explained how coloring works to alleviate the effects of stress: “The action involves both logic, by which we color forms, and creativity, when mixing and matching colors. This incorporates the areas of the cerebral cortex involved in vision and fine motor skills [coordination necessary to make small, precise movements]. The relaxation that it provides lowers the activity of the amygdala, a basic part of our brain involved in controlling emotion that is affected by stress.”
Much like meditation, coloring allows us to focusing on what we’re doing in the moment, thus ceasing to focus on our worries. It also taps into our imagination and is especially effective for those of us who are intimidated by a blank page. Coloring in the pre-drawn designs allows us to be creative without the pressure.
Yoga/Pilates
While there are distinct differences between the two disciplines, both yoga and pilates are fantastic ways to ease stress while getting a little bit of a workout. Stress can manifest in our bodies, often through headaches, stomach aches, digestive issues, back pain, muscle tension, dizziness, and rashes. Fortunately, yoga and pilates provide the perfect way to relax and rejuvenate your body by releasing tension.
Both yoga and pilates place great focus on breathing. This oxygenates the blood which triggers a physiological response in the body that naturally decreases stress and anxiety. They also allow you to concentrate your attention solely on your body, clearing your mind of problems and distractions. You can reap all the benefits of meditation without sitting still!
Journal
It’s amazing what organizing your thoughts into a journal can do. For instance, journaling can:
Reduce stress: By writing about stressful events and negative emotions, you can come to terms with them. This gives you time to calm down and reduce the impact of these stressors on your physical health.
Know yourself better: Writing routinely allows you to identify the things in life that bring you happiness, as well as those situations and people who are toxic.
Effectively solve problems: Generally speaking, humans solve problems from an analytical perspective. However, sometimes the answer is best found by employing creativity and intuition. Writing helps to unlock these more unorthodox problem-solving abilities.
If just sitting down and writing isn’t your forte, consider using a few prompts. What are you grateful for? What never fails to make you smile? What can you learn from your biggest mistakes? How have you grown in the past year?
A study by Mindlab International revealed reading to be a one of the best ways to lower your heart rate, relieve muscle tension, and reduce stress. During the study, scientists increased the stress level and heart rates of a group of volunteers through a range of exercises. Then the participants engaged in typical stress-relief activities like listening to music, walking, playing video games, and reading. The group who read found their stress levels reduced by 68 percent. In fact, in most cases, the subjects’ stress levels were lower than what they were before the test began.
So, grab a book or magazine and set aside at least 30 minutes to read every day. Make sure you’re reading in a quiet place where you won't be interrupted. And remember, reading only helps you relax if you pick something that doesn’t upset you. Try to stick to novels where you can escape into another world, or nonfiction regarding activities that you enjoy (like your hobbies).
Knit/Crochet/Macrame/Cross Stitch
Did you know that getting crafty is also a great way to loosen up? Low-key repetitive physical activities ease tension through progressive muscle relaxation. Crafts like knitting, crocheting, macrame, and cross-stitching are perfect examples of this, thanks to the repetitive needlework or knotting.
A 2013 international survey of knitters showed a significant relationship between knitting frequency and feeling calm and happy. More frequent knitters reported higher cognitive functioning, while knitting in a group impacted perceived happiness, improved social contact, and communication with others.
Of course, you’ll need to get past the learning curve before you’re really able to reap the benefits (e.g. lower heart rate, blood pressure, and cortisol levels), so if you’re looking to relax short term, make sure it’s an activity you’re already familiar with.
Stress comes in many forms, and sometimes the best way to shut it down is to take a hands-on approach. It’s not always easy to ditch the screen in this technology-driven world, but the benefits of doing so are totally worth it. So, grab a book, your journal, some colored pencils or yarn and get to it — your body will thank you in the long run.
Liz Greene is a dog loving, beard envying, pop culture geek from the beautiful city of trees, Boise, Idaho. You can catch up with her latest misadventures on Instant Lo or follow her on Twitter@LizVGreene.
Oh Lardy! is a participant in the Amazon Services LLC Associates Program, an affiliate advertising program designed to provide a means for us to earn fees by linking to Amazon.com and affiliated sites.
Related
Original article and pictures take ohlardy.com site
Now that Christmas and New Years are over, routines are starting to return to normal. The stress, heavy eating and late nights puts a toll on the body’s ability to function properly.
With the start of a new year, this is the perfect time to clean house with a detox.
Signs that your body is overloaded
Acne, liver or age spots, fatigue, aches and pains are all signs that your body is battling a toxic build up. Herbalist Rosemary Gladstar also points to PMS, menstrual related conditions and erratic mood swings to a poorly functioning liver. Skin conditions like acne and age spots are signs of a liver that’s too overloaded to filter.
Chronic illness, swollen glands like tonsils and fevers are signs the lymphatic system needs cleansed.
Even if you feel healthy right now, toxins from our air, food and environments shouldn’t be given a chance to build up, causing problems later.
What to Choose?
There are so many detox methods out there, it’s hard to know where to begin. I’m not a huge fan of extreme, short term cleanses. Especially ones that are sold in your local big box grocery store and come recommended by a celebrity.
Herbs are a holistic and gentle way to cleanse your body’s systems. Even though they’re plants, they’re powerful and can do amazing things to support the body.
1. Cleansing herbs.
Milk Thistle– Supports the liver and kidneys. Has traditionally been used to regenerate liver cells and protect from liver toxins, like the drug Tylenol. To use, mix 1 tbsp of crushed or powdered seeds in a smoothie or other beverage.
Burdock – Supports the liver, lungs, kidneys, bladder and digestive system. Helps with acne, dermatitis, psoriasis, eczema, kidney stones, lymphatic congestion, respiratory issues and sciatica. To use, simmer 1 tsp of cut root for 15 minutes in water and drink 3-4 times daily.
Echinacea – Cleanses the blood and lymphatic congestion. Excellent for infections and inflammation throughout the body, including skin conditions. To use for lymphatic congestion simmer 1 tbsp cut root in a pint of water for 10 minutes, cool before straining and drink 1 tbsp at a time frequently.
Yellow dock– Supports the lymphatic system, liver, spleen, gall bladder and acts as a blood purifier. Helps skin conditions like acne, eczema and jaundice. To use, simmer 1 tbsp in some water for 15 minutes. Drink this 3-4 times a day.
Dandelion – Supports the lymphatic system, liver, kidneys and skin. Helps with acne, constipation, water retention and acts as a blood purifier. To use, simmer 1 tsp of the root in 1 cup of water and drink 3-4 times a day.
Bentonite clay– This isn’t an herb, but I wanted to include it because of its unique ability to pull heavy metals from the body. This can be taken internally mixed with water or used in a bath.
These dosages are suggestion only and are based off of my research in herbalism. Please see your health care professional with any questions or concerns you may have about drug interactions or conditions you have. It’s not recommended to cleanse while pregnant or nursing.
It is important to consume high quality sources of fiber during a cleanse. Otherwise, toxins will be released into your system, but not removed. Dark leafy greens and whole grains are excellent choices. I find that gluten stops me up like a cork, so I rely on grains other than wheat, like oats and quinoa. And be sure to drink plenty of fluids!
2. Cleansing the Colon
Psyllium seed husks are the main ingredient in popular products like Metamucil and are good for pulling toxins from the inside of the colon. This needs to be used in conjunction with a laxative though to completely expel the material.
Below are some laxatives that can be used with a bulk forming agent like psyllium seed to cleanse the colon. Strong laxatives shouldn’t be used for more than 7-10 days at the most. I personally don’t use them for longer than 2-3. Mild laxatives, like fruit, are good to include in the daily diet.
Mild laxatives – Dandelion, apple fiber, marshmallow root, rosehips, fruits – especially prunes.
It’s important to implement permanent diet and lifestyle changes. It’s no good to binge eat ice cream every night and eat sugary cereal for breakfast, then expect a yearly cleanse to fix everything.
If you’re already living a fairly healthy lifestyle, then commit to making a positive change or two this year. Replace more water in your diet with herbal teas and fermented beverages like kombucha and water kefir. Be more active. Eat more fresh veggies.
4. What Goes On Must Go In
What you put on your body is just as important as what you put in it. Even products that claim to be all natural, or naturally derived, often contain harmful chemicals.
With the rise in popularity of natural products, chemists purposefully create products that are “greenwashed.” This is the term those in the industry use to describe a product that will contain certain “natural” ingredients prominently advertised on the front label to distract consumers from the harmful chemicals packed into the product.
Always read the ingredients!
The Skin Deep app from Environmental Working Group can tell you the safety rating of a beauty product. However, truly natural skincare quickly gets expensive.
Room sprays, scented candles, moldy air and other pollutants go into your lungs and disrupt your system with toxins. These can eventually cause serious health problems. Simple changes like using a room spray with essential oils and burning beeswax candles not only make your home smell good, but they detox the air, not make it worse.
Sources:
Practical Herbalism
The Green Pharmacy Herbal Handbook
_____
Disclaimer: I am not a doctor or medical professional, and this post should not be taken as medical advice. Please do your own research. Material on this blog is provided for informational purposes only. It is general information that may not apply to you as an individual, and is not a substitute for your own doctor’s medical care or advice.
Original article and pictures take redandhoney.com site
5 Fun and Frugal Activities to Get the Family Outside Outdoor activities are fun, healthy and save money! Here are 5 fun frugal family activities to get you outside! :: DontWastetheCrumbs.com
Written by Mr. Crumbs
I work in a large office like environment. On a typical day I’m either in a data center with headphones on, behind a desk, or programming network equipment. Because my weekdays are filled with fluorescent lights and more computer monitors than I can count, I prefer to spend my weekends outside of the house and away from modern electronics.
We could do everyday fun stuff like movies, eating out and miniature golf – but we could also save the money and use it towards bigger, more memorable stuff like family vacations or trips to visit family.
For me, weekends often feel like a tug of war. One hand says to take the kids to the new Lego movie while the other hand says to spend every second outside and find ways to appreciate and admire God’s creation. The fact that the latter is free plays a factor too (and we did splurge to see the Lego movie, by the way).
It’s important that we find balance in the things we like to do as an individual – and the things the family likes to do corporately. No one – not the child nor parent – wants to be dragged somewhere and forced to have fun. At the same time, it’s important that families spend time together as an entire unit, not just Mom taking one child to ballet while Dad takes another to baseball.
As the result, we’ve come up with a short list of things that we all like to do as a family. They’re frugal, they’re 100% family approved and they’re all outside. None are mind-blowing or earth shattering ideas, but they have become routine in our household, in which both Mrs. Crumbs and the kids all look forward to.
Outdoor activities are fun, healthy and save money! Here are 5 fun frugal family activities to get you outside! :: DontWastetheCrumbs.com
5 Fun and Frugal Activities to Get the Family Outside
1. Hiking
Children love exploring and seeing new places. As it turns out, parents kinda like it too! Hiking is our go-to weekend activity when there isn’t a birthday party or baseball game scheduled. We’ve been able to explore the trails in our area, enjoyed amazing views of the ocean and mountains, and it’s a great way to escape the hustle and bustle of busy life in general. My in-laws have even jumped on board, making it something that family of all ages can enjoy. Tips for success:
Be patient with the kids. Depending on the age of your children, they may travel at a lighting pace, or a snail’s pace. Enjoy your time with them and let them be the guides. If the area has maps or trail markers, let them lead the way and make it a competition on who can find the next trail marker. Estimate about 1/2 mile per year of age (so 2 miles for a 4 year old) at first, and if you snacks, you might be able to get a bit more out of them. Parents, be patient.
If you get slack for going on another hike, give it a theme. Our last hike was a “photo hike” and each kid had their own camera (ones we no longer used). They were in charge of all the photography for the day. After the hike, we went to a local craft store, picked up a multi-picture frame, printed the pictures, and made a photo collage for their great grandmother. They plan to give it to her when she’s in town this month as a gift. This idea made for our best hike yet! Find the biggest pine cone and find the biggest leaf are two others that were a lot of fun too.
Outdoor activities are fun, healthy and save money! Here are 5 fun frugal family activities to get you outside! :: DontWastetheCrumbs.com
2. Go on a bike ride
It sounds cliche, but they really are a lot of fun! If you have bikes, get out and use them. If you don’t know of any bike paths or safe areas to ride, get out and find them. Use the internet and ask around to find parks, trails, paths and large car-free places in your area. Tips for success:
Take plenty of breaks. This is especially important if the kids are younger or new to biking. Let the child set the pace and pack water and snacks in a backpack to make the trip more enjoyable. If possible, have a destination in mind. Smaller distance markers like picnic tables and grassy area count as destinations too!
Bring a friend. You’ll be surprised at how much farther your children will ride if they have a friend riding with them. My 6 year old son complained one early Saturday morning – for 3 LONG miles – about not wanting to ride. However, as soon as his friend joined us on the path, the complaining stopped and we rode another 11 miles at a nice brisk pace. Remember from your childhood – friends always make it more fun!
Create an incentive or goal. Riding your bike to the ice cream shop is so much more fun that riding to nowhere. Our longest (and most memorable) ride was completely unplanned. While on our regular 7 mile loop, my son decided that he wanted to ride to a local crepe shop. The shop is over 10 miles from home, making the total trip 21 miles. I explained to him that if we rode all the way to the crepe’ shop, we’d have to ride ALL the way back. He jumped at the opportunity and rode the entire way without complaining or whining!
Outdoor activities are fun, healthy and save money! Here are 5 fun frugal family activities to get you outside! :: DontWastetheCrumbs.com
3. Find a local park
Do you remember swinging as high as you could on the swings? Finally making it all the way across on the monkey bars? What may not seem important to you as a parent often mean the world to your child. Make it a mission to find the most awesome playgrounds in your local area and actually visit them! One of our favorite parks has a slide over three stories tall, that we never would have considered visiting unless we were intentional about looking. Tips for success:
Pack a lunch and plan to stay for awhile. It’s easy as parents to want to “check the box” off that you spent a few minutes outdoors, but consider letting your kids decide when they are ready to leave (provided you have the time to stay).
Play with them. Whether you are playing tag on the jungle gym or swinging from the monkey bars – kids love it when you get involved. Avoid the bench if at all possible.
Bring a friend. As mentioned earlier, it’s always more fun with friends!
Outdoor activities are fun, healthy and save money! Here are 5 fun frugal family activities to get you outside! :: DontWastetheCrumbs.com
4. Go to the beach
I realize this isn’t possible for a large majority of the country (and that it’s freezing in many parts of the country right now), but if you are within a 45 minute drive of the coast, go! Pack the car with a blanket, umbrella, lunches and make it a day trip. goodies. There’s a fairly good chance your kids like to dig giant holes in the sand and this can provide hours of entertainment – without an electronic gadget it sight! Tips for success:
Get wet. Don’t be afraid to go in the water with them! The day is about family time, not getting the perfect tan. Jump in, have fun and enjoy the time with your kids.
Bring a shovel. Yes, a shovel! It’s no fun looking at the beach goers next to you who have a ginormous hole in the sand, all the while your own kids want to play in it. Dig it deeper, build it bigger and have fun!
No ocean? Try community pools. There may or may not be sand, but playing in the water is fun whether it’s the ocean or a pool. Look into your community to see what’s available and if they open swim hours.
Outdoor activities are fun, healthy and save money! Here are 5 fun frugal family activities to get you outside! :: DontWastetheCrumbs.com
5. Find a free concert
Don’t tell me they don’t exist in your area because they do. They always do. Use the internet to search what’s happening in your local area and commit to going. We were surprised to find that Santa Cruz offers a free summer concert series every Friday night during the summer months. We made it a point to go to every single show last year and the whole family loved it. Tips for success:
Make a day out of it. Whether you’re going to the beach, park or mall – do what you can do to make the most of the opportunity.
Pack meals. Snacks and drinks offered at concerts are usually not very healthy, and often very expensive. Save by packing your own meals and drinks.
No matter where you live, spring is right around the corner. Living on a budget doesn’t mean you can’t have any fun! Be creative with your activities, think outside the box and remember most importantly – these years with the kids will only last for so long.
What’s your favorite childhood activity as a family? What do you do NOW as a frugal way to enjoy the outdoors?
Some Other Posts You Might Like:
Original article and pictures take dontwastethecrumbs.com site