Cold and flu season is coming hard and fast this year. It is time for us to stock up our natural medicine cabinet with herbal allies and homemade treatments to get us through the various illnesses of the season.
One of my go-to treatments when my family gets chest congestion, cough, or cold symptoms is my home made chest rub. This natural chest rub is an easyrecipe, made with Certified Pure Therapeutic Grade Essential Oils, the highest quality oils you can find. This safe and effective remedy helps soothe cough and congestion, clears the sinuses, ease spasms, coughing, catarrh, is calming to the senses and helps promote a good night sleep.
Directions Melt the oils and bees wax in a double boiler set up until the bees wax is completely melted. Remove from heat. Add the essential oils and put in a container for later use.
Double Boiler Method
You may choose to exclude Rosemary and Peppermint if you are using this while pregnant. That is fine. This blend will still help calm and soothe an irritated respiratory system without them.
To use simply rub onto the chest or back to relieve cough and congestion. For children under 6 months or people with respiratory issues, rub onto the bottom of the feet and put socks on. The essential oils will permeate the large cells membraines in your feet and provide you with the medicinal benefit without the vapors.
You will not regret having this amazing chest or foot rub in your natural medicine cabinet.
I may receive a commission if you purchase something mentioned on this page. See more details here.
Here is a great chest rub recipe I like to always have stocked in our cabinet using our essential oils. I find it great to use on our chests and backs when needed to support my family's wellness.
I make sure I have this recipe which uses Eucalyptus oils and blends and our homemade vapor rub on hand all year long. I often use this rub on our chest and back and the vapor rub on our feet.
I like to make this with RC Essential Oil blend and Eucalyptus Globulous. RC is a blend of Eucalyptus Globulus, Eucalyptus Radiata, Eucalyptus Citriodora, Myrtle, Spruce, Peppermint, Pine, Lavender, Marjoram and Cypress. It has a very invigorating aroma, creates a spa like atmosphere and contains the naturally occurring constituent limonene (google it!).
This crazy easy to make and you will love it!! Make a good size batch so you are sure to have it on hand!
10% Discount
And our friends from SKS Bottle and Packaging are offering a 10% discount on these great 2 ounce glass jars. Use coupon code SKSCoupon05 for item #4026-15 at this website!
Original article and pictures take ohlardy.com site
Long ago I parted ways with most store-bought lotion and baby products, and this salve does the job of many products quite nicely.
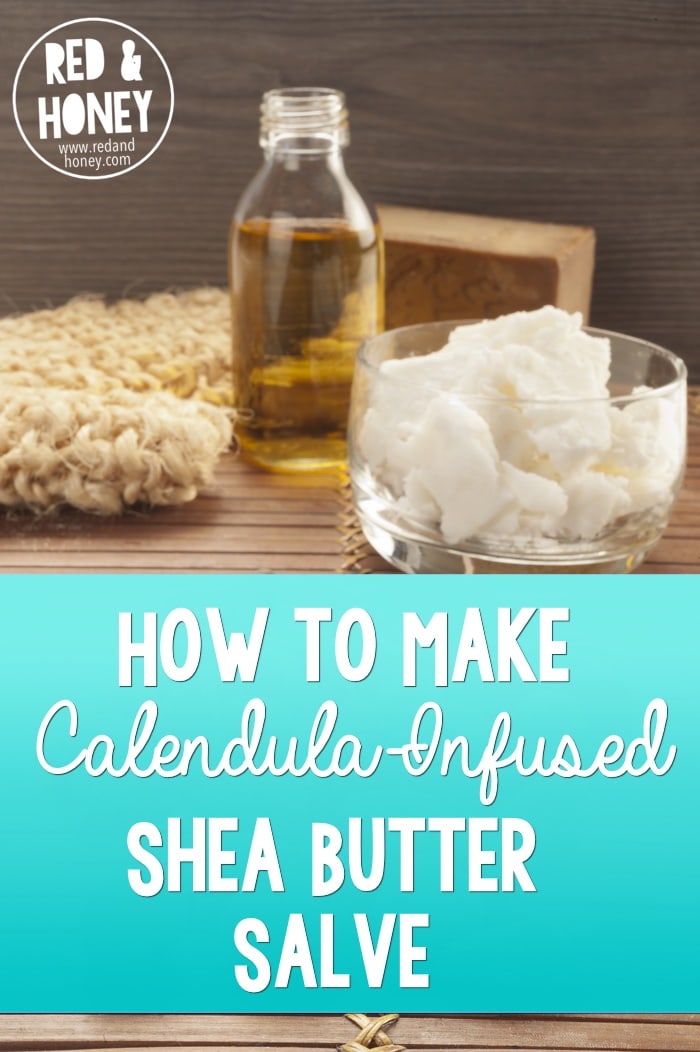
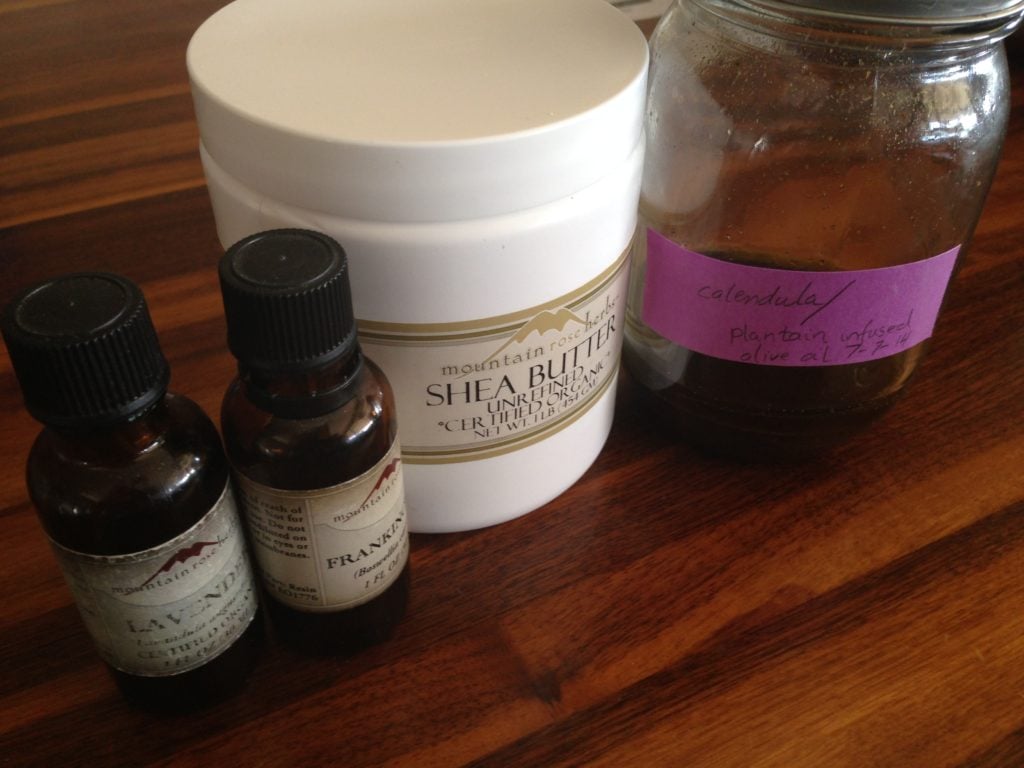
This shea butter-based lotion is infused with the incredible properties of the plantain and calendula plants, and is awesome for pretty much everything. It also uses an infused oil, which Jessica recently showed us how to make.
At my house it probably gets most use for diaper rash. I have even used it with cloth diapers and it doesn’t seem to cause a problem. It is also a good all-purpose body lotion and because of the mild SPF of Shea butter (about SPF 6, according to Mountain Rose Herbs), it can be used as a sunscreen as well.
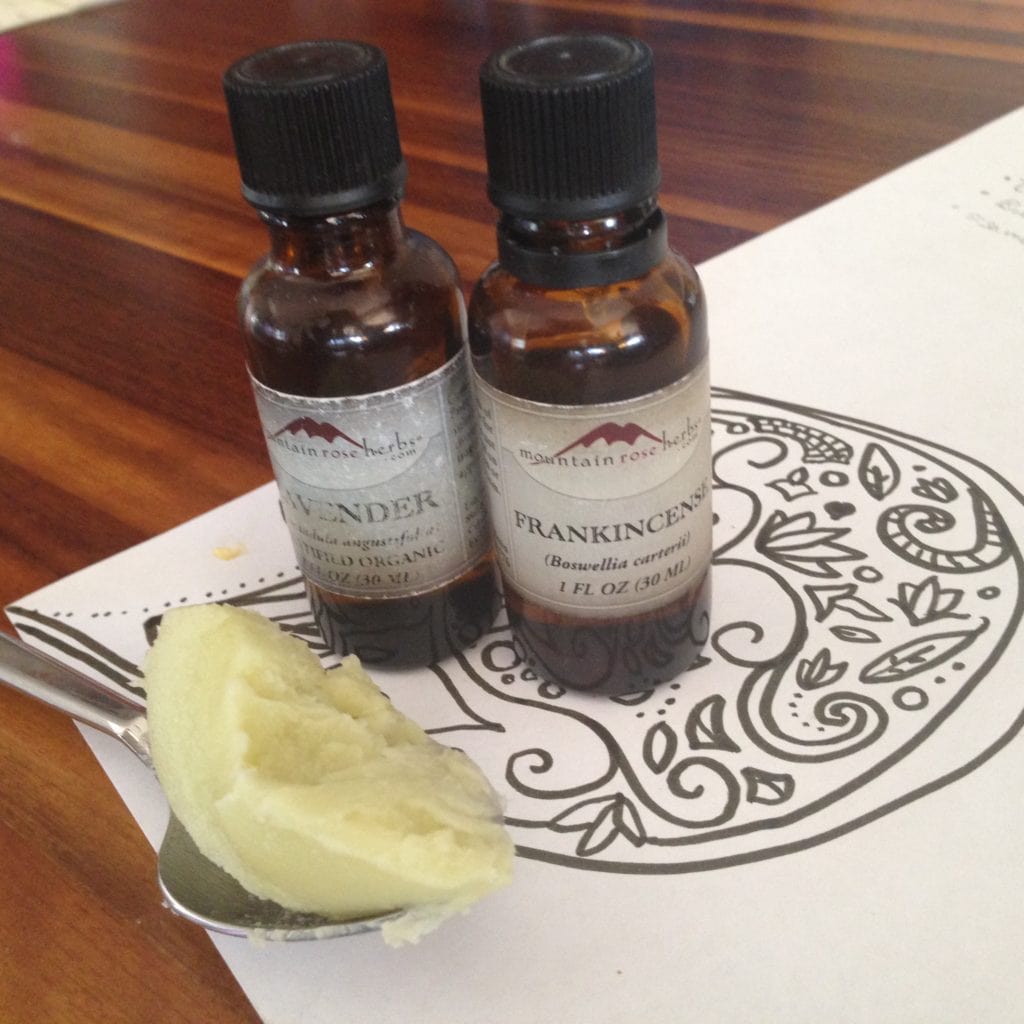
I use calendula and plantain in my infused oil for their skin-healing properties and lavender and frankincense essential oils for their muscle relaxing properties.
Calendula flowers and plantain leaves grow wild in a lot of parts of the country, so you can forage these if you want. I got mine in dried herb form from Mountain Rose Herbs. If you are dying to try this out and don’t want to bother with infusion or essential oils, you can get at least 80% of the effectiveness using Shea Butter and olive oil alone.
Here’s how you do it!
Plantain & Calendula-Infused Lotion
To infuse olive oil:
Get about 1 cup of good olive oil and 1tbsp each of calendula and plantain.
Now you can infuse it using either heat or time… If you have time, just throw them in a jar together and come back to it in a couple of weeks. If you want to heat infuse your oil, read Jessica’s post to get the lowdown.
To make the lotion:
Use 1 part infused olive oil to 2 parts Shea butter by volume (i.e. use 1/3 cup olive oil to 2/3 cup Shea butter to get 1 cup final product).
Gently melt in a double boiler over low heat until it is all liquid. Let it cool for 10-15 minutes and then add 5-10 drops each of lavender and frankincense essential oils.
Pour it in a jar and let it sit for a day or two. It will take a little bit of time for it to reach its final texture.
Use for all kinds of skin-related ailments, and enjoy!
Notes:
The smell of shea butter is probably unavoidable here, so be aware in case you’re averse to that particular scent
If you prefer a different final texture you can play with the proportions to get your preferred thickness
I discovered that if you stir some activated charcoal and bentonite clay (about 1tsp each per 1/4 cup of Shea butter lotion) you get a good “drawing salve”, great for bites and stings to draw out the toxins
I didn’t meet our only grandchild until she was 4 years old, and she didn’t officially become our grandchild until she was 10, so I haven’t had the pleasure of a grand-baby. But now we have a brand new great-nephew to fuss over, so I wanted to come up with a gentle soap just for him, for times when soap is needed.
Chamomile and Lavender Soap
DISCLOSURE: In order for me to pay my blogging expenses, I may receive monetary compensation for my endorsement and/or link to products mentioned on this blog. I am a participant in the Amazon Services LLC Associates Program, an affiliate advertising program designed to provide a means to earn fees by linking to Amazon.com and affiliated sites.
I’m sharing my recipe and step-by-step instructions for this gentle bath soap at Mommypotamus – head on over to learn how to make my Chamomile and Lavender Soap!
Resources for Soap Making:
Handmade Soap: Recipes for Crafting Soap at Home – a Country Living Book – my first book on soap making. It teaches you how and has great recipes. There are newer versions of it, but this is available practically for free on Amazon and it’s great!
DIY Organic Beauty Recipes eBook by Heather Dessinger, the Mommypotamus. Heather’s eBook is full of recipes for skin care, toothpaste, hair care and much more. She also has a section on soap-making.
Original article and pictures take learningandyearning.com site
DIY All-Natural Homemade Hand Sanitizer I refuse to buy hand sanitizer! Not only do we avoid triclosan, but making homemade hand sanitizer is easy and all-natural. This recipe is a mix/match of what you have on hand, and it's ready in under a minute! Plus the essential oils smell good AND keep the germs away! Perfect for children at school. :: DontWastetheCrumbs.com
I. can’t. stand. hand. sanitizer.
It totally grosses me out. It’s gel-y, stick-y and I really don’t like the idea of adding chemicals to my hands to clean them.
So we eliminated hand sanitizer from our house YEARS ago. Like, back when my daughter used to think it was a toy and smear it all over herself.
Seriously.
It’s been a no-no for the family ever since… which is why when I saw “hand sanitizer” on my daughter’s school supply list, I nearly choked on my granola.
My stubbornness kicked in. I absolutely was NOT going to buy hand sanitizer and send it with my daughter to school.
First, I can’t stand the stuff, remember? What’s wrong with natural soap and water?
Second, I don’t trust my daughter with the stuff for one iota of a moment. I know how she works. She’ll gladly use it at the tiniest suggestion from her teacher.
Clean up after recess? Before lunch? After lunch? To get the marker off her hands (that she “accidentally” drew on herself)?
She’ll be on it like white on rice.
And my crunchy self will want to throw a fit. All the the hard work I’ve put into NOT having hand sanitizer in the house and FINALLY getting my daughter to stop asking for it? Down the tubes.
But I promise – I’m not going down without a fight!
The purpose of hand sanitizer is essentially to disinfect when soap and water are not available. It’s faster and easier in classroom environment, and since not all families teach their kids to wash their hands regularly (or properly), I totally understand why her teacher wanted her to have some.
At the same time, I’m very much so NOT on board with triclosan.
Never heard of triclosan? It’s one of the most common ingredients found in products labeled “anti-bacterial,” including hand sanitizers. (Hand sanitizers are just one of many potentially contaminated items – get the full list of products to avoid here.)
Can you tell this issue is a soap box for me? Grrr…
Homemade hand sanitizer recipe using vodka, witch hazel, rubbing alcohol and/or essential oils. The easiest way to make homemade hand sanitizer out there!
Here’s the thing. I can control what goes on in my home. I have declared it a hand sanitizer free environment, choosing quality goat milk soap, water and lots of scrubbing action instead.
But I cannot control what goes on at school. While I don’t have to like it, I understand the circumstances surrounding the need for hand sanitizer in a classroom full of first graders who pick their nose and eat glue.
But I won’t buy it. I’m making my own instead with 100% natural ingredients. That way it’s effective AND doesn’t have triclosan.
And my daughter doesn’t come home with cooties!
Avoiding chemicals is one thing we try hard to do at my house. Making our own hand sanitizer helps us when we are on the go or for the kids at school when soap and water isn't easy to get to.
There are several options for making an all-natural homemade hand sanitizer. This tutorial will make two kinds you’re used to seeing at stores: gel and spray. If you’re looking for a super super (aka FREE) option, scroll down to the bottom!
DIY All-Natural Homemade Hand Sanitizer
Supplies: Gel
2 drops tea tree essential oil**
3 drops essential oils** with antimicrobial properties (lavender, thyme, peppermint, clove, cinnamon, rosemary, eucalyptus OR thieves blend)
Combine ingredients in a small bowl. Pour into the container of choice and disinfect away!
DIY Hand Sanitizer is one of the easiest homemade recipes! Simply mix and pour into a squeeze bottle.
Additional Recipe Notes
It is important to supervise children when using hand sanitizer, whether homemade or store-bought. While the ingredients are natural, they can be harmful to children if ingested. YOU squirt into their hands and watch them rub it in. Don’t let them squirt (they’ll likely use too much) and don’t send them away until they’re done rubbing!
Vodka and Vitamin E oil are natural preservatives. The shelf life of homemade hand sanitizer will be several months if you use both. If you omit both, you’ve got about a month or so.
Some antimicrobial essential oils (like cinnamon especially) can be irritating to sensitive skin. Use less essential oil, or add more of another essential oil that soothes (like chamomile).
Cost Breakdown
Straight up, homemade hand sanitizer is NOT more affordable than store-bought. But it doesn’t have icky stuff… so you kinda have to pick and choose what’s more important to you.
If you’re paying off debt or for whatever reason cannot afford the ingredients for the recipe above, consider using vinegar! Vinegar is non-toxic, edible and kills 99% of bacteria. Just keep some in a small spray bottle, spray on the hands and rub together. Shake or wipe dry and you’re good to go.
I’m a total quitter. I quit shampooing my hair 23 days ago and I’ve gotta be honest: I’m glad. I’m still going through the transition period, and nailing down the exact routine that shall lead me to hair nirvana, but I have faith that I’m close.
The transition period has been far better than I imagined it would be, which tells me two things:
1) I should have started this a year ago and not been such a wimpy-pants.
2) Hard water makes no-poo’ing approximately eleventy-billion times harder because last time I tried this (while living in Tiny Town a couple of years ago) it was TERRIBLE AND DISGUSTING AND DISASTROUS. (Sorry for yelling – I think I’m still traumatized. *shudder*)
There’s a facebook group for no-poo’ers, filled with very smart and experienced people who’ve quit shampoo and achieved hair nirvana. They have all sorts of wisdom and advice for hard water no-poo’ers, as well as advice for greasy hair, dry hair, colored hair, curly, straight, and everything in between.
I first heard of homemade dry shampoo when Kathleen wrote here at R+H about How to Stay Clean Without Showering Every Day. She uses a recipe with a few more ingredients, but it’s fairly similar.
Its basic purpose is to hide the greasy look in your roots or bangs, on a non-hair-washing day.
This “recipe” (if you can call 2 ingredients a recipe) is recommended all over that no-poo facebook group that I linked to above. I tried it out last week when I was trying to stretch out the days between washings (because that actually helps you get through transition faster), and I loved it so much, I figured I just had to share it with you!
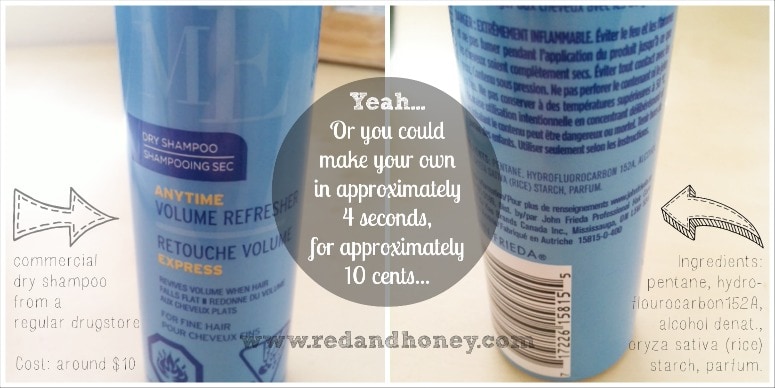
I used to use a drugstore kind that was made from some chemical propellants, alcohol, rice starch, and parfum (which is the most worrisome ingredient, actually. It’s usually a cocktail of at least dozens of chemicals, none of which have to be named on the ingredient list as long as they are called “fragrance” or “parfum”.)
I found it amusing that rice starch was the main ingredient in the stuff, and they sell it for $10 a bottle at the drugstore, with some added toxic chemicals. They could advertise it as “NEW! Single-ingredient Dry Shampoo, now with BONUS toxic chemical soup! Buy yours now, while supplies last!”
By the way, products that contain propellants – as this one does – are not so great for the environment. You may recall that there was a lot of talk about CFC’s several years ago (chloroflourocarbons) which were used in aerosol cans all the time, but which were damaging the ozone layer.
Well, they have now been replaced with other chemicals like hydroflourocarbons (as in this product). This propellant does not damage the ozone but scientists all agree that it is still harmful to the environment.
Harmful to me, harmful to the environment, and expensive.
So how do you make your own?
It’s pretty simple. Find the jar in your kitchen that contains arrowroot powder. Corn starch works too, as does (according to John Frieda) rice starch. Okay, done.
Now find the cocoa powder. Resist the urge to get distracted by making brownies, especially if you’re a highly-distractible INFP like myself. Ooooh! Shiny! *scurries away to new adventures involving sweet chocolate dreams* Whoops, back to our task at hand. Cocoa powder. FOCUS, Red, yeesh.
Get a small bowl or container.
Get a spoon.
Get your hydroflourocarbon 152A and pentane out. (Oh, actually never mind. Skip that. Uber-unecessary.)
Are you with me so far? I know it’s complicated, but try to keep up, okay?
Put a spoonful of arrowroot powder in the bowl. Add a lesser amount of cocoa powder. If you have really light blonde hair, then you might skip the cocoa altogether. For every other shade of hair – add accordingly. If you have very dark hair you’ll want to go maybe 50-50. But don’t worry – it doesn’t really show in your hair when you’re done.
Get a comb.
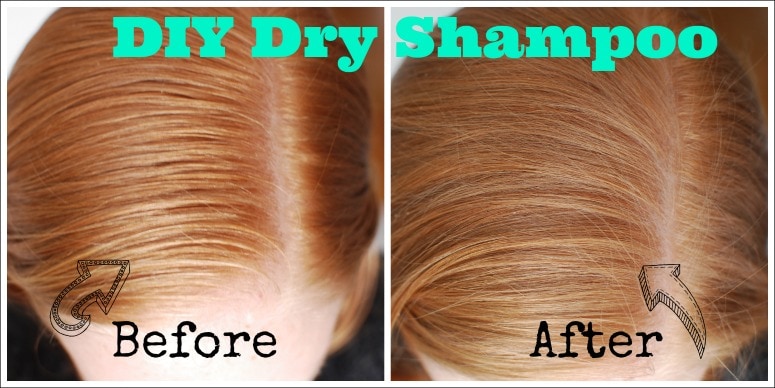
Use your fingers to pinch a bit of your new dry shampoo (Oh, you didn’t know? You just made dry shampoo – congratulations.) and sprinkle it on the greasy areas, mostly near your roots. Use your fingertips to tussle your luscious locks to disperse the dry shampoo, and then use a comb to help move it down.
(The before is not the awesomest shot ever, but it shows how my hair was a bit shiny with grease from having been unwashed for 2 days… then the after photo shows it having been totally transformed. Subtle, but it made all the difference.)
Lather, rinse, repeat.
(Oh no wait – don’t do that. That’s what commercial shampoo companies tell you in order to make you go through their product twice as fast and then buy it twice as often. Lame.)
Just keep using your dry shampoo until you’re seeing the results you want, then style as desired, strut out of the bathroom like you’re bringing sexy back, and have a dance party in the kitchen.
Nicely done, you crazy-sexy granola crunchy hippie, you.
Now go forth and save yourself some cash.
PS. For all of you skimmers: here’s the “recipe”:
1/2 cup arrowroot powder
1 tablespoon cocoa powder (adjust according to hair color)
A clearly awesome individual with slightly greasy hair
Mix. Apply small amounts. Comb and tussle hair. Continue being awesome. The end.
P.S. I no longer use the no-poo method, and wrote an update about that here. I do still use my dry shampoo regularly, though, since I don’t wash my hair every day, and my bangs get greasy faster than everywhere else.
Original article and pictures take redandhoney.com site