I may receive a commission if you purchase something mentioned on this page. See more details here.
Back in December 2016, I was scrolling through good old Facebook when I came across a friend's post about her food sensitivity testing with EverlyWell. Completely curious, I read her entire post. And the whole time I was reading, I was super excited for her. I mean, what a great insight! She would be able to know which foods to avoid so that she can heal her gut and move towards wellness! So awesome!
I was so intrigued by this post I knew that I had to do food sensitivity testing with EveryWell for myself. Here's the thing. I feel fine. I eat pretty much everything. Except for canned tuna. I don't like canned tuna. But anyway, I was just wondering if I do happen to have any food sensitivities. I truly believed that my test would be negative for everything. Simply based on how I feel. Which is great! Actually, I figured that if any sensitivity came back, it would be gluten. I eliminated gluten for a while to see if it would help with my rosacea. It didn't help with that at all. Anyway.
On the flip side, I am smart enough to ask myself the question, “What if I could feel BETTER?” That's the thing! Most people don't realize that they COULD feel better. So, I decided to grab myself a test kit from EverlyWell and see what I see.
It really couldn't have been simpler. I got the test in the mail, gave my blood sample – which was hard by the way. The finger prick was the easy part. Squeezing my finger to get every last drop of blood out was the hard part. Go figure. So, I put it in the bag, slap the label on it, and drive it to a UPS store. Off it went.
It didn't take long to get the results, either! I got an email when they were ready and I simply logged on to see what came up!
Guess what? Gluten showed up in the Class 0 – low reactivity – section. What? I guess that is not what was causing my rosacea. HA! But, in Class 3 – high reactivity – here is what I found:
DAIRY!!!!!!!! I about DIED!!! I have homemade milk kefir in my smoothie every morning! And milk in my coffee? I LOVE cheese. I mean, who doesn't? I really, really do! And butter!? Oh dear. Each food is clickable. So, here is what it says when I clicked on Cows Milk:
So, I guess I need to try to eliminate Dairy and see what happens! But what about Class 2 foods? How did I do there? What else might be irritating to my body?
I guess I should take those out too! Can I just say that I didn't think I would feel completely overwhelmed when I saw the results of this test. The idea of removing dairy seems impossible. Because I love it so much. I realize that it isn't impossible. I can do it. It is just a mindset shift. I am VERY curious to learn what my normal feels like without dairy. Will it feel different?
So, what next? Obviously the next step is to begin eliminating these foods and see what happens. But what is my plan? I was able to convince my husband to try the Whole30. Doing the Whole30 will eliminate these foods, plus a lot more! Well, the Whole30 keeps almonds but gets rid of peanuts. Turns out peanuts don't really bother me, but almonds do! Gah!
Now, the question is WHEN? When do I say goodbye to these foods for a while? To be honest, I have been procrastinating. Because I know it will be hard at first. But then it will get easier! So, stay tuned for my progress and what I find!
Have you ever done food sensitivity testing? I think it is so fascinating! Lots of people have told me that they don't ever want to do that test because they don't want to know what they are sensitive to. They are afraid they would have to give up what they love eating. I consider it another tool in my bag of tricks. Knowledge is power AND freedom. And, in this case, health freedom! I have the knowledge. Now I just have to do something with it!
If you are curious about your own food sensitivities, give EverlyWell a shot! It was simple to do and the results can give you a great starting point!
Oh Lardy! is a participant in the Amazon Services LLC Associates Program, an affiliate advertising program designed to provide a means for us to earn fees by linking to Amazon.com and affiliated sites. Original article and pictures take ohlardy.com site
As I explain over on Confessions of a Pioneer Woman today, my Christmas episode airs tomorrow on Food Network. Marlboro Man and I have some good friends over for a Christmas party, and I had so much fun pulling together all the food. While I did some prep ahead of time, I essentially wound up being able to make several dishes in just under three hours, and wound up with an exceedingly tasty (and dude-friendly) spread of festive food.
Here are just a few things I served. I’ll share a couple of the step-by-steps next week!
Quick and easy way to make regular ol’ cheese and crackers look extra special: arrange them on a tiered platter!
Beef, glorious beef…along with stuff for mini sandwiches.
The stuff that dreams are made of. These were super fun and festive…
And these. Holy moly, you won’t believe the deliciousness. I call these Skewers of Glory and they’re in my new cookbook.
And these were a total cinch: cherry tomatoes, chunks of fresh mozzarella, and cooked spinach tortellini. Then I made a pesto dressing and spooned it over the top. So fresh, cool, and flavorful!
There are other things, too: sausages, cheese dip, etc.
But oh, will you love this fudge. It took me ten minutes to make, and I couldn’t quit popping it in my mouth.
Hope you enjoy the show, guys! The food is really delicious, and really simple…which leaves more time for enjoying friends and family.
And that’s really what the holidays are all about.
Original article and pictures take 1.gravatar.com site
I received a food allergy book review request from Priyanka Talwar, the author of you can’t always tell.
you can’t always tell is about how a young boy with food allergies who explains to a new friend why he can’t eat the cupcakes that she made. This is an important topic that all children who have food allergies should be well rehearsed in doing, which makes this book such a great tool.
I like the book because it is straight and to the point, easy to read, and short enough that it doesn’t lose the readers interest. Let’s face it, we all know that little kids don’t have the longest attention span! I also like it because it touches on a subject that is important for kids with food allergies (and their friends) to learn, never assuming that a food is safe!
I would recommend this book for teachers to read to their classrooms at the beginning of the year as a good way to open up dialogue about food allergies in the classroom.
Thank you again, Priyanka, for sending me a copy of this great children’s book. I’ll be donating it to our elementary school for the teachers to use in their classrooms to further educate our town’s children about keeping our kids with food allergies safe.
-Elizabeth
Original article and pictures take www.eblfoodallergies.com site
Follow by email, and get your daily clean eating weight loss meal plan for free! clean eating meal plan clean eating meal plan clean eating meal plan clean eating meal plan clean eating meal plan clean eating meal plan clean eating meal plan clean eating meal plan clean eating meal plan clean eating meal plan clean eating meal plan clean eating meal plan clean eating meal plan Original article and pictures take cleaneatingmealplan.blogspot.com site
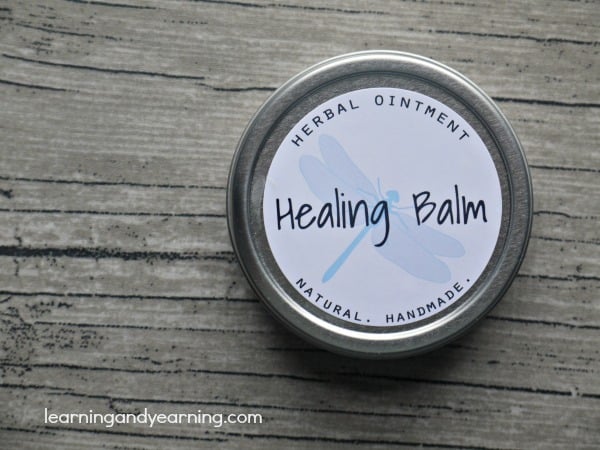
You use herbs everyday. They are wonderful for adding flavor to our foods, and can also have great value as home medicine. Making medicinal teas is one way to consume herbs but sometimes an herb is needed externally to relieve itch, soothe a rash, or provide pain relief.
By steeping herbs in oil many of its chemical components can be extracted and preserved for future use in healing salves and balms.
St. John’s Wort
DISCLOSURE: In order for me to pay my blogging expenses, I may receive monetary compensation for my endorsement and/or link to products mentioned on this blog. I am a participant in the Amazon Services LLC Associates Program, an affiliate advertising program designed to provide a means to earn fees by linking to Amazon.com and affiliated sites.
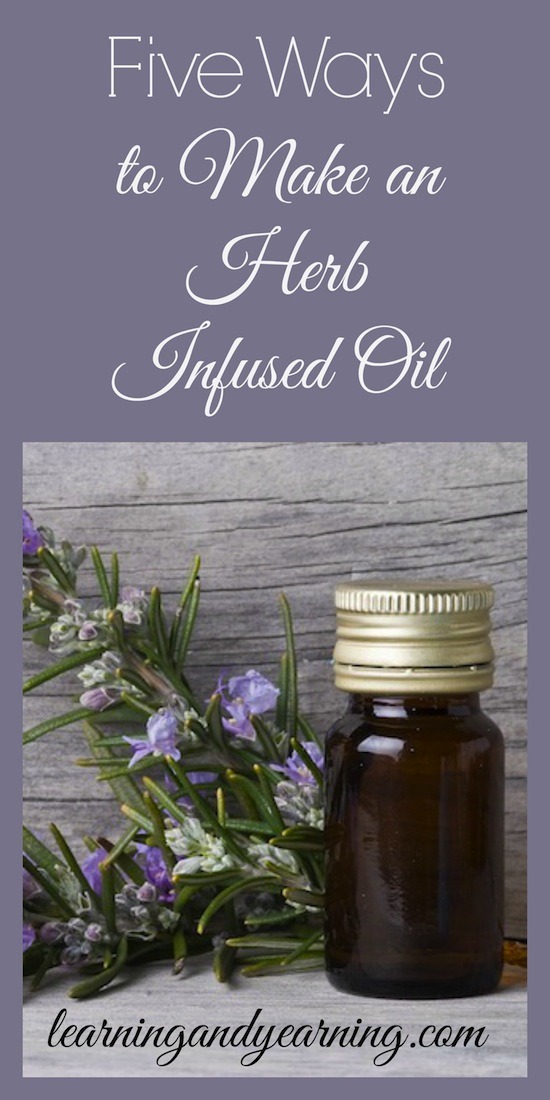
How to Make an Herb Infused Oil
Making an herb infused oil really is as simple as steeping quality herbs in a quality oil. Time and warmth are needed to allow the volatile oils in the herb to become infused in the oil.
There are a number of ways to provide that warmth; we’ll discuss 5 methods below. But first a word about the herbs and oil.
Fresh herbs contain water which can potentially cause mold. Using dried herbs can prevent this problem, but if you must use fresh herbs, allow them to sit spread out in a dry, airy location for a day to allow some of the water to evaporate. If you’re looking for a quality source of dried herbs, you’ll love Frontier Herbs or Starwest Botanicals.
With each method, I do not specify amounts for the herbs or oil; you can make as little or as much as you like. In each case, just be sure to completely cover your herbs with oil.
Your herb infused oil will only be as good as your herbs and your oil. Choose high quality. Olive oil is a good choice for making infusions since it itself is nourishing and does not easily go rancid.
Mullein
Double-boiler Method
When infusing an oil with herbs, it’s important to keep any heat used very low (around 100°F is ideal) so that neither the herb nor the oil are destroyed. A double-boiler can help to protect these precious ingredients. A mason jar placed in a pan of water will work in a pinch. I like to place a few canning jar rings in the bottom to protect the oil from overheating.
Chop or tear your herbs and place in the top of a double-boiler, or in a mason jar. Completely cover the herbs with olive oil. Place water in the bottom of the double-boiler and keep warm at very low heat for at least 60 minutes. Remember, low heat and long infusion time means great oil.
Strain the herbs which may then be composted. Bottle your oil and be sure to label and date your jar.
Calendula
Solar Method
To use the heat of the sun to infuse your oil, simply place your chopped herbs in a mason jar and cover with olive oil, leaving about an inch of headroom. Cover the jar. Now simply place your jar in a sunny location for 2 – 4 weeks. Consider moving the jar to a warm location (like the top of your refrigerator) on days the sun is not shining, and at night.
Strain the herbs which may then be composted. Bottle your oil and be sure to label and date your jar.
Dehydrator Method
I like to use my Excalibur dehydrator to make infused oils when it’s already running for another purpose, as long as the temperature is not above 110°F. Place your chopped herbs in a mason jar and cover with olive oil, leaving about an inch of headroom. Place in your dehydrator and set the temperature anywhere between 100° and 110°F. Allow to infuse for at least 8 hours. Longer is always better.
Strain the herbs which may then be composted. Bottle your oil and be sure to label and date your jar.
Oven Method
Place your chopped herbs in a mason jar and cover with olive oil, leaving about an inch of headroom. Place several inches of warm water in an oven proof baking dish and place it in the oven. Warm your oven to 200°. When the oven is at temperature, turn it off. Place the mason jar into the pan of water. Close the oven door and let the herbs steep there for at least 4 hours.
Strain the herbs which may then be composted. Bottle your oil and be sure to label and date your jar.
Dandelion
Crock-Pot Method
Chop or tear your herbs and place in a mason jar. Completely cover the herbs with olive oil. Place a dishtowel in the bottom of your crock-pot and add several inches of warm water. Place the mason jar in the water and turn your crock-pot to warm. If the lowest setting on your crock-pot is low, then monitor the water temperature and if it goes above 110°F, turn the crock-pot off until the water begins to cool a bit. Allow to infuse for at least 4 hours. Longer is always better.
Strain the herbs which may then be composted. Bottle your oil and be sure to label and date your jar.
Storing Your Oils
Store your oils in a cool, dark place (or in colored bottles). The shelf life is approximately one year, longer if you keep them refrigerated.
Where do you get your books inexpensively? I’m always a fan of the library, but they don’t carry all the books I want. I’ve tried requesting some on paperback book swap, but it seems some of the lesser known books are hard to find on there. I’m guessing you use swagbucks for Amazon, but just curious. Thank you!
I basically never pay for any book. I just can’t justify it when I have found other ways to get books for practically free. Would you like to know how? Well, here are my top five ways to get books for free:
1) Request Review Copies From the Publisher
I used to do this a lot back when I had my other blog and was writing regular book reviews. If you’re a blogger or review books for another type of media, you can fairly easily obtain free review copies from the publisher. Just search for the publisher of a book (you can often find this on Amazon) and then find their website and look for contact information for review copies.
Most publishers state their review copy policy right on their website and many are extremely generous in their willingness to send review copies to bloggers. However, please do not take advantage of this. Only request books you are truly interested in, and which you will write a review on your blog about.
Many publishers are also more than happy to do a giveaway along with your review and see this as extra exposure for them. So it never hurts to ask, if you’re sure you’ll like the book!
I no longer actively ask for review copies, but I do receive a few each month from various publishers who are wanting me to review their book on my blog. So occasionally, some of the books I read come compliments of the publisher.
2) Request Books on PaperBackSwap
PaperBackSwap is one of my favorite resources for getting books inexpensively–or even free! You only pay postage to swap books you already have on hand for books you’d like to add to your library.
You start out by adding 10 books to their system. Once you’d added your 10 books, you’ll get 2 free credits. And then every time someone requests a book of yours and you send it out, you’ll get another credit. Most books only cost one credit–even big hardcover volumes.
I recommend that you add books to your wishlist, instead of looking through the books they currently offer. You’ll get an email notification when the book is available and have 48 hours to respond and request it. I’ve been amazed at some of the really nice almost-brand-new $20 and $30 books we’ve added to our library this way!
If you want to keep your costs down, stick with only listing books that are lightweight. Also, the more popular your book is, the more likely it will get requested–which means another credit for you!
In addition to listing extra books you already have around your home, you could pick up 10 cent books you find at thrift stores or garage sales and list these as well, if you’re needing more credit.
3) Check Out Books at the Library
Of course, no list of ways to get free books would be complete without a mention of the library! I’ve checked out countless books from the library over the years; it’s an invaluable resource!
If you have a relatively small library that doesn’t have a great selection, check and see if they offer Inter-Library loan. Most libraries do, and this offers a much, much broader selection. You have to request the book and then wait for it to come in, but it’s free–which usually makes it worth a bit of a wait!
You can also suggest books for your library to purchase. They might not heed your suggestion, but it’s always worth a shot.
4) Borrow Book from Friends
I’m always swapping books with friends–and this is a great way to keep your reading materials varied! Just be sure that you keep track of what books you’ve borrowed and loaned out. And return the books in the same condition they were loaned in. Otherwise, your friends might not be so excited to loan you books again!
5) Buy Books With Swagbucks
If there is a book I really want to add to our library (not just borrow) and I can’t get it in PaperBackSwap, then I usually will save up my Swagbucks to “buy” it. Swagbucks offers a great deal on the Barnes and Noble gift cards so I often request those as rewards. And then I try to wait until Barnes and Noble runs a free shipping deal, and I have a coupon code. Combining that with shopping through a cashback site, I can usually get a great deal on a book I really want–all for free because Swagbucks is covering the tab!
What are your favorite ways to get books for free? Tell us about it in the comments section.
Since the CDC whistleblower case broke last year, and the documentary Vaxxed: From Cover Up to Catastrophe aired this year, the fact that the MMR vaccineDOES cause autism in some susceptible individuals can no longer be denied. We’ve written pretty extensively about both measles and autism. Still, some parents think that measles is so deadly that even if vaccines do cause autism, they’d prefer to have a child with autism than battle measles. Which is ridiculous, because measles is better than autism.
For the vast majority of children, measles is a mild illness that passes quickly. Children with autism will deal with a lifetime of struggles, and everyone around them, parents, caretakers, teachers, and siblings, are affected.
And before you cry for acceptance of neurodiversity, keep in mind, I’m referring to children with severe, regressive cases of autism, not those that are high-functioning and more self-sufficient.
Don’t tell me you’d rather take your chances with autism than expose your child to measles. Measles is better than autism.
Five Reasons Measles is Better Than Autism
The argument that you’d rather take your chances with autism than face the possibility of measles or some other ” vaccine-preventable” disease makes no sense. If you’ve done any research on the matter, you’ll find that in the majority of outbreaks, most affected people have, indeed, been vaccinated.
Not only are the chances of developing autism following vaccinations much higher than we’ve been led to believe, but the efficacy of vaccinations is questionable at best.
Here are five reasons to choose this benign childhood disease over autism.
Measles Imparts Lifelong Immunity
You know what’s great about getting measles? Once you have it as a kid, most people acquire an immunity to it forever. The antibodies that are created when you naturally catch childhood diseases help your immune system to know how to fight off the sickness when you’re exposed again at a later time. (In rare cases, measles immunity isn’t lifelong.)
Vaccine-induced “immunity” wanes in a matter of years and cannot compare to natural immunity.
You know what’s great about autism? Nothing. When you “catch it,” it’s there to stay, imparting no future gifts of immunity. Children don’t just “get over” autism without serious healing efforts.
Note: I’m just being cute. I know you can’t “catch” autism and it’s not contagious. However, most cases of autism occur following exposure to some insult to the immune system, such as vaccines, pharmaceutical drugs, or environmental toxins. Are some children born with autism? Probably. Do some children who were never given vaccines or pharmaceutical drugs have autism? Yes.
There is no doubt, though, that regressive autism occurs. One study concludes, “The mass of scientific evidence compiled by researchers clearly indicates that the incidence of autism occurs following vaccination and is most closely associated with the schedule of vaccines culminating in the MMR vaccine.” (source)
Autism is a big deal. It’s not something to take lightly, and it is worse than measles. We need to stop saying that autism isn’t a big deal and call it what it is: vaccine damage, toxicity, and poor gut health.
You know what’s not a big deal? Measles. Did you know that according to this CDC document (page 85), between 1950 and 1960, there was less than 1 death per 100,000 in the US, which is 0.00001%, or about 1 in 100,000.
Out of the 1,153 cases reported from 2001-2013, there were no deaths. (source)
If you get measles, you have a 99.7% chance of pulling through just fine. Want to read more in depth? Check out “Is Measles REALLY So Scary?”
Not only does measles give you immunity to future exposures to it, it also strengthens your immune system so you can avoid other future illnesses, including autoimmune disease and even cancer.
You see, our bodies were actually created to get these regular, normal workouts throughout childhood. Just like our muscles need use to grow and become strong, so our immune systems need to be used in order to bulk up and prepare to fight off invaders.
Instead of catching what used to be normal childhood illnesses, most kids are vaccinated against them, providing a false sense of immunity and overloading the immune system. So now, children have weakened immune systems that allow them to catch every common cold and suffer from frequent ear infections. Suffering through one week of discomfort with an illness like measles is surely preferable to long-term, frequent and annoying illnesses.
Having autism actually destroys the immune system. If you know the real cause of autism, you understand that autism develops due to a compromised immune system, then the underlying causes of autism continue to wreck the immune system. It’s a vicious cycle.
Autism Causes Long-Term Damage
For the vast majority of children, measles will be a short-term, uncomfortable illness. They’ll get a fever; they’ll have a rash; they’ll get to stay home from school (or skip their home school work), which kids are always angling for anyways. Yeah, being sick isn’t necessarily fun, but it’s a rite of passage for childhood.
Once the child’s immune system has fought off measles, thereby receiving lifelong immunity, they’re back at ’em in no time (kids are so resilient, you know).
When a child gets autism? There’s no easy bouncing back. A bowl of chicken soup ain’t gonna solve this problem (though soup can help to heal autism).
Autism results in long-term neurological damage with can affect a child for lifetime, though there are children who recover through the hard work of their warrior mamas! Indeed, many studies, including this one, have found that gut health has a profound impact on the behaviors of those on the autism spectrum, and interventions such as diet and probiotic supplementation may be helpful.
Measles is Easier to Cure Than Autism
There’s actually no cure for measles. Know why? Because it’s a benign childhood disease.
After some rest and time, and maybe some cod liver oil for vitamin A, most children are good as new in no time. ( Vitamin A treatment has been found to lower measles death rates by 62%!) (source)
The general consensus in the medical community is that there is no cure for autism. That’s actually not true, autism can be cured, but it’s not a walk in the park. Healing autism involves intensive intestinal healing, expensive supplements, and plenty of time and patience, but it certainly can be done.
Wouldn’t it be nice, though, if autism was as easy to heal from as measles. Hmm… with the fear surrounding measles, and the flippant attitude towards autism, you’d think it was the other way around.
Measles Complications Are Uncommon
Less than one thousand people per year get measles in the US, and only one death has been confirmed in over a decade (and even then, the cause of death was arguably due to something else, as the woman had a number of conditions contributing to poor immune function, and the measles virus was only found during an autopsy, as she had no symptoms. [source] It’s possible the measles vaccine she received- yes, she had been vaccinated- was actually the reason the virus was found in her body).
The latest estimates show 1 in 45 children in the US have autism. (source) That’s about 1,478,837 kids, or about 2%.
The places where typically mild diseases are more likely to have complications are the places that struggle with poor sanitation and nutrition, like third world countries. When we read statements like “Measles is one of the leading causes of death among young children even though a safe and cost-effective vaccine is available,” but fail to read on and learn that 95% of these deaths occur in third world countries, we’re making decisions based on fear, not facts. (source)
The death of a child is always sad, but we need to look at the facts: 114,900 people die from measles a year, globally, the majority being under the age of five. That’s about .002% of the world’s population. It’s estimated that 1% of the world’s population has autism. That’s 71,250,000 people.
There is no doubt, autism is more common than measles complications in the US and other developed nations. While rare but serious complications of measles can lead to death, a child is more likely to suffer from autism following an MMR vaccination than to catch measles at all, let alone have very serious complications.
Is Measles Better Than Autism?
You bet. As we can clearly see, the odds of catching measles, and especially suffering from complications, are much lower than the chance of being diagnosed with autism.
Not only that, but once you get over measles, you move on in better health. Autism can have lifelong implications for both sufferers and their families.
It’s time we stop taking chances with our children’s health and making decisions based on well-calculated propaganda. Look at the facts and make the best choices for your kids based on the real risks, not hyped-up figures and half-truths.
Do you think measles is better than autism? Share so your friends can read the facts too.
Original article and pictures take www.modernalternativehealth.com site
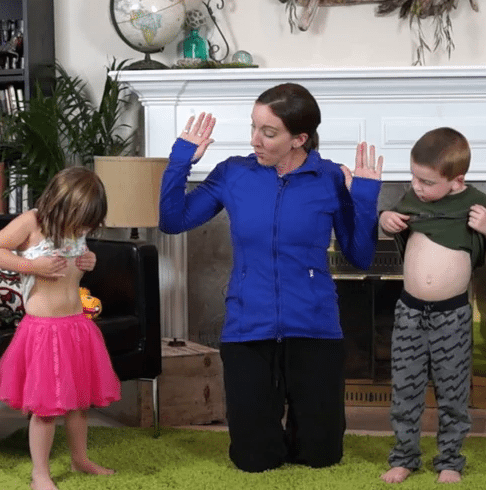
This special page is just for kids! Our smallest members love this page best, and so do the homeschooling families who utilize this section to supplement their home-based physical education! Preview all the great titles below!
Of course, parents are welcome to join in these kids workouts if they promise to be silly with us. But be warned: young bones can handle things things that old bones can’t. Our kids come up with some interesting moves and – while it’s tempting to try to keep up with their antics – adults need to careful while being silly with their kids. Note Bethany’s more modified moves, and follow her lead for your own participation
We try to film at least one workout for children each time we do a shoot, but – as you can imagine – the stars aren’t always predictable and sometimes we are more successful at being silly than producing a workout with our wiggly warriors. These workouts are only scripted in Bethany’s head, and she rolls with the kids and how they respond. Children will burn endless energy once they are given permission to have FUN with exercise. So, in alphabetical order, we give you our kid-friendly FUN workouts! Join in if you dare!
“I don’t use weights. I just shake and burp daily” … Yes, this is what I caught myself saying to friends as I posted brag pics of my recent fermented adventures. My growing fascination with ferments as food started with water kefir, but I’m telling you: That stuff is a gateway drug to another lifestyle! Before I knew it, I was dabbling with sourdough starters, smuggling sweet tea into my kombucha {or “booch” as it’s nick-named} and encouraging my husband to soak his nuts.
Ahem! I’m talking about almonds and walnuts, people, Soaking your nuts overnight before eating them makes them more digestible and is a type of quick fermenting which preserves and enhances food.
Seriously now, researchers from UCLA’s Geffen School of Medicine have determined that consuming a milk fermented with probiotics changes the brain activity of women. But fermented foods aren’t just dairy-based like yogurts and cheeses. They can also be honey or bean-based. Miso, Tempeh, and Kimchi are all forms of ferments that have their own spectrum of healthy bacteria to contribute to your gut.
Here’s an awesome video that explains the human microbiome and healthy bacteria
I’ve got more nerdy articles and a couple recipes to share with you below, but what I know from experience is that fermented foods have been a huge help in getting me away from eating as much sugar! You see, when it comes to my own nutrition, what works for me is ADDING good things to my diet which end up crowding out the not-so-good things. Lately I’ve been on a fermenting kick, and sure enough: if I drink water kefir in the morning, my sugar cravings go way down!
At home, we eat really healthy 90% of the time. We have an organic garden, dry lots of fruits and veggies, raise free-range chickens for their eggs, enjoy elk meat hunted by my husband himself, and I milk a goat to get raw milk! But I praise the Lord for pre-made Costco lasagnas, and I do like my Dr. Pepper.
To perfectly candid, I don’t want to NOT WANT sugar. I like sugar. I like my coffee each morning with its 1 – just one – teaspoon of organic cane sugar. I like the occasional soda. I like the occasional bowl of cocoa pebbles.
The trouble is when “occasional” becomes “frequent,” but giving something up doesn’t necessarily solve the problem. In 2012, I gave up soda for the whole year, but the cravings didn’t go away; I just filled that craving-hole with other sugary things. Fermented foods like sauerkraut, dilly carrots, elderberry/honey/garlic syrup, water kefir, and maybe kombucha have REALLY helped reduce my sugar cravings.
But cravings aren’t mental. They don’t come from your brain. They come from your gut!
A recent study was released that proved that gut microbes manipulate behavior! Read about that on NPR here and on Forbes here. Then ponder those sugar cravings coming from the gut… ponder the notion of replacing those unhealthy yeasty bacterias over time … ponder how the messages to your brain will change. Just this past Sunday, I did the dew for the first time in months, and when I came off that high, I felt like poo for the next 5 hours. Woke up Monday with a virtual hangover. Massive sugar cravings since then. But I kept up my arsenal of fermented goodies, and today they’re gone again.
On another funny fermenting note: Many avid fermies recommend separating your ferments. For example, I often have sauerkraut AND a honey ferment AND water kefir AND some type of pickle all going at once. However, if I separate mine, I lose track of them. Plenty of people keep their ferments all in one cupboard with no repercussions, while others say it seems to change the flavor and cause an increase in kahm yeast. But the one time I spread my ferments out to various safe places in my home, I lost one of them completely and wandered around for an hour mumbling, “Lost my kraut. How does someone lose their kraut? Has anyone seen my kraut?”
I just spilled a whole gallon of fermented lemonade all over my kitchen counter and floor…sticky mess. While cleaning that up, my 3 year old son peed his pants. It’s been a rough 10 minutes around here. Positive – I *think* I engaged my Transverse while kneeling to clean the floor. -Julie B.
Okay, now how about some of my personal recipes?
Wait, first I need to say that I’m no expert. I’m not a foodie or fermenting philanthropist, but I’ve had some good success with countertop pickles, sauerkraut, and water kefir. I’m too good at kombucha; my home environment seems to foster epic scobies that I can’t keep up with! Then my “booch” is a little too “hooch” if you know what I mean… LOL
Beth’s Baby Dills (pictured below)
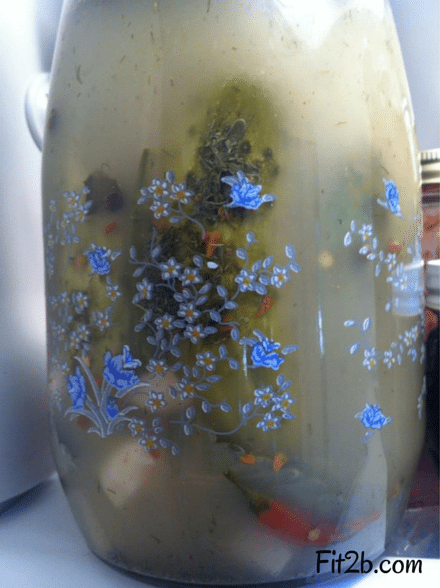
The most simple pickle recipe that works for me is making small batches of tiny baby cucumbers in a fido jar. Right now I’ve got them growing in my garden, and I try to harvest them when they’re no bigger than my thumb. I typically fill a pint-sized fido like this to within an inch from the top with pickles and water, add 1 tbs sea salt, 1-2 sprigs of dill, 3-4 halved garlic cloves, 20-30 peppercorns, and then I weigh it all down with a small vintage glass lid that fits inside so the pickles stay under the brine. I let it sit under a towel on my counter for 2-3 days, burping it 1-2 times a day by cracking it open just far enough to burp any excess gas. Tiny cukes stay crisp with no need for grape leaves. I haven’t yet perfected a recipe I like for larger pickles, but that’s okay because I love baby dills! In the jar below with pretty blue flowers, I added a couple tiny spicy peppers for some serious kick.
Note: Pickled foods aren’t the same as fermented pickles. Pickles off the shelf at your grocery have been canned, cooked, and contain additives and artificial colors like Yellow #5 … blech! The slower process of fermentation creates the good bacteria we’re after while canning kills the good along with any potential bad. I encourage you to do your own research before starting your fermentation journey.
By the way, regarding the statement in the first paragraph of this blog, of course I use weights as a fitness chick. When it comes to ferments, I find that glass weights work well for weighing down sauerkraut BUT in fido jars – which I’ve always collected for their gorgeous antique flair – I’ve had wonderful success with a daily burping and shaking… By the way, it’s best to shake AFTER you burp
Pineapple Coconut Water Kefir
The hubs is on an anti-inflammatory diet, and our naturopath was delighted to hear that his wife {that’s me} was already fermenting. Now that she’s told him to try it, he’s all over me for more! His favorite drink is 2F water kefir that’s had coconut shavings and dried pineapple soaking in it.
Start by going through the 1F first ferment of grains like these in this kit which comes with fabulous instructions {it’s the same one I started with} and then add a slice of dried pineapple and a handful of dried shaved coconut to your 2F second ferment. It will get super bubbly, so watch it carefully and don’t let it go past 18-24 hours without burping it. I make all my water kefir in two plain mason canning jars with reusable plastic lids like these. Between uses, I just rinse them with water, occasionally running them through my dishwasher if they get grubby. Glass doesn’t absorb bacteria – yay!
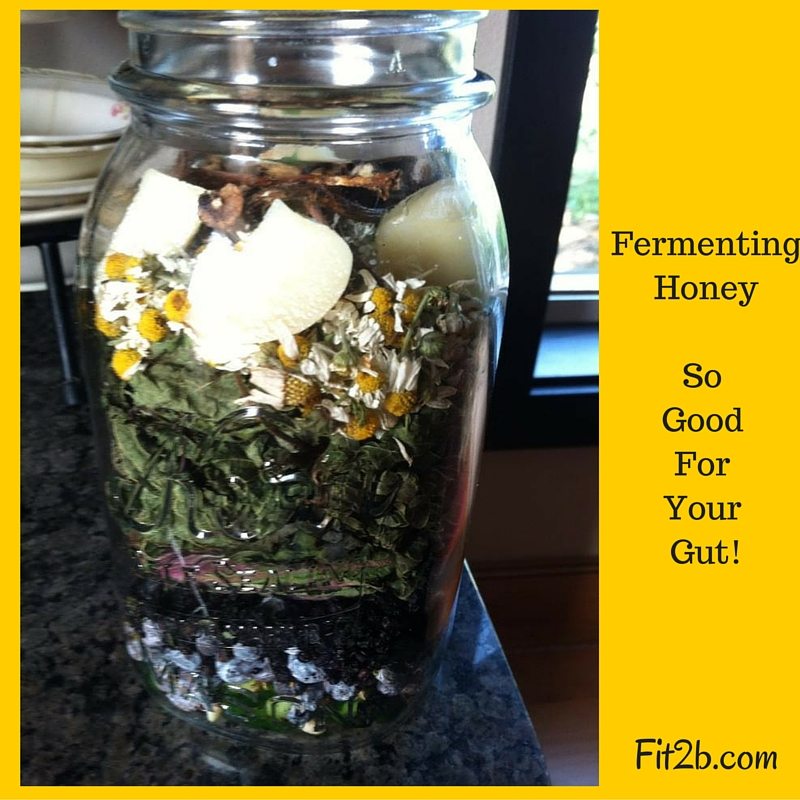
Fermented Elderberry Honey Syrup (pictured above)
The hubs came home with a whole box of fresh elderberries last year, and I knew exactly what to do with them: Start an immediate honey ferment with a few clusters, and freeze the rest for more batches later! Concerns about raw honey aside {again, please do your own research} this recipe rocks because it kills sickness in our house so fast. Whoever gets the sniffles gets a couple spoonfuls of this each day. Plus there’s no alcohol in it like the stuff at the store!
First, find a source for local raw honey and secure at least 1 quart of it. By raw, I mean it still has bee-butts in it. Then get a large, sturdy fido jar like the one I mentioned in the pickle recipe. Sometimes you can find them at second-hand stores, but don’t use tinted ones and always check for cracks and good seals.
Layer elderberries and whatever other sick-fighting food you have on hand into the jar. Mine typically gets mostly elderberries, then quartered garlic cloves, jalapenos, sliced ginger root, sliced turmeric root, dried chamomile, nettle leaves, and sliced white onions at the top to hold down floaties. I don’t worry about mixed dried and fresh since the fermenting process will balance it all out.
Then I slowly pour honey all over that and let it settle until everything is submerged and seal the jar. Thus begins the process of burping and turning it upside down at least once every day if not twice for the next 4-6 weeks. If you have an airlock or good weights to keep everything below the fluid, you won’t need to shake/burp. But I like babysitting my ferments and hearing that pffffTTT as I crack the lid slightly.
A few things: You need to have clean safe kitchen practices, do your research before you start experimenting, and don’t fear anything except mold. MOLD IS YOUR ENEMY!!! If you see anything fuzzy white or green or black on top, you must toss it out!!! Scraping doesn’t work since mold has roots, and your happy bacteria is no longer winning. Be sure your surface is always clear. This is by no means a comprehensive article. You must do your own research. Oh, and I use chalk labels on the sides of my jars to keep track of when I start them.
Books I strongly recommend because they spell it out clearly, have gorgeous pictures, I actually own them, have read them, and have been able to easily apply lots from them:
You see, I’m a fitness chick, not a nutritionist, but your belly is more than your transverse abs which is the area of my expertise. However, you can’t just exercise and lose all your belly fat and bloating.
What you eat matters AND how you move matters. If you feel like you’re a bit stuck with your stomach, you are welcome to set up a personal consult with me so I can help you narrow down what your next steps are. Usually, though, it just goes back to your consistency and taking care of yourself on a daily basis. I’m here to encourage you as much as I can. I hang out in our forums a lot; are you in there?