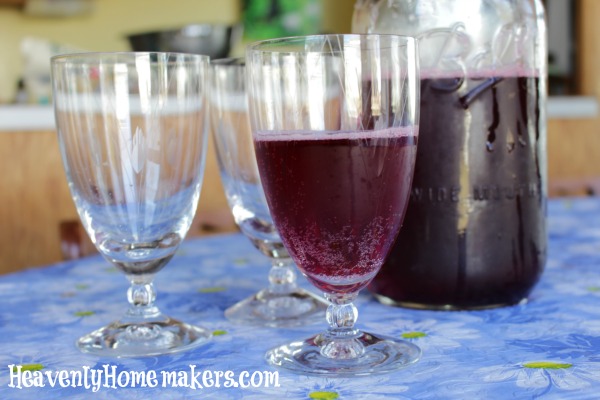
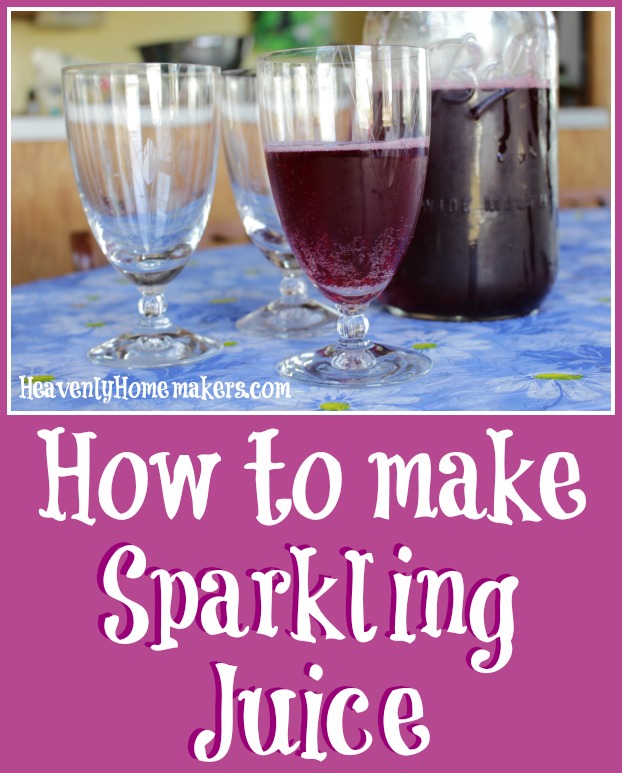
I’m in it for the bubbles. Easy Sparkling 100% Juice is so very perfect.
I shared all kinds of thoughts (that didn’t necessarily make sense) about “how much I love drinks” in this post. I guess with warmer weather coming, I’ve been thinking more about fun drinks (not that warm drinks aren’t fun in the colder months too, of course).
One of my boys’ favorite things to splurge on isMartenelli’s(and by boys’ splurge, I should clarify that they prefer it if we parents do the splurging, because it is much easier to enjoy something if someone else has paid for it).
Have you tried Martinelli’s? It’s a very tasty sparkling cider that is 100% juice, made especially fun because it comes in a cool bottle and pours out nice and bubbly. I find it in the juice aisle at Wal-mart.
Martinelli’s is great for a special occasion, like New Year’s Eve, when I might not mind spending close a few extra dollars for each of us to have a sip of sparkly bubbles. But for a random Tuesday, I’m a little more selective about where I put my grocery money.
Soooo, we’ve found a way to have our sparkling juice and drink it too. We call it “Mom-inelle’s” because I invented it and we are all quite proud. The boys are especially happy because this invention means they can enjoy this fizzy drink more often than every December 31.
This has become the drink we enjoy when friends come over, and it always receives rave reviews. Note that you can add any 100% juice that you choose. We’ve discovered that our favorite is 100% Cranberry. Who knew? 100% Grape is a close second.
You may also find it fun to make this with combo-juices like 100% Cran-Raspberry or 100% Cran-Grape or 100% Apple-Raspberry.
It may just be us, but we have also found that this Sparkling 100% Juice tastes best with Mexican food or Pizza. There’s just something about fizzy drinks with food that has a bit of a spice. Try this!
Easy Sparkling 100% Juice
Do you love bubbles like I do? Ever tried making Sparkling Juice like this?
P.S. If you’re having a hard time giving up soda (pop/coke/whatever you call it where you live) – I recommend this fizzy juice as a great alternative. :)
Original article and pictures take heavenlyhomemakers.com site
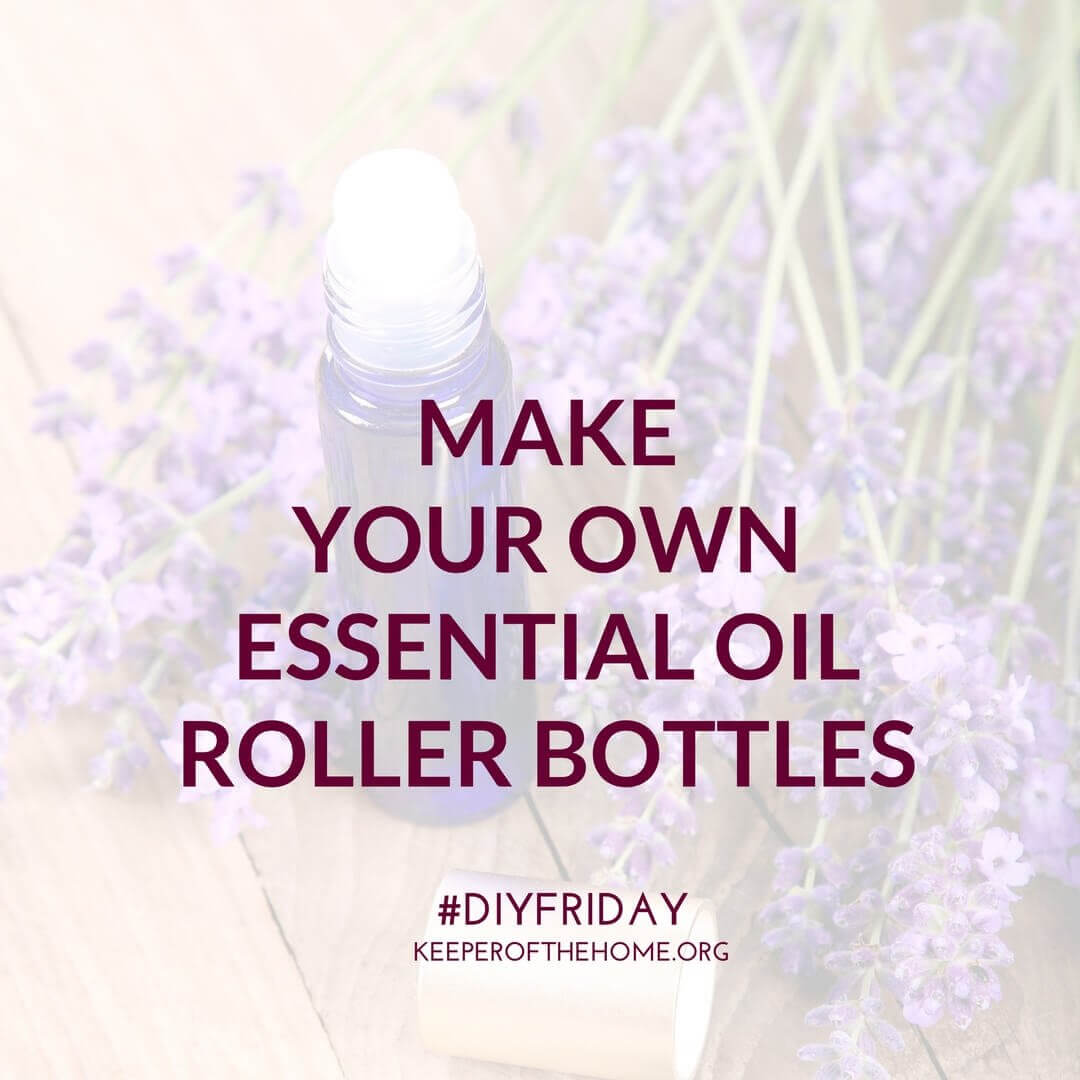
How to Make Essential Oil Roller Bottles #DIYFriday (with Video)
I am frequently asked how I make my mixes and magic “potions” that I use all the time for my kids, myself, and even my dog. What people are referring to are the essential oil roller bottles that are so often in my purse, in my kids’ backpacks, and all over the bottom of my bags.
They’re gifts, they’re therapy, they’re indispensable in my life!
How do you make essential oil roller bottles?
First, you have to have a recipe, even if you’re just going to make a roller bottle that’s only one oil. (You have to know that, right? And that’s the recipe!)
There are so many recipes out there. You can find great blends to make for yourself by looking in any number of places, or you can devise your own by considering the impact you want and the properties of the oils.
Though I have quite a few blends that I share regularly, this is my current favorite, “Embracing Gratitude.” I am making this mix for my loyal customers as a thank you and I hope they enjoy the feelings of peace and enjoyment it can bring.
My “secret” trick for roller bottle blends:
My trick with the mixes is I always use 10 drops per oil in my blend. That is mostly for ease of mixing. When I do it this way, I never forget the recipe or have to look it up after I have made it the first time.
If you were using the blend on small children or people with sensitive skin, you would probably lower the number of drops, but 10 drops just keeps it simple for me.
I put all of the oils in the bottle and then top it off with a fractionated coconut oil. (Fractionated coconut oil does not harden when it gets cold and it stays very stable in the bottle.)
What’s in this essential oil blend and why I chose these oils:
Wild Orange: Inspires abundance, creativity, and a positive mood.
Grapefruit: Teaches true respect and appreciation for one’s physical body.
Bergamot: Opens the soul up to hope and offers courage to share inner feelings.
White Fir: Teaches each generation to look for the gifts they have to offer and opportunities for new beginnings.
Geranium: Encourages emotional honesty, love, and forgiveness.
[Credit to Emotions & Essential Oils, 5th edition, from Enlighten Alternative Healing]
Final tip: Never forget to label!
Make sure you label your roller bottle with the oils that are in the blend. Otherwise, you may find yourself ready to refill it and sniffing the bottle, hoping you can tell what oils you used!
I love to make fancy labels, but in all honesty, I rarely have time for that! Sometimes I buy labels, but most of the time I use my label maker, the cap stickers that came with my kit, and clear packing tape! Works great!
Have fun making your own fancy mixes! (And share your favorites in the comments…I love to hear what ideas other people have!)
What are your favorite essential oils or blends to use in roller bottles?
***If you would like a copy of my newest ebook with some great Back-to-School recipes, click here. Follow me on Facebook for weekly recipes and tricks, and watch for more videos here at Keeper of the Home.
Disclosure: This post includes affiliate links. Thank you for supporting our work and mission!
Disclaimer: Although all Keeper of the Home contributors are passionate about nutrition, natural living and alternative health issues, we are not certified nutritionists, medical doctors, or practitioners of any kind. We are not licensed to counsel anyone in medical matters, nor may we be held responsible for any course of action that you choose in regards to your own health or that of your family. Please remember that what we are sharing is the result of our own experiences and years of study, but may not necessarily be the right course of action for you. We are advocates of becoming informed, knowledgeable and responsible for one’s own health, but our desire is not to be an authority on any matters of health for you, nor would we presume to have sufficient knowledge to do so. Our hope is that what we share may encourage you and start you on the road to doing your own research, and seeking out the opinions of professionals or others that you trust.
Original article and pictures take keeperofthehome.org site
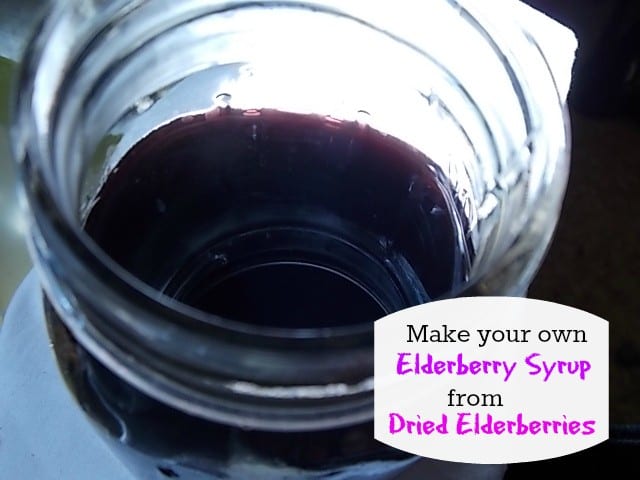
How to Make Elderberry Syrup Elderberry syrup has immune-boosting benefits, and it works! I buy dried elderberries from Amazon for this recipe and my kids don't catch colds! :: DontWastetheCrumbs.com
Cold and flu season technically runs November to February, but if you or anyone in your family interact with ANYONE else, chances are you get sick year-round.
That’s why I keep charcoal gummies in my freezer. If someone gets the stomach virus, I want to nip it in the bud ASAP and prevent the rest of us from catching it. (Can we just admit that holding hair for a kid in one hand, and a vomit bucket for yourself in another hand, is not a fun place to be?)
It’s also why I made two batches of elderberry syrup a couple months ago. I admit to being skeptical at first, but let me tell you how awesome homemade elderberry syrup is (and how easy it is to make!).
A few weeks ago (right after I made my first batch of elderberry syrup), my in-laws visited for Grandparent’s Day. The weekend before arriving here, they were at a high school class reunion.
At some point during the reunion activities scheduled in those two days, someone sneezed or coughed or breathed too hard and too close to someone else. By the time the reunion was over, 85% of the attendees had fallen sick. In fact, there’s now a running joke among the class that they caught the “Bridgeport Crud!”
My mother-in-law was one of those who caught it, and a doctor at a local walk-in clinic diagnosed her with a virus of some sort. Other attendees went to their own doctors and they were all given different diagnosis… one was told bronchitis and another was told pneumonia!
Regardless of what it really was, it was passed on to my father-in-law. He woke up the first morning at our house feeling off. Thankfully, he felt better later in the day.
By that night though, he felt awful. He was ready to pack up and head home, cutting the trip short by two days!
I asked him to stay one more day and to let me give him a few homemade remedies first, including elderberry syrup. Besides, it was raining outside. His choice was either drive 6 hours in pouring rain, OR spend the day resting, taking natural medicines and watching his favorite nature shows.
He chose the latter.
Elderberry syrup has amazing immune boosting power! When recently faced with a very contagious bug, we only took elderberry syrup and completely sidestepped the illness!
My family and I started taking elderberry syrup a couple weeks before their arrival to boost our immune systems and as a general precautionary measure (we start taking it the first week of October). Once my father-in-law caught the crud though, we extended the precautions it to everyone in the house:
The adults took one tablespoon once a day.
The kids took one teaspoon once a day.
For those who were sick (i.e. my father-in-law), we upped the dosage to one tablespoon THREE times a day.
In full disclosure, I gave my father-in-law a combination of other natural remedies too:
He massaged a combination of Thieves, Raven and Purification essential oils on his chest, three times a day. (I buy my essential oils through Young Living.)
This same combination of oils was also diffused in the main living area.
I gave him one tablespoon of BactaMune by TriLight Health three times a day.
And of course, the one tablespoon of elderberry syrup (tutorial below), three times a day.
On top of this, I sprayed my Thieves cleaner and wiped down EVERY door knob and light switch in the entire house twice a day. (This sounds like a lot of work, but it only took about 15 minutes.)
Call me crazy if this sounds like overkill, but if nearly the entire high school class of 1967 got sick in 2 days and they weren’t even in the same house, I wasn’t taking any chances!
What’s really important though, is whether or not all this worked….
Homemade elderberry syrup is SO easy to make! I'm keeping it on hand this cold and flu season to keep the bugs away.
And it did! My father-in-law woke up the next day feeling rested and so much better!
Now, was this because of the elderberry syrup? Or because of everything else?
Well, my first instinct would be that it’s everything combined together, except…
NONE OF THE REST OF US GOT SICK EITHER!
Sorry for the all caps, but this is a big deal. They were carrying something HIGHLY contagious, and the rest of us ONLY took elderberry syrup. And just once a day, at that!
Another big question though… Was our experience subjective?
It’s hard to say, but this article says elderberries are a potent immune booster and can mitigate flu-like symptoms.
In fact, this study concluded that the effects of elderberry flavonoids were comparable to the flu medicine Tamiflu!
Elderberry is found over the counter in common cold and flu brands like Zarbees, Sambucol and Sambucus, but for the price of JUST ONE of those medicines, you can make several batches of homemade elderberry syrup.
Considering this actually WORKED for us and it’s significantly cheaper (and super easy to make), it’s something I’m going to be keeping on hand throughout the year.
Elderberry syrup is my number one go-to for boosting immune systems! This simple recipe makes a batch that lasts for over a month and keeps the bugs away.
The tutorial for how to make elderberry syrup is below, but I want to share a few important notes with you guys before you dive in.
Don’t go foraging for elderberries (and especially don’t eat them raw).
There are only a few elderberry plants that are edible in general, and the leaves and stems from nearly all elderberry plants can be dangerous.
If you use fresh berries for this recipe, I recommend finding a reputable local source. Otherwise I recommend these dried elderberries online. (This is a reputable brand and the best deal I’ve found!)
Raw honey is not for infants under 12 months old.
Raw honey has exceptional health benefits, including managing seasonal allergies and boosting the immune system. That’s why I’ve included it in my elderberry syrup recipe. Well, that and elderberries are quite tart and medicine won’t work unless it’s you actually take it!
If you’re making this for your little ones, you can use a different sweetener altogether OR put the syrup back on the stove after its strained and add the honey, simmering for about 5-10 minutes to pasteurize it.
I found local raw honey at a health store in my town. This raw honey is good too, and I’ve seen it in my local Walmart. This honey is from Brazil though, so chance are it won’t offer allergy relief (unless you live in Brazil!).
Ginger, cinnamon and clove are optional.
I included all of these in my batches, because I think it adds a layer of yumminess to the syrup and they have benefits too. However, the syrup will work just as well and taste just fine if you omit one or all of these.
You probably won’t find a knub of ginger small enough for what you need for this recipe, so I recommend buying about a 4″ pieces and grating the whole thing. Measure what you need for this recipe, and then freeze the rest in a small baggie for a future batch!
Use a strainer or a nut milk bag. Don’t use a blender.
Numerous sites discuss the dangers of eating the seeds of elderberries. Because a blender will pulverize the berry AND the internal seed (especially if you have a Blendtec or Vitamix), I don’t recommend using it to make elderberry syrup.
Instead, smash the berries with the back of a wooden spoon through a fine mesh strainer OR place them in a nut milk bag and squeeze like crazy. Both of these methods will ensure no seeds make it into the final syrup.
Save the elderberry mash for flavoring kombucha!
Instead of throwing away the elderberry mash (the solids that are left after you’ve smashed the berries through the strainer), use them for flavoring your kombucha! You’ll get a double whammy of immune boosting AND gut boosting benefits, and get the most out of the investment in elderberries.
To do this, place 1-2 tablespoons of elderberry mash into a tea bag. I have cotton tea bags like these, and was able to put 2 tablespoons of mash into each of my 4 tea bags.
To brew, use 1 tea bag per 1 gallon of kombucha. If you don’t need all the elderberry mash right away, there are tree ways to save them for later:
Filling up the tea bags and placing them directly in the freezer. You’ll simply pull a tea bag from the freezer and put it in the water when you’re ready to make kombucha.
Freeze the elderberry mash in 1 tablespoon portions, in an ice cube tray.
Use a cookie scoop to portion the mash onto a cookie sheet lined with parchment paper. (This is the same method I use to freeze tomato paste.)
It may not seem like much, but using up every bit of food that comes in the kitchen is great way to save money. I believe so much in avoiding food waste that I dedicated an entire lesson to it in Grocery Budget Bootcamp! Every little bit adds up!
Keep the germs at bay this flu season with homemade elderberry syrup! The immune boosting properties of elderberries are AMAZING. Plus this syrup doesn't taste so bad.
Combine dried elderberries, water, cinnamon, clove and ginger in a medium pot and bring just to a boil. Cook until the liquid has reduce to almost half, about 45 minutes. (Mine took exactly 45 minutes both times, but you can set a timer for 30 minutes and check if you don’t want to forget about this being on the stove!)
Place a fine mesh strainer (I have this set) over a big bowl (I have this set) and pour the liquid through the strainer. Mash the solids against the strainer, doing your best to get as much of the fruit through the strainer as possible. Take your time here so you’re not wasting precious elderberries!
When you’re left with mostly seeds, use the elderberry mash for kombucha OR compost it (here’s an easy way to get started with composting). Let the syrup cool to room temperature.
When the syrup is cool, pour into a quart jar. Add the honey and stir well. Store in the fridge!
Elderberry Syrup Dosage
I mentioned our dosing above, but this is because we were surrounded by people who were sick. If that weren’t the case, I’d reduce our dosage to ½ teaspoon daily for kids, and ½ tablespoon daily for adults.
Other Home Remedies
I’m (very) slowly added home remedies to my arsenal as I get more familiar with how food and minerals act in our bodies. Here are a few other simple tutorials I think you’ll find helpful!
Charcoal Gummies (just 2 ingredients, for the stomach flu/virus/bug)
How to Make Elderberry Syrup with dried Elderberries
The cold and flu season is nearly upon us, and I want to be ready.
Yes, I feed my family a whole foods diet, rich in nutrients and vitamins and minerals. But, despite my best efforts, sometimes a bug comes to stay in our house. Of course, my kids learned how to share, so they do. Instead of running to the pharmacy for some OTC medicine that may have ingredients that I don’t want to give my kids, I make my own natural medicines to help deal with symptoms. Elderberries have been used medicinally for hundreds of years and may have a measurable effect in treating flu, allergies, and helping with respiratory health. (source:Wikipedia)
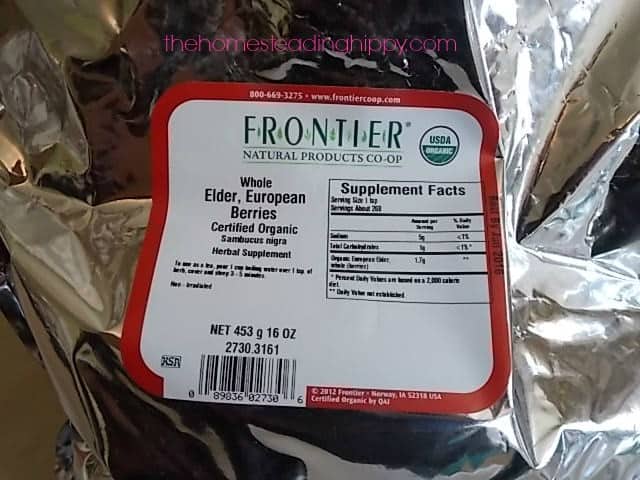
Instead of buying the elderberry syrup at the health food stores at the rate of $20 for a 4oz. bottle, I make my own. I bought a 1lb. bag of dried elderberries for less than $20 and got to work!
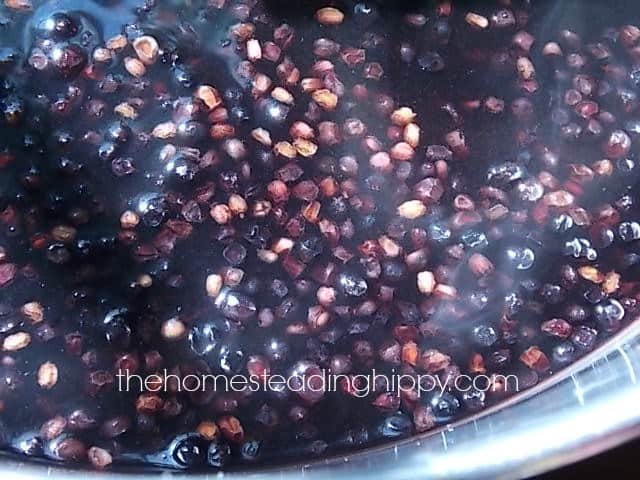
First, I took 2 cups of filtered water (I use a berkey) and brought that to a boil.
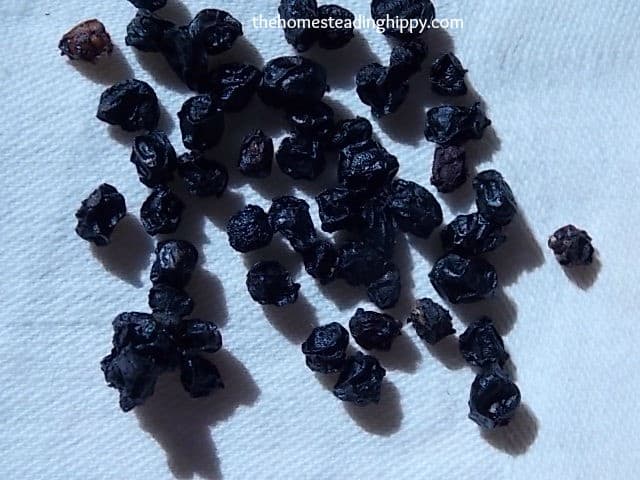
Then, I added 1 cup of the dried elderberries and took off the heat. I let the elderberries steep for 30 minutes, and swirled the pan every so often. I don’t have a real reason why I swirled it, I just like to do that.
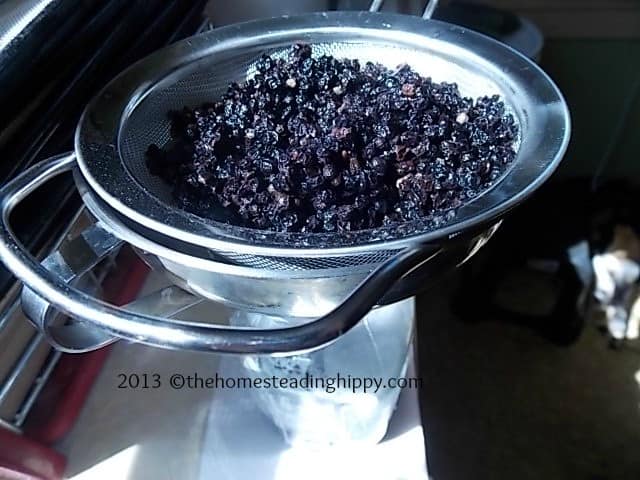
Then, drain the elderberries.
I used a wooden spoon to “push” the rest of the tea into the jar. Add 1/4 cup of honey and stir to dissolve. Store in the fridge for up to 6 months. To use, simply add 1/4 cup of the syrup to a large mug and fill with hot water to drink as a tea, or take 1 Tablespoon by mouth while symptoms persist.
**This post is for educational purposes only. The information provided by myself is not intended to diagnose, treat, or cure any conditions. If you are seeking medical advice, please speak with a licensed health care professional.**
Original article and pictures take thehomesteadinghippy.com site
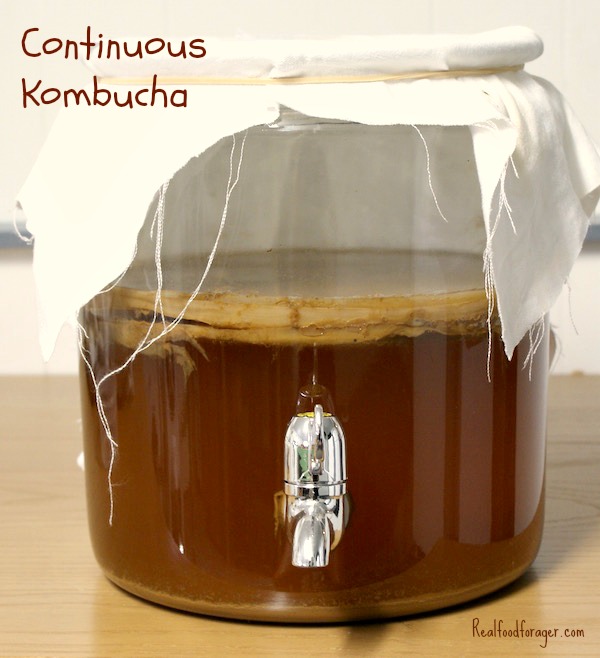
If this is the first time you are reading about kombucha here, you need to catch up by reading this post to find out what kombucha is and this post to get the basic kombucha recipe.
SCOBY = Symbiotic Culture of Bacteria and Yeast
What does SCOBY stand for? Symbiotic Culture of Bacteria and Yeast. It looks like a mushroom – also known as kombucha mushroom and kombuchamother.
You may have noticed in your store-bought bottles of kombucha, vinegar or water kefir, a film may form on top or at the bottom – that is also a SCOBY – a community of bacteria and yeast.
Part of the function of the SCOBY is to seal off the top of the liquid and protect it from outside bacteria. A healthy SCOBY will form a new layer each time it is fed. The SCOBY will get thicker over time – remember, it’s alive. You can keep it thick as long as it doesn’t start to take up too much space in your container, or you can thin it out periodically.
What to do with the extra SCOBY’s? Well, start a SCOBY hotel next to your main container – just in case something goes wrong with the main SCOBY you have a backup. Feed it whenever you fed the main SCOBY.
Share your SCOBY will friends and family.
According to Hannah at Kombucha Kamp, you can remove some brewed kombucha every 7 – 10 days, depending on the temperature of your home. Slip a straw under the covering of your container to taste test. If it is too sweet, leave it a few more days. If it is too tart, next time test it sooner.
Fill smaller half gallon jar 3/4 with filtered water
When the brewed tea is cool add it to each of the half gallon jars
Now add this to the 2 gallon container
The SCOBY will drop to the bottom – that’s fine, during the brewing process a new, thin SCOBY will form on top and the older SCOBY will eventually join it
Cover with cloth cover and secure with the rubber band
Place it in a warm location out of direct sunlight unless container is opaque or you have a cover for the container
Let brew for 7 days and then check it
I tend to let it go longer as I like it less sweet but that is something you have to figure out for yourself
Equipment
stainless steel pot to make the tea in
Plastic funnel (for bottling)
Distilled white vinegar for rinsing the jars
Clean cloth (like muslin) to cover the top of the jar with
Rubber bands to secure the cloth to the jar
PH strips if you want to be technical and test the acidity of your kombucha
Tips
Clean the containers and jars you are using, but do not use soap as that will kill the SCOBY — just rinse with hot water and rinse again with white vinegar
Of course whenever you are handling the SCOBY or jars be sure your hands are clean
It loves to be at around 70º F so if it is warmer it will go faster and if it is cooler it will go slower
It will be slightly tart when it is ready
You could also check the PH level if you happen to have PH strips handy – it should be around 3.0
Using a plastic straw, stick it into the liquid and taste your kombucha — if it is still sweet, let it go another day and keep checking it until you think it is ready
The brewing time will vary for each home and each person’s taste and may differ at different times of the year
Flavored Kombucha
The next step is to flavor the kombucha. Of courser, we can drink it plain if you like, but flavors add interest.
The key to good health is a healthy microbiome. You may be shocked (or surprised) to find out that there are 10 times that amount of bacterial DNA in each and every one of us.
That makes us more microbe than human. Perhaps we are just walking containers for the bacteria – many of whom are essential to human life.
Get the Most Current Information about the Microbiome
Are you as fascinated by the microbiome as I am? Are you hoping for a cure through this new research explosion?
Like this article? Get many more and tons of information and instructions on using grain free flours in my fantastic kindle books. You don’t need a kindle to read them, as Amazon offers a FREE reader for all devices, on the sales page for each book.
How to Make Comfrey Salve For Bumps, Bruises, Broken Bones
This post may contain affiliate links, which won't cost you extra to purchase but helps support this site. Thank you for your support!
Comfrey is an amazing herb. This comfrey salve is a must have for your home herbal apothecary.
Comfrey is known to have anti-inflammatory, analgesic and decongestant properties. It is also known as one of the herbs to heal broken bones.
I like to have this salve to use on bumps and bruises. Comfrey root salve has been shown to be a bone knit herbal remedy. Comfrey bone healing research shows it helps reduce the time in healing. With kids in taekwondo, and a busy homestead, broken bones, bumps and bruises happen on a regular basis around here.
Place about the dried comfrey into a clean glass jar.
You can use a canning jar, or any other glass container you have. Glass is the best choice due to the heat and the oils.
Cover the herbs with the oil. In a heavy bottomed pot, add enough water to come up on the sides of the jar. You want the water to be the same level as the oil in the jar. Do not allow the water to get into the jar. Heat the water to a simmer, then turn the heat down. You will want the water to be at a “just simmering” level, not boiling.
Using a towel or trivet, place the jar of herbs and oils into the water. Cover the jar loosely with a lid to keep the herbs oils in place. Keep in the simmering water for 45 minutes.
Don’t allow the oil to get too hot. I use a thermometer to make sure it stays under 100°. If necessary, turn the heat down lower. Allow to cool completely.
For a double infused oil, drain the oil from the herbs. Since the herbs were in oil, they are not good to add to your compost. The oil may not break down. Toss the used herbs in the garbage instead. Weigh out new herbs. Add the new herbs to the infused oil. Place back in simmering water for another 45 minutes. Double infused oil would be most often used for helping broken bones heal.
Drain the herbs from the oil using strainer or cheesecloth.
Carefully press down on the herbs to ensure all the goodness is drained out of it.
Put the infused oil back in barely simmering water and add the beeswax. Allow to slowly melt together. Remove from heat and allow to cool completely before use. Label and store in a cool, dry place. Use within 6 months.
For a fresh comfrey salve recipe:
pick your comfrey herbs
place in a 200 degree oven for 4-6 hours to allow to dry
remove from oven, weigh out
follow directions for dried comfrey salve
You want to allow the herbs to dry to remove as much water as possible. The water may cause mold or quicker spoilage of your comfrey herb salve.
To use, simply apply a thin layer to bruises, sprains or broken bones.
Use about a quarter sized amount each time. You can apply this 3-4 times day to help promote healing. Obviously, you can’t remove any cast, but you gently rub under the cast as best as possible.
You DO NOT want to use this on open skin. This may irritate the skin. This comfrey salve is only for surface wounds that are closed like bruises, sprains, and broken bones.
What would you use this comfrey salve for? Be sure to pin this for later!
Original article and pictures take thehomesteadinghippy.com site
They are lightly sweet, filling, and full of good fat and protein.
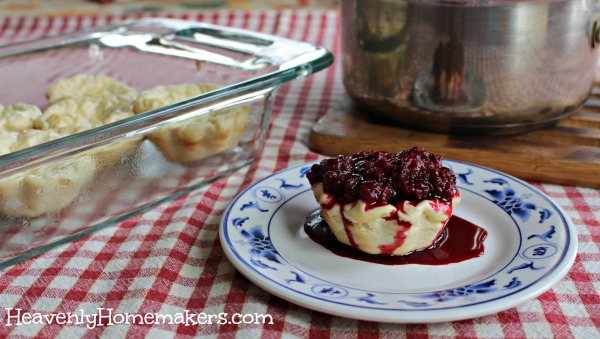
So what’s a girl to do when she runs out of her Mini Cheesecakes on a hot day in the summer? She certainly doesn’t want to turn on the oven to bake more for herself. And I think we all know the waffle iron just won’t work for something like this (but don’t think I didn’t at least consider it for one insane moment).
How to Make Cheesecake in a Crock Pot
I forgot to mention – this Crock Pot Cheesecake is crustless. (I’m so used to eating them this way, I forget cheesecakes are supposed to have crusts. Ha!)
This same idea will work to make these Low Sugar Brownie Cheesecakes in the Crock Pot. Follow the recipe on this page and the directions above to make a chocolate version.
Or, if you want some No-Bake Cheesecake Varieties, check out the list below.
Can’t wait to hear how you like this Cheesecake in a Crock Pot idea!
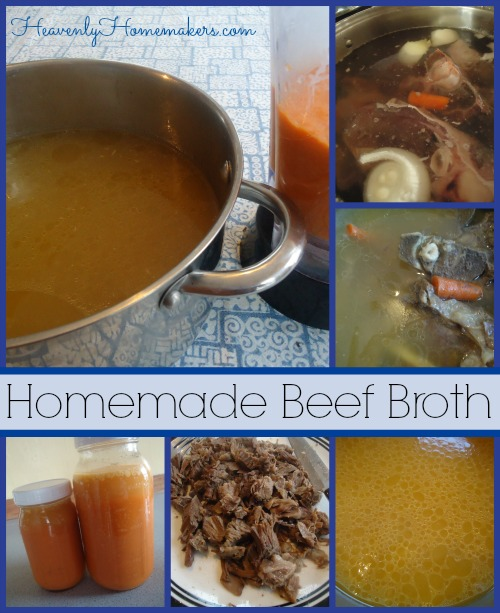
There’s nothing very beautiful about pictures of soup bones and vegetables floating in water. And yet, here I am again, just like the time I showed you all the pictures of my chicken carcasses. Some people create adorable collages of their children. Me? I spent time yesterday crafting a collage of my beef broth. Isn’t it precious? Take note of the fatty bubbles floating along at the top of the jar. I’m so proud.
Beef Broth is as fantastic for your body as Chicken Broth. There are so many minerals we need that we can get from beef bones, such as calcium, phosphorous, magnesium, sulfur, and potassium – all in their natural, beneficial, and digestible form. The vegetables you add to the pot of broth are invaluable. And the best part? Making homemade broth is one of the most inexpensive ways to provide nourishment to yourself and to your family members.
Look into buying Beef Soup Bones. There’s still a little meat on the bones (more on that later), but mostly you’re just going to pay a small amount for a package of bones. Cook those mineral-filled-bones in a pot with water and veggies, and you’ve just created several jars full of nutritional goodness for a very tiny amount of money.
Here’s how I make Beef Broth. As you can tell from my collage above, my process is very fancy and exact:
1. Place thawed or frozen beef soup bones into a large kettle or stock pot.
2. Add, to your heart’s content, chunks of onion, carrots, leeks, celery and/or any other veggie you enjoy in your broth.
3. Fill your pot with water.
4. Sprinkle liberally with sea salt.
5. Cover and simmer pot of water/veggies/soup bones for 4-6 hours. Or more. Or less. Or whatever works for you.
6. Remove soup bones from pot. Pull cooked beef off the bones with a fork, and set meat aside for soup or salads.
7. Blend liquid and vegetables together until smooth.
8. Allow broth to cool, then refrigerate or freeze until you are ready to use it to make soup, cook rice, or add it to a recipe.
That meat you’ll pull off the bones? It tastes incredible because it’s right by the bone and has been cooked low and slow. I love it in chef salads. I also snack on it as I’m pulling it off the bones.
Why do I blend all the veggies into the broth? Because after 6 hours of simmering, they are mushy. When I blend them in, they just become part of the nutritious broth. Depending on the number of carrots I use, my broth might turn orange. No matter. It’s delicious.
Once you’ve made Beef Broth, what can you do with it? You can use it to make Beefy Vegetable Soup. You can also use it in any recipe that calls for chicken broth – like my Cheeseburger Soup or Pizza Soup. Cook rice in broth for extra nourishment and flavor in a side dish – or add that wonderful rice to Cheesy Beef and Rice. Follow my instructions for Chicken Noodle Soup, but instead use beef broth and the meat that came off the bones for Beef-n-Noodles.
What other ideas do you have? What ways do you use Beef Broth?
Isn’t this a wonderful way to be healthy and save money at the same time?!
Original article and pictures take heavenlyhomemakers.com site
One of the many herbs I grow in my garden each year is basil. My family can’t get enough of it for pesto, in sauces, capresse salads and more! Today, I am going to share with you how to make basil butter so you can enjoy this delicious herb all year long.
I love making basil butter to not only freeze for winter, but to spread on hot, fresh made french bread as well. You can use it on pizza dough; just brush it on before baking. Use it to top hot rolls or biscuits out of the oven. I also like tossing fresh hot pasta with basil butter, and a few chopped tomatoes for a quick lunch.
Another great use for basil butter is melting into mashed potatoes or in croquets.
It’s great as a spread on sandwiches like grilled cheese, too!
Here’s how to make some for yourself! First, you want to start with room temperature butter (salted preferred) and fresh picked and washed basil. Or, you can grab some from the farmer’s market or grocery store. It’s best if it’s fresh, and room temperature. I found that “cold” basil makes it really hard to chop up.
Add the softened butter to the food processor.
You can also use a mixer, but you will need to chop the basil first. As the butter is processing, add the basil. Process for 2-3 minutes, 20 to 30 seconds at a time to incorporate all the ingredients. It can get a bit “mushy” at first, and you may need to move the butter around a bit manually to help get it all incorporated. You don’t want it to go too long in the processor at any one time, or you risk melting the butter. You only want it soft, not melted.
You can freeze for up to a year, or use right away. Viola! Basil Butter! Have you made basil butter before? What did you use it on? Be sure to pin this for later.
Original article and pictures take thehomesteadinghippy.com site
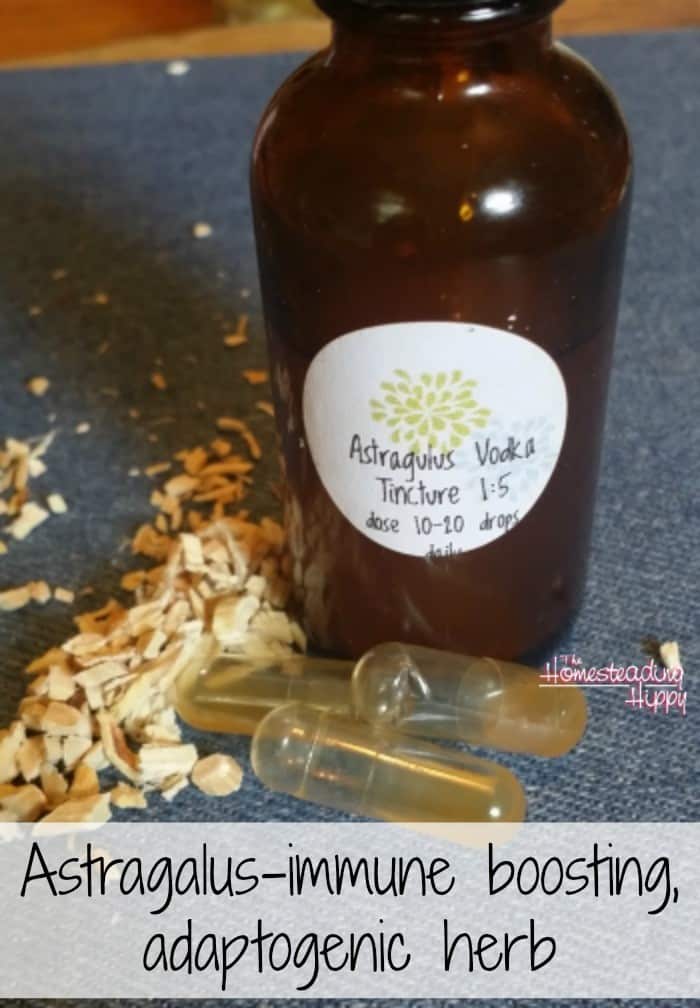
Astragalus is a Chinese legume, often used in culinary medicine in healing soups or other nourishing foods.
It is an adaptogen, which means that it helps the body return to normal function, especially during times of stress. It is safe for most situations, even with long term use as there are no known contradications. It also has a tradition of being an immune support and reducing the severity and longevity of infections. In
this video, I am going to show you how to make an astragalus tincture.
I am using a 1:5 ratio of herbs to alcohol.
This means, that for every gram of herb, you use 5 mL of alcohol to extract the medicinal properties of the herb. You want to weigh and measure, not just eyeball this. This way, you will get a much more concise dosage each time. I like to leave the herbs in the alcohol for 30 days or so before draining them. Once you have gotten the tinctured alcohol, you can store it in a eyedropper bottle. Since it has 80 proof alcohol, the shelf life is quite long, almost indefinitely, when stored in a cool, dark place.
The dosage for astragalus tincture at this ratio is 10-30 drops daily.
This is based on a 150 lb. adult, taking it 2 times daily. My children do not need as much, so their dose is only 10-20 drops once a day. Since I place the tincture into the
capsules, I put 10 drops in each time and take a total of 30 drops per day. (My kids get 10 drops in a pill 2 times a day.) This amount works well for me, helping me with the stress of gardening, homesteading, homeschooling, running my teens to and from part time jobs and so on.
The main reason I put it into capsules is that it tastes nasty.
My children liken the aftertaste to something you would scrape off the bottom of your boot after being in the chicken coop. It’s probably pretty close, anyway. As Mr. Myagi from The Karate Kid said, “smell bad, heal good”. Let me know how you like it!
Original article and pictures take thehomesteadinghippy.com site