This is the homemade sling I used the entire time my firstborn was a baby and through most of my second daughter’s babyhood, as well.
Slings are wonderful. There are many, many benefits of babywearing. If you aren’t familiar with them, try an internet search for “babywearing”. There are many websites with lengthy lists, so I’m not going to add another.
Slings are much more versatile than Snugli-type carriers, and most are not as bulky. With a sling, the main options are usually to carry the baby in a cradlehold (good for nursing), against your chest – either face-in or face-out, on your hip,
or on your back. Many of the sling sites, including the sling sources I will offer later, provide photos and instructions for the various carries.
The most popular slings seem to be the Over The Shoulder Baby Holder (OTSBH) – a padded sling with rings and a closed tail, the Maya Wrap – an unpadded sling with rings and an open tail (THE most popular, I think), and the Didymos – a German sling with no rings (you have to tie it). You can buy the Maya Wrap at their site. The others (and more) are available from Kangaroo Korner. [Although, as far as I know, the purchasing information here is still correct, the “most popular” information is probably out-of-date, with the introduction of a number of new baby carriers on the market. I personally tried – and loved – a Kozy Carrier, which happens to be made by a mama local to me. (I still like my homemade “Maya Wrap” for a small baby, but the Kozy was great for a toddler.)]
In case you’re wondering, an open tail means that the fabric is free – you can spread it out. A closed tail means that the fabric at the end is all sewn together into a tight little package.
If you want to make your own, there are many patterns available.
Most Many of these patterns will require rings. Make sure they’re at least 1/2 an inch thick and loadbearing. You can get sling rings from Elizabeth Lee Designs’ ring page or from Sling Rings.
This is not to be construed as design or medical advice, and I cannot be held responsible for the way you make your sling. Just use common sense and remember that this has to hold your precious baby.
Being a mother has made me reevaluate the things we do in our home. One of those things is to really take a good look at the food we eat and the beverages we drink on a regular basis.
It was easy to rid our home of things like soda and candy, but it took me a while to realize that sugar was hiding in a lot more than just those obvious things. A few months ago I was at the deli ordering lunch meat and I happened to see the ingredients for the lunch meat. I would have never have guessed but there was sugar in the lunch meat! Can you believe that?! It is also in many of the baby snacks they have on the market.
After this, I became a better sugar detective. I learned how to read labels and identify the different names that sugar has. It is a tricky little substance and is hiding in most of our food.
Why is Sugar so Bad?
Sugar seems to be the newest food being victimized, but it is for good reason!
Sugar is Highly Addictive
Your body craves sugar the more you feed it. I definitely find this is true for me! When I give into my sugar cravings, I just have another one within a few hours. A recent study shows that sugar is as addictive as drugs like cocaine, possibly more so. Even just the process of detoxing from sugar causes irritability, cravings, and headaches.
Excess Sugar is the Cause of Many Ailments Like Obesity, Heart Disease, Diabetes, Cancer, and More
Our culture consumes more sugar in one day then they did in an entire year only a few hundred years ago. Sugar is not beneficial for our bodies and yet it is in just about everything.
Sugar Makes Your Brain Feel Good As it Mimics “Feel Good” Chemicals in Your Brain, but it Actually Causes You to Lose Energy
The energy perks are short-lived and come with a crash. My toddler, on the occasion that he gets sugar, tends to crash hard. He makes poor choices, cannot concentrate or focus regularly, and is all around uncooperative.
What Should I Use Instead
There are many alternatives to the normal white cane sugar we are all used to. Some of these alternatives may actually be more harmful than sugar itself!
Alternatives like sucralose (Splenda) and aspertame (Equal) are dangerous. They are known as artificial sweeteners. They are a chemical cocktail that may harm you over time. Products that claim to be sugar-free or low in sugar often have these substitutes in them. Also, many diet soda products will have them as well. Look at the labels so you know what you are putting in your body.
Are There Natural Sugar Alternatives?
Of course there are! There are many different options out there. They all taste different and many people prefer certain ones over others.
Six Natural Sugar Alternatives
Xylitol
This is a healthy alternative to sugar. Xylitol is naturally found in fibrous fruits and vegetables, corn cobs, and some hardwood trees.
Stevia
This is made from the leaves of the stevia plant. This substitute has no carbs and no calories. Easily usable for day to day things like tea.
Date Sugar
This substitute is made from dehydrated, ground dates. This is a great substitute for brown sugar.
Coconut Sugar
When the sap from the coconut is heated it, the water in it evaporates leaving useable sugar granules. Coconut sugar is an easy substitute for cane sugar.
Honey
Often you can buy this locally. Honey is a fantastic substitute for sugar in things like tea and even in baking.
Maple Syrup
Get this one locally as well, if you can. Maple Syrup has many benefits as well as being a good sugar substitute.
Using these natural sugar alternatives is simple really. For example, one of the favorite breakfast options is plain Greek yogurt with fresh fruit, like strawberries, and a little bit of stevia.
Take the time to look at what is in your food so you can make better decisions for your health. Also, find a few natural sugar alternatives that you enjoy and keep them readily available in your home. I often keep a few packets of stevia in my purse for when I am out and someone wants to grab a tea. This way I can still enjoy myself, but in a healthy way.
Which of These Natural Sugar Alternatives is Your Favorite? Which Would You Add to This List?
Original article and pictures take modernalternativehealth.com site
I am not a fitness expert. In fact, even though I was my high school valedictorian, I failed gym class in college. Life is funny like that.
Here’s why I failed. Consistency, which is sometimes the same as boredom. The class required me to come to the same room in the same building the same three days every week and do the same things on the same machines that always smelled the same…and that was not a good same smell, if you know what I mean.
Some people thrive on that…and they look buff. I don’t thrive on that…nor do I look buff. But I am trim and active. I also just turned 40 with seven children living in a travel trailer touring the country with my husband’s music mission.
What did she say? They live in a trailer? How does she exercise? How does she stay sane?
We’ll take the sanity question over at The Simple Homemaker, but the exercise question I’ll answer here with these four basic principles that apply to exercise and almost every other aspect of my life:
THH Fitting in Fitness TSHM Exercising with Jedi
My 4 Exercise (and Life) Principles
With no floor space not taken up by our 125-pound dog, and no room to wiggle without putting an elbow in someone’s eye, exercise has to get pretty creative. That’s principle number one: think outside the box.
Because our schedule and location varies week to week, day to day, principle number two is to be flexible.
Since it is obvious (remember the FAIL) that I’m not into repetitiveness, principle number three is that it has to be fun…or at least not boring or lonely.
And finally, principle number four, my favorite: it has to be able to involve the entire family.
Here’s how that works on a practical level
1. Walking.
No matter where we are, we walk. Sometimes it’s just the older set while Daddy and the littles sleep in (I wear the baby), and sometimes it’s the whole family (I still wear the baby). Sometimes it’s walking through fields, sometimes on groomed trails, and sometimes around parking lots. We try to mix up the terrain, but that’s not always realistic.
2. Play.
We don’t take the kids to play at the park. We take the family to play at the park. Sometimes it’s Mommy and Daddy shouting, “Hey, watch me on the monkey bars!” We also keep sports equipment at hand, a ball at the very least. Play like a kid and you’ll be fit like a kid. Plus small children make good weights. It’s true!
THH Fitting in Fitness TSHM Hike
3. Exercise bands.
We had a sweet piece of exercise equipment in our old life, but it grew green with jealousy watching my hubby exercise using only gravity and an exercise band. Exercise bands offer effective resistance, and are small and affordable. Plus they come in pretty colors…which my hubby doesn’t seem to care about. Silly man.
4. Squeezing it in.
We make due with the time and space we have. I call it lazy exercise. If you peek in our trailer windows, in the brief moment before we release the hound on you, you’ll see us doing small exercises while brushing our teeth, reading, waiting in line for the bathroom. With nine people and one bathroom, a person can burn a lot of calories doing the potty dance. No joke.
THH Fitting in Fitness TSHM Play
5. Taking a break.
When leisure time is exercise time, what fun it is! We hike every national park or state trail we can find on our journeys, and always have. We walk beaches, play in water and sand, climb mountain trails, explore woods, climb trees, ride horses, jump fences, you name it! I am not (NOT) athletic, but we do stay active.
6. Parking far away.
You’ve heard this one before. We use it. Okay, so the main reason I park far away is because I drive a 15-passenger “bus,” and, while I’m a safe driver, I’ve never won a gold star for my parking abilities. Still, it works. We gain extra steps during the day by walking the furthest route possible to get anywhere, taking the stairs (sometimes extra times just for “fun”), pacing, carrying music equipment in and out of venues ourselves instead of asking for help, name it!
THH Fitting in Fitness TSHM Park
7. Pedometers.
Those nifty little counters make us aware of how sedentary we’re being. If our pedometers nag caution us that we’re consistently missing 10,000 steps a day, we know we have to ramp it up. Sometimes this requires quite a bit of marching in place.
8. Never blushing.
Whether I am teaching my kids ballet in a church parking lot or we are being outmaneuvered on the jungle gym by our tribe of monkeys, we are never embarrassed to be seen in public doing whatever it is we do to stay fit. Anybody who is judging us for getting fit or for enjoying our kids has a problem that goes way beyond us. Of course, we don’t exercise to be seen either–you’ll never see us jogging half-naked down a crowded sidewalk in San Francisco. You’re welcome for that.
9. Motivation.
Ultimately our purpose for exercising is to be healthy so we can live a life of service, spending more time looking outward rather than inward at our physical struggles. Still, that’s vague. I mean, really. Our more immediate, tangible goals are being comfortable in our own clothes and lifestyles, and keeping (or getting) our dog fit. Even that isn’t enough sometimes. The biggest motivator of all for my family is that we are in training for the rim to rim hike down into the Grand Canyon and back up the other side. Not being the whiny slacker on the trail is huge motivation. Huge, I tell ya!
THH Fitting in Fitness TSHM Walk
Does it work?
I weigh less than I did in college, and, in general, have the energy to keep up with my kids. My husband’s pushing 50 and he’s a hottie. Hey, he is! And I married him so I could have the privilege of saying that out loud. I’m not in the running for Mrs. America and I could use some extra toning, but I also don’t have to soak up someone else’s sweat in the gym anymore, and I can keep up with my children. I’m good with that happy medium.
Do you think that if I send a link to this article to my gym teacher in college, he might retroactively change my grade?
What are your simple, out-of-the-box ideas for staying fit?
The Simple Homemaker Family-1
Christy Bagasao writes with understanding and humor about simplifying life at The Simple Homemaker. Once weighed down by unrealistic expectations, life’s overwhelming demands, and the burden of clutter, Christy has learned to make life less complicated and find joy in the simple things. She and her contemporary Christian musician husband, Stephen Bautista, “roadschool” their 7 children, ages 1 to 16, on the open road as they tour the country full-time in a travel trailer for the music mission.
Get Fit with Fit2B! For just $14.99/month, Fit2B is a fraction of the price of a gym membership. But Humbled Homemaker readers get an even better deal! Use code humbledhomemaker to get 30% off a 1-year membership!
Fitting in Fitness at The Humbled Homemaker
Erin’s Week 3 Update:
Weight: I was really disappointed that I haven’t lost weight this week. Although, I think I may just need to give up weighing or pick a time/day to weight and stick to it. Every time I get on the scale, it says something different.
Inches: I lost 1 inch. Woo hoo! This made up for the disappointment in not losing weight this week.
Diastasis: It seems like it’s down to about a 2?
Biggest Challenge: Burn Bootcamp is at 5:45 every night…which is really, really hard for a mom to attend. When I go, I have to rush out the door as soon as my husband walks in the door and miss dinner with the family. That’s not good at all. Fit2B is a lot more feasible at this point.
Week 3 Mini Challenge: Work out 2 times this week. (That’s it! Two times!)
Matt grew these beauties in our garden this summer!
Will your feelings be hurt if the sweet potatoes for your holiday meal don’t have marshmallows?
I don’t want marshmallows. My husband doesn’t want marshmallows. I’ve never even liked marshmallows (even in a s’more). But some people want marshmallows.
For example:
According to my 13-year old, the sweet potato recipe below isn’t sweet enough. Therefore I asked him, “Do you think I should add more maple syrup? Maybe even some brown sugar? Extra butter? Do you think I should salt it to bring out the natural sweetness? What do you think this recipe needs?”
With a grin, he quietly said, “Probably just marshmallows.”
Stinker.
I do love to accommodate, especially for a holiday. Therefore, even though I vowed I never would, I looked again at homemade marshmallow recipes. Maybe for a special occasion, I thought, I could go to the trouble to make some. I searched for the marshmallow recipes that said “easy” and “quick.” But once again, I realized why I’ve never wanted to make homemade marshmallows. They might be easy, but they aren’t quick. They instruct, “Stand and whip the mixture until your legs cramp and you can no longer remember your name.”
Have I mentioned I don’t even like marshmallows?
I tell you what. If you want to add marshmallows to this recipe, I won’t even care. You can make them homemade. You can buy a package of them at the store. I will probably just skip the sweet potatoes and eat extra Green Bean Casserole. We can all still be friends. The good news is that this recipe (without the marshmallows) is incredibly simple to make, and you can make it ahead if you like!
Simple Whipped Sweet Potatoes
Scrub sweet potatoes and place them in a covered baking pan.
Bake them in a 350° oven for about one hour or until they are tender.
The skins should peel right off!
Place peeled potatoes and remaining ingredients into a high power blender or into a mixing bowl. Blend until smooth either with a blender or a hand mixer.
Serve right away or follow directions below to prepare ahead of time.
Make Ahead Whipped Sweet Potatoes
Make sweet potatoes according to directions above. Allow them to cool completely. Cover and refrigerate for up to two days before rewarming to serve. Or, cover and freeze the dish for up to 3 months. To reheat and serve, thaw potato dish, cover, and place in a 350° oven for about 30 minutes or until they are warm through and through.
Truly, you will want to embellish these sweet potatoes to fit your tastes. Add more sugar if you like. Toss on some marshmallows (I’ll look away). It’s a holiday! Do whatever you enjoy!
Are you a fan of marshmallows?
Here are the quick links to all the recipes we covered in this series:
Today we are talking about kids and vegetables. I don’t know about you, but I am ALWAYS looking for new ways to get my kids to eat their vegetables. Did you know that today, 9 out of 10 people in the United States do not get the proper amount of vegetables, according to The State of the Plate report? Thankfully, I was raised by a mom who instilled a love of vegetables in myself so I am happy to use my mom’s own tips and tricks to help develop a love for veggies in my own children. In this post, we are sharing some simple tips & an easy recipe to help encourage those kids to eat veggies!
Tips to Get Kids to Eat Vegetables : The Chirping Moms
10 Tips to Get Your Kids to Eat their Vegetables
1. Take them shopping & let them pick their vegetables. Let them pick the vegetables while you are at the store. Knowing that they picked the vegetable might make them more likely to eat it!
2. Serve a variety of vegetables often. At almost every meal or snack time (besides breakfast!), I try to make vegetables an option. This is one thing that my mom did for us growing up so I have it instilled to serve vegetables at every meal. I try to offer a variety of vegetables & thankfully I often buy what is part of the weekly specials at the store, which often rotates & allows me to provide a variety for my kids at an affordable price.
3. Let them help you cook & prep meals. Allowing my kids to help dump the peas into the soup & attempt to peel the carrots gives them more hands-on experience with the vegetables & hopefully makes them more likely to eat what they make!
4. Add them to meal favorites. Add vegetables to kid favorites which you know they will always eat. Put peas or chopped broccoli into mac & cheese. Serve grilled cheese with tomato soup. Add peppers to quesadilla. Since they already love the meal, a few vegetables hopefully won’t turn them away!
5. Give them the choice of vegetables. Often for lunch, I pack a vegetable as a side dish to their meal. I just let them choose between what we have. For example, carrots or celery OR tomatoes or cucumbers. They pick one & that’s what they get!
6. Serve with dips. My kids love dip so they will eat about anything with dips. Serve vegetables with ranch dressing, hummus, spinach dip, or other favorites in your house!
7. Try different “sneaky” recipes. There are so many great “sneaky” recipes out there where you can mix purees & chopped vegetables into meals and kids won’t even notice. Pick ones that appeal to you and the kids and try them! We love some of the hidden veggie breads and always add greens to our smoothies.
8. Be willing to try new things with your kids. Try new vegetable recipes & preparations along with your children. Let them see you eating the veggies & they may want to try it to!
9. Make veggies visually appealing. Make a vegetable kabob or make a smiley face out of your vegetables. Try to plate the vegetables so kids will want to eat them. Be creative & have fun!
10. It’s okay to say “no” : If there is one thing that my mom has taught me, it’s okay if they say no and don’t like it. Keep offering & trying new things. Their taste buds will grow & change and don’t ever give up on those veggies!
Today, I want to share one of our favorite after school veggie-packed snacks with you: Southwest Salsa Dip. This dip is perfect for appetizers, served with tacos and quesadillas, & perfect for a fun and veggie packed snack for kids!
Southwest Salsa Dip : The Chirping Moms
Southwest Salsa Dip is awesome. Not only does my husband & love it, but it’s perfect for my kids. It’s not too spicy AND the dip includes two things that many kids don’t love to eat: an array of vegetables and a protein source, the beans. This recipe can be made in five minutes, perfect for busy moms. By using the Birds Eye Southwest Blend bag of vegetables, there is no more prep work in chopping onions and peppers.
So now, here’s the recipe for Southwest Salsa Dip! Southwest Salsa Dip
Stir all of the ingredients (except the Italian dressing) in a big bowl until well mixed.
Add the Zesty Italian dressing & stir.
Let chill overnight or for several hours before serving.
For more veggie-loving tips & a few easy simple recipe ideas , make sure to check out the video below from the host of FoodNetwork.com’s web series The Picky Eaters Project, Melissa d’Arabian. I can’t wait to try her tip on roasting frozen vegetables & adding parmesan cheese, because roasting fresh vegetables is one of my go-to side dishes for dinners!
Birds Eye has partnered with Melissa D’Arabian, celebrity chef & mom of four, to make a difference and help moms with the dinnertime dilemma of getting a balanced meal on the table every day. With over 40 unique blends year round at great prices, Birds Eye frozen vegetables are a nutritious, affordable, and tasty item to have on hand in the kitchen. Birds Eye and Melissa are teaming up to encourage families & kids to eat more vegetables, one bite at a time. Step Up To the Plate is Birds Eye’s long-term commitment to reshaping kids’ veggie perceptions and getting children to like veggies for life. So take a stand to step up to the plate & encourage a love for vegetables in your own kitchen. We would love to hear your own “veggie-loving” tips that you try with your own children, so please feel free to leave a comment with your own tried & true veggie-loving tips and recipes!
I was selected for this opportunity as a member of Clever Girls Collective and the content and opinions expressed here are all my own.
Original article and pictures take thechirpingmoms.com site
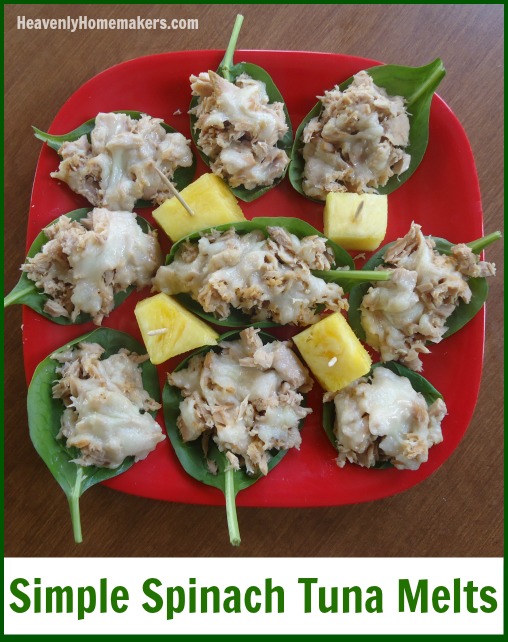
Simple Spinach Tuna Melts – Don’t Knock it Until You’ve Tried It
Now that we’ve realized how easy it is to add spinach to our meals, I think we’re working it onto our table at least once each day. The day these Spinach Tuna Melts were invented, Matt was the guy in charge of figuring out lunch.
We almost always have several cans of tuna on hand, our freezer held plenty of cheese, and I think it goes without saying that we had spinach in the fridge. Here’s what Matt came up with:
These were awesome. I lost track of how many he had to make, as these are one or two bite tuna melts – and I’m not sure if you’ve seen our boys eat lately, but let’s just say they eat a lot of bites at each meal. We went through a lot of spinach, and not one boy complained that there was no bread involved in this meal.
This meal is perfect for days you’re limited on time to cook, days you don’t have meat thawed, and days you want extra nourishment in the form of spinach. (Every day is the day you want extra nourishment in the form of spinach. Join the spinach-eating bandwagon.)
How to Make Spinach Tuna Melts
1
Open and drain a can of tuna. Use a fork to separate the tuna pieces, then place about a tablespoon on each leaf of spinach. Top with about a teaspoon of shredded cheddar cheese. Place prepared spinach/tuna/cheese on a baking sheet and broil in the oven for 1-2 minutes until the cheese is melted.
One 5-ounce can of tuna makes 6-8 Spinach Tuna Melts. If feeding teenage boys, open many cans of tuna and be prepared to make many pans of tuna melts.
So there you go! A super easy meal you can make that packs a big nutritional punch.
How are you doing on eating spinach? Have you found fun ways to work it into your meals?
Original article and pictures take heavenlyhomemakers.com site
Once again, a Simple Recipe saves the day. Three cheers for Simple Pizza Chicken Bake! (Hip, hip…okay, let’s just get to the recipe.)
Truth: I have been too busy to cook lately. Why? Well, for one thing, I’ve been quite occupied by writing about how to put simple meals on the table.
Do not miss the irony of this.
Oh my dears. We hosted people for Thanksgiving, then turned right around and traveled to Kansas. We arrived home a few days later happy and tired, and very behind on all of our work. We began to play catch up while getting ready for Christmas and finishing up our kids’ semester of school work. Our youngest has been in our big downtown Christmas play, so we’ve been running to practices and performances and hosting family who came into town to watch. We hosted Christmas parties for two groups of college students, and enjoyed a big basketball triangular in town with the team our two middle boys are involved with.
Did I mention we’re getting ready to drive to California to see family at Christmastime?
All this fun in the midst of trying to keep up with everyday life has threatened to push me into the next level of crazy-head. (No one wants to see what that looks like.) So when Matt got home from his current job site one day last week and asked how he could help with dinner, I looked up from my computer (where I was editing a post about keeping dinner simple) and said, “I’ve been too busy writing about how to put food on the table easily to actually get food on the table. I love you. I’m hungry. Malachi needs to leave for practice in 15 minutes.”
Fun times. I have no recollection of what we actually ate that night. But no one starved, and I think I’m back on track this week to at least have the brain power to throw something in the crock pot or oven at a reasonable time.
Keep this new Simple Recipe in your back pocket. It truly is a no-brainer, and maybe it’s just me, but I think we can all use no-brainer recipes this time of year and always.
Cut chicken into thin strips and spread them into the bottom of a 9x13 inch baking dish.
Spread pizza sauce over the chicken.
Sprinkle with cheese.
Top with pepperoni.
Bake, uncovered in a 400 degree oven for 30 minutes or until chicken is no longer pink.
I’m happy to report that the work I was behind on is almost caught up, and the work I’m trying to get ahead on is coming along at a nice pace. I got to a good enough point a few days ago that I told Matt, “Hey, I think I’ll be able to go to California with you for Christmas after all.” Now here’s hoping he gets all his work done so he can go too.
Other Simple Recipes I’ve Shared Recently:
If you haven’t joined Simple Meals, we invite you to come aboard! We’ll provide the plans. We’ll provide the recipes. We’ll provide the grocery list. All you have to do is take a deep breath and enjoy how simple your life in the kitchen has become! Join Simple Meals!
Original article and pictures take heavenlyhomemakers.com site
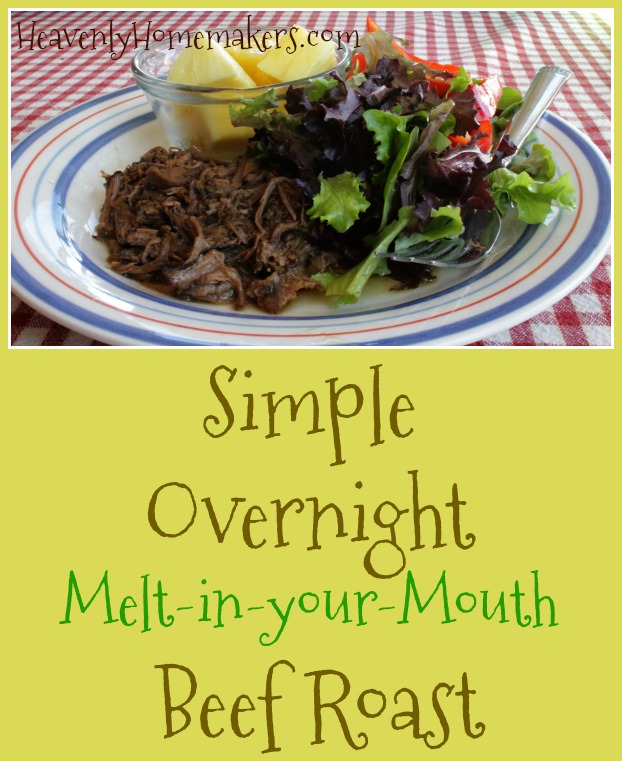
Remember the Simple Overnight Saucy Crock Pot Chicken recipe I shared? That’s becoming one of my new go-to recipes to help me feed my family on busy days. This, of course, led me to experiment more with the idea. What else, I wondered, could be cooked in the crock pot overnight to make my day simpler tomorrow? Well. One result this Simple Overnight Melt-in-Your-Mouth Beef Roast.
Just like the chicken, you can put your roast into your crock pot directly from the freezer. It thaws and cooks overnight. The next day, the meat will fall apart and melt in your mouth!
Why would we want to cook meat in our crock pots overnight? Let me count the ways:
When we wake up to cooked meat, we have something good to pack for lunches if that is a need.
We can turn the crock pot to the “keep warm” setting and have meat waiting for us later at lunch time at home.
We can turn off the crock pot and cool the meat to eat in big chef salads at lunch time.
We can put the meat in the fridge to pull out any time we need it during the next few days.
The concept is so simple, and it presents so many easy meal options!
This roast is delicious no matter if you serve it with mashed potatoes and veggies or if you serve it in a chef salad. The flavor is incredible!!
Have you tried cooking meat in a crock pot overnight? What has your experience been like?
Here are more Simple Recipes you’ll love!
It’s recipes like this that makes Simple Meals such a life saver for families. We’ll provide the plans. We’ll provide the recipes. We’ll provide the grocery list. All you have to do is take a deep breath and enjoy how simple your life in the kitchen has become! Join Simple Meals!
Original article and pictures take heavenlyhomemakers.com site
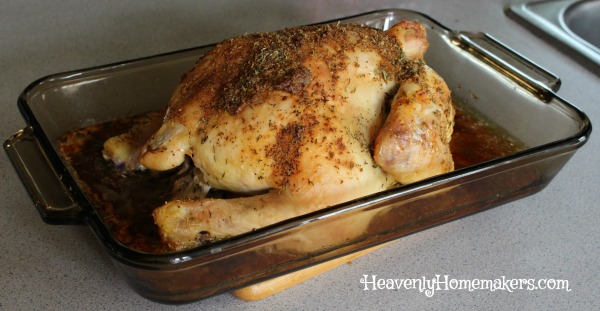
Brace yourselves. Today we’re going to learn to butter up a chicken and rub him down with herbs and spices. This might not be the most precious moment of your day, but I guarantee you will find it to all be worth it after you taste your delicious Oven Roasted Rotisserie Chicken.
Now, I’ve buttered many a slice of bread in my day. I would even venture to say I’m pretty good at it. But never before had I buttered a bird – until the first day I made this chicken.
Recipe research told me to “brush on the butter.” But that would require that I melt butter in a saucepan and dirty up a pastry brush. In the name of lazyness simplicity, I just slapped butter on my bird with a butter knife.
Did it work? Meh, good enough. I figure what didn’t get spread on smoothly will just melt and drizzle itself over the skin while baking.
Now, beyond the butter, we’ve got to do a little chicken massage for this recipe too. Don’t freak out about this because your hands will wash up just fine afterward. Sure, rubbing spices over a raw piece of meat in the shape of well, a chicken, will feel strange. But you can do this.
Here’s why the buttering up and the rubbing down are well worth your few minutes awkward chicken moments:
You will create a most delicious meal for your family. This chicken is incredibly juicy and flavorful.
All the “effort” you put forth to create this chicken will take less than 10 minutes.
You’ll save money, because making this chicken at home costs less than buying one pre-made.
So gather up your chickens and let the fun begin.
Simple Oven Roasted Rotisserie Chicken
Oh yes. I failed to mention the “reach up into the ‘cavity’ of the chicken and pull out the little bag of gizzards.” I guess I was trying to stop while I was ahead so as to avoid scaring you away from this recipe. But alas, this task cannot be avoided.
I’ve found it’s best to go ahead and say “eeeewwww” while completing this gizzard removal step, because that’s how I feel and it truly is helpful to express oneself verbally during moments of trouble.
So before you butter and rub your chicken, get the gizzard step over with. After that, you will feel empowered to do anything. All hail queen/king chicken preparers. We are all super heroes.
Keep this meal simple by serving this chicken with tossed salad, a steamed veggie, and fresh fruit (like strawberries, pineapple, or cantaloupe).
Make your life simpler by joining Simple Meals. Then you won’t even have to think about what to cook or what to buy because we do the work for you every single week!
Check out how long this list of Simple Recipes is getting!
Original article and pictures take heavenlyhomemakers.com site
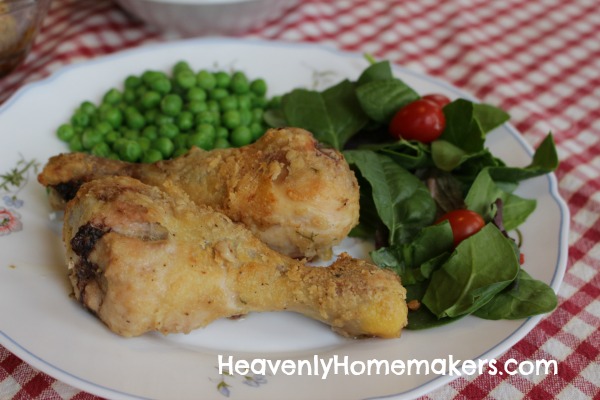
My men-filled family loves fried chicken. Who doesn’t?
I used to stand at my electric skillet every couple of weeks frying a bunch of chicken legs, and I’d make a pot of mashed potatoes, use the chicken drippings to make gravy…oh I’d go all out. I did it because my family loved it and I love them.
It’s not that my family doesn’t still love fried chicken and it most certainly isn’t that I don’t still love my family. But at this point in my life, spending over an hour cooking one messy meal just isn’t something I can do. We’ve missed the fried chicken, for sure. But we all like it when Mama can use her nice words, so in a joint effort to keep me sane, no one has complained too much.
I finally decided to experiment with Oven Fried Chicken, though I didn’t see how it could possibly be as good as “actual” fried chicken. My family all agrees that it’s not...quite as good as actual fried chicken. But when the alternative is NO fried chicken, all six of us rally behind this and appreciate its simplicity and goodness.
Simple Oven Fried Chicken
You might be wondering, as you look at the pictures above, “WHERE are the mashed potatoes??!” Where, indeed. But we went through all this a few days ago when I admitted that I’d broken up with mashed potatoes after years of happiness. We’ve agreed to remain friends, but for now, when I make this Simple Oven Fried Chicken, I stick with simple sides that take no effort. (I mean, if I don’t have time to make fried chicken, I surely don’t have time to make mashed potatoes.)
I guess it could be said that now that I’ve discovered this Oven Fried Chicken recipe, I’ve also broken up with “real” Fried Chicken. (Don’t worry Fat Bombs. I’ll love you forever. XOXO.) But at least this Oven Fried Chicken is the next best thing so we can keep our kitchen life simple and eat our chicken too.
Here are more Simple Recipes you’ll love!
Truly, all of these recipes are ridiculously easy, good, and nourishing.
If you haven’t joined Simple Meals yet, you are missing out on SIMPLE becoming even MORE SIMPLE! (It’s actually possible. I do the work for you!) Check it out here. Get an full Simple Meals Planning Packet in your inbox every single week!
Original article and pictures take heavenlyhomemakers.com site
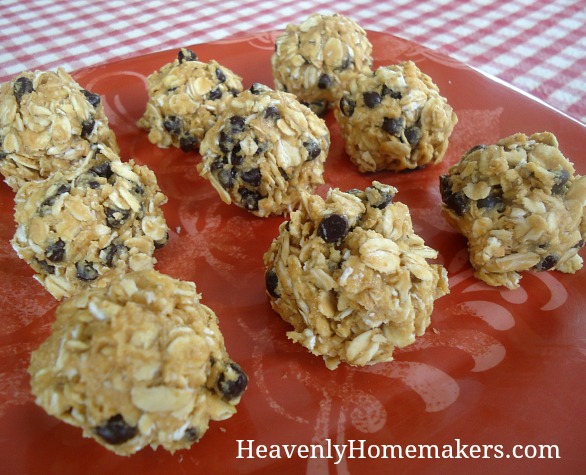
This is a non-recipe recipe. This means that you can sub out ingredient for ingredient as you have preferences, allergies, and stock piles. Love flax seeds? Throw ’em in. Can’t have peanut butter? Use the nut butter you like. Prefer maple syrup? Use it instead of honey. Running low on raisins? Oh well. Don’t like chocolate chips?
Wait. Who doesn’t like chocolate chips??
Here’s how this non-recipe works:
Plop 1/2 cup peanut butter (or whatever butter) and 1/4 cup honey (or maple syrup) into a bowl. I really do mean plop. Just eye-ball it. An exact 1/2 cup of peanut butter is not necessary here.
Stir in 1 1/3 cups total of whatever dry ingredients you want. Oats, flax, sunflower seeds, sesame seeds, raisins, chocolate chips, anything else you like.
Scoop the mixture into balls and enjoy.
Store them in the refrigerator.
Here’s the printable version:
Simple No-Bake Granola Bar Bites
As you can see, these Granola Bites are easy to put together in just a few minutes. They are great to take on the road or pack in a lunch. Of course, if you just want to sit right down at your kitchen table and eat them, that’s okay too. You could even make them at night and eat them for breakfast the next morning. Basically, this is one of the most versatile recipes in your whole wide kitchen. Everyone wins!
Original article and pictures take heavenlyhomemakers.com site
When it comes to kitchen appliances, I’m sure most of us would agree that we don’t want any gadgets that only serve one purpose. Never shall I own a Quesadilla Maker or a Hot Dog Toaster (yes, that is a real thing).
But a waffle iron? Sure, we can assume they only make waffles and therefore wonder if they are worth the purchase because of the single job they perform. But guess what? I’ve been on a “what else can I make in my waffle iron?” kick lately, and I’m here to share some delightful waffle iron hacks!
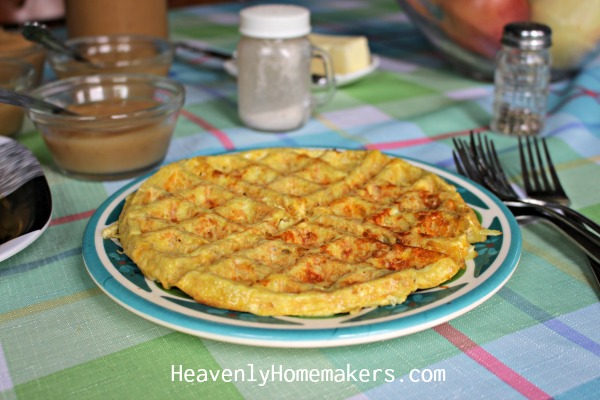
The Waffle Iron: Good for so much more than just making waffles. Check it out…
It looks like a regular waffle. But it’s eggs, cheese, and hashbrowns, and it’s ridiculously good.
Why Waffle Iron Experiments?
Perhaps it’s the ease of making food in a waffle iron, the fact that I can easily offer a “made to order” option for picky eaters, and that I can make as many “waffles” that we need as we need them. Using a waffle iron instead of an oven on a hot day is also a huge perk because it doesn’t heat up the house!
And the best part: it’s fun. Somehow making food in the shape of a waffle is more fun than making food in the shape of normal.
Earlier this week I shared how you can make Waffle Omelets (otherwise known as Womelets). Later I will show you how you can make Waffle Muffins (perhaps we will call them Wuffins, though we hesitate to get carried away). And who knows what else this summer will bring as we avoid turning on the oven and test our waffle iron to the limits.
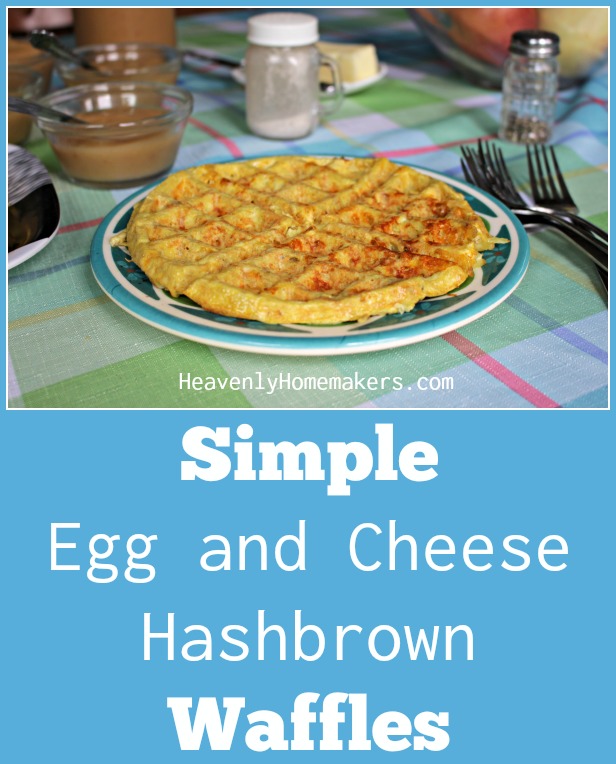
Today, I show you how to make Egg and Cheese Hashbrown Waffles. These are hearty and filling, naturally gluten/grain free, can be adapted for each family member’s preferences, and are fun to serve. The only difference is that there is no obvious way to cleverly rename these because saying Washbrowns is just weird.
Simple Egg and Cheese Hashbrown Waffles
1½ pounds frozen hashbrowns (or freshly made, see link below)
Sea salt and pepper to taste
Add in options: chopped meat, chopped veggies such as onions, pepper, mushrooms, or asparagus
Whisk eggs and stir in all other ingredients.
(For picky eaters, leave the add-in options separate to add to each waffle individually.)
Scoop ½-3/4 cup of egg/hashbrown mixture into waffle iron.
Top with add-ins.
Close waffle iron and cook for 3-5 minutes until brown and crispy.
Look out because I’m on a waffle iron kick. What else will I come up with?!?!
Have any ideas for me? What creative ways have you found to use your waffle iron?
If you haven’t picked up your copy of The Prayer Mugs we’d love for you to get this 96-page parenting prayer packet full of lessons, stories, encouragement, printables, scripture, study guides, and prayer prompts! (Read more about this beautiful resource here.)
Original article and pictures take heavenlyhomemakers.com site
There are definitely seasons that lend themselves to “I’m booooored, Mom” kind of phases, like the hottest days of summer, and the coldest days of winter.
To help combat the dreaded kid boredom, I want to show you a very easy, very cheap way to keep your kids entertained and their imaginations soaring.
Today, we’re going to make a quick kiddie tent that shouldn’t cost you more than $15!
Here are the supplies you’ll need:
• (4) 1X2X4 whitewood boards
• (1) ½” X 48” dowel rod
• (2) 5/8” X 48” dowel rods
• twin flat sheet
Here’s how to put it together:
1. Measure 6” down from the end of each 1X2X4 board and, using a ½” spade bit, drill a 1/2” hole through one end of each whitewood board.
2. Measure 3” down from the opposite end of each 1X2X4 board and, using a 5/8” spade bit, drill a 5/8” hole through the end of each whitewood board.
3. Take two of the boards and slide one end of the ½” dowel rod through each ½” hole at the top of each board. Do the same thing with the remaining boards on the other end of the ½” dowel rod.
4. Now take your 5/8” dowel rods and insert each end into the holes at the bottom of the whitewood boards on each side of the tent structure.
5. Here’s where you can get as fancy or as simple as you want. I chose the simple way: I took the twin sheet and I draped it over the dowel rod at the top of the tent. Then I just turned each end of the sheet under each of the dowel rods at the bottom of the tent and secured the sheet with several large safety pins.
If you’d like to get fancy, cut your sheet down to size (45X86) and sew a 1” hem on the long sides. Then sew a 1” hem on the short ends of the sheet, creating a “tunnel” for the small dowel rods to run through at the bottom of the tent. You’ll attach your “fancy” sheet by draping it across the top of the tent and then running your small dowels through the bottom edges of the sheet first before you insert them into the holes in the bottom of each whitewood board.
6. Finally, make a simple bunting (or have your kids make one with scrapbook paper and attach it to some yarn!) and string it across the sides of the tent! You’re finished!
Now your kids have an easy, sweet little fort to play in! This tent would be fun to put outside in the shade so the kids can play in the yard.
I had to set mine up in our living room because we’re getting torrential amounts of rain and our backyard is a swamp, complete with Texas-sized mosquitoes. Yuck. But, the kids don’t mind and they love to watch movies while lying in their new fort!
What’s great about this little tent is that it’s super simple to break down and store when the kids aren’t using it. And using a sheet as the tent fabric makes it easy to throw in the wash if it gets dirty. I call that a win for kids and for moms!
Happy tenting!
Original article and pictures take redandhoney.com site
Simple Crock Pot Chicken Soup with a Kick – 4 Ingredients!
It’s as if this soup knew we needed it in our lives. As if somehow, in the mysterious ways only known to soup, it recognized that many days of the week are busy, and our time in the kitchen is limited, but we still want a hearty meal as the sun goes down. Therefore, on the day we needed it most, this soup arrived, begging us to make it on a morning we are still half-asleep and thinking about the other items on our agenda for the day.
This soup! I don’t think I’ve ever made one that takes less effort or energy. I didn’t even thaw the chicken ahead of time. I had all four ingredients already in my home because I almost always have:
boneless chicken
salsa
chicken broth
cheese
I didn’t have to chop, stir, measure, or think. I put the ingredients into my crock pot, plugged it in (always recommended), turned it on, and walked away. Six hours later we sat down and ate soup.
If all of life was as easy as this soup, we would all turn into lazy, squishy people. Seeing as most days we are going-going-going, I don’t think we need to fear the squish. But this soup? It’s got our back at the end of a busy day, because it recognizes all we do and it’s here to say, “Dinner? No problem. I’m here for you. Sit down with your family. Eat. Enjoy.”
What to serve with this Chicken Soup with a Kick:
Tossed salad
Fresh fruit
Consider adding to your bowl of Chicken Soup with a Kick:
Crushed tortilla chips
Sour Cream
Sliced Olives
Black Beans
Corn
This soup will work wonderfully to serve to guests. It is seriously delicious and need I remind you? You don’t have to thaw the chicken ahead of time. I mean, you can if you want. But why plan ahead when this soup doesn’t require it?
This recipe, for sure, will be one of my go-to recipes this fall and winter.
Hopefully you also saw the Simple Baked Salmon and Asparagus recipe I posted earlier this week. If you’re wondering if there’s some kind of theme going on – perhaps a conspiracy to force us put healthy meals on the table with very little effort – you are right on track. Meals that take just a few minutes to prepare. Healthy food ideas and guides that prevent us from spending hours in the kitchen. Plans to save our family time. Oh yes. This is definitely in the works.
Check it out! Cooking Guy (my friend’s son) is at it again. He’s four. He made this soup. See? I TOLD you it was simple!