5 Easy and Healthy Breakfast Ideas (Weight Loss Help)
Need weight loss help but running out of healthy eating ideas?
Healthy breakfast recipes are the hardest to come by. Although breakfast is (still) the most important meal of the day, it's also one you have the least time to prepare.
No worries. Look below for healthy breakfast ideas--just on mornings that you need to rush out the door.
1. Egg White French Toast with Banana, Real Maple Syrup and Cinnamon
Easy, yummy and nutritious--just how healthy breakfast recipes should be.
Regular meal plans should return in no time, so see you soon.
Original article and pictures take cleaneatingmealplan.blogspot.com site
5 Day Clean Eating Lunch Menu That Is Easy to Prepare
Ingredients:
1 organic chicken breast
1 T butter
salt & pepper to taste
For the Salad:
1 heads of romaine lettuce, shredded
3 hard boiled eggs, chilled & sliced
3-4 slices nitrate-free turkey bacon
1/2 cup grape tomatoes, halved
1 avocado, diced
For the Dressing:
Instructions:
Preheat oven to 450℉, and generously grease a baking dish with butter.
Place the chicken breast bone in the dish and brush with melted butter. Season with salt and pepper to taste and bake for 45-60 minutes depending on the size. Remove the breast from the oven and let it rest for a few minutes.
While the chicken is cooking, prepare the rest of your ingredients. Chop your veggies, cook the bacon, and peel & slice your eggs.
Create a simple vinaigrette by combining olive oil, apple cider vinegar, mustard, honey, and salt and pepper to taste in a small bowl and whisk together.
Carefully slice and cut chicken into bite-sized pieces.
Prepare your salad by combining a bit of each ingredient in a medium bowl, drizzle with the vinaigrette, and enjoy!
Tuesday
Ingredients:
1/2 cup water
1/4 cup lemon juice
2 teaspoons minced garlic
1/4 teaspoon salt, divided
1/4 teaspoon freshly ground pepper
1 pound chicken tenders
1 medium tomato, chopped
1 cup chopped cucumber
Instructions:
Bring water to a boil in a small saucepan. Stir in couscous and remove from the heat. Cover and let stand for 5 minutes. Fluff with a fork. Set aside.
Meanwhile, combine lemon juice, oil, garlic, 1/8 teaspoon salt and pepper in a small bowl.
Toss chicken tenders in a medium bowl with 1 tablespoon of the parsley mixture and the remaining 1/8 teaspoon salt. Place the tenders in a large nonstick skillet and cook over medium heat until cooked though, 3 to 5 minutes per side. Transfer to a clean cutting board. Cut into bite-size pieces when cool enough to handle.
To assemble wraps, spread about 3/4 cup of the couscous mixture onto each wrap. Divide the chicken among the wraps. Roll the wraps up like a burrito, tucking in the sides to hold the ingredients in. Serve cut in half.
Notes:
Keeping the filling inside a wrap or burrito can be a challenge, especially if you’re on the go. That’s why I recommend wrapping your burrito in foil so you can pick it up and eat it without losing the filling, peeling back the foil as you go.
Using leftover rotisserie chicken or leftover chicken of any kind will work just as well in this recipe.
We always have brown rice leftover at my house. Use brown rice instead of couscous so you aren’t wasting if need be.
This recipe makes four servings. Make two and save the extra for this weekend while you are out with friends or you are running errands.
Wednesday
Instructions:
Toast bread. Mash avocado with a fork and spread onto one piece of toast like you would mayonnaise. Top with chicken, tomato and the second piece of toast.
1/2 cup (2 ounces) shredded reduced-fat sharp cheddar cheese if wanted
To prepare salad, heat a large nonstick skillet over medium-high heat. Coat pan with olive oil. Add beef and garlic, and cook 9 minutes or until browned, stirring to crumble. Drain; return beef mixture to pan. Stir in rice and next 4 ingredients (rice through pepper). Cool slightly.
Combine lettuce and next 4 ingredients (lettuce through beans) in a large bowl; toss to combine.
To prepare dressing, combine sour cream, salsa, 1 teaspoon chili powder, and 1/2 teaspoon cumin, stirring with a whisk. Spoon dressing over lettuce mixture; toss to coat. Place 1 1/3 cups lettuce mixture on each of 6 plates. Top with 3/4 cup rice mixture and about 1 1/2 tablespoons cheese if wanted.
Makes 6 servings, so you will have plenty for dinner or lunch for the weekend!
Ready to jump start your weight loss? Check out my Clean Eating Quick Start Guide. Packed full of tips and tricks to get you on your way to eating healthier! You deserve it, mama!
Until next time…
~xoxo
Mandi
I would love to invite you to join my FB group, The PurposeFULL Woman, where we share, encourage, support and uplift each other. We share fitness tips, holistic living recipes and tips, business, anything and everything family and all the while giving you permission to be yourself. We keep it real and share on a daily basis! If you would like to join, head on over and ask to join us.
Post may contain affiliate links. By clicking on the affiliate links you are helping support my family and this blog. Thank you for clicking and buying through our links! You are truly a blessing!
5 Chair Exercises That Will Reduce Your Belly Fat While You Sit
If you are one of those people who spend most of their day sitting at work, you should definitely try the following chair exercises, as they can help you get in shape while sitting!
Reports say that the average American has only four hours of free time daily, and in most cases, this time is spend watching TV, scrolling down the Facebook accounts, and again- sitting!
What’s more, the average American mother has 36 minutes of free time every day!
Yet, you no longer have excuses, as you can work out at home, or try these amazing chair exercises!
The fitness trainer you are going to see below is Denise Austin, a popular fitness trainer, reveals these 5 simple exercises to target busy women and workaholics.
Yet, remember to always consume a balanced and healthy diet.
The following exercises will definitely make you do anything to free yourself at least for an hour daily to exercise and get the body you dream of!
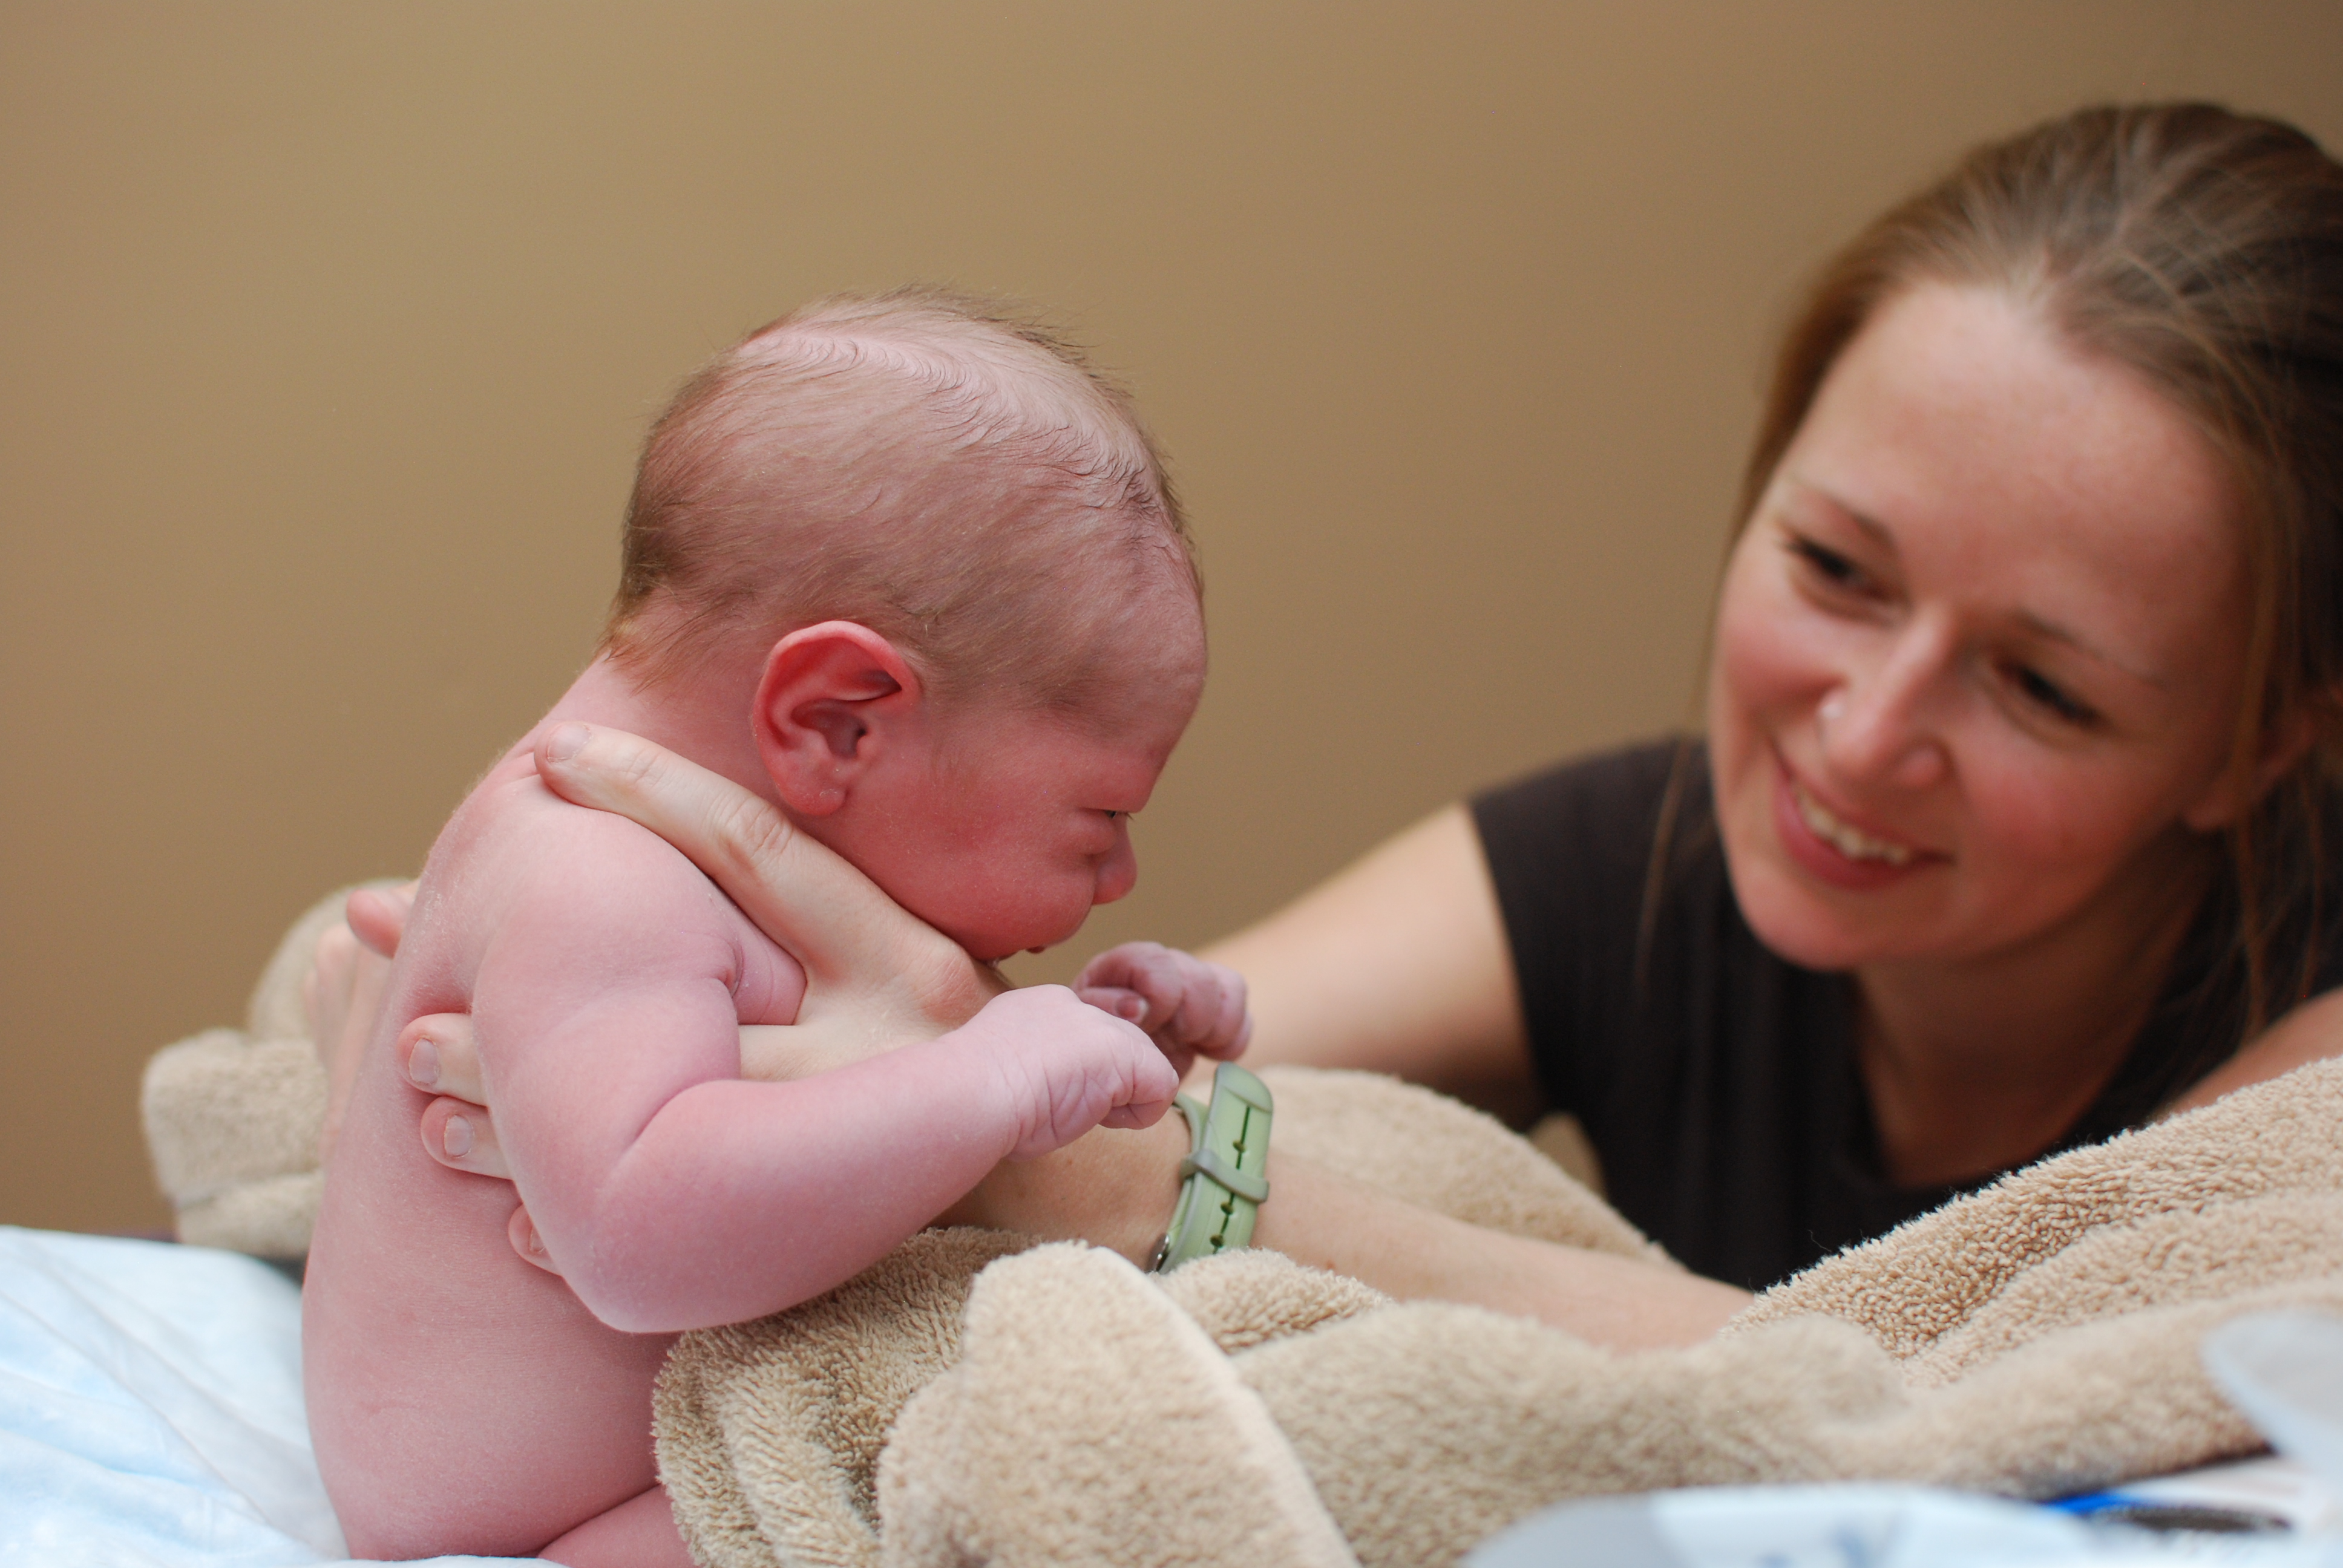
When I was pregnant with my first child I knew that I was going to breastfeed, and hopefully do it for a long time. I had no qualms about it; I thought it would be natural, easy, a wonderful bonding experience…you know, all those things you hear about breastfeeding.
You can imagine, then, my surprise and disappointment when breastfeeding didn’t go as smoothly as I had anticipated.
In fact, there was nothing smooth or easy about my breastfeeding experience with my first baby and I have since learned that not many women have it “easy” when it comes to nursing.
Don’t get me wrong; I am a HUGE proponent of breastfeeding. I believe in it and support it 110%. I nursed my daughter for 16 months and I plan on nursing my 8 month old son as long as he’s interested. However, after the struggle I had breastfeeding my daughter (my son has been easier since I had encountered many of the issues with his sister), I know how important it is to share the truth with other moms so they can be prepared.
Here, I want to debunk some of the most common myths you may have heard about breastfeeding and shed some light (perhaps also offer some hope?) for other mamas out there.
1. Breastfeeding is easy.
More often than not, breastfeeding is far from easy. There are so, SO many things that can complicate a breastfeeding relationship: lip and tongue ties, oversupply, low supply, food intolerances, nipple confusion…the list could go on.
Both of my kids had severe lip and tongue ties which caused a bad latch which caused cracked and bleeding nipples that caused severe, toe-curling pain each and every time they nursed.
Both of my kids have an intolerance for dairy so I have had to give it up each time I’ve had a baby (for a girl who loves cheese, I can’t tell you how hard it was).
To add insult to injury, I have oversupply issues. Needless to say, my breastfeeding journey has been anything but easy.
Photo credit: Wisner Photo
The more I talk to other moms, I find I’m not the only one who has had a rough time.
The good news is, there is almost always a way to work around these issues so that you can have a better, easier breastfeeding relationship.
For example, we had my son’s lip and tongue tie revised when he was 7 days old and since then nursing has truly been a breeze. No more pain, no more bad latch issues. He nurses like a champ and our nursing relationship is beautiful.
So while breastfeeding may not be easy from the beginning, it can and does get better.
A wonderful resource that discusses just about everything you’ll ever need to know about breastfeeding and its nuances is an amazing website called KellyMom. Believe me, you’ll want to bookmark this website!
(Beth’s note: that’s totally my fave site for breastfeeding advice, too! Fantastic resource.)
2. Breastfeeding is normal.
Technically, yes, breastfeeding is the way God intended for a mother to nourish her child. Breastfeeding should be seen by mothers and the world and a natural, normal act.
Unfortunately, in today’s society, a mother feeding her child is often seen by others as lewd, gross or as an obscene display of nudity. Ridiculous as it sounds, mothers all over the country are lectured, chastised, given the evil eye, even kicked out of establishments for doing nothing more than feeding her child.
This type of behavior has given moms the (untrue and unfair) idea that there is something wrong or shameful about breastfeeding, especially in public.
Hear me, mamas, when I tell you: THERE IS NOTHING SHAMEFUL ABOUT FEEDING YOUR CHILD IN PUBLIC.
You have the RIGHT to feed your baby when and where you see fit. Whether you use a cover or not, nourishing your baby is top priority…don’t let anyone shame you from doing what you need to do.
Photo credit: Fresh Light Photography
3. Breastfeeding always fills you with feelings of bliss and joy.
In most cases, I hope this is true. Unfortunately, in my case, breastfeeding actually caused a little known condition called D-MER (Dysphoric Milk Ejection Reflex) in which nursing actually causes negative emotions that occur right before milk release and continue for several minutes. I wrote at length about my experience with D-MER here.
While D-MER does not affect most women (thank goodness), there may be other less joyful emotions that accompany nursing, especially in the early days.
Worry, frustration, fear, guilt for feeling tired or resentful that your baby is wanting to nurse for the billionth time, etc. –-all are normal feelings.
Don’t let these temporary feelings deter you from continuing to breastfeed your little one! As you progress in your nursing relationship and as your baby gets older, it is highly likely that these feelings will subside and you will feel bliss, joy, awe and wonder in those quiet moments while you’re feeding your precious baby.
That being said, there are many moms out there who, for whatever reason, cannot or choose not to breastfeed. AND THAT IS OKAY, MAMA.
The bottom line when it comes to caring for your precious child is that you are making conscious effort to do what you believe is best for your child.
If that includes supplementing with formula, or exclusively feeding with formula, then that is what is best for your child. Period. The end. Do not let anyone tell you differently.
5. Breastfeeding helps you lose weight.
Nope. As much as I want this myth to be true, sadly, it is not. I can’t tell you how many moms I’ve talked to that have had a hard time losing weight while breastfeeding.
In fact, they often tell me that they only lost those last stubborn pounds after they stopped nursing. If you think about it, this makes perfect sense.
Photo credit: Wisner Photo
Your body is providing nourishment for another human being, as well as providing you, the nursing mom, with the energy you need to survive.
It’s no wonder that your body is going to hold onto fat (a.k.a. energy) like it’s going out of style.
Personally, I found that it was easier to shed the post-baby pounds after my first baby than it has been since my son was born 8 months ago. I’m even working out more vigorously now than I did after baby girl was born.
Alas, my body is not giving up it’s extra stores of energy very easily and it’s taking much longer for me to get back into shape this time around. I have to continually remind myself that this is a marathon and not a sprint and re-focus my efforts on being healthy and fit.
___
While breastfeeding can certainly be a challenge, it is nevertheless a wonderful, special bonding experience that only you as a mom can have with your child.
Despite the challenges that I faced first with my daughter and now with my son, I am so glad that we fought through, found solutions and continued our nursing relationship.
It is a priceless experience, and the benefits to my kids far outweigh the temporary struggles I faced.
I encourage you, mamas, to give breastfeeding your best effort and to seek help from certified lactation consultants if you run into any issues at all. Happy nursing!
Do you have any other breastfeeding tips or myths to debunk?
Cheyenne, a photographer and SAHM, resides with her amazing hubby, two crazy kiddos, a Border Collie and two evil cats in the suburbs of Houston, Texas. Besides photography, her greatest passions include lots of coffee, autumn, flea markets, vintage finds, old books and red wine. When she’s not wrangling babies or shooting them (with her camera, of course) you can find her over at her blog, Girl v. The World, where she writes about everything from DIY, decor, motherhood, and healthy living, to the occasional product review or giveaway of things she loves.
Original article and pictures take redandhoney.com site
5 Bread Products to Stop Buying and Start Making at Home
This post may contain affiliate links, which won't cost you extra to purchase but helps support this site. Thank you for your support!
5 Bread Products to Stop Buying and Start Making at Home
Besides homemade bread for sandwiches, or toast, do you make your own bread products at home? You can easily control the ingredients in your own bagels, bread crumbs, hamburger buns,and bread sticks. The recipes are simple, and once you get the hang of them, super easy to do!
toppings like sesame seeds, dried fruits, dried onions or chives, poppy seeds, 1/2 cup of your favorite jam
****
1 egg white
1 T. water
****
6 cups boiling water
3 T. sugar
*****
In a large mixing bowl, pour in water and yeast. Stir to dissolve, and add sugar. Leave for 5 minutes to “proof” yeast. Add in salt and flour and mix well. Knead with either your hands or a dough hook for 10 minutes to develop gluten in the flour. If you want to add ingredients, now is the time. Mix your add ins to the dough. You can also divide in 1/2 and make two different flavors.
Allow the dough to rise in a covered bowl for about an hour.
After the dough has risen, remove from the bowl and divide into 8 pieces. Shape each piece into a ball, squash down, and poke a hole in the middle.
Allow dough to rise for 10 minutes. Meanwhile, bring the water and sugar to a boil, and preheat the oven to 450°. When the sugar water is boiling, carefully add in one bagel at a time, leave for 30 seconds, and flip to the other side for 30 seconds. Remove from the water and place on a greased cookie sheet. Repeat with remaining bagels. Mix together the egg white and water and brush the top of the bagels. Sprinkle toppings on. Place in oven for 20-25 minutes.
3 1/2 cups whole wheat flour (or you can use a mix of white and wheat)
1 egg white (optional)
1 T. water (optional)
2 T. sesame seeds (optional)
Dissolve the yeast in the warm water, and add honey and cooled melted butter. Allow to “proof” for 5 minutes, then add egg, flour and salt. Knead with a dough hook or by hand for 10 minutes. Break dough into 8-10 buns, shape into disks and flatten slightly. If you want to add sesame seeds, brush with the egg white and water mixture and sprinkle sesame seeds. Allow dough to rest while you heat the oven to 425°. Bake for 12-15 minutes, until golden. Cool completely. *** you can use this recipe to make hot dog buns as well, just shape the dough into logs before baking***
Dissolve the yeast in the warm water. Add the honey and oil and stir. Add the salt to the flour, and add in 1/2 cup increments while mixing. Knead by hand or mixer for about 10 minutes. Let rise in a warm place until doubled, about an hour. Punch down, and shape into sticks, and using a sharp knife, slice carefully down the middle of the stick, about 1/4″ down. Brush sticks with 2T. melted butter and place in a 400° oven to bake for 20 minutes. To make garlic sticks, add 1/2 tsp garlic powder to the melted butter and brush on the sticks. Sprinkle with parmesean cheese for a delicious treat!
Cool, and remove from pans. Enjoy!
BREAD CRUMBS
6 cups dry bread crumbs
1 T. garlic powder
1 T. onion powder
1 tsp celery salt
1/2 tsp paprika
3/4 tsp majoram
1/4 tsp cumin
1/4 cup parsley flakes
1 tsp salt
1/2 cup olive oil
Begin by leaving bread out, uncovered for 6-8 hours or overnight. “Flopped” bread recipes are great for this as well. Tear the bread into chunks and place in a food processor and process until fine crumbs. You can use a blender for this as well, blending small amounts at a time.
Mix crumbs with seasonings and oil, stir well and spread on cookie sheet. Bake at 250° for 15 minutes, stirring every 5. Store in an airtight container.
PITA POCKETS
1 cup warm water
1 T. melted butter
1 tsp salt
2 tsp sugar
3 cups whole wheat flour
2 tsp dry yeast
Mix together water, butter, salt and sugar. Add in 1 cup of flour and yeast, and stir to mix. Add remaining flour by cupfuls and mix together well. You want a soft dough, that feels “just a bit sticky”. Don’t over add flour, or you will have a tough pita.
Allow to rise in a covered bowl for 1 hour, or until doubled in size. Punch down, and remove to lightly floured counter. Cut into 8 pieces, and roll each piece into a ball. With a rolling pin, roll the dough balls out to a large circle, about 1/4″ thick.
Cover with a damp cloth, and allow to rise for 30 minutes. They will begin to get “puffy”. Meanwhile, preheat oven to 500°. Place the rounds, two at a time, directly on the middle rack. Bake for 4 minutes. Any longer and the bread could dry out and not be pliable. Remove from the rack, and wrap each pita in slightly damp paper or cloth napkin. This will get moisture back into the pitas. Allow to cool thoroughly. Cut pitas in 1/2, split open carefully and stuff as desired.
Need some help getting back into the kitchen and cooking from scratch? Try this delicious collection of easy to make recipes to get you started!
Original article and pictures take thehomesteadinghippy.com site
“There are no benefits to breastfeeding beyond one year.“ I cringe a little bit every time I hear this myth perpetuated among moms. My son and I have enjoyed so many benefits from breastfeeding the past 21 months, particularly since he turned a year old, that I just want other moms to know and experience the many potential benefits.
5 Benefits of Breastfeeding Beyond 1 Year
The breastfeeding guidelines in the United States can be a little misleading. When the AAP recommends “the continuation of breastfeeding for one year…” the second part of the sentence is usually left off or ignored. The recommendation continues “…or longer as mutually desired by mother and infant.” (The World Health Organization along with most other health organizations across the world recommend breastfeeding for 2 years and beyond.)
Don’t get me wrong. If you have breastfed your baby for one year, you have given an amazing gift to your child. If you don’t wish to continue breastfeeding beyond one year, then you should feel absolutely no guilt about weaning at a year. However, saying that there are no benefits to breastfeeding beyond one year is simply inaccurate.
5 Benefits of Breastfeeding Beyond One Year
1. Breastfeeding when You’re an Expert
The first weeks and even months of learning to breastfeed a newborn are not the easiest for most of us. While the vast majority of women can breastfeed their babies successfully, it is something that both mom and baby have to work hard to learn. As the months pass by, breastfeeding becomes second nature. This is when there is real joy in the breastfeeding relationship. The struggle and discomfort are gone. Breastfeeding beyond one year allows mom and baby to enjoy this relationship to the fullest.
2. Peace of Mind for Toddler Nutrition
Pediatricians often recommend looking at a toddler’s entire week of food to assess their nutrition. Little ones may eat half a pound of chicken one day and three bites of peas the next. This may be totally healthy nutritionally, but sometimes a mama can’t help but worry that her little one isn’t eating enough or getting enough nutrition. Breast milk changes in composition throughout the breastfeeding relationship to meet a nursling’s needs. Breast milk provides a significant source of calories, protein, calcium, folate, and Vitamins A, B12, and C. Continuing to breastfeed beyond one year still gives many nutritional benefits for your toddler, and it gives Mama a little peace of mind.
3. Immunity & Comfort for Sick Littles
Booby Button 2
There seems to be a spike in colds and coughs for toddlers as they begin to adventure out more into the world and are exposed to more germs. Breastfeeding beyond a year provides immune factors, comfort, and nutrition for little ones during illnesses when they might otherwise decrease their food and liquid intake. In fact, breast milk increases in the concentration of immune factors after one year, just when the toddler needs them. This leads to fewer, shorter, and less serious illnesses.
4. Reconnecting with a Busy Toddler
From the moment a toddler learns to walk, they are on the go. However, they still have a strong need for connection with mom. Breastfeeding beyond a year provides the perfect opportunity to reconnect with your toddler. It brings comfort for the many bumps, scrapes, and frustrations a toddler experiences each day.
5. A Break for Mama
Breastfeeding also provides an excellent opportunity for Mama to enjoy a much-needed moment to sit down and relax while still meeting her toddler’s needs. I have been especially thankful for this now breastfeeding during my second pregnancy. In addition, toddlers are notorious for waking their parents up too early. By continuing to nurse, you may convince them to cuddle in bed a little bit longer in the mornings. You also might be able to hold off their hunger and thirst with some breast milk, so they don’t insist on you getting up and making their breakfast right away.
Shannon Brown
Shannonwrites about pregnancy, parenting, and simple living at GrowingSlower. She and her wonderful husband are parents to one energetic toddler and are expecting the arrival of Baby #2 in August. She’s currently working on her first book, a collection of positive natural birth stories to be published in Fall 2013.
Original article and pictures take www.intoxicatedonlife.com site
5 Beauty Products to Stop Buying and Start Making at Home
Hygiene is an important topic to anyone.
Nothing creates more conversation, either, then getting a group of ladies together and asking “What shampoo do you use?”; “Oh, you smell nice! Bath and Body works?” The beauty industry certainly has a major role in our media, and in our daily lives. Why, if you don’t use the right toothpaste, or deodorant, or your hair doesn’t have that bounce and shine, you’ll never find love…
The amount of money spent to keep up a certain standard of beauty is astounding to me. A friend of mine once confessed that she spent well over $200 a month on hair care, makeup, and various lotions, perfumes, and body sprays. Wow..$200 a month!! Let’s see if we can’t get that down a bit shall we? Never mind the chemicals that are in the products, and the waste the containers create! Here’s my top 5 beauty products to stop buying and start making at home:
TOOTHPASTE
With all the conflicting reports on fluoride, I would much rather my family and I stay away from it. It’s super simple to make your own, too. All it takes is a few simple ingredients to keep your mouth “minty fresh” and clean.
Simply take:
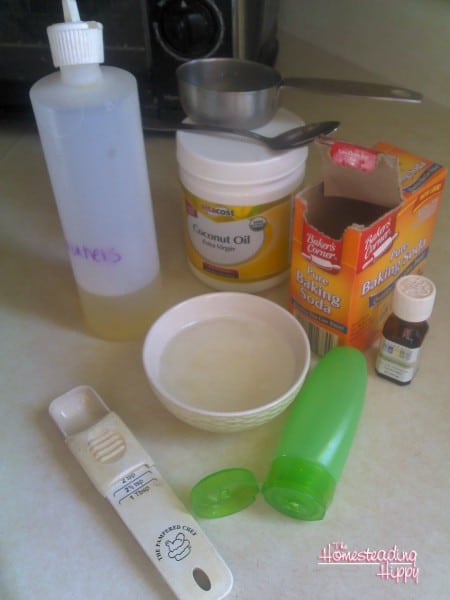
6 T. coconut oil
1 tsp baking soda
15 drops peppermint oil or mint extract
10 drops orange oil (totally optional)
1 packet stevia (or 2-3 drops liquid stevia)
Mix together and store in a tightly covered jar. We use a spoon to dip some out, and then place it on our brushes for use. We have been using this for over 5 years now, and my children have NEVER had a single cavity! Plus, the added benefit of not having to worry about recycling the packaging is nice.
TIPuse a spoon to scoop a bit of this out and then place it on your brush. This will keep it all nice and “sanitary” for those who can’t stomach the thought of everyone’s toothbrush in the same tub.
DEODORANT
6 T. virgin coconut oil (this has anti bacterial properties, so you don’t want the more highly processed stuff)
1/4 cup arrowroot powder (or you can also use cornstarch)
*optional-additional fragrances like lavender, mint, lemongrass…my hubby just doesn’t like smelling like a “girl”
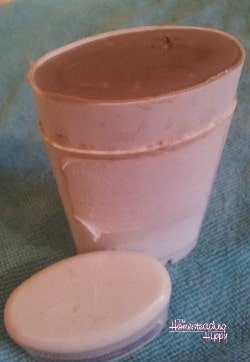
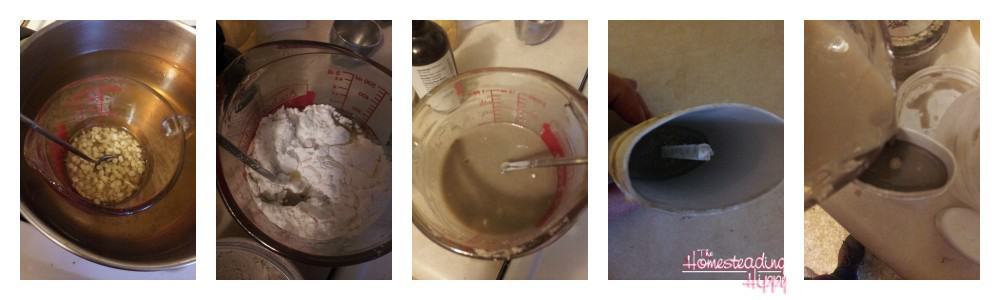
Slightly melt the coconut oil with the beeswax. I use a glass measuring jar in a pot of boiling water. Add the clay and mix. Add the arrowroot powder and mix well. Add the tea tree oil, and mix in. Viola! You have deodorant! To use, we allow it to harden in a small container, then “break it out” so that each person has their own little “stick”. You can also use an old deodorant container and refill it. The shea butter will keep it nice and hard, even in the summer time.
In a heat-proof container, add the oils and beeswax. I put my glass measuring cup in a pot of boiling water. Heat on medium high heat until all the oil is melted. Pour the hot liquid in a muffin pan and allow to cool completely. “pop” them out and store in the fridge during the hot summers. To use, simply rub anywhere on your body. Your body heat will help soften and “melt” the lotion on your skin.
SHAMPOO
This may take a bit getting used to, but your hair WILL adjust and not create as much oil. I promise! It works on my baby fine hair and I love it! My hubby used to have a dry scalp, especially in the winter time, but with this shampoo, he no longer has that issue.
Pour all ingredients into a bottle, and gently swish to mix. Use 5-6 squirts each time. To condition I use another spray bottle with 1 cup water and 1 cup apple cider vinegar. Spritz 2-3 times and rinse well.
HAIR SPRAY
Oh, to be alcohol free in your hair but still have amazing hold! Would you believe it possible with only 2 ingredients? Yup, it’s true!!
You need…are you ready for this???
1 cup of water, warmed to nearly boiling
1/8 cup of sugar
Melt the sugar completely in the warm water, and place in a spray bottle. You can add essential oils like lavender to this if you want, but I just use it plain like it is. This isn’t a strong hold hair spray, more like “flexible hold”.
Original article and pictures take thehomesteadinghippy.com site
48 Questions To Ask Before Choosing a Birth Care Provider
Choosing a Care Provider
Having a baby is one of the most amazing things a woman can do. It can also be the scariest. It’s easy to worry about how you can afford a baby, if labor is going to hurt or who will take your insurance.
One of the most important steps though, is choosing a care provider. You want someone who will go along with your preferences, support you during labor and who is experienced and knowledgeable in their profession.
So how do you make sure that you’re choosing the right person? First impressions say a lot, but there are some questions that need to be asked before you choose.
Finding Out We’re Pregnant!
When I found out that I was pregnant with our son, I was in a bit of shock to say the least. I was still in college and working towards a full time career, with no plan to have children for a long time. My husband was equally surprised. ” Are you serious? You’re not teasing me, right?” were the first words out of his mouth when I told him.
We were both thrilled to be pregnant, but I knew I had a lot of research to do in order to make informed decisions about my pregnancy and birth.
Not Such a Smart Idea
I started off seeing a female obgyn at our local hospital. I knew I wanted a natural labor, preferably a water birth, but a home birth wasn’t an option since I was high risk.
My very first appointment sent off flashing red alarm bells, but I ignored them, thinking I had no other options. I have a heart problem that causes me to pass out when I’m over exerted. And labor can be quite exerting.
When I asked the doctor about testing, or precautions that could be taken to ensure a safe delivery, she said, “We’ll worry about that during labor.” Not something you want to hear from your doctor! She didn’t even use a stethoscope to check my heart beat. She also became defensive at the mere mention of a birth plan.
I knew that I didn’t want to be fighting with my doctor and hospital staff during labor, so 6 months into my pregnancy I began the search for a new care provider. I later found out that my local hospital required all delivering mothers to be on their back in bed with their feet in stirrups. Definitely not something I wanted to endure!
The Search Begins… Again
I wasn’t sure where to begin. I spent days calling all the hospitals within 60 miles to see if they had midwives on staff. I finally found the perfect place. A birth center with an attached suite for your family to wait for you. They made fresh nutritious electrolyte smoothies for the new mothers and baked fresh bread every morning for your breakfast.
But, they didn’t take our insurance.
When I finally found a hospital that had midwives and also took our insurance, I wanted to be sure it would be a good experience. I spent well over a week researching standard hospital procedures. I read about circumcision, episiotomies, c-sections, epidurals, pitocin, vaccinations at birth and everything else I could find. From my research I created a birth plan. And from that birth plan I created interview questions for the midwife.
What to Look For
It’s important that your care provider works with your decisions during pregnancy and birth, but also has the wisdom to know when different measures need to be taken in an emergency situation. We wanted to delay cord clamping until it had stopped pulsing. However, because I had excessive bleeding, the staff had to hand my son to my husband and rush me off to stop the bleeding.
Below is a list of questions to ask your midwife or doctor. Some of these would even apply to a doula. Most care providers will do an interview session with you, although doctors usually won’t spend as much time. Be sure to tour the hospital or birth center and ask lots of question there as well to see if they can accommodate the birth you want. It doesn’t do any good to plan for your dream water birth if the hospital won’t allow you to leave the bed.
Questions to Ask
Prenatal Care and Before you Begin
How do you see your role as a care provider?
What is your birth philosophy?
How long have you been a midwife and what are your certifications?
Describe a typical prenatal visit with you.
Do you work with VBACS? What is your experience with this?
What will I need to provide for a home birth?
What supplies do you bring to a birth?
How many births have you assisted?
Do you have a backup hospital and doctor?
What hours are you available in case of an emergency?
Do you require certain pregnancy tests?
What happens when I go past 40 weeks, 42 weeks?
Do you require or offer any childbirth classes?
Will you deliver multiples?
Will you deliver a breech baby? If not and the baby is shown to be breech well into the labor, who would you refer me to?
Do you have experience turning a baby and how do you do it? What is your success rate on this?
Do you work with doulas or birth photographers?
Who assists you at a birth? Can I meet them?
Do you have experience with any types of natural medicine? ie herbalism, homeopathy, acupressure, essential oils
What conditions do you consider “high risk” and what would happen if I develop one?
Do you allow/provide for a water birth?
During Labor
What is your hospital transfer rate?
In the event of a transfer, would you accompany me to the hospital, stay with me there?
What is your C-section rate? (obviously a midwife wouldn’t perform this procedure, but how often does she hand a mother over to the surgeon?)
At what point will you arrive at the labor?
What is your plan if another client goes into labor at the same time as me?
Have you ever missed a homebirth and why?
Are you able to repair a torn perineum?
How do you handle cord clamping?
Do you use a fetal scope or Doppler to monitor the baby?
What happens if you’re sick or for an emergency reason are unable to attend me?
What precautions do you take for perineal tearing?
What do you do if the cord is wrapped around the baby’s neck?
How often do you perform episiotomies and when would you find one necessary?
If an episiotomy may be indicated, what steps do you try first?
What’s the best way to communicate with you, and how can I reach you when labor begins? ie phone, email.
Are my husband, children, etc. allowed to be present at my birth?
Have their been any bad outcomes with a mother and/or baby before?
How often do you perform vaginal checks and do you rely on alternate ways of assessing dilation?
Postpartum Care
Do you have experience with postpartum haemorrhage and what precautions and interventions do you administer?
Do you help with breastfeeding at the birth or as part of postpartum care?
Do you have neonatal resuscitation training?
How long do you stay after the birth?
What post-natal care do you provide?
What procedures are provided/required for the infant after birth? ie vitamin k, Hep B, PKU test.
What was an important question you asked or wished you had asked your care provider?
Original article and pictures take redandhoney.com site
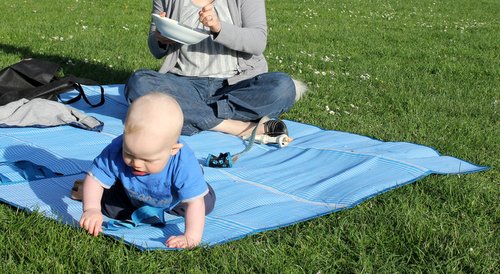
If you go TV free for just one week, you will have over 32 hours of extra time! Thirty-two hours is a lot of time! You may find yourself wondering what to do instead of watching TV. You could really accomplish a lot, or get out and have a lot of fun! What will you do? Here are 47 things to do instead of watching TV.
Previously, Mindy shared some fantastic ideas more specifically for toddlers and for on-the-go eating (no mess!). Now Stacy shares a very wide variety of any age, kid-friendly, whole food snacks for home and for traveling.
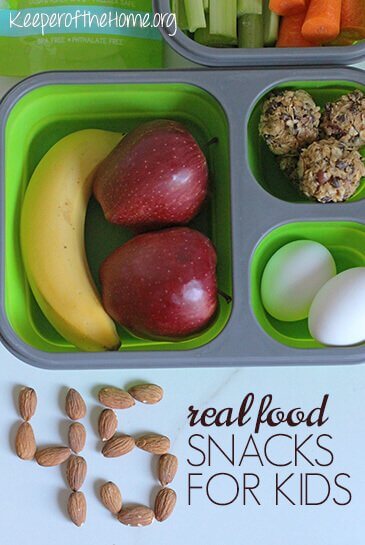
Snacks are an important part of a child’s day. Kids grow fast and need frequent refueling.
The type of food they consume greatly affects their development, attitude, and feeling of well-being.
The task of feeding them is never ending, isn’t it?
The only way I’m able to respond positively to hearing, “Mom, I’m hungry,” over and over and over, is to think and work ahead.
Many times I’ve diligently planned our meals but thought little of snack time. I assumed I could simply throw something together when the need arose. As you can imagine, this hasn’t worked very well. My growing children seem to have more hunger pangs than my brain can handle.
While it’s not necessary to plan each and every snack, a little forethought before heading to the store, and a few minutes preparing snacks in advance, will enable you and your family to make healthier choices when hunger strikes.
Real food snacks are far superior to the packaged products lining supermarkets shelves. Even “organic” snacks are often highly processed and provide little nutritional value. (Of course, sometimes it is necessary to buy these types of items to maintain sanity! I certainly do now and again.)
Eating whole food as a snack is an excellent way to enhance your child’s diet. Keep in mind that variety helps prevent boredom and provides greater nutritional benefits than eating the exact same things repeatedly.
The following is a list of snack ideas than many children will enjoy. Most of these foods could also be served for lunch, too.
I encourage you to make a list of healthy snacks your family likes and post them in an easy to find location such as the inside of a cabinet door or in your home-management binder. Having a list on hand will make life easier when the “hungries” come to call.
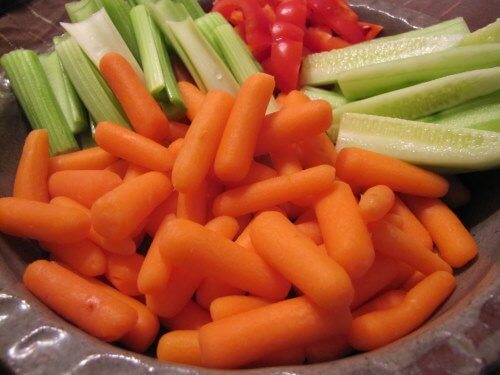
Ants on a log – celery filled with peanut butter and topped with raisins
Guacamole and corn chips or pita chips (Make your own corn or pita chips by slicing tortillas or pita bread into triangles and baking at 350 degrees for 10 to 12 minutes).
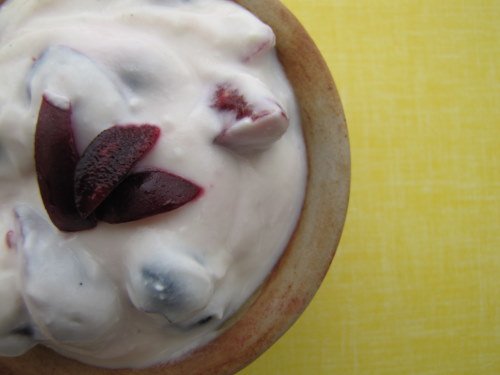
Fruit-Based Snacks
Fruit eaten alone is one of the easiest snacks around!
Always use bread made with whole grains. Whenever possible, make breads, tortillas, and muffins from sprouted flour or use the soaking method for extra nutrition and easier digestion.
Bread (or toast) spread with nut butter, avocado, or cultured butter.
Mini pizza – Spread an English muffin with tomato paste, sprinkle with grated cheese, then broil until cheese is melted.
Sandwiches – Grilled cheese, meat and cheese, meat and veggies, avocado and tomato, and so on.
Quesadillas
Image by Dietriffic
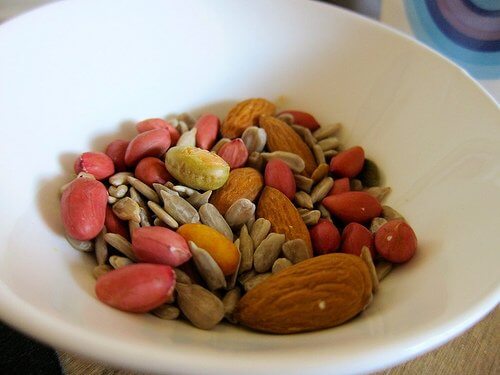
High Protein Snacks
Nuts (a handful of nuts is an excellent source of protein and healthy fat. Lightly toast them for added flavor).
Trail mix – toss your favorite fried fruits and nuts together for a tasty treat.
Hard boiled eggs
Cooked meat chopped into bite-sized pieces.
Mini-Meatballs – When making meatballs for dinner, prepare some extra and set on a tray lined with wax paper. Place the tray in the freezer. Once frozen, remove meatballs from the tray and store in a ziplock bag or air-tight container. Thaw and heat as needed.
Popcorn – the real stuff, not microwave! Prepare in an air- popper or on the stove top.
Snack tray – Prepare your own snack combination by placing a variety of real food items, cut into bite-sized pieces, on a plate or tray. For example: cheese cubes, meat, fruit, and crackers.
Looking for more healthy, kid-friendly snack ideas? One of my favorite resources is the ebook Healthy Snacks to Go, written by another frugal and creative real food mama! Check out the imitation “larabar” recipes… yummy. ��
What real food snacks do your kids enjoy?
Original article and pictures take keeperofthehome.org site