1 roll Pillsbury™ refrigerated chocolate chip cookie dough
1 cup Jif® Chocolate Flavored Hazelnut Spread
3 tablespoons unsweetened baking cocoa
3/4 teaspoon Watkins™ Chili Powder
1/2 teaspoon Watkins™ Ground Saigon Cinnamon
6 large marshmallows, cut in half
Directions
In large bowl, break up cookie dough. Add hazelnut spread, cocoa, chili powder and cinnamon. Beat with electric mixer on low speed about 2 minutes or until well blended.
Shape dough into 12 (2-inch) balls. Flatten each ball into 3-inch round. Shape 1 cookie dough round around 1 marshmallow half, covering completely. Repeat with remaining dough rounds and marshmallows. Place 2 inches apart on cookie sheets.
Bake 10 to 13 minutes or until surface of cookie appears cracked and marshmallow shows through. Cool 5 minutes; remove from cookie sheets to cooling racks. Cool an additional 5 minutes. Serve warm. Store tightly covered.
Jif and Simply Jif are trademarks of The J.M. Smucker Company
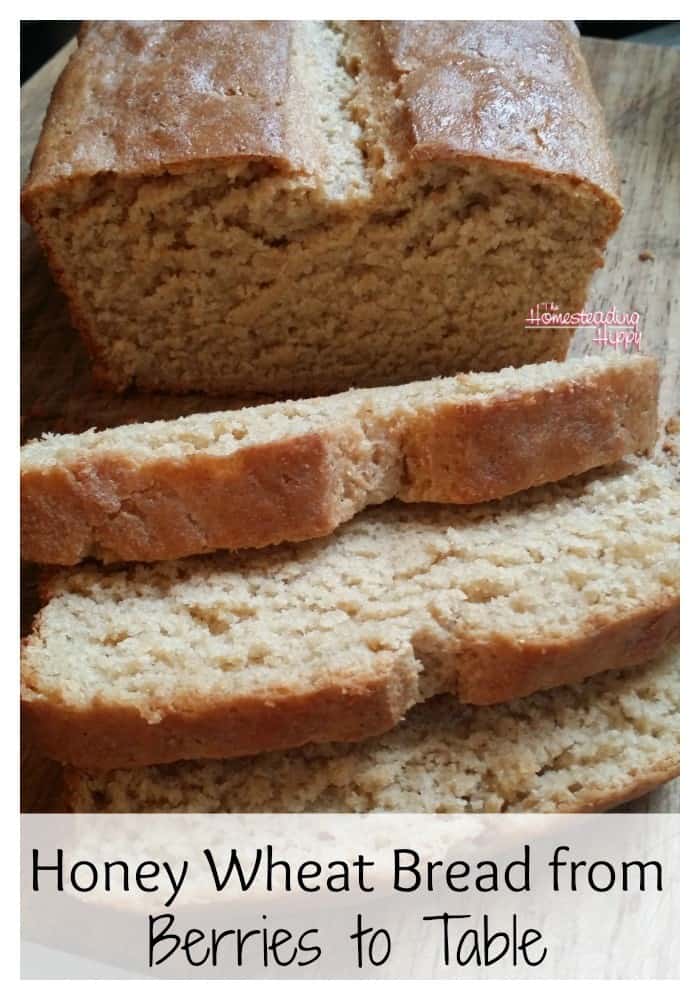
Honey Whole Wheat Bread Recipe From Fresh Milled Berries
I love baking homemade bread, even in the hottest of summer.
The smell of homemade bread is out of this world, and the taste so perfect. My family can literally gobble down a whole loaf before it’s been completely cooled! With some butter and jam, this is the perfect treat! Making it yourself costs about $.50 for 2 loaves and there is no plastic trash to deal with. Win-win-win all round!
When you are able to mill the wheat yourself, it makes the perfect food storage item. Most wheat berries,(affiliate link) if stored properly, can be stored for 20 years. I use plastic food grade buckets to store mine. Simply mark what berries you are storing and when you got them so you can rotate your stock. This is the last of the soft wheat for my storage,(affiliate link) so thankfully we will be placing our Spring order with our co-op soon.
Once you get your wheat berries, you will want to have a grain mill for them.
I love my WonderMill. (affiliate link) It’s super quiet (well, as quiet as they can be) and it has 3 different settings; pastry, homemade bread and course. It is great for making whole wheat pastry flour as well as all purpose flour. I also use it to mill corn for cornmeal. Simply pour in the amount of berries you want to mill. One cup of berries of soft white wheat (affiliate link) can give you 1 1/2 cups of flour. You don’t want to mill more than 6-8 cups at once in the WonderMill,(affiliate link) as it may run over and create a huge mess (trust me on this one!). I will mill several batches at a time and store the whole wheat flour in the freezer to help keep the nutrients longer. Usually, we will use this up in a week or so.
When your wheat berries are milled, you will want to get to work baking some fresh, homemade bread. What could be better than a fresh loaf of honey whole wheat bread? With the sweetness of honey and the nutrients in the wheat, this is a wheat bread you’ll feel good about feeding your family again and again!
2 cups warm water
1 T. dry yeast (or one packet)
1/2 cup honey
1/2 cup coconut oil, or melted butter
1 tsp salt
4 cups wheat flour
2 cups white flour
Directions for a soft honey wheat bread recipe you’ll love:
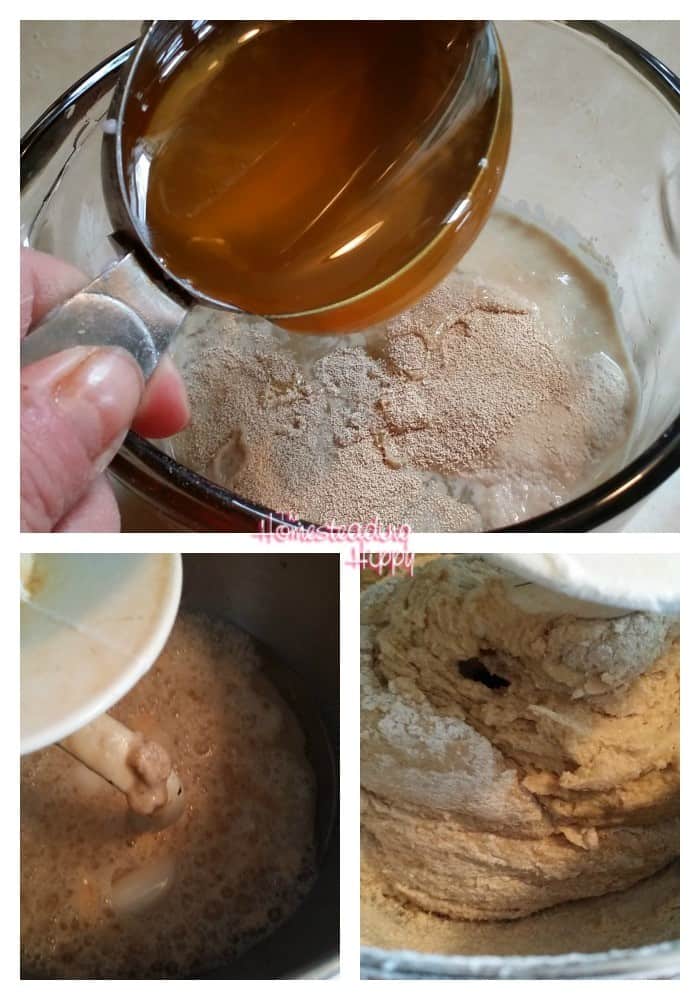
Dissolve the yeast in the warm water.
Add the honey and oil and stir.
Allow to “proof” for 10 minutes, until the yeast is active and bubbly.
Add the salt to the flour, and add in 2 cup increments while mixing. You want the dough to pull away from the side of the mixer, but yet still be on the sticky side. Fresh milled flour can take a bit longer to absorb the liquid so if you add more flour at this time, you may end up with a dry and crumbly loaf.
Knead by hand or mixer for about 10 minutes. You need this time to get a good development on the gluten in the wheat for a fluffy loaf.
Let rise in a warm place until doubled, about an hour.
Punch down, and divide the dough in half.
Shape into loaves, and place in two greased bread pans. I like to add a cut down the middle for appearances.
Let rise a second time until doubled again.
Put the bread in a cold oven, and turn the oven on to 400 degrees. (This helps give the yeast another “kick” and makes your bread more fluffy.)
Bake for 30 minutes from time you put the bread in.
Cool for 10 minutes, and remove from pans.
Allow to finish cooling for another 10-15 minutes on a cooling rack before you cut into it.
Enjoy!
Do you make your own homemade bread from scratch? What is your favorite wheat bread recipe? Be sure to pin this for later!
Need some help getting back into the kitchen and cooking from scratch? Try this delicious collection of easy to make recipes to get you started!
Original article and pictures take thehomesteadinghippy.com site
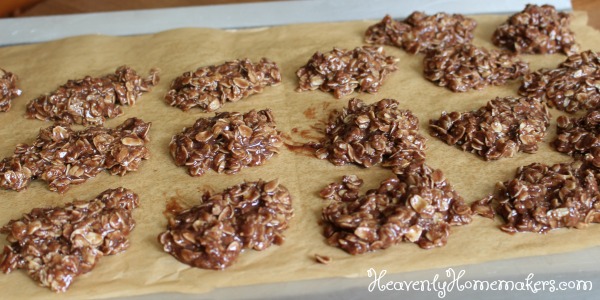
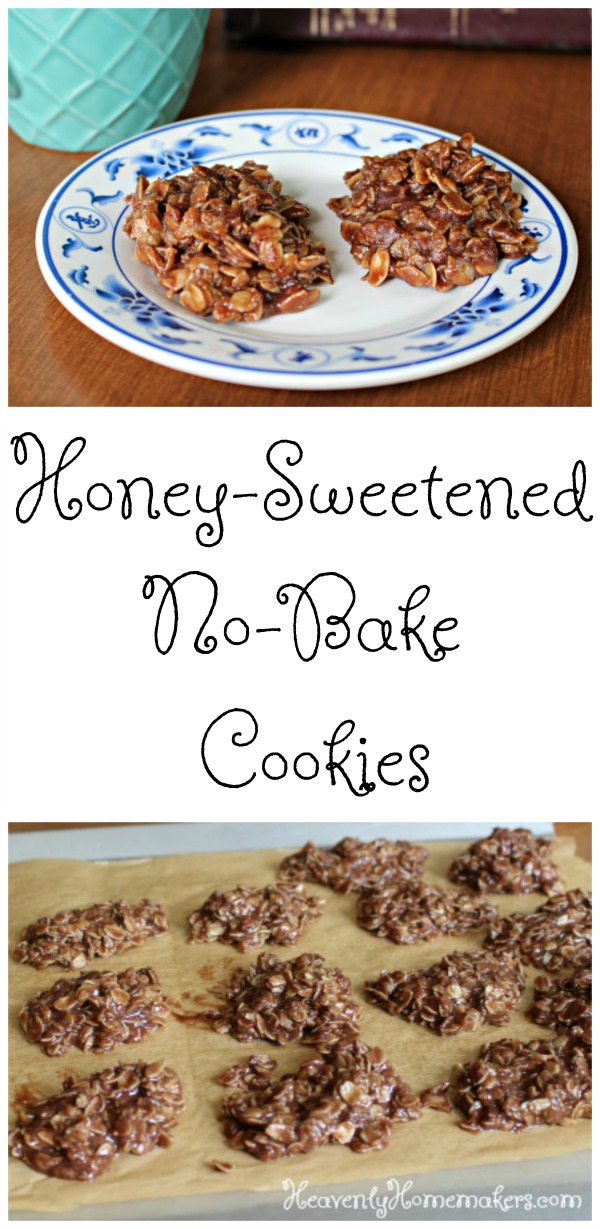
Honey Sweetened No-Bake Cookies – Prepare To Be Amazed!
When you no longer eat much sugar, but you want to enjoy your childhood favorite No-Bake Cookies…you make the cookies with a little bit of honey to see if you can pull it off. They turn out so delicious you start dancing in the living room.
What? Of course you can dance about cookies. Delicious No-Bake Cookies made with honey are worth dancing over.
For the record, I don’t dance in public. There is good reason for this as my feet and my head don’t always play nice together. My head knows where my feet should go and gives directions accordingly. But then my feet are like, “Are you kidding me right now?” then my head is like, “That is not at all what I told you to do; what are you actually thinking?” and my feet say, “You aren’t the boss of me, I’ll do what I want.” So then my brain gives up and says, “Forget it. At least I’m good at making cookies.”
My friend Kim sent me this recipe idea, then I tweaked it just a bit to make it my own. I guess we could say that it’s Kim’s fault that I was dancing in the living room. She can be glad I didn’t invite her over to watch. Though I probably should thank her with a cookie sometime.
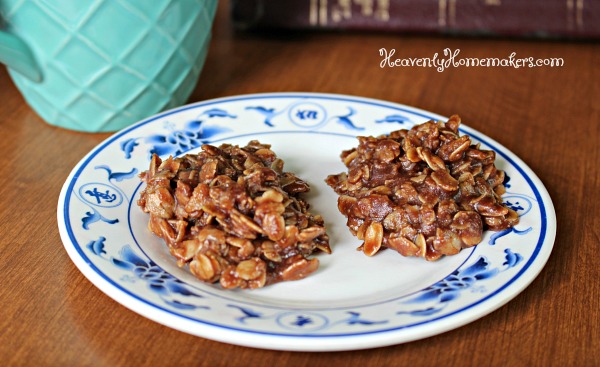
Honey Sweetened No-Bake Cookies
Want some more Low Sugar Cookie recipes?
With all these recipes making us so very happy, we will all be dancing in our living rooms. What will the neighbors think?
Are you a No-Bake Cookie fan? Did you grow up eating these? Can you dance? (I mean, any of us can. But are you good at it?)
Original article and pictures take heavenlyhomemakers.com site
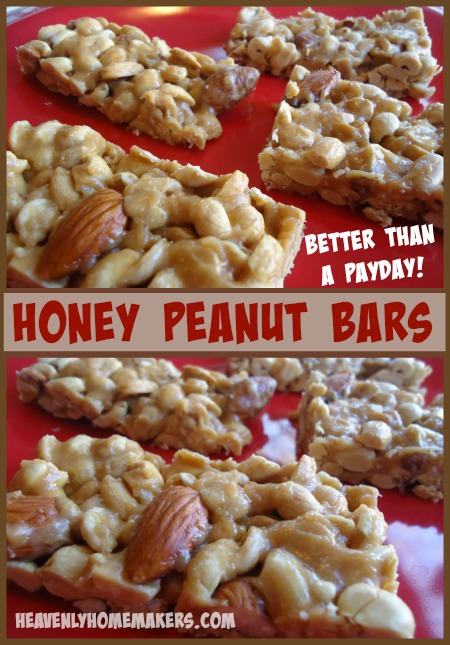
Honey Peanut Bars ~ Like a Healthy Payday Candy Bar
Ladies and um, other Ladies (although surely there is a gentleman or three around here too): We have a winner! Honey Peanut Bars it is!
Thanks to all who put in their vote as to which of the new healthy snack recipes from our upcoming eBook we should reveal early. It was a pretty close call on several. I put Malachi to work making tally marks as votes came in (a great school project for him). He had a lot of fun with it…
Here’s how my afternoon sounded:
“Pizza Muffins are in the lead. They’re going to win for sure!”
“Mom! Peanut Bars have a ton of votes. They caught up to Pizza Muffins.”
“I think Oyster Crackers are going to pull ahead!”
“It’s back to the Peanut Bars. Why is everyone choosing that one?”
Yeah, Malachi doesn’t like peanuts. ;)
When it was all said and done, the Honey Peanut Bars won by several votes. Not to worry though. Our 227 Healthy Snacks eBook is almost finished. Then you’ll have access to all the recipes forever! (Our goal is to have the book ready for you by Sunday night.)
I mixed up a batch of these Honey Peanut Bars tonight again, just because they sounded good. Our older boys will probably finish them all off once they get home from basketball practice. What a perfect post-workout/bedtime snack for them. (With apples and cheese and whatever else they get out because…do I really need to explain?)
You should be excited to know that it only took about five minutes for me to mix these up tonight. Their simplicity is of the many reasons I love them. :)
¼ cup roasted, unsalted almonds
3 Tablespoons natural creamy peanut butter
Told you they were easy to make! Go grab your simple ingredients and get busy on these bars. You will love them as much as we do (well, everyone but Malachi).
Grab your copy of 227 Healthy Snacks which includes this recipe and 226 more recipes and snack ideas that are super delicious!
Original article and pictures take heavenlyhomemakers.com site
Allergies making you miserable? Find relief and healing with this easy, homemade Honey Ginger Allergy Relief Tea and get my 5 tips for minimizing the effects of allergies.
This post contains affiliate links, FYI. Also, PLEASE NOTE that I’m not a doctor, and have no medical training. This post is entirely based on my own personal research and opinions. ��
For as long as I can remember, I’ve been one of those people who was allergic to practically everything. Dust, trees, cats, weeds, flowers, flours, coffee, strawberries, dogs, hay, lettuce… You name it, I feel like I’ve probably reacted to it in some way at some point in time.
Due to the sad state of my immune system, croup, eczema, chronic sinus infections, bronchitis, asthma, and headaches have plagued the majority of my life. I’m not trying to whine or complain, I’m just stating the facts. And they’re not fun facts.
For all of you who suffer through allergies, be they seasonal or not, I thought I’d share a few of the things that help me get through the rough patches and keep my allergic reactions at a minimum.
#1 – Cut back on the grains.
Sadly, I don’t just mean gluten containing grains. Even gluten-free grains like rice, corn, and oats are hard on your digestive system, and therefore also on your immune system. Even though I love my muffins and bread, I can definitely tell a difference in the strength of my immune system when I cut out grains. Not only to I not get sick as often, my seasonal allergies are remarkably easier.
If you have any sort of allergies at all, I strongly suggest you check out the GAPS Diet. It’s a strict, gut-healing diet, and seriously has been a godsend for me and my family.
About two years ago, my family of 6 (at the time) did the GAPS and found immense healing through it (you can read all about that here). Even though we were only able to stay on GAPS for about 6 months, I was able to take my list of around 30 allergies down to about 10, and keep it generally in that area.
If you are in the same boat as me and can’t really afford to eat only meat and veggies like the GAPS Diet requires (I wish I could!), cutting back on as much grain as possible will definitely still help.
Need help eating grain-free? Here are some of my family’s favorite meals:
#2 – Stay hydrated.
And I don’t mean drink another cup of coffee. Actually, when you’re wrestling with allergies, caffeinated drinks should not be on your list of helpful things to consume. Neither should alcohol, since it’s also considered to have diuretic affects. This basically means that it causes your body to lose water, or the ability to retain the water you drink, therefore causing dehydration.
There’s no doubt about it, water is vital to life. And not only do we need it to stay alive, we need it to stay alive well. Water flushes out toxins in our bodies, and helps to thin out mucus from overactive sinuses, making it easier to expel it all, and relieving congestion.
#3 – Stay faaaar away from sugar.
“You’re a monster, Mr. Grinch Your heart’s an empty hole Your brain is full of spiders You’ve got garlic in your soul, Mr. Grinch I wouldn’t touch you with a thirty-nine-and-a-half foot pole”
In this excerpt from How the Grinch Stole Christmas, Dr. Seuss could’ve been describing how I feel about sugar. Except for the garlic part, ‘cause garlic’s amazing, y’all. But honest and true, everyone and their mom needs to stay as far away from sugar as possible, since any amount of sugar will lower your immune system. And if you have allergies, you need your immune system as strong as possible. Not that you don’t need a strong immune system otherwise… You know what I mean.
That being said, I don’t mean stay away from sweeteners. Dates, raisins, apples, bananas, stevia, local honey… these are all fine for you. In fact, honey is a good thing to add in to that hot cup of herbal tea you’re gonna brew at the end of this post. It’s full of vitamins and minerals, has large amounts of good-for-you bacteria and is anti-fungal, and probiotic.
If you’re looking for a good bunch of treats that are free of refined sugar, here are a few of my favorites…
#4 – Salt water
Salt water is really amazing. Some people swear by drinking it (sole water, anyone?). My husband is sure the using it in a Neti Pot helps him during allergy season. I can’t get a Neti Pot to work (I’m weird, ’cause it shouldn’t be that complicated), so I opt for gargling and rinsing with warm salt water.
No matter how you get the salt water into your system, it will benefit you. Salt naturally increases circulation, eases sore throats, and reduces inflammation, while its minerals help your body naturally detox. Just make sure the salt you’re using is not regular ol’ table salt! I repeat DO NOT USE TABLE SALT. It’s pretty much devoid of everything useful, even if it has iodine added. Make sure the salt your using has a little color. Grey or pink salts, such as Himalayan salt and real sea salt, contain magnesium, calcium, potassium and over 60 other trace minerals. Quite the boost for your immune system.
#5 -Honey Ginger Allergy Relief Tea
Ginger
With anti-inflammatory benefits that rival those of NSAIDs, ginger not only helps to lower the risk of infections, it also helps break down toxins buildup in your organs. Ginger root is also known to cleanse the lymphatic system, which is basically our body’s sewage system.
If your allergies are causing an overproduction of phlegm, ginger will help break it up, easing your congestion while giving your immune system a boost.
Lemon
All citrus are high in vitamin C, which helps boost your immune system and fills your body with antioxidants. Lemon especially helps to loosen mucus so that your body can easily eliminate it.
Apple cider vinegar
If you’re even a little crunchy, you probably know that apple cider vinegar has a million + 1 uses. But did you know that it helps to break up and reduce mucous in your body, keeping your sinuses clear? Its antibacterial properties are also useful for sore throats and keeping infections away. (Here’s the acv I like.)
Honey
Full of vitamins and minerals (niacin, thiamine, pantothenic acid, riboflavin, vitamin C & B6, calcium, and iron, to name just a few), honey is also full of friendly bacteria, making it anti-fungal, and probiotic. To get the most benefits from your honey, make sure that it’s local and raw, if possible.
Bonus tip! Keep a clean house.
I’ve gotta admit, this one is hard for me, but it definitely deserves an honorable mention here. Living with 7 people in one little house means that I have a hard time keeping the stuff out, and keeping the stuff that’s here clean and tidy. But I know how important it is for my allergies (and sanity) to be dust and clutter-free. Dust is one of the most common allergens out there. If you struggle with it like I do, then a clean, minimalistic house is going to be your best friend. The less you have, the less there is to trap dust and other allergens. Also, the less you have, the less there is to clean, which is always a plus.
I’ve also learned from experience that carpet is bad for allergies. It traps dust and other allergens and – no matter how much you vacuum – it is hard to keep clean. (Vacuums also have this bad habit of stirring up the dust anyway.) If you have the ability to go carpet-free, do it – for your health.
In the end…
All allergies begin in your gut. If your gut isn’t happy, you won’t be either. If you’ve never taken steps to heal your gut , you should start there (here are 5 steps you can take now!). Adding in fermented foods (probiotics) and homemade bone broth to your diet are easy ways to help get your gut on the right track. And don’t forget to check out the GAPS Diet... It might just change your life.
In the recipe card I’ve linked to some of the products from my affiliate partners that I like to use. Purchasing through these links won’t cost you anything extra. Thanks! ��
Already got yourself a cold or sinus infection? Check out these helpful recipes…
We’re just a few days into homeschooling for the year, and it’s surprising how little the day to day routine has changed so far.
One of my goals for the school year is to put a higher focus on healthy lunches and snacks. Being home with the kids all day most days might seem like it leaves plenty of room for healthy snacking, but I find the opposite to be true. Instead of packing something healthy and heading out the door, we’re faced with the full arsenal of our kitchen at our disposal. If an unhealthy craving hits, there it is just waiting to be consumed.
I almost always serve peanut butter and jelly sandwiches with fruit to the kids for lunch. While I’m pretty happy with this combo, I’d like to have a little more variety for the kids. I feel like it’s important to have protein, whole grains, and a little bit of sweet to satisfy and provide energy for the next few hours. Snacks during the day are generally something crunchy or salty like crackers or pretzels. That way they get the satisfaction of munching on something for a while without consuming too many calories and I don’t have to worry about too much of a mess if they’re walking around with it. I like to put snacks like these in an individual snack cup for each kid so that it’s portioned out. When it’s gone it’s gone and they don’t get to complain about it. It’s important to choose what they snack on carefully because artificial colors and sweeteners can easily creep in.
One of my new favorite ways to make healthy lunches and snacks more exciting is ordering from NatureBox. When you join NatureBox, you’ll receive five different snacks every month. You can choose the snacks you want (from their catalog of over 100 exciting options!) or be surprised by their carefully curated selections. The best part is each food offered is carefully sourced, nutritionist approved, and free of artificial sweeteners, flavors, and colors. Oh, and they deliver it right to your door. Hallelujah.
I can’t believe the variety offered by NatureBox. The catalog is bursting with every snacky flavor you might be craving. Jeron is generally suspicious of “healthy” snacks and was very surprised to find these tasted as good (if not better) than the usual packaged junk food. His favorite was the guacamole bites, which were super crunchy, corny, and satisfying.
I loved the seaweed rice pops. They have that great umami flavor that seaweed offers, while still giving you a crispy mouthful.
The kids were all over these coconut date energy bites. I think they would eat them until they were gone if I let them. They’re sweet and chewy and the coconut keeps them from being too sticky on little fingers.
Oh that right there? Dark cocoa nom noms. I might have hidden these for myself after the first time we tried them. They’re the perfect chocolate bite to satisfy your sweet tooth after a meal. And they’re healthy. I mean, come on.
I went out on a limb picking the dried figs because it’s not something I’ve had before. The texture was definitely new to me, and I’m not sure I would enjoy just snacking on them straight out of the bag. I want to try slicing them up on a pizza with goat cheese and caramelized onions. That’s one of the things I love about the food you get from NatureBox, a lot of it can be incorporated into meals. (Remember this pasta? Use the lemon pistachios from NatureBox! It’s the only place I’ve ever found them.)
What are your favorite back to school snacks?
I was selected for this opportunity as a member of Clever Girls Collective and the content and opinions expressed here are all my own.
This Whole Wheat Graham Crackers recipe was originally posted in 2008. My current big 11-year old was a tiny 3-year old back then and I can’t stop looking at the pictures in this post.
I updated this post to have an easy-to-print recipe option for you. These crackers are crunchy-crispy…and taste SO GOOD. Oh, I hope you love them like we do.
If you like theHoney Graham Cracker recipe, you’ll love the fact that you can also make CHOCOLATE Graham Crackers! Just add 1/3 cup cocoa to the recipe.
2 ¼ cups whole wheat flour
½ cup sucanat (dehydrated cane sugar juice)
1 teaspoon baking powder
½ teaspoon baking soda
½ teaspoon salt
¼ teaspoon cinnamon
4 Tablespoons honey
1 teaspoon vanilla
½ cup butter, melted
Preheat oven to 350°.
Melt stick of butter in a pan on the stove. Set aside.
In a mixing bowl, stir together the flour, sucanat, baking powder, baking soda, salt and cinnamon.
Add the liquids: honey, water, vanilla and melted butter.
Stir well until a nice ball of dough is formed.
Cut two pieces of Parchment paper the size of the cookie sheet.
Lay one piece of parchment paper on the cookie sheet.
Place the ball of dough on the parchment paper.
Lay the other piece of parchment paper on top of the ball of dough. Squish dough down a little with your fist.
Use the rolling pin to roll the dough between the pieces of parchment paper. Roll until the dough covers the whole cookie sheet.
Remove the top piece of parchment paper. Cut rolled dough into 2 inch squares, or cut shapes with cookie cutters, being sure to separate the shapes from the surrounding dough a little.
Bake in oven for 18 minutes.
Turn oven off, but leave crackers in the oven to get crisp.
Remove from oven after 30 minutes to one hour. Break graham crackers apart.
Store in a air tight container.
Malachi is finishing up the rolling for Mama!
Here’s a shot of the chocolate graham crackers
cut into squares and ready to bake.
Malachi is using little cookie cutters to make “animal crackers”!
Here’s a plate of the Chocolate Graham Crackers.
(Got milk?)
My kids get so excited when I make these. They are a great snack to have on hand. Try them and see what you think! :)
Original article and pictures take heavenlyhomemakers.com site
I realized after mixing it up that I don’t have a funnel.
So I improvised and used my tea pot instead. Hey, it was a little non-conventional, but it worked!
And then I used the spilled cleaner to scrub my clean off my kitchen table.
Homemade Tub & Tile Cleaner
68K+
3/4 cup baking soda
1/4 cup lemon juice
3 Tablespoons salt
3 Tablespoons dishwashing liquid
1/2 cup vinegar
10 drops essential oil (optional)
Mix all ingredients together in a large bowl. Pour into a plastic container with a lid. You can use a spray bottle (that’s what I had), but since the mixture is thicker, I couldn’t get it to spray out of my cheap spray bottle.
To use: Shake and pour a small amount onto a rag or directly onto the area you are cleaning. Scrub and then rinse with water and wet rag.
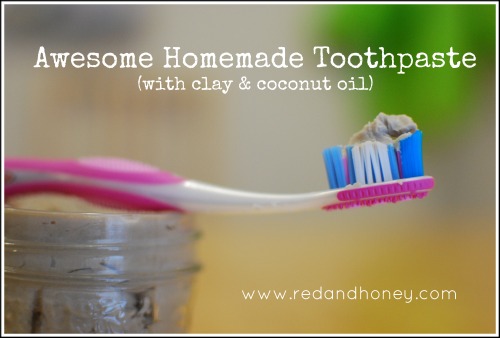
I’ve seen many homemade toothpaste recipes floating around internet-land for a few years now.
Most recipes are a baking soda mixture, and while I have serious respect for the power of baking soda (it’s an awesome tub cleaner!), the thought of it in my mouth makes me scrunch up my nose and keep on buying those danged expensive little tubes of all-natural toothpaste from the local health store.
Then, I saw this post on Keeper of the Home where Stephanie makes homemade clay toothpaste. She essentially made her own Redmond Earthpaste – how awesome is that?! I recently got a tube of Earthpaste in the mail from the ebook bundle freebies, and I am loving it.
Being on a every-penny-pinched kind of budget though, I’m not loving the price. I mean, if you’re going to buy an all-natural flouride-free toothpaste (definitely a good idea if you aren’t going to make your own) then Earthpaste is definitely one of the best out there, and fairly priced too.
However, since I needed a more frugal option I opted to attempt to make my own concoction. (I love how the little things can really add up to big savings in the long run!). Woot woot! It turned out fabulously, and I am sharing the recipe below.
How Frugal Is It Compared to Store-Bought?
Redmond Clay – bought a jar for around $10, used 1/4 cup for a cost of $1.30 (found at a local natural health store)
Organic Virgin Coconut Oil – bought a jar for around $10, used 2 T for a cost of 68 cents.
Xylitol – approximately 25 cents worth (bought at the Bulk Barn, and I don’t honestly remember how much it cost, so this is a guesstimate!)
Peppermint Extract – a small container for around $3, used 2 teaspoons for a cost of 70 cents.
Redmond Real Salt – I only used 1/2 teaspoon of salt, so I didn’t bother calculating it.
Water – free. (OK, so technically I used the water from our Berkey, so maybe it cost a penny or two towards the cost of a new filter in 2-3 years…)
TOTAL COST: $2.93 for 130 ml (I used a little 125ml mason jam jar, and there was a little extra, so we all brushed our teeth and then squished the rest in as best we could!)
Cost of Redmond Earthpaste where I could buy it online (with free shipping here): $6.59 for 113 g.
The bottom line? My homemade version is approximately 60% cheaper!
When you calculate the annual costs for a family of five like ours, brushing our teeth twice a day, you will save approximately $326.50/year!
That’s no small chunk of change, and most definitely worth it in my opinion… especially when you consider the fact that this toothpaste feels and tastes just as good as the regular stuff. I actually find that it makes my teeth and mouth feel smoother and cleaner than ever. I’m guessing that if I were to try and suck it up and use a homemade baking soda kind, I’d likely give up on it eventually.
Why Not Conventional Toothpaste?
The toothpaste brands typically found on store shelves are full of harmful ingredients that you really don’t want to be ingesting; such as sodium lauryl sulfates (SLS), artificial flavours and colourings, parabens, fluoride, glycerin, and more. The EWG (a non-profit information agency) says
“Many people believe that companies are required to test personal care products for safety before they’re sold. It’s not true. While many companies make perfectly safe products, other personal care products that you use every day might be laden with carcinogens or miscellaneous chemicals that no one has ever studied the health effects of.”
The safety of using fluoride has also come into serious doubt recently. This article has some excellent info. Interestingly, more and more people are starting to recognize the dangers of fluoride, such as the city of Calgary (an hour from Tiny Town!) which has voted to ban all fluoride in the public water supply.
Another ingredient that is in virtually all store-bought toothpaste (even the natural brands!) that I wanted to avoid is glycerin. This relatively harmless ingredient actually wreaks a lot of havoc by leaving a coating on your teeth, which does not allow them to remineralize on their own, leading to more cavities. The book Cure Tooth Decay by Ramiel Nagel is the one most commonly cited by other writers on this subject, though I haven’t personally read it yet myself.
The Amazing Power of Clay
The clay is a fabulous starring ingredient in this toothpaste as it is smooth and mostly tasteless on its own. It has incredible medicinal properties as well so that if you accidentally swallow some it’s totally safe (and even potentially beneficial).
There are a number of scientific studies published that show the power of clay to draw out toxins from the body. It is often used for stomach/bowel upsets, and it has even been proven to have a powerful role in the adsorption of radiation. Toxins are attracted to the clay like a magnet and carried out of the body. This process is called adsorption (spelled with a “d”). Clay has been used therapeutically for thousands of years, and is starting to see a resurgence in popularity once again.
Why I Didn’t Use Essential Oils or Baking Soda
I decided to not use any essential oils because I have concerns about the safety of ingesting them, especially on a daily long-term basis. You may think it doesn’t matter since we spit it out, but since my four-year-old son loves to declare that “Toothpaste is my favourite food, Mommy!” whenever he brushes his teeth, I decided that spitting the toothpaste out was not a safe bet.
I also have concerns about having things in my mouth that I’m not comfortable ingesting due to the absorbing nature of the mucous pathways of our bodies (think eye, nose, mouth, etc).
Some claim that ingesting small amounts of certain higher-quality oils is safe, but even that is not on a daily long-term basis. Either way, essential oils are powerful things, and they can make a person quite sick if used incorrectly.
So, I needed something else for the minty flavour and preferably something else with antibacterial properties. I decided to use peppermint extract and xylitol for taste (minty and sweet), and coconut oil for its antibacterial properties.
You could easily sub in stevia for sweetener if you’d like, but I didn’t for a couple of reasons: 1) I didn’t have any on hand 2) The first brand I’ve tried had a yucky aftertaste and I haven’t wanted to drop the money on trying more to find one I like, and 3) there are many studies citing the benefits of xylitol on reducing or healing cavities.
I also decided to avoid baking soda, which is the basis of most homemade toothpaste recipes, for a couple of reasons. First, because the taste is just gross to me. I’ve also heard conflicting reports about using baking soda on your teeth. Many say that it is too abrasive, and too harsh for daily use on teeth and gums.
Mix clay and salt in a bowl, then add boiling water. Mix well with a hand mixer, then add the rest of the ingredients. Mix all together well, store in an airtight container, and throw out your colgate.
(Edited to add: I find mine fairly stiff in texture, so feel free to add extra hot water (a tablespoon at a time) to get the consistency you want before putting it in the container).
I have mine in a small mason jar for now, and I plan to keep a little butter knife or spoon with it to use to apply the toothpaste to the brush. Dipping it in won’t work because of the potential contamination of bacteria, and the texture is a bit too thick for that to work well anyway.
I love this toothpaste, my family loves it, and there’s no way I’m ever going back!
Have you ever made your own toothpaste?
Original article and pictures take redandhoney.com site
Homemade Toothpaste (that’s just like Earthpaste!) We started making homemade toothpaste for a fraction of the cost, and it tastes just like Earthpaste! Just a few ingredients and you'll have homemade toothpaste in whatever flavor you want! :: DontWastetheCrumbs.com
Confession: I make homemade toothpaste because I’m a toothpaste snob.
I fell in love with Earthpaste after using it only once, and the whole family has been happily brushing their teeth with dirt ever since. In fact, we credit my husband beating gum disease to the clay.
However, when our supply of Earthpaste began to run low, I started to panic.
You see, I was so in love with all-natural Earthpaste and so against conventional toothpaste (because of the glycerin and fluoride), I never wanted to go back and use the old stuff again..
So in a temporary moment of temporary mom-gone-too-crunchy, I threw every other tube of toothpaste we had away.
In one fell swoop, every last box and tube was gone. Even the tiny samples!
Don’t get me wrong – I’m SO glad we’ve switched to an all-natural toothpaste. But without a backup in the closet, when the toothpaste was gone, it was gone!
In all the stores I shop locally, I’ve never seen Earthpaste on the shelves.
I know Whole Foods carries it, but since the I always walk out of there spending more money than I planned, I just try to stay away in the first place. I’d probably pass out at the price tag anyway.
I know I can get Earthpaste from Amazon, but that usually means waiting a couple days for delivery.
Our experiment to see if cutting the tip off the end of toothpaste saves money worked, and it would stretch what toothpaste we had on hand for a little bit. But I had to come to terms with the inevitable: A day would come when the tubes would be completely empty and we would officially run out of toothpaste.
That day came sooner than later and I was forced to make a decision: Either fork over the money for more Earthpaste, or try my hand at homemade toothpaste.
Pssh, as if there’s an option in this frugal crunchy house.
I thought it would be super cool to make homemade toothpaste with coconut oil, and I know that the benefits of coconut oil are pretty amazing, so my first batch included it plus clay, peppermint essential oil, salt and tea tree oil. The flavor wasn’t bad, but it made for a really weird brushing experience.
Because coconut oil is solid at room temperature, you can’t just dip your toothbrush into the jar. I had to scrape some out first and then put it on my brush. Then in my mouth the homemade toothpaste felt like little pieces of hard-ish clay were floating around until the heat from my mouth finally melted it.
And then suddenly my mouth become oily and minty and I wasn’t really sure if I was actually brushing with it or if the melted toothpaste was just hanging out under my tongue.
Let’s just say my first batch of homemade toothpaste with coconut oil was weird.
Too weird in my book and if it’s weird to me, it’ll definitely be weird to the rest of the family. And who wants to feel weird when they’re brushing their teeth?
After reading the benefits of clay, we starting making homemade toothpaste and we love it! Not only are we saving money by making homemade toothpaste, but our dentist says our teeth have never looked so good! :: DontWastetheCrumbs.com
So I moved on to plan B and what should have been plan A in the first place: Make homemade toothpaste that’s just like Earthpaste.
The list of ingredients on a tube of peppermint Earthpaste is pretty simple and straightforward: water, clay, xylitol, peppermint essential oil, menthol, real salt and tea tree oil. Lucky for me, I had everything but xylitol and menthol.
Xylitol is a sweetener (with some beneficial properties for teeth), but I did have stevia and figured it would do the job as a sweetener just fine.
Menthol is often used for its breath-freshening qualities, but using both tea tree oil and peppermint oil would work.
Neither of these substitutions were deal breakers in my book – we still needed toothpaste, remember?!
My second batch of homemade toothpaste included water, clay, stevia, peppermint essential oil, real salt and tea tree oil. Dare I say, it was just like Earthpaste?!
I got brave and branched out beyond peppermint, mixing and matching the essential oils I had with the flavors of stevia in my pantry. In the end, I was able to create three flavors of all-natural homemade toothpaste that replicate Earthpaste so much so that my family can’t even tell the difference!
All three flavors are Mr. Crumbs and kid approved, verified by eating AND brushing. (The Boy is actually the one that said the lemon flavor wasn’t lemon-y enough!)
How to Make Homemade Toothpaste (that’s just like Earthpaste!)
Combine 3 Tbsp of water with clay in a non-metal bowl and mix well using a non-metal spoon (the clay should never come in contact with any metals). Add tea tree oil, stevia and 10 drops of desired essential oil (peppermint, lemon or orange). Mix well.
Add a pinch of salt, mix well and taste. Add additional stevia and/or peppermint essential oils and/or water to taste and texture, adding oils one drop at a time and water 1/2 Tbsp at a time. The flavors will meld together over time, so wait 48 hours before making significant adjustments to the flavor.
Our homemade toothpaste that tastes just like Earthpaste is our favorite of all time. The kids love the lemon flavor, and my husband loves peppermint. I love that it only takes 5 minutes to make! :: DontWastetheCrumbs.com
Cost Breakdown for Homemade Toothpaste
The best price on Earthpaste I can find is through Azure standard, where you can get one tube for $4.20. The next lowest price is at Amazon for $5.15 per tube. Since not everyone has access to Azure, let’s use Amazon’s price of $1.56 per ounce for comparison purposes.
The recipe above will yield approximately 1.5 ounces and here’s the breakdown of the cost of each ingredient:
clay: $0.60
water: $0
tea tree oil: $0.05
peppermint essential oil: $0.18
liquid stevia: $0.08
salt: $0.01
Total cost of all-natural, homemade toothpaste that’s just like Earthpaste: $0.61 per ounce. That the same as $2.45 for one 4oz tube, or a savings of over 60%!
So far, the only downside I can see from making your own toothpaste is the up-front cost of ingredients. However, one 10 oz tub of bentonite clay can make over 34 batches of the recipe above and each 1 oz bottle of essential oil will make over 37 batches.
To say you’ll have enough ingredients on hand to make toothpaste for awhile is an understatement!
Using and Storing Homemade Toothpaste
We use this toothpaste by simply dipping our brushes in the one jar. However, if you’d prefer everyone to have their own containers, here are a few options:
Mini Plastic Pots: These are about the size of a single eyeshadow container and take the issue out of sharing one bigger jar. One batch will fill 2-3 pots, depending on how well you pack it in.
Reusable Plastic Tubes: These allow you to squeeze the toothpaste out, instead of dipping into a jar. Each holds 3 oz, so roughly one batch of toothpaste per tube.
Small Glass Jars: Each jar is 4 oz, so one batch of toothpaste fills each about halfway. This is what I use personally, since each jar can serve many functions beyond the bathroom.
Mini Glass Jars: Similar to what we use, except that each jar is only 2oz and comes with a plastic lid. Perfect for those concerned about the clay touching metal, and traveling!
Side note:
You might be asking, why bentonite clay? Bentonite clay has so many amazing health benefits (you can read more about that HERE and ways to use it!). One of the benefits is the remineralizing effects clay has on your body (and teeth!). This could be one reason why my husband was able to heal his gum disease naturally.
Are you a toothpaste snob? Would you fork over the money and pay for toothpaste, or would you try to make it yourself? What flavor would you make?
Original article and pictures take dontwastethecrumbs.com site
Homemade Sunscreen with Just 3 Simple Ingredients We're making this recipe for non-toxic homemade sunscreen this summer because it's SO easy. It's just 3 ingredients, ready in less than 5 minutes and costs only $2 - WAY less than the sunscreen at stores! :: DontWastetheCrumbs.com
When we lived in California, we didn’t worry much about sunscreen and chose other methods for avoiding sunburns when we were outside for a long period of time.
Now that we live in Georgia and there are many pool days in our future, I’m ready to jump in with two feet and make my own homemade sunscreen.
But with 50% of the family having fair skin that’s prone to burn easily, it was important that our homemade sunscreen worked.
Reasons to Make Homemade Sunscreen
For a long time, I bought whatever sunscreen was cheapest. Whether that was store brand or name brand, buying in bulk or using coupons – it didn’t matter. I bought it and we used it whenever we needed it, which really wasn’t that often.
We lived in an area that was typically cool and overcast. While you can get sunburned on a cloudy day, I was more concerned about our getting enough Vitamin D than getting burned. Family vacations aside, I can probably count on one hand the number of times we used sunscreen in the average year. Since we didn’t use sunscreen that often, I wasn’t too concerned about what was in it.
The weather where we live now is very different. It’s mostly sunny the majority of the time and we’re outside enjoying every minute we can. Our neighborhood pool has only been open a week and we’ve been there every single day.
As we gradually learn more and more about what we put on our skin, and balance it against how often we do it, making homemade sunscreen has become more of a priority for me.
You see, my daughter inherited my fair skin and together we cover ourselves head to toe with sunscreen. If we don’t, we burn after just 30 minutes in the sun. Summer days at the pool means applying and reapplying sunscreen on a regular basis.
The more often we use a product or eat a food, the better quality I want it to be, and we’re finally to the point where it’s time to upgrade our sunscreen. The top of my concerns are toxins, the cost of quality sunscreen and the fact that traditional sunscreens may even increase the risk of skin cancer.
Parabens
With the amount of sunscreen we use in the summer, our sunscreen needs to be free of toxins and parabens is at the top of the list. According to the Environmental Working Group (EWG),
Parabens act as a synthetic estrogenic compound and can alter hormone signaling… Proper endocrine signaling is particularly important during critical windows of development – while in the womb and during childhood and adolescence. Chemicals that disrupt hormone signaling can lead to adverse effect on development, reproduction and the neurological and immune systems.
This ingredient is found in all sorts of make-up and skin care items because it has anti-oxidant properties that slow the aging of the skin. However, this same ingredient that can cause a “greater sensitivity to sunlight” is also attributed to “enhancing the photocarcinogenic activity,” of sunlight according to a panel of independent scientists convened by the NTP.
Fragrance
The Federal Drug Administration (FDA) doesn’t require the term “fragrance” to be broken down any further. Many companies hide their trade secrets behind this term on ingredient labels, and it might very well include something that is fragrant. But it can also include preservatives for the fragrance and other chemicals we’d never even know.
Because I don’t know what “fragrance” includes, I avoid it whenever possible.
Cost
With four people in our family who all love to spend days at the pool, I anticipate going through a lot of sunscreen this summer. We spent 3 weeks in Costa Rica last year and as a family, we went through an entire 8 ounce bottle of sunscreen each week!
We won’t be in the sun all day every day, so estimating about 4 ounces each week seems fair. The best, most affordable non-toxic sunscreen on the store shelves comes in a 2 ounce container and costs almost $10. If we went this route, we’d be paying nearly $160 in sunscreen alone this summer!
Your actual cost to make your own homemade sunscreen will vary since the main ingredient will depend on your brand preference. Buying both zinc oxide and carrot seed oil is an up-front cost, but they’ll last at least through the summer, if not longer. The carrot seed oil will make 8 batches of homemade sunscreen and the zinc oxide will make 14!
When I figure the cost of making one batch of homemade sunscreen every week this summer, I’m saving over $125!
Pure Ingredients
I’ve been dealing with acne-prone skin for as long as I can remember. It wasn’t until I switched to an all-natural soap that my skin finally cleared up.
Ever since, I avidly read every label of any product I put on my skin. I even make my own tinted moisturizer and powdered foundation so that minimal ingredients are used on my face.
The rest of my body isn’t quite as prone to breaking out as my face, but I’m still hesitant about ingredients. And since I don’t want to have a separate bottle of sunscreen just for my face, I’d rather make a homemade sunscreen that worked for the entire body, for the whole family.
Finding safe sunscreen can be a challenge. We started making this homemade sunscreen and love it! Only 3 ingredients and only $2 a batch!
Most homemade sunscreen recipes include ingredients like coconut oil and shea butter or cocoa butter to make a lotion as a base. I’ve been trying various homemade lotion recipes using these ingredients for two years now and for one reason or another, my family doesn’t like them.
So it shouldn’t be a surprise that the homemade sunscreen recipes that also use these ingredients would create a texture that I wouldn’t like either:
Some were way too thick.
Some were sticky.
Some smelled awful.
Some wouldn’t rub in (at all).
Some were too oily.
For one reason or another, every homemade sunscreen recipe I tried was a no-go.
However, one common thread I did find was that the homemade sunscreens with zinc oxide worked. And that’s what spawned me to create my own homemade sunscreen recipe with just 3 ingredients, using our favorite lotion as a base!
One batch of homemade sunscreen costs just $2 to make - compared to $20 for the cheapest non-toxic sunscreen in stores. It's ready in 5 minutes and works great on my daughter's fair skin! :: DontWastetheCrumbs.com
Controlling the SPF of Homemade Sunscreen
My homemade sunscreen recipe relies on two ingredients to provide SPF: zinc oxide and carrot seed oil.
You can increase the amount of SPF you want in your homemade sunscreen by adding more zinc oxide, or by using less, in relation to the amount of lotion you’re starting with. Here’s a general chart for zinc oxide recommendations:
SPF 2-5: Use 5% zinc oxide
SPF 6-11: Use 10% zinc oxide
SPF 12-19: Use 15% zinc oxide
SPF 20+: Use 20% zinc oxide
If you wanted to make homemade sunscreen with an SPF of 20, you would calculate 20% of the amount of lotion you’re starting with. So if you have 4 ounces of lotion, you would use .8 ounces of zinc oxide.
This is where a kitchen scale is very handy when making homemade sunscreen, although you can make do with measuring spoons if that’s what you have. One ounce is about the same as 2 tablespoons, so .8 ounces would be 1 tablespoon + 2 teaspoons.
Carrot seed oil has a natural SPF ranging from 35-50. While this won’t add to the total SPF of the homemade sunscreen, I like to add some because of it’s own SPF properties. We have fair skin, remember? Better safe than sorry.
And if you don’t have carrot seed oil, raspberry seed oil has a similar SPF profile of 30-50.
This homemade sunscreen recipe takes just 5 minutes to make and only uses 3 ingredients. It's non-toxic, won't leave your skin white and really works. Plus it costs 80% less than store bought! :: DontWastetheCrumbs.com
Tips for Successful Homemade Sunscreen
Depending on the type of lotion you use and oils you have on hand, you might have to add other ingredients to make it a bit more user-friendly as a sunscreen.
For example, my husband’s favorite lotion absorbs really quickly. This is fine as a lotion, but when I use it to make homemade sunscreen, it absorbs before I’ve had a chance to rub the sunscreen over the area. Adding 1-2 tablespoons of a nourishing oil helps to thin the homemade sunscreen just a bit so I have extra time to rub it in.
Zinc oxide is famous for leaving a layer of white on the skin. Depending on how much zinc oxide you use, the layer might be thin and barely noticeable, or it might be thick and quite noticeable. You can tint homemade sunscreen though, to better match your skin. To do this, add cocoa powder 1/2 tsp at a time until you reach the desired color.
You can see the white sunscreen two pictures above, and the tinted sunscreen in the previous picture. I used 1 tsp of cocoa powder in that batch and found it to be good for my fair skin.
Finally, raspberry seed oil also has SPF properties if you’re unable to find carrot seed oil. Use the same amount as you would for carrot seed oil.
How to Make Homemade Sunscreen with Just 3 Ingredients
Homemade Sunscreen Supplies
4 oz of your favorite non-toxic lotion (I prefer the lotion from Bend Soap Company while my husband likes Aveeno)
.8 oz zinc oxide for about 20 SPF (about 1 Tbsp + 2 tsp)
12 drops carrot seed oil** (scant ¼ tsp)
Optional Ingredients (see “Tips for Successful Homemade Sunscreen” for how to use)
Measure lotion into a small bowl. Add the zinc oxide, oil(s) and any other optional ingredients as needed and mix well.
Store in a glass jar or in a squeezable tube like this one. This recipe makes about 1/2 cup. Multiply as needed to make as much as you need.
This recipe for homemade sunscreen is so easy to make and it costs 80% less than what you buy at the store. Plus it's non-toxic sunscreen, and it works even on my super fair skin! :: DontWastetheCrumbs.com
How to Make Homemade Waterproof Sunscreen
The recipe above makes a sunscreen that rubs in easily and doesn’t feel greasy. I attribute this largely to using a lotion that we already like.
If you want to make a sunscreen that’s waterproof and will stand up to time spent in the pool, use this recipe.
Make a double boiler by placing a glass or metal bowl over a pan of boiling water. Measure beeswax and allow to melt.
Remove the melted wax from the heat and let it cool just slightly. Add the lotion and zinc oxide and stir until it’s completely incorporated.
Add the essential oils and any other optional ingredients as needed and stir well. Allow to cool before using. Although I really like using these squeezable tubes at the pool, homemade waterproof sunscreen is easier to clean out of glass jars.
Tip: Working with beeswax can be messy. Be sure to use bowls and spoons you won’t care to get dirty. For tips on how to clean beeswax and butters off your kitchen gear, read the tutorial on this post.
Best Natural Sunscreens to Buy
I was overwhelmed at the mere thought of making homemade sunscreen for a long time. If that’s where you are right now, there’s nothing wrong with going store-bought for now. Here are the top recommended sunscreens by the EWG and from fellow moms!
Have you made homemade sunscreen before? How do you like it compared to traditional sunscreen?