Baking treats, muffins, quick breads and more just got taken up a notch with this homemade vanilla sugar.
This sugar is perfect for adding just a touch of vanilla flavor, and is great for when you don’t have any extract on hand. It’s also great for sweetening tea, coffee, kombucha and other beverages.
Vanilla sugar makes a great gift for that “hard to buy for person”, that budding chef, or anyone who loves vanilla!
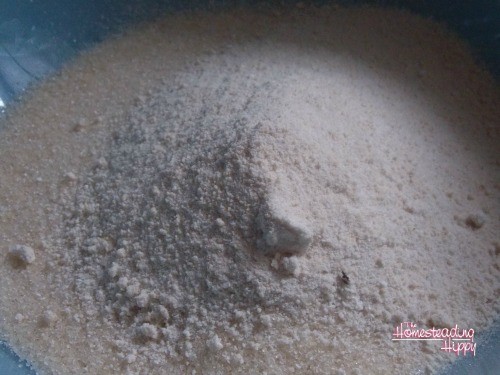
Gently run the knife down the bean to get all the “beany goodness”. Put the vanilla goodness and the beans into a jar and add your sugar. This is my preferred method, but you could also “cheat” and just break them up into pieces into the sugar.
(from my affiliate partner) for this as I like the bigger grains for added flavor. Of course, you can use any sugar you would like for this and it would taste just as wonderful. Close the lid, give it a gentle shake, and in a week or so, you will have awesome smelling vanilly sugar!
Store in a cool, dry area.
I never remove the beans as I use the sugar. If one of the bean pieces falls out, I simply let it be added to the recipe. The pieces are small enough that it doesn’t pose an issue. When I run out, I simply add more sugar to the beans. I think I am able to do this about 3-4 times before the beans seem to be “spent” and have no more vanilla flavor or scent.
Have you made your own vanilla sugar before? Will you try this recipe? Be sure to pin this for later!
Original article and pictures take thehomesteadinghippy.com site
This is the season for strawberries!!! I am so excited, because my family can easily consume them at a rate of 4 pounds an hour…really! And, since they are in season, they are abundant, on sale, and sooo good! Today, I am going to show you one way to preserve this wonderful fruit by making freezer jam.
You will want to begin with 2 quarts of fresh strawberries.
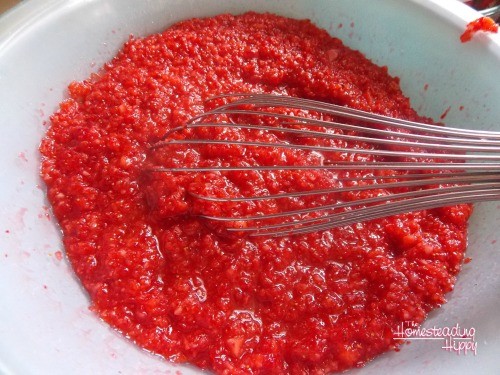
Don’t work with more than this at a time, or you can get a huge mess…trust me on this one, mmmkay? Gently mash the strawberries with a fork or potato masher. Using a blender or food processor also works really well and is much faster. In a separate bowl, mix together 2/3 cup sugar and 2 Tablespoons pectin very well.
Add in the mashed strawberries and mix together for 3 full minutes.
I personally set a timer on this one, because 3 minutes can seem like an eternity after only 30 seconds. I know just how long I’ve stirred and how long I need to keep going for.
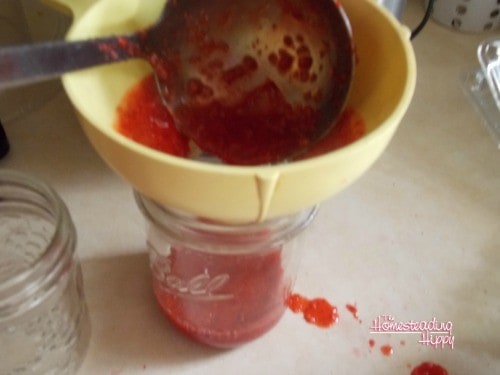
Carefully pour into clean pint jars. (see what happens when you are ladeling and taking a pic at the same time?)
You of course want to use clean jars. I like the ball freezer jars, but any freezer capable jar is fine. I’ve reused old jelly jars for this, old spaghetti sauce jars, whatever. For the most part, it’s not going to be in the freezer for longer than a couple months anyway.
Freeze for up to a year, or put in the fridge and enjoy within 3 weeks!
Do you make strawberry freezer jam? Are you going to try it next time you have strawberries? Be sure to pin this for later!
Original article and pictures take thehomesteadinghippy.com site
I used to eat it on crackers, tortillas, and pita bread all the time. Of course, being gluten free means that I don’t eat those things as much anymore. Sure, there are gluten free versions, but I have found it’s easier to give those items up completely for now. I just eat a small bowl of it with a spoon now, and it’s just as wonderful as always. I make it much healthier by sprouting the garbanzo beans first, to make them a “living food”. Here’s how I do it:
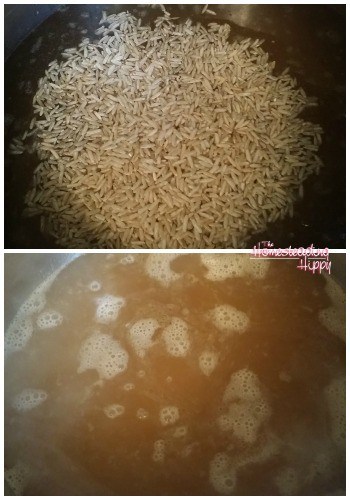
Begin by adding approximately 3 cups of dried beans to a sprouting jar.
You want to make sure to leave enough room for the beans to expand. Soak them overnight. After 12-18 hours, the beans will have expanded to fill the jar like this:
Drain the beans, rinse and drain again.
Set the jar at an angle to completely drain the water from the jar. This could take about 10 minutes, but I leave it at an angle for up to 30 minutes. Lay the jar on it’s side to allow the beans to begin to sprout. Repeat this process 2 times a day for 2-3 days, until you see “tails” on the beans.
Rinse the beans a final time.
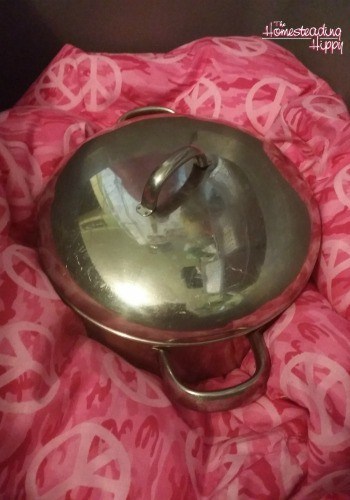
Then, place the beans in a pot large enough to cover with at least 6 inches of water over the beans. Gently simmer the beans for an hour, until tender. Drain completely. In a blender, add 3 cloves garlic, 2 cups of the cooked beans, 1/2 cup olive oil, 1 tsp salt. 1/2 tsp black pepper, and 1 tsp lemon juice.
Blend until smooth and enjoy!
Original article and pictures take thehomesteadinghippy.com site
I don’t like to cook much in the summer, as it just heats up the kitchen even more. However, my family LOVES rice for stir frys, fried rice and other dishes, especially in the summer as the garden gives us delicious veggies to use with it. I use instant rice as much as possible, but I still need to cook that from scratch and that heats up the kitchen. I found an easier way to make large batches of rice without all the heat! The WonderOven!
It looks like a huge bean bag, to be honest.
When I first got this, I wasn’t really sure about using it but it has since garnered a permanent spot in my kitchen. It’s simply amazing! It holds in the heat and keeps the food cooking, without burning, for hours! An easy way to get started is by making rice. So, here’s how to make rice in the WonderOven. You will need rice, water, salt, a pot with a lid, your WonderOven and a large plastic box with a lid for the WonderOven to set in, like a Rubbermaid Container.
First, bring the measured amount of rice and water to a boil.
You want to add a bit of salt or other flavorings for your rice at this time. Sometimes, I will add some butter if it’s a wild rice I am cooking. Allow it to boil for 10-15 minutes.
Next, place the bottom part of the WonderOven in the bottom of the box.
You will want to spread it around a bit to make room for your pot. The beads are easily manipulated into place and this part is kind of fun since it’s all squishy.
Place the lid on your pot of boiling water and rice.
CAREFULLY, place the pot in the center of the WonderOven. You will want to make sure it’s in the center as much as possible at this point. Cover with the top of the WonderOven, and place the plastic box top on tight.
Walk away for at least 40 minutes.
I have left this in for up to 12 hours before, and it was perfect! When you are ready, take off the plastic lid and remove the WonderOven top. It’s still going to be very hot, surprisingly, so use hot pads. Fluff your perfectly cooked rice with a fork and serve! Delicious! You can purchase a WonderOven here for your very own. Or, they also have something very similar to them here.
Original article and pictures take thehomesteadinghippy.com site
Eating healthy doesn’t mean you have to give up family pizza night! Check out these ideas for a healthy, frugal pizza night that your family will love!
Let’s take away the unhealthy reputation pizza has and learn how to make pizza night healthier! Having a regular pizza night is a fun way to create lasting family memories. Our family enjoys pizza for dinner with a family movie in our living room most Friday nights.
That being said, ordering pizza out gets expensive and frozen pizza, while convenient, is far from healthy. Making homemade pizza is the best way to save money and provide a healthier meal while still enjoying family pizza nights.
Once you get the hang of how to make pizza at home, your family will enjoy the special touches you add that make pizza night extra special.
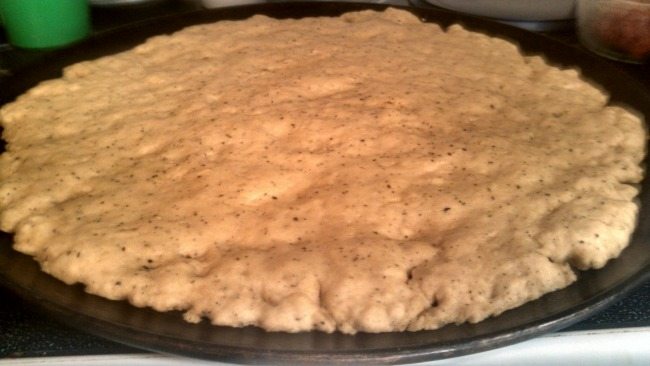
1. Start with homemade pizza crust
Store bought pizza crusts and mixes are easy to use, but loaded with chemical preservatives. Instead, make your own pizza crust! This doesn’t mean you have to make a yeast crust and wait for the dough to rise. My go-to pizza crust recipe is a whole wheat pizza crust made with Greek yogurt that rises using baking soda and baking powder.
2. Use simple ingredients
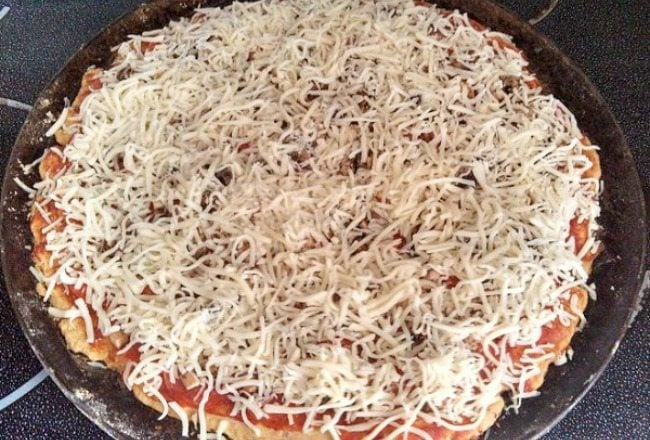
Forget the store bought pizza sauce. Using basic ingredients is much healthier. I simply spread tomato paste on the pre-baked crust and top with a couple of different seasonings. Oregano and onion powder go well on most pizzas.
Don’t forget to take into account preparation of ingredients. Sausage will need to be pre-cooked and drained. Ham, green peppers, onion, and mushrooms will need to be chopped.
3. Have fun with toppings
I often ask my family what they would like me to include on a pizza. My 3-year-old daughter once suggested macaroni and cheese as a topping, so I tried it! My 8-year-old son likes when I add crushed pineapple (be sure to drain well!). For my husband, the more meat the better.
I buy 8-ounce blocks of cheese at Aldi and freshly shred a block of mozzarella cheese to use on a pizza. This eliminates all the added fillers that pre-shredded cheese needs in order to keep the pieces separated.
5. Assemble your pizza
Now you have everything you need to assemble your pizza. Here are the basic steps to pull everything together:
Find a pizza crust recipe you enjoy and prepare.
Pre-bake the crust according to instructions.
Add your desired sauce, seasonings, toppings and cheese.
Bake at 425°F for 15-18 minutes (or follow directions for recipe you are using).
6. Include healthier sides
Instead of opening up a bag of frozen French fries or ordering cheesy garlic bread to go with your carry out pizza, you could opt for healthier, homemade sides. You could even search Pinterest for recipes to make your own homemade potato wedges or garlic bread. The result would be healthier because you control what ingredients you use.
Fresh fruit and salads are wonderful sides to serve with pizza. By keeping lettuce or spinach on hand and some carrots for shredding, you can easily throw together a quick side salad. You can also make a fruit salad by simply mixing Greek yogurt, honey and whatever chopped fruit you have on hand. Strawberries, blueberries, apples, bananas and pineapple all work well.
What is your favorite way to make pizza night healthier?
Dawn is a work-at-home mom who enjoys preparing home cooked meals to reduce processed ingredients in her family’s meals. She shares tips on healthy eating, family, skin care and natural health solutions on her blog, Reveal Natural Health.
Original article and pictures take thehumbledhomemaker.com site
How to make perfume with essential oils – enjoy your own signature scent with this recipe!
So, you may remember that I’ve been on a little DIY all-natural beauty kick. Remember when I made deodorant, lip balm, and lotion? I really enjoy making my own products because I am kind of a freak about avoiding chemicals like parabens, phthalates, artificial scents, dyes, and anything that is related to antifreeze or formaldehyde. This is my body, and the skin is the largest organ. There’s no way that I’m going to apply anything to it that is a carcinogen, you know?
Plus, I just find it to be very fun and relaxing to make my own products. I decided to make my own perfume the other day because I ran out of mine. I use the Pacifica Italian Blood Orange scent, which is fabulous, and very safe, but I ran out. Boo. And I didn’t want to run to Whole Foods and spend $20, so I started to do a little research and found out that I could make my own at home with essential oils. Since I have a quite a few oils, including several citrus scents, I decided to try it.
two 4 ounce glass bottles with caps – at least one needs to be dark glass. You probably want one to have a spray top.
a small funnel
a coffee filter
1 Tablespoon sweet almond oil
5 Tablespoons vodka
a vitamin E capsule, prick with a pin so you can squeeze the oil out
21-25 drops of the essential oils of your choice
2 Tablespoons water distilled water
Method
1. Choose your three essential oils. Many articles that I read suggested choosing a base note, a middle note, and a top note. The top note is what you will smell first, but will fade the quickest. The middle is longer lasting, but the base note will be what lingers. This is a handy chart that lists out the oils and what note they are.
2. Put the sweet almond oil and the vitamin E oil in your bottle, then drip your essential oils in. You can evenly divide them, 7 or 8 drops of each of the three oils, or you can do 9, 9, and 7…that’s where the fun is. The scent is going to be yours, so you can play around with it.
3. Add the vodka, put the cap on the jar and shake it for a few minutes to blend it.
4. Place the bottle in a cool, dark place and let it sit for at least two days, and up to six weeks. The scent will strengthen over time. It’s up to you how long you want to let it sit. Mine has not been sitting for too long, but I love the fragrance already. I will probably let it sit for two weeks.
5. When you are satisfied with your fragrance, add the distilled water, shake the bottle again, and strain the perfume through a coffee filter into the dark glass bottle. You’re ready to use your perfume!
You might notice that I actually did not use a base note in this blend. I LOVE citrus scents, and these three scents have mood boosting properties that help me. Sweet Orange is Brightening, Tangerine is Cheering, and Lemon grass is Inspiring. In the winter, I need a little bit of cheering up, and so I am going to try these scents in perfume form to see how I like them. Just a note, some citrus oils are phototoxic, which means that if you apply them to your skin you should NOT expose that skin to the sun for 24 hours or you will have some irritation or be more prone to sunburn. You can read more about essential oils and phototoxicity here. I am comfortable with these citrus oils in the cooler weather because I will be spraying the perfume on my arm and it will be covered with clothing.
I’m also making a blend with sweet orange, clove, and vanilla, which I think will be lovely and warm smelling this fall. I will be updating this post with how I like my perfumes, and how long they last.
Have you ever made your own signature perfume? How did it turn out?
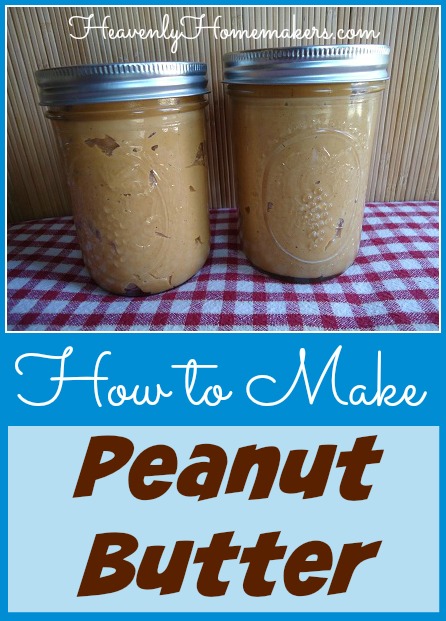
I just learned last week how to make peanut butter.
Here is what I must now ask myself…
WHY HAVE I NEVER MADE PEANUT BUTTER BEFORE?
I make almost everything else from scratch. But somehow making peanut butter sounded hard to me. I guess I thought I’d have to crush each individual peanut for three hours with my fingernails until it turned soft and creamy. I’d just never looked into it before. Finally I watched a tutorial here.
Um, hello Laura! It takes about a minute and a half! And you don’t even break a sweat (or a fingernail). Now, I’m totally addicted to making peanut butter. It’s one of the coolest things I’ve ever made.
After I made it, we ate it on pancakes and it was one of the best meals I’ve ever eaten. I loved it!!! All of us loved it! (Except Malachi who doesn’t love peanut butter at all.)
Here’s how to make Peanut Butter:
After about thirty seconds the nuts will all be crumbled up like this. Keep going with the food processor… Here’s what it looks like after about one minute.
And after about a minute and a half, it starts to become butter-like and rolls itself into a ball. Continue processing until your peanut butter reaches desired consistency.
Tada…peanut butter!
Stir some honey into your peanut butter if you think your family would like it better that way. Even better, if you prefer a more spreadable peanut butter (like Jif or Skippy but without all the icky ingredients) – check out this recipe for Super Creamy Peanut Butter.
NOW, I’m going to experiment making other nut butters and sunbutter (which is butter made from sunflower seeds if you aren’t familiar with that one). *Update* You’ll find my Almond Butter tutorial here.
The math: The way I figured it, making my own peanut butter did save me money, but not oodles of it like I was hoping for. However, because of the fresh taste of this peanut butter…and the fact that making it was as easy as using my thumb to push a button – I’m hooked!
Grab the family and try this! Then pour yourself a glass of milk and enjoy your hard work. (I love hard work that isn’t hard…)
Original article and pictures take heavenlyhomemakers.com site
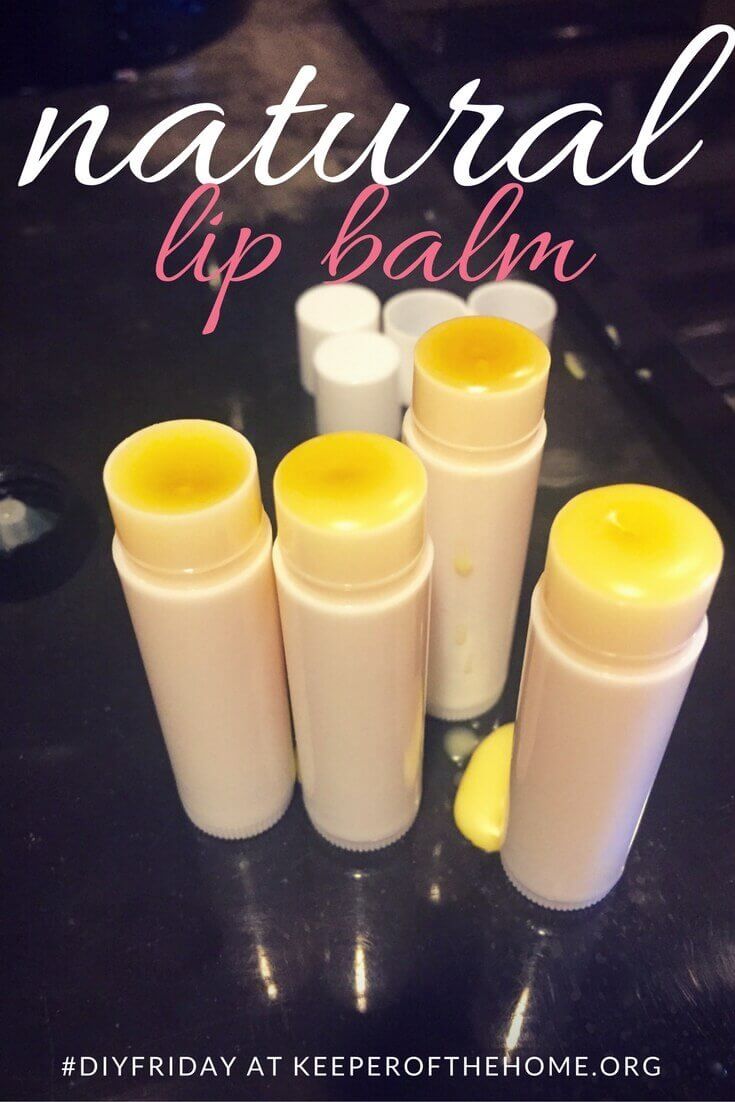
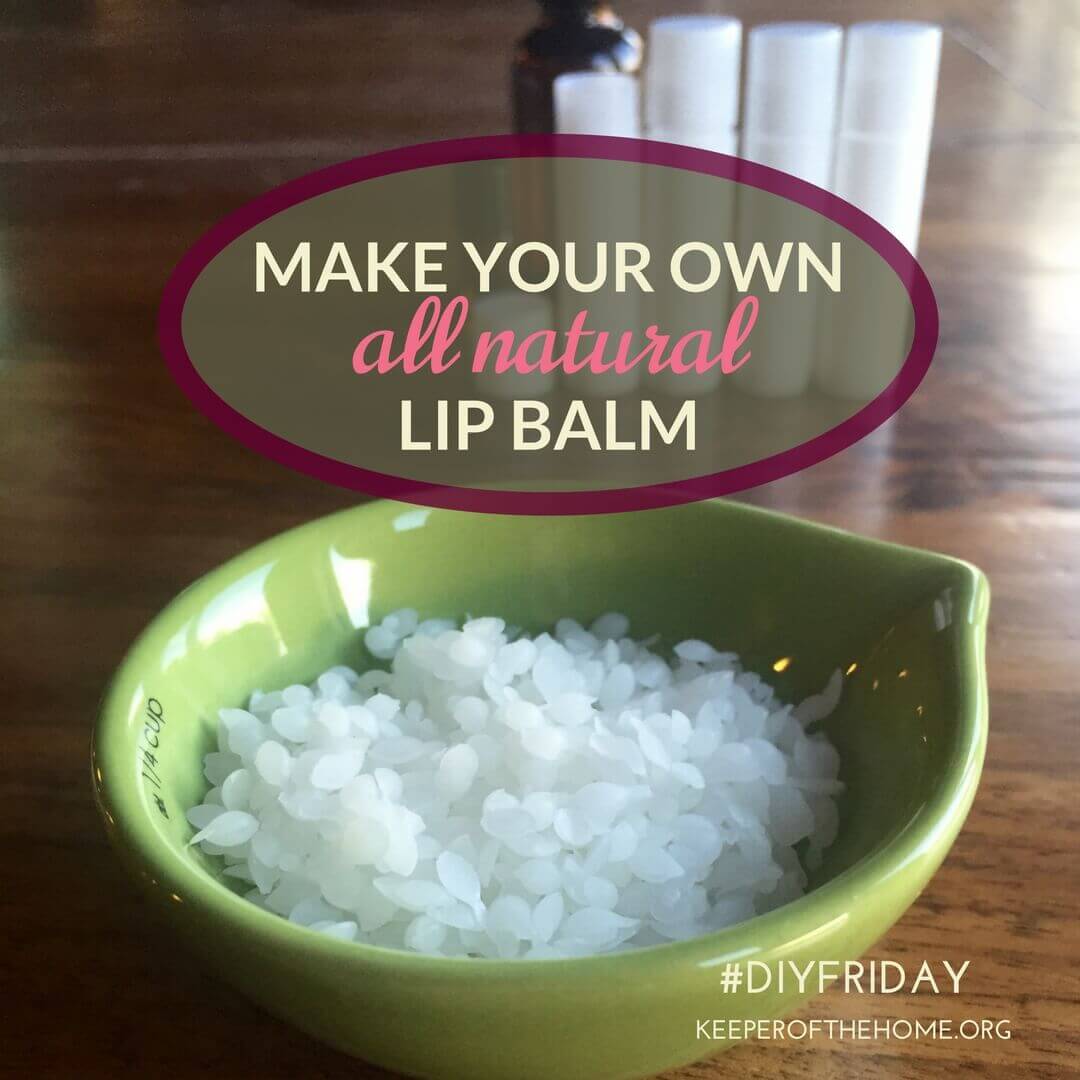
How to Make Natural Lip Balm (with Video) #DIYFriday
Me: “Hey honey, do you have any lip balm?”
Him: “Do I have lip balm?”
Me: “Oh.” (Eyerollsmirk) “Sorry. Can I borrow your lip balm?” ��
I thought I went through tubes of lip balm…until meeting my husband. I realize now that I never really used them up, I just lost them after a while. They’d disappear in a drawer, pocket, or purse, or maybe even rolling around the floor of the car.
But Mark ALWAYS has a tube of lip balm in his pocket and he ALWAYS uses the tube all the way to the bottom.
Before I met my husband, I had never before seen the bottom of a tube of lip balm! The kids and I tease him regularly about whether he has a tube in his pocket. We always know the answer. (Same as a pen.)
Until we married, he used chapsticks that contained a dozen or more ingredients that we couldn’t even pronounce and, worse yet, that dry out lips like camphor, phenol, and menthol.
Kind of counterproductive, wouldn’t you say? Or…designed to keep you buying more.
For the last several years, I’ve been searching for the best lip balms. I’ve been looking for the ones that really protect and soothe my lips without drying them out or exposing me to harmful chemicals, chemicals that I’ll end up eating or scraping off my lips with my teeth and swallowing. I don’t need those extra toxins, thanks.
Favorite all natural lip balms
You’re probably familiar with lip balm companies like Burt’s Bees, found in stores like Target and Kroger. It’s easy to find Burt’s Bees lip balm, which I usually have laying around (somewhere) in a few colors. They have a huge selection of flavors and tints. I don’t share them with the kids and hubs would rather not use the pretty colors!
But Burt’s Bees isn’t the only place to find great lip balms. There are many other natural lip balm companies out there with nourishing ingredients that are free of the parabens, phthalates, petrolatum, and other harmful ingredients.
Bend Soap (you may know them for their milk bath!) has a luxurious version that they call lip butter, made with shea, cocoa, and mango butters, with oils like coconut, raspberry, and palm oils.
Lexie Naturalslip balm is hand poured in small batches and contains NO fillers, preservatives, or fragrant oils. Their ingredients are simply coconut oil, beeswax, shea butter, and essential oils like peppermint, vanilla, grapefruit, lemongrass, and palma rose.
Last but not least—and definitely one of my favorites!—is Skinny & Company! Their lip balm is a bit pricey, but comes in either a tube or a tin. It offers an ultra-lightweight feel while still nourishing and protecting with beeswax, coconut oil, vitamin E, and peppermint essential oil. If thick goopy lip balm isn’t for you, give Skinny a try!
Making your own lip balm
Have you ever tried to make natural lip balm? Over the years, I’ve made quite a bit of lip balm from scratch and filled round metal tins with them for gifts, along with healing hand balms and other natural skincare products.
These lip balms are super easy to make and a fun activity with my girls. The girls especially love being able to choose which oils go into their own tube or tin! This is also another way to give meaningful gifts.
Recently I found this fun kit on Sew Grown (my newest addiction). It’s easy and inexpensive! It includes just the right amount of ingredients and tubes to quickly make your own natural and nourishing lip balms.
I bought a pack to try with my girls, because they love crafty things and they love starring in videos, but they are spending a week in Canada with friends, so my hubby stepped up to stand in for them. I’m not sure he knew what he was in for, but he was a good sport!
This fun DIY Lip Balm kit is super easy when you are short on time. That, and it makes sure Honey has his lip balm…so that I can borrow it. ��
How to make natural lip balm:
Gather supplies together:
A double boiler OR a pot with 2-3 inches water and a glass bowl, measuring cup, or container set inside
Sew Grown Lip Balm Kit (includes 5 tubes, organic white beeswax, a glass vial with organic cold-pressed Rosehip Seed oil and Carrot Seed essential oil)
Remove tops from tubes and set them beside the stove, near the funnel and measuring cup.
Melt the beeswax and the carrier oils together in the pot on medium heat. Stir with a wooden spoon to mix thoroughly.
Once melted, turn down heat to low and stir in essential oils if you’re using them.
At this point I poured my mixture into a measuring cup with a spout and with a steady hand (the liquid is still HOT!), poured it through a funnel into the tubes.
Fill tube until it is slightly overfull. As it cools, it will settle down and not be over the top. If you spill, simply let it cool and then smear the spillage on the lips of your husband �� but only if he is a good sport ��
Let tubes completely cool about 30 minutes before using. Easy peasy. Enjoy!
What’s your favorite lip balm? Do you have a story about making your own natural lip balm? (I’d love to hear it!)
This post contains affiliate links, which helps us keep the site up and running. We appreciate your support!
Original article and pictures take keeperofthehome.org site
I may receive a commission if you purchase something mentioned on this page. See more details here.
Milk Kefir!!! My favorite fermented dairy to make at home. Why? Because it is SO easy. I am not even kidding. I guess most fermenting I do at home is super easy. But when it comes to dairy, I always think about yogurt. And that takes more steps than I am willing to do. At least right now.
I have mentioned before the many benefits of milk kefir. It is so incredibly good for your gut. There is simply no reason this shouldn't be in your fridge! Can you think of one? Drink it. Put it in smoothies. Make dressings. Get a healthy gut!
How to Make Milk Kefir
Step 1. Find some milk kefir grains. Are you a fairly crunchy granola hippy like I am? Then chances are you know someone who has milk kefir grains. Ask them to share. Trust me, they will be happy to hand some off to you! If you don't know anyone, ask around on Facebook or Instagram. I guarantee SOMEONE knows a crunchy hippy granola. Still no luck? Craigslist. Seriously.
Step 2. Grab yourself a mason jar and add as much whole milk as you would like. Personally, I turn my raw milk into kefir and I only make 1 cup at a time because that is what I put in my morning smoothie. If you want to be EXTRA FANCY, get yourself a Kefirko. This snazzy little jar with a strainer lid really makes me happy.
Step 3. Add some milk kefir grains to your milk. How many grains? I just stick a spoon or fork in and grab some. Remember, they multiply. When you strain off your kefir you will see there will be more grains than you started with!
Step 4. Now you wait. But you don't have to wait too long! In my warm Phoenix house, 12 hours seems to be my magic number. I like my kefir to still be milky – not super thick. Typically anywhere between 12-24 hours is an adequate fermenting time.
Step 5. Strain it! If you have the handy dandy Kefirko, you can pour your milk kefir into a mason jar for storage in the fridge using the built in strainer. Otherwise, strain your milk kefir using a plastic strainer of some kind. For some reason milk kefir grains get testy when they touch metal.
Step 6. What to do with the strained off grain? Simple, just add more milk and start fermenting a new batch! Or, if you feel like you have too much milk kefir on hand, you can store your grains that aren't being used in a little milk and keep them in the fridge. It might be nice to feed them fresh milk from time to time to keep them happy. Until, of course, they are called once more to fermenting duty!
My Method for Preparing Milk Kefir – a video!
So, are you a big milk kefir fan? How do you prepare your milk kefir? Any fun tips on how to use it? We want to hear!
Oh Lardy! is a participant in the Amazon Services LLC Associates Program, an affiliate advertising program designed to provide a means for us to earn fees by linking to Amazon.com and affiliated sites. Original article and pictures take ohlardy.com site
And, unfortunately, I don’t really get the feeling I will ever see one in my house. The kitchen just wasn’t designed for that, and the amount of money it would take to update it so that I can get a working dishwasher in here, with all new plumbing that could handle it, is not a top priority financially. So, I have to hand wash my dishes. 3 times a day, 4 days a week. My kids get the other 3 days, when they don’t have school, part time jobs, or taekwondo to deal with.
Washing the dishes by hand means that my hands are in the water a lot.
With the commercial dish soaps that are meant to “pull grease out of the way”, they also seem to pull grease and moisture out of my hands. And when I am already dealing with dry skin either due to dry winter air, or being out in the dirt of the garden, having the remaining moisture pulled out of my hands isn’t fun. They can get dry, crack and bleed. Not a pretty picture.
So, one day, while hubby and I were trying to figure out how to cut expenses from the store, I realized that we were almost out of dishsoap
. I hadn’t had time to get there lately, and there wasn’t much more than a sinkload of soap left. So, me being ME, I set out to do what I do best. Make do with what I had. I grabbed my castile soap, essential oils, and an empty hand soap bottle and began to mix it up.
What I came up with makes my dishes sparkle, and keeps my hands soft
I used 1/4 cup of castile soap 1 cup of water, and 3 drops of
lemon essential oil. To use, just swish it around, and add 5-8 squirts into a sink of hot water. This will NOT get all bubbly like “regular” dishsoap, but it works very well.
What do you use to wash dishes? Pin this to your favorite board for later!
Original article and pictures take thehomesteadinghippy.com site