I may receive a commission if you purchase through links in this post. - Danielle
Hello there!
Embarking on the GAPS Diet? Or thinking about it? I know how you’re feeling right now. I found it helped to collect as much information as I could, before I started as well as during the diet. Here are some resources for you – in fact, it’s everything I’ve written about the GAPS diet. Be sure to pin or bookmark this, in case you are needing GAPS recipes. <3
I love books that help me get creative in how I teach math. Today’s post is a list of fun books to teach math. When we need some creativity in out math lessons, or just a fun learning project, I pull out one of these books. They are full of creative ideas that keep kids from being too bored with their math lessons.
Do you have any great books to teach math that I am missing? I love using ideas from these books in our homeschool, so any suggestions would be greatly appreciated! I’ll add them to my wish list.
See More Math teaching ideas at the iHN Massive Guide for Homeschooling Math.
Original article and pictures take teachbesideme.com site
Frugal Living Means Knowing What to Spend Money On
For many people, frugal living is thought to be living without spending money. While I think there is some truth to that cheap living idea, that is definitely not the way it is for most of us. Frugal living is more about knowing what to spend money on rather than what you’re not getting. It is about having the life you want by prioritizing how your money is spent or how you save it.
A few years ago I was discussing with my mom a little about our plan for the next few years. I told her we were thinking of selling all our baby clothes since it would be a few years before we are going to have our next baby if we have another at all. Her response surprised me a bit. She said, “I don’t think that is a very frugal thing to do. You’ll just have to buy them again when you have another baby.”
Really, though, she is right. We will have to buy them again if we have another baby. But what is the cost of storing them? Especially with people always having hand me downs and thrift stores to shop in, the cost to have room to store our clothing would be more than if we sold them and then used the same amount of money buying them back. It is all about knowing what to spend money on and when to spend it.
Frugal living means knowing what to spend money on
I thought about what she said and how she viewed frugality and I realized that it wasn’t about who holds on to the most stuff hoping they will use it in the future. It wasn’t about how to save money and who saves the most in the long run. It is more about how you choose to spend your money. What to spend money on and what not to spend it on.
It is about focusing on debt to pay it off and sometimes missing out on some dinners at restaurants or things like that. It is about having a certain priority for your money so you give up other things. Frugal living is about having a rich life with the money you have. It is not about ways to save money by saving everything forever so you don’t have to buy it in the future.
To me, having a rich life means having a simple, clean and orderly house. It means having a home that functions well and everyone is happy. If you are holding on to things, frugal living is limiting those things to the storage you have so your family has room to enjoy their space. It is utilizing all your resources and getting things at the lowest price possible.
Frugal living is about being smart
Living Frugally is all about being smart. Smart with your money, smart with your family and smart with your life. It is about planning and knowing what you buy, where you will buy it, and what price you want to pay for it.
Mostly, it is about self-control and not having immediate gratification. It is about using what you have to the max and feeling ok with not having what everyone else has. It is about taking the time to slow down and enjoy the life you have when you have it.
This is why I choose to get rid of things while still having to pay for them later, If it makes the quality of my life better, then it is what to spend money on! So don’t feel bad about spending money when you are trying to be frugal!
Other Posts You May Like:
Original article and pictures take www.livingafrugallife.com site
This frosty peach pineapple smoothie is a cool and refreshing breakfast or snack!
Am I the only one losing track of days this summer? We’ve been busy busy busy doing fun summer things and I swear yesterday felt like Saturday, and today I wake up and it’s Wednesday, and I’m confused and frazzled.
Not so frazzled that I can’t share this frosty peach pineapple smoothie recipe with you, but frazzled enough that it took me forever to decide on breakfast once I realized we were out of pineapple and I couldn’t make this again today.
We spent yesterday at the Toledo Zoo, and I was so happy we made the drive down to see it! It was well worth the trip. They have a huge aquarium that has recently been renovated, and it was amazing. Tons of beautiful fish, awesome jellyfish, seahorses, crabs, and other sea creatures, and even a station where you could “pet” a sea urchin and a horseshoe crab. The boys had a great time. And we saw so many other animals as well – it was a perfect outing for the first week of summer.
Anyway, back to the recipe. This peach pineapple smoothie is my favorite smoothie right now. The peach and pineapple combination with a little bit of coconut milk is so light and refreshing, plus it’s so easy to make on busy summer days.
As peaches are not in season yet here in Michigan, I have been using frozen peach slices. One little drawback of the frozen peaches is that they tend to be on the tart side. Boo. To combat that, I have been adding a little bit of maple syrup. You can adjust the sweetener based on how ripe your fruit is – I would expect that if you have really ripe fresh peaches, you won’t need any sweetener.
If you do start with fresh fruit, I would still freeze it first to keep this smoothie extra frosty and refreshing!
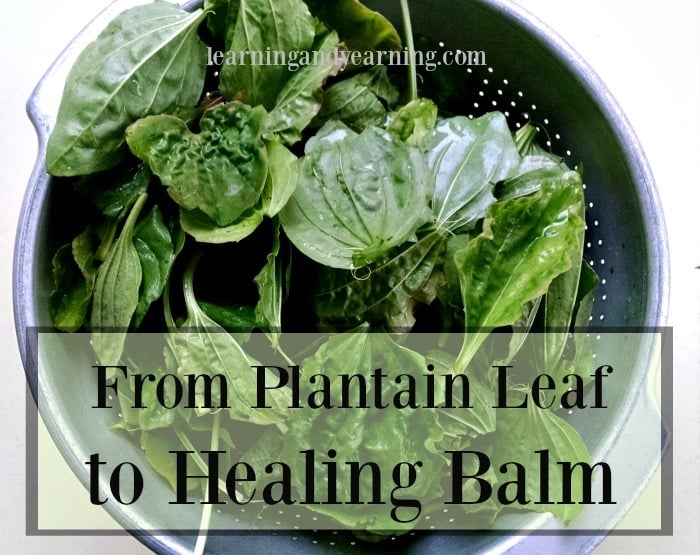
You’ve seen plantain all your life. You’ve stepped on it without even noticing it. According to Katrina Blair in The Wild Wisdom of Weeds, plantain grows everywhere in the world where humans live.
Plantain is both edible and medicinal. We’ll focus here on the medicinal properties and its amazing ability to heal skin. I’ve used it effectively to soothe eczema, severely chapped lips, and rashes, and it can help with so much more.
Plantain is:
DISCLOSURE: In order for me to pay my blogging expenses, I may receive monetary compensation for my endorsement and/or link to products mentioned on this blog. I am a participant in the Amazon Services LLC Associates Program, an affiliate advertising program designed to provide a means to earn fees by linking to Amazon.com and affiliated sites.
Antibacterial: it inhibits the growth of bacteria
Astringent: it reduces secretions and discharges
Antiseptic: it inhibits infections
Demulcent: it soothes by forming a film over mucus membranes and draws out toxins
Hemostatic: it stops bleeding
Vulnerary: it heals wounds
Plantain can soothe and relieve:
bee and other insect stings
spider bites
eczema and psoriasis
sunburn
chapped lips
diaper rash
burns
cuts
rashes
poison ivy or oak
acne
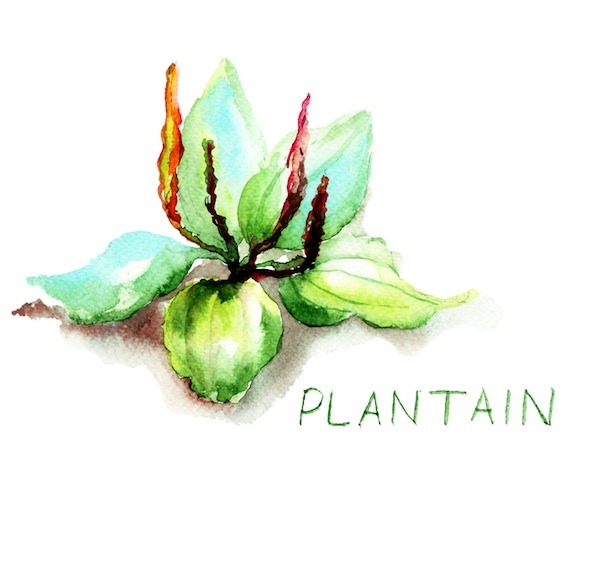
How to Identify and Harvest Plantain
There are 34 species of plantain but the two most common varieties are broad leaf (Plantago major) and narrow leaf (P. minor). Plantain is common in areas where the ground has been compacted and can withstand being walked upon quite easily.
The leaves of plantain grow in a basal or rosette form at the base of the plant. Broad leaf plantain has wide, egg-shaped leaves with several veins running the length of the leaf. When harvested, you’ll notice that the leaves are stringy.
Narrow leaf plantain has long leaves and resembles wide grass, and like broad leaf has long veins that run the length of the leaf.
Plantain has small, greenish-white flowers, each with four petals which grow in clusters at the top of a stalk.
To harvest, simply tear each leaf off at its base. You’ll notice that the leaf will often feel like it is pulling back because of it is so fibrous and stringy.
How to Use Plantain
Using plantain leaf can be as simple as putting a leaf on a cut and using a bandage to keep it in place.
The leaf may also be chewed to release its juices. Applied to poison ivy, this will help to bring relief.
Using plantain leaf to make a balm or salve is a wonderful way to preserve the healing properties of the plant and to keep it on hand whenever needed.
Using Plantain Leaf to Make a Healing Balm
To make a healing balm using plantain leaf you will need to:
harvest plantain leaves
dry the leaves – moisture can cause your balm to mold (I use this dehydrator)
infuse the leaves into oil (olive oil is a great choice because it is healing and because it does not easily go rancid).
Gather plantain leaf. The more you gather, the more balm you will be able to make, but gather at least a few cups of it. Once it is dried, the volume will decrease.
2.
Carefully wash the leaves with cold water. I wash 3 times. Drain.
3.
Chop the leaves which will help them to dehydrate more quickly. A food processor makes quick work of the process.
4.
Spread the chopped leaves in a thin layer in your dehydrator. Dehydrate at 125° for several hours until dry. Alternately, dry them in your oven at its lowest setting.
5.
Place the dried leaves in a mason or other heat-resistant jar and cover completely with olive oil. Put the lid on your jar.
6.
Allow the plantain to infuse into the olive oil by allowing it to sit at room temperature for 1 - 2 weeks. Alternately, place the jar into a pot of water. Set this on the stove on the lowest setting possible and infuse for several hours. Longer is better.
7.
Line a strainer with cheese cloth and strain the plantain leaf out of the olive oil.
8.
Measure the olive oil and return to the mason jar. For every cup of oil, add 1/4 cup of grated beeswax, or beeswax pastilles. Place the jar into a pot of water and heat on a very low setting. Stir until the beeswax has melted. Allow to cool.
9.
If the consistency of the balm is too soft, re-melt and add a little more beeswax. If the consistency is too hard, re-melt and add a little more oil.
10.
Pour the melted balm into tins or small glass jars.
11.
Store the balm in a cool, dark place.
Original article and pictures take learningandyearning.com site
This time of year is the only time you can really get this delicious garden fresh treat
…when squash is blooming, but not forming it’s fruit yet
. They are so yummy, and so easy to make…you’ll have a hard time stopping and leaving some blossoms to form squash!
You can use any squash you have…butternut, spaghetti, zucchini, etc. to make these. First, you want to gently pick some blossoms off the vine. You want to use only the “male” blossoms off the vine, as the “female” blossoms are the ones that produce the actual squash. Here’s the difference:
I love to serve these without any sauce, as they are THAT GOOD.
They will take on whatever flavor blossom they are. Zucchini will taste like zucchini, butternut blossoms will taste like butternut, and so on. Head on out to your garden NOW and try them!
Original article and pictures take thehomesteadinghippy.com site
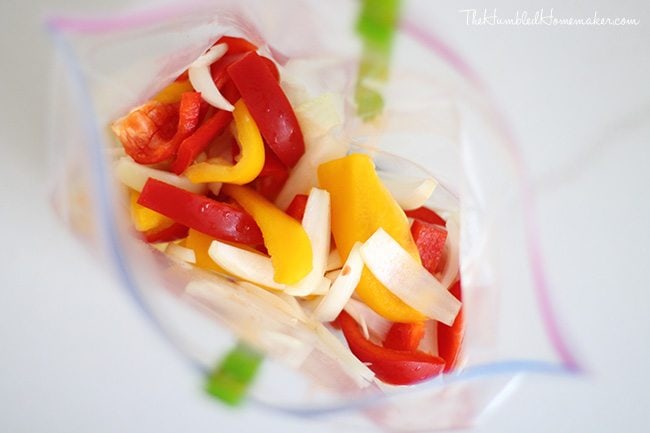
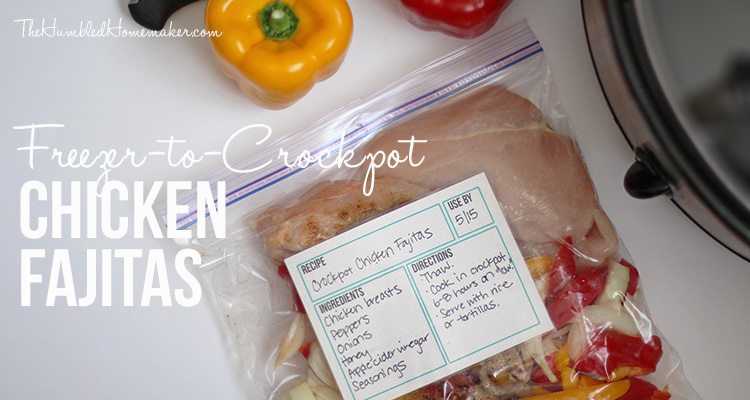
This recipe for freezer-to-crockpot chicken fajitas is very healthy! The chicken, peppers, and onions are all fresh and you create your own simple sauce.
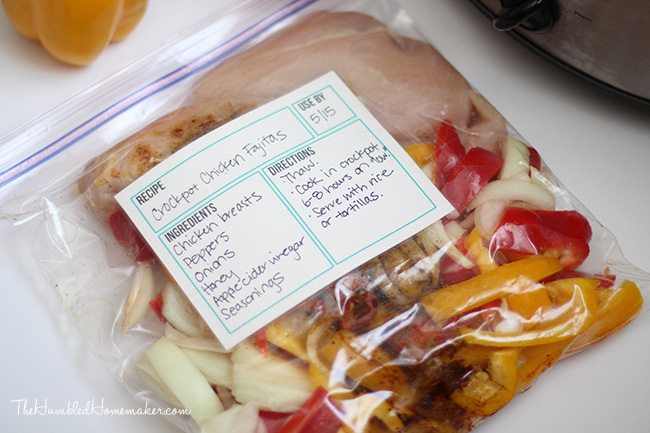
I’m so excited to share my family’s favorite recipe for freezer-to-crockpot chicken fajitas with you. What I mean by “freezer-to-crockpot” is that you assemble the meal in a gallon-sized plastic freezer bag, freeze it, and then cook it later in your crockpot.
My favorite thing about freezer-to-crockpot meals is that you can prepare them ahead of time and then make them on days when you don’t have time to cook. There’s literally nothing easier than grabbing a meal from your freezer and dumping it in your crockpot. It takes probably 30 seconds total.
Here are some other awesome things about freezer-to-crockpot meals:
There’s no cooking ahead of time so the recipes are very easy to prep.
The meals cook for the first time out of the freezer and don’t taste like leftovers at all.
You can take advantage of sales and freeze a couple at a time. (Most freezer meals will last in a standard fridge-freezer combo for at least three months.)
What I love about this recipe for freezer-to-crockpot chicken fajitas in particular is that it’s very healthy. The chicken, peppers, and onions are all fresh and you create your own simple sauce by adding apple cider vinegar, honey, and seasonings.
I first came up with this chicken fajita recipe for my slow cooker cookbook and then adapted it as a freezer recipe for my No Cook Freezer Meals cookbook. My family LOVES this recipe. I have made it many, many times. It’s just an easy, healthy, delicious meal your whole family will like.
Besides cooking it in your crockpot, you can cook it on your stovetop in a pinch. There have been times when I didn’t plan for lunch or dinner and then quickly thawed the frozen fajitas to cook on my stovetop. It’s hard to justify ordering take-out when you can have a healthy, delicious, homemade meal in 15 minutes or less.
Note from Erin: If you’re looking for a place to get affordable chicken in bulk, check out Zaycon Foods. I have been getting chicken breasts there for as low as $1.69/lb! Zaycon also carries other meats, including wild Argentine shrimp! Their prices are typically a fraction of the price you would pay in the grocery store! Check out Zaycon here. You can also earn Zaycon credits with each new customer YOU refer: $5 the first time they order and pick up at a sales event, $1 every order after that. There’s no limit to how many friends you can refer and how much you can earn!
We like to eat our fajitas on tortillas with tomatoes, shredded lettuce, cheese, and guacamole. For a gluten-free version, serve on corn tortillas or rice.
Have you ever frozen a meal for your crockpot before? Please share your thoughts in a comment below!
Dr. Kelly McNelis lives in Pittsburgh, PA with her husband and three young daughters. Kelly shares her favorite crockpot recipes and freezer meal sessions on her blog, New Leaf Wellness. You can connect with Kelly on Facebook, Instagram, and Pinterest.
Original article and pictures take thehumbledhomemaker.com site