As a parent, it’s such a thrill to observe your child blossom from a newborn to an infant. Suddenly, you catch glimpses of your baby’s personality. And finally, your child reacts when you initiate play. It’s a joy to watch your baby respond to a musical mobile with kicks and wriggles, or to see his or her face light up when discovering a new toy.
So often, parents take for granted that the toys their tots are playing with are safe. For the most part, toys are safe. But every now and then, toys can do more harm than good.
What’s involved in toy safety?
Toy safety boils down to a three-part system: planning, manufacturing, and parenting.
First, toys are designed to be safe – and each toy is appropriately made for a specific age. While a child may be developmentally ready for “older” toys, the toys might not be safe enough for a young child.
Once a toy is designed, it’s manufactured with safety in mind. A whopping eighty percent of toys sold in the U.S. are made in China, and only ten percent are made in the United States. The country where a toy is manufactured doesn’t affect the safety, though – all toys sold in the United States must abide by the same basic safety standards.
Fortunately, toys are inspected at least twice: once by the toy manufacturer and once by a store’s corporate headquarters. Quality control managers, either directly employed by the company or a third-party inspector, check to see that the toys are safe enough for their targeted audiences.
If a toy passes inspection, then it’s sent on to store shelves. At that point, the burden of protection falls to consumers.
Choose wisely
To best protect children, a parent – or gift-giver – should choose a toy wisely:
Most importantly, pick an age-appropriate toy based on each toy’s recommended age range. While older children cannot be harmed by a younger child’s toy, younger children can be harmed – by choking or getting punctured or suffering other injuries – by an older child’s toy.
Beware of cheap imitations of popular toys. Because they’re inexpensive, it usually means the toys don’t go through the same stringent safety checks that reputable toy manufacturers have – they just meet the most basic standards.
Once a child is given any toy, supervise playtime – that’s the easiest way to prevent injuries. If a toy gets damaged, either fix it or dispose of it.
Finally, keep an older child’s toys away from younger children. The advanced toys look tempting to play with, but they’re simply not safe enough for infants and toddlers. 1
As a parent of two children, I know that is much easier said than done. My toddler daughter is always trying to play with her older brother’s toys, but it’s my duty as a parent to make sure she’s kept away from potentially harmful things.
Parental responsibility
For me, hearing all the restrictions on children’s toys is anything but fun. When I’m shopping for my children, I love to peruse the coolest looking things. The flashiest, shiniest items are eye-catching for both children and adults.
However, as a parent, it’s my God-given responsibility to make sure my children are safe.
If a toy – no matter how fantastic it looks – has a great potential to harm my child, then I need to make sure it never enters our home. Of course toys look so appealing to children – they should. But just like Snow White was seduced by the shiny, poisonous apple, our children face grave dangers – including death – when they play with unsafe toys.
I Corinthians 13:11 says, “When I was a child, I talked like a child, I thought like a child, I reasoned like a child. When I became a man, I put childish ways behind me.” Children are unable to discern what is best for them because they’re children.
As parents, though, it’s incredibly important to choose safe toys and then have a wonderful time playing right along with your children.
How to Build the Ultimate Home Climbing Wall Under $200
You’ll have fun with the whole family when you build a home climbing wall! This free standing climbing wall tutorial will make the process easy. Includes cost-conscious project budget, material list, and step by step photos.
You’ll have fun with the whole family when you build a home climbing wall! Whether you incorporate it into your home decor as your next amazing kids bedroom idea, build it in the garage to boost fitness for an indoor workout, or put it in the backyard, this free standing rock climbing wall DIY tutorial will make the process easy. Includes cost-conscious project budget and material list.
The first year my husband and I were dating, he gave me climbing gear for my birthday: a harness, shoes, chalk bag, the whole deal.
I guess he didn’t want to leave it to chance that I would join in the sport he loved.
We’d hit the climbing gym after classes during college and after work as we started our careers. This all would usually be with me dragging my feet a little, but I always looked forward to the day we’d take our little blonde babies along for the fun.
I just didn’t anticipate the challenge of fitting it in between naps, meals, baths, and bedtime!
So, instead of taking our family to the climbing gym (though we do that sometimes too), my husband decided to bring the climbing wall to our family.
This project was his baby, but I love that it was complete in one weekend for under $200! And it’s a great indoor workout for us and the kids, especially as I work on getting healthy and losing weight this year.
For the rest of the post, I’ll hand the keyboard over to him, so he can tell you how to build a home climbing wall.
Last fall I realized I was not using my climbing gym membership enough to justify the cost.
I quit the gym without any real plan, just the hope that a Christmas bonus from work might fund a home climbing wall for me to train on and hopefully get some use by the rest of the family also.
Sure enough, the work bonus and a bit of Christmas cash came through.
I spent hours scouring the internet for tutorials and info on building a wall and laid out a few different options in the free 3D modeling program Sketchup.
I’ve had building a climbing wall on my to-do list for a while but had never had the space available before.
Shannon was interested in the idea…IF I could prove via spreadsheet exactly what the costs would be and also submit to her final approval of the design.
You’ll have fun with the whole family when you build a home climbing wall! Whether you incorporate it into your home decor as your next amazing kids bedroom idea, build it in the garage to boost fitness for an indoor workout, or put it in the backyard, this free standing rock climbing wall DIY tutorial will make the process easy. Includes cost-conscious project budget and material list.
The Ultimate DIY Home Climbing Wall Tutorial
Important: Build and climb at your own risk and take every precaution to keep your family safe.
Design-wise the wall had to fit in the one available corner of the garage. It had to still allow a car to fit in front of it.
Since we’re renting, it had to be free-standing.
My research and experience at various climbing gyms suggested 20 to 30 degrees of incline would be the best for training, but I also wanted to leave some flat vertical walls the kids could use easily.
The design came down to two finalists, both with roughly the same materials and enough merit for the Design Review Board (a.k.a. Shannon) to approve the budget and construction.
I decided to commit to going through with it at this point and purchased the bulk of the materials.
For me at least, a pile of lumber in the garage is motivating.
I built a small scale model and then mocked up the exact size and angles using blue painters tape in the garage to work out the final design.
The mockup gave me the best feel for how the pieces would fit together and ultimately how it would feel.
You’ll have fun with the whole family when you build a home climbing wall! Whether you incorporate it into your home decor as your next amazing kids bedroom idea, build it in the garage to boost fitness for an indoor workout, or put it in the backyard, this free standing rock climbing wall DIY tutorial will make the process easy. Includes cost-conscious project budget and material list.
Tools List
To build a climbing wall, you will need the following tools. We’ll assume you already have these available, so they’re not included in the project budget.
Drill
Skill Saw or Jigsaw (or Handsaw if you don’t need to cut the plywood panels)
Measuring Tape
Carpenter’s Speed Square
Hammer
Allen or T-Handle Wrench (for tightening climbing hold bolts)
Materials List and Project Budget
Frame Materials
(7) 4′-8″ x 3′-8″ Panels – $42
(6) 2×4 x 10 ft Studs – $16.80
(6) 2×4 x 12 ft Studs – $18.00
(4) 2×6 x 10 ft – $22.68
(3) 1 Lbs Wood Screws – $19.41
Support Materials
(7) Joist Hangers – $6.72
(1) 4×4 x 10 ft Stud – $11.70
(1) 2×8 x 8 ft Stud – $5.98
Climbing Wall Materials
(250) T-Nuts – $5.63
(50) Climbing Holds w/ t-nuts and bolts- $0 (see below)
Total Cost to build our home climbing wall – $148.92
Sourcing Materials for Cost Savings
Saving on Plywood
The materials and savings I found with locally-sourced products made all the difference in being able to afford the project.
I found the plywood on Craigslist for $6 per sheet of ⅝” plywood.
The catch is sheets were 3’-8” x 4’-8”. This is an odd size, but since I had researched materials first I could design around that module.
You can see in the 3D image above, I laid out those odd-size sheets to try and use them as completely as possible.
¾” exterior grade (CDX) plywood is preferred for most home climbing walls but ⅝” is holding up great for us and is what happened to be available.
I wouldn’t go down to ½” unless the wall is only completely vertical.
You can get nicer sanded plywood but you’ll pay a large premium.
The same person selling the plywood also had 2×4 “farm-grade” lumber which translates as Pretty Ugly Lumber.
However, they let me pick through the pile to find what would work for me even in 14-degree weather.
Saving on Lumber
I got all of the 2×4 lumber I needed in lengths up to 12 feet for about 50% off what you’d pay at your local big box. I did purchase the 2x few brackets and screws at the hardware store but spent very little overall there.
If you’re using reclaimed, “farm-grade” or other inexpensive material, make sure to buy extra or sort and pick your pieces well. (Having extra never hurts, even if you have the design down to the last screw in your spreadsheet.)
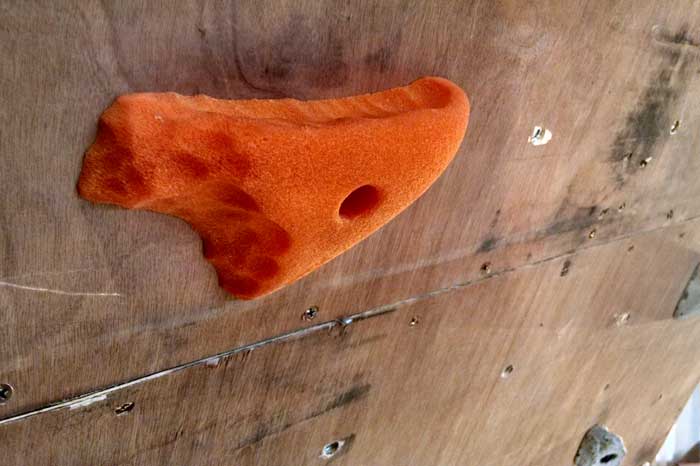
A Big Win on Climbing Holds
The last and best win came from finding a local manufacturer of climbing holds. I started looking at Amazon and found some holds I liked.
When I searched the company name, it popped up on a map search with a local address.
I called and spoke directly to the owner who asked what set of holds I wanted and told me to call back the next day to make sure they were ready to go.
I followed up and planned to go pick them up that afternoon.
Unfortunately, when I arrived the owner was out, but I was able to get him on the phone.
He was sorry to miss me, but let me know the holds were sitting out for me to pick up. I asked how much, and he said, “Oh, we give them away free to locals.”
I think he had told me that the first time, but it didn’t register so we picked up about $80 worth of holds and bolts for FREE!
The whole construction took a full Saturday and Sunday but was 100% complete in one weekend.
You’ll have fun with the whole family when you build a home climbing wall! Whether you incorporate it into your home decor as your next amazing kids bedroom idea, build it in the garage to boost fitness for an indoor workout, or put it in the backyard, this free standing rock climbing wall DIY tutorial will make the process easy. Includes cost-conscious project budget and material list.
Step 1: The longest task was drilling 300 holes for t-nuts in the plywood. The bolts for the holds screw into these t-nuts. The easiest spacing for these t-nuts is 8″ on center. You can do these in a square pattern, staggered rows or randomly spaced. I went with staggered rows. If you stick with standard 4ft x 8ft plywood, 8″ spacing for the holes and 16″ on center studs your holes should miss all the studs.
I had a few hours of help from my awesome brother-in-law and super helper 3-year-old to get the holes drilled and t-nuts hammered into the back of the panels.
Step 2: A climbing wall is built like any regular house wall with studs and plywood.
The stud frames for the flat walls were built on the garage floor.
First, layout the studs to match the size of your panels with a single 2×4 top and bottom plate. Attach the plates to each stud with 2 screws or nails at top and bottom.
Step 3: Plywood screwed on…
Attach the plywood to the front of the stud frames. The spacing of screws for attaching the plywood should be six inches on center on the edges and 12 inches on center on the studs at the interior of the panel.
Step 4: The panels were stood up in place and temporarily braced with 2x4s. (I did this step by myself, if you’ve got more helpers you can use less bracing.)
You’ll have fun with the whole family when you build a home climbing wall! Whether you incorporate it into your home decor as your next amazing kids bedroom idea, build it in the garage to boost fitness for an indoor workout, or put it in the backyard, this free standing rock climbing wall DIY tutorial will make the process easy. Includes cost-conscious project budget and material list.
Step 5: Next, the 4×4 post was braced with wood screwed to the garage rafters temporarily, and the 2×8 top beam set in place with brackets attached to the 4×4 post and the top of the vertical wall at the left side.
You’ll have fun with the whole family when you build a home climbing wall! Whether you incorporate it into your home decor as your next amazing kids bedroom idea, build it in the garage to boost fitness for an indoor workout, or put it in the backyard, this free standing rock climbing wall DIY tutorial will make the process easy. Includes cost-conscious project budget and material list.
Step 6: Next, the 2×6 studs for the angled wall were cut at each end to match up with the angle for the short walls at the bottom and the beam at the top. These were then set in place and fastened with screws and the joist hanger brackets. The same process was repeated for the steep panel above the door.
You’ll have fun with the whole family when you build a home climbing wall! Whether you incorporate it into your home decor as your next amazing kids bedroom idea, build it in the garage to boost fitness for an indoor workout, or put it in the backyard, this free standing rock climbing wall DIY tutorial will make the process easy. Includes cost-conscious project budget and material list.
Step 7: The plywood for the angled walls was clamped to the 2×6 frame and screwed in place with the same screw pattern as the vertical walls.
Construction done! Step 8: Finally the holds were put in place.
Important Details and Tips
If you’re not sure where to start with the design of your own wall try checking out your local climbing gyms to see what would be fun.
Most larger YMCA’s or other community recreation centers will have one these days. Talk to the staff and other members. Ask what they like to train on and what brands of holds are used locally.
Kids absolutely need someone spotting them to make sure they get up and down safely.
Adults should use a spotter also, especially for that epic roof dyno you just set to impress your buddies.
The wall turned out better than I expected.
It’s rock solid and it gets me the workout I need.
I can set routes easy enough for the kids or hard enough for me to fall off trying them.
A couple free craigslist mattresses provide important crash pad protection from the garage concrete. A nice sewn cover would improve the look of the crash pads but the lack thereof doesn’t keep us from enjoying the wall.
For best results, measure twice, cut once, and don’t forget to consult your wife, and your spreadsheet!
Tell us about the home climbing wall you’re planning. Share your story in the comments!
Original article and pictures take growingslower.com site
There was this one day when I saw that I could order 20 pounds of broccoli for just $12.50 and we all know how much I love good deals on good produce. Then there was that other day I picked up my order and found that 20 pounds of broccoli filled a box big enough for my 10-year old to play in. This was also the day we had four basketball games and the day I wanted to make heart-shaped pancakes for my family because they might not have known how much I loved them unless I shaped their pancakes into hearts and also because it was Valentine’s Day. I never bite off more than I can chew.
I also never can make nicely shaped heart pancakes, which is clearly another issue to tackle another day.
So there I was, flipping a triple batch of ugly heart pancakes on the griddle, packing lunches to take to our basketball games, and staring down 36 crowns of broccoli. I love relaxing Saturday mornings.
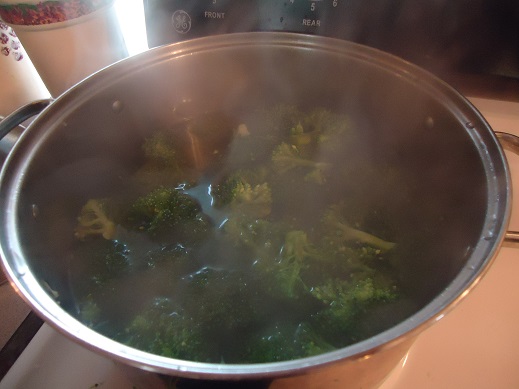
I started a pot of water boiling on the stove, flipped the pancakes, and started to chop broccoli. I almost (happy valentine’s day) slid the prepared broccoli into the pancake batter, but stopped myself just in time, took a deep breath, and got my camera because that’s how quickly my brain moves on to the next thing. I am a blogger, after all, which means that just at that moment I realized that I should probably document the project so as to share the broccoli blanching details with you.
Matt suggested I also take a picture of the heart pancakes and I was all, seriously? No one wants to see these. So instead you get to look at my pot of boiling water which mostly looks like I’m about to set my kitchen on fire. It’s just steam though, I think.
How to Blanch Broccoli
Step One: Boil water. One might wonder at the fact that it takes an entire tutorial to explain this process. Don’t worry. The exciting part is yet to come.
Step Two: Wash and cut your broccoli. (Told you it would get more exciting.)
Step Three: Place cut broccoli into your pot of boiling water for 2-3 minutes. (This stops the aging process so your vegetables will maintain better nutritional value.)
Step Four: Immediately remove broccoli from boiling water and run it under very cold water. (This stops the cooking process.)
Step Five: Spread the cooled broccoli on a clean towel to dry. I didn’t get a picture of this. I was probably flipping ugly pancakes.
Label a freezer bag and fill the bag with blanched, cooled, and dried broccoli. Freeze for up to 6 months.
You can use your prepared broccoli for soups and stir fry. The work is done!
If you have a trick for making nicely shaped heart pancakes – do tell. If you have any tasty broccoli recipes, I believe I’ve made it clear that I would benefit. And in case you’re wondering, I slept very well the night of the basketball/broccoli/ugly pancakes.
Original article and pictures take heavenlyhomemakers.com site
How to Beat Winter Colds With Essential Oils (+ save 20%!)
Want to help stave off colds and the flu this winter? I’d highly recommend essential oils!
Rocky Mountain Oils is one of my favorite essential oil companies. I love that they offer high-quality oils, that they have a 100% satisfaction guarantee, and that they price their oils significantly lower than many other essential oil companies.
They recently sent me some of their Winter Collection oils to try out, and I love them! Here are three I love:
1. Immune Strength
Immune Strength is one of my all-time favorite oils and is a go-to at our house — especially when we feel sickness coming on. This oil combines the beneficial properties of powerful herbs, spices and citruses to help your body stay strong during the winter months.
Immune Strength has spicy overtones, with a whiff of citrus which then descends into the rich, deep, herbal undertone. It makes you feel calm and comforted — and I love how it smells!
I’ve used Immune Strength topically multiple times over the past few months when we were all experiencing various levels of sickness. I ended up never getting anything more than a slight fever and a cold and I think some of this was due to applying Immune Strength topically and diffusing it almost every day while we weren’t feeling well.
Immune Strength Essential Oil Blend may help:
Support all of the functions of the body — adrenal, nervous, circulatory, respiratory, digestive, and lymphatic systems
Supports the immune system
Loosen mucus due to occasional environmental threats
2. Purify
Purify is a winter must-have for its ability to clean up the air in your home. This is part of the Rocky Mountain Oils cleaning line.
Purify Essential Oil Blend has a sharp, clean aroma that can help clean and freshen the air. Try diffusing it in your kitchen or bathroom to help clear the air. Or, use it when cleaning countertops and sinks.
Purify Essential Oil Blend may help:
Clean the air in your home
Clear out the scent of smoke and eliminate other noxious odors
Can help repel insects
3. Deep Breathe
Deep Breathe‘s sharp scent encourages you to breathe more deeply. Deep Breathe Essential Oil Blend is a strong blend with a sharp scent similar to Tea Tree with notes of Pine. The combination of these oils inspires users to inhale deeply.
Contributes to feelings of easy breathing and clear airways
Promotes general feelings of wellness
Jesse was having some chest congestion last week and I suggested he use this oil before bed. The next day, he came to me asking where the oil was because he said it helped him breathe so much better! We’ve also been diffusing it at night in our room for him.
Get 20% off your purchase of essential oils from the Winter Collection!
There are 15 different essential oils to choose from in this sale. You’ll be able to get the Immune Strength blend for $21.20, the Deep Breathe blend for $12.60, and the Purify blend for $15.96. As always, shipping is FREE!
No coupon code is required. The 20% discount is already reflected in the price listed. Just add the oils to your cart!
This sale is valid through January 23, 2017.
If you are thinking of trying out essential oils and you’re not sure which company to start with, I definitely recommend checking out Rocky Mountain Oils. I think you’ll be really impressed with them, too!
Do you have any natural remedies for colds? Tell us about them in the comments!
(Note: The links in this post are affiliate links, and we will be compensated when you make a purchase by clicking through our links. Read our disclosure policy here.)
Subscribe for free email updates from Money Saving Mom® and get my Guide to Freezer Cooking for free!
Original article and pictures take moneysavingmom.com site
How to Bake Potatoes in a Crock Pot (without foil)
Your crock pot is here, once again, to save the day! Allow me to fill you in on the great and easy way to bake potatoes in a crock pot!
In an effort to avoid turning on my oven this week to bake potatoes, it occurred to me that maybe I could bake them in my crock pot. Am I a genius or what?
Or what. My online search told me that others had already been there done that – and blogged about it too. So others are the geniuses, and I am a few years late in learning this wonderful potato baking method.
I will, however, take the credit for figuring out that you don’t have to mess with wrapping each potato in foil. All of the instructions I found online included wrapping each potato lovingly in foil. I tend to skip this extra step in an effort to save time and to avoid putting aluminum on my food. Could foil-less potatoes be baked in a crock pot? I decided to try and see.
I won’t keep you in suspense, because surely you’ve never wondered something so much in your life and the title of this post didn’t give away the answer even a little bit. You can, indeed, throw a plain ol’ potato in the crock pot and let it bake without foil. You don’t even need to poke the potatoes first. It doesn’t get any easier than that.
Here is the detailed break-down of the oven-less, foil-less, poke-less, practically effort-less crock pot baked potato…
How To Bake Potatoes in a Crock Pot
1. Scrub dirt off of potatoes (I always use red or gold potatoes as they tend to work much better, plus they are more nourishing.)
2. Place potatoes in crock pot
3. Cover and cook on low for 6-8 hours or until potatoes are tender
You can cook as many potatoes as you need. You can use any size or variety of potato. And if possible, I would suggest making extras so that you can use your leftovers to make Homemade Hashbrowns.
How should you serve your baked potato? Well, I personally love mine with lots of butter and sea salt. I’m sure you’re shocked. Sometimes we sprinkle on some cheese and call it lunch, along with a side of veggies and fruit.
But if you really want a good baked potato meal, which is super easy and perfect in the summertime (now that we know how to avoid heating our ovens for this fine item), Taco Potatoes are awesome.
Or, how about topping your baked potato with chopped ham, chicken, or turkey, sour cream, shredded cheddar, and broccoli. So, so good.
What’s your favorite way to top a baked potato? Ever tried making baked potatoes in the crock pot? Yeah, I bet I know what you’re having for lunch tomorrow…
~~~~~~~~~~~~~~~~~~~~~~~~~~~~~~~~~~~~
I always make extra baked potatoes on purpose. Here’s why:
Think you can’t avoid a stomach virus after being exposed? Think again! I did it–and I think you can, too!
The month of March is always full of surprises.
Where I live in North Carolina, one day it’s 75 degrees F, and the next day it’s sleeting. It’s the month when you leave your home in the morning wearing a coat and scarf and are donning a pair of flip flops by the afternoon.
It’s also the season when you fool yourself into thinking that you’ve made it all winter without getting sick. You’ve avoided the flu, colds and the horrible, no-good stomach virus.
It hit the girls first–one-by-one they began throwing up.
Then, in the middle of the night, it overtook my poor husband.
All night long, I listened to the bug biting my family. I cleaned up their messes and soothed them as best I could, and I prayed I wouldn’t get sick as well.
But I knew it was coming. I just knew it! How could I avoid such a highly-contagious illness when every single person in my home was affected by it?
But I did! Oh, I did!
And not only that–but I used natural means to avoid a stomach virus!
My plan of attack was simple: I did not want to get sick! With sheer determination, I scoured my natural medicine arsenal.
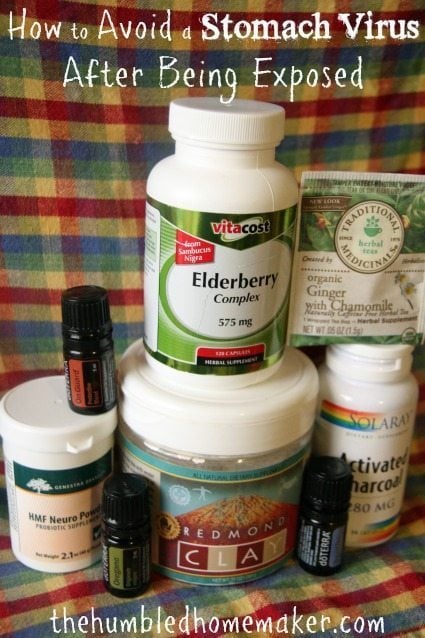
Here is what I came up with that helped me avoid a stomach virus after being exposed:
A few days before the stomach virus hit our house, I had felt the very first signs of a cold (my first in two years!). My first symptom of a cold is usually a scratchy throat. Wanting to stave off the cold before it really started, I began loading up on elderberry, vitamin C, echinacea and garlic.
Without knowing it, I was strengthening my immune system to fight off another bug!
Thankfully, having heard that activated charcoal can work wonders for tummy ailments, I already had this stashed away in our natural medicine cabinet. But because our family hadn’t been ill for the past two years, I had never really used it!
Hands down, if you do not heed anything else in this post, please, please, please stock your natural medicine cabinet with activated charcoal!
In a nutshell, activated charcoal adsorbs most toxins in your body before they can harm you (source). Some emergency rooms even give activated charcoal to patients with food poisoning!
I was a bit skeptical to take it at first because I assumed this was a stomach virus, and I had heard that activated charcoal only works with stomach problems caused by bacteria.
But then I found this post by my friend Kimberly at The Nourishing Gourmet. (And yes, I actually found it in a Google search in the middle of the night!) In the post, Kimberly recounts how her family beat the stomach virus with the use of activated charcoal as well!
I took Kimberly’s advice, and I am so glad I did. I truly feel that the activated charcoal took care of the virus that was most likely already inside of my body.
I took two capsules with water every few hours. Read Kimberly’s post for more details on dosing. Also, keep in mind that the activated charcoal may also adsorb all the good nutrients in your body as well, so do not take it at the same time as your other supplements.
I continued to take 1-2 capsules of activated charcoal for a few days after the stomach virus left our house.
Note: If you child is actively throwing up, it may not be a good idea to give them charcoal unless there is a bucket near by. One of our kids threw up charcoal all over the carpet. Talk about a mess to clean up.
3. Digestion Essential Oil Blend
Essential oils are a big part of my family’s natural medicine cabinet. Many bloggers love them so much that they decide to sell them. I love them so much that I will sing their praises without selling them–because I hate selling things! Ha!
I rubbed a couple drops of the oil blend, diluted with a carrier oil, on my stomach every few hours while my household had the stomach virus.
4. Immune-Boosting Essential Oil Blend
When my family became ill, I did not hesitate to begin rubbing a diluted immune-boosting oil blend on my feet and the feet of my family members. I also added it to a diffuser where my husband, who was the most ill, was sleeping.
This happened to be the only ginger tea I had on hand (and I was completely out of ginger, so I couldn’t make my own!). I drank it the morning after the long night of my family’s illness, and it definitely had a nice calming effect!
6. A Strong Probiotic
I typically give my girls the Garden of Life Raw probiotic, which I get from Vitacost.com, but my husband and I usually take a cheaper Vitacost brand probiotic for our daily dose. However, I had recently purchased a super probiotic supplement from my girls’ integrative pediatrician–HMF Neuro Powder. I will say this stuff is PRICEY. I had it on hand for such a time as this.
When a stomach virus hits, I believe it’s the time to pull out the best of the best probiotics.
In addition to taking the probiotic powder, I also ate some coconut milk yogurt, which we also happened to have on hand that day.
Redmond Clay is helpful for an assortment of ailments, including stomach issues.
I did not take much of this, as I felt really confident in the activated charcoal, but I did take a little bit.
It is supposed to adsorb the toxins and flush them out of your system as well. I just didn’t feel like I needed both the activated charcoal and the clay at the same time.
This is the first winter we have owned an air purifier, and you better believe I had it running during this illness! In fact, I moved it from room to room.
Interestingly enough? The air purifier we use turns red when there are contaminants in the air. It turned the reddest when I put my natural cleaners aside and pulled out the Lysol! Now if that doesn’t tell you something about the toxins in conventional cleaners…
It’s been two and a half weeks since the stomach virus hit our house, and I never got it!
This was a new one to me after I wrote the original post. Someone at church told us about it, and it’s been our go-to ever since. Supposedly, grape juice coats the stomach and helps you avoid the stomach virus!
This is one of the easiest to get on the spur of the moment (although we make sure to always keep the other supplies on hand!). I dissolve activated charcoalin grape juice for my kids. This has helped us so much!
Note: Again, if you child is actively throwing up, I would not recommend giving them grape juice. Dark purple spots do not look good on carpet (ask me how I know.)
What are your tips for how to avoid a stomach virus after being exposed? Did you get the stomach virus this year?
Disclaimer: Although I am passionate about nutrition, natural living and alternative health issues, I am not a certified nutritionist, medical doctor, or practitioner of any kind. I am not licensed to counsel anyone in medical matters nor may I be held responsible for any course of action that you choose in regards to your own health or that of your family. Please remember that what I are sharing is the result of my own experiences, but may not necessarily be the right course of action for you. I am an advocate of becoming informed, knowledgeable and responsible for one’s own health, but my desire is not to be an authority on any matters of health for you, nor would I presume to have sufficient knowledge to do so. My hope is that what I share may encourage you and start you on the road to doing your own research, and seeking out the opinions of professionals or others that you trust.
Original article and pictures take thehumbledhomemaker.com site
How To Always Have Fruits and Vegetables to Serve With a Meal {31 Days to Real Food Reality ~ Day 16}
Always, always, always serve a fruit or a vegetable or three at each meal. Then snack on them throughout the day too. Fill your body with the nourishment that comes from these wonderful convenience foods!
Without a doubt, eating fruits and veggies is the easiest way to eat healthy. Yet somehow, it is often the food group that is left out of a meal and forgotten as a snack option. Why is that? Why does it sometimes seem hard to serve vegetables with our dinner? Or to pack them in our lunch? After all, most of them come pre-packaged! (Banana, anyone?)
I find that I have to make a conscious effort to be sure to serve enough fruits and vegetables to my family. Often, we focus on cooking the main dish (which is typically meat and carbs – both good, but only when balanced with fruits and vegetables). Side dishes in the form of fruits or vegetables are often an after-thought. Let’s make this easier, shall we?
1. Buy Them
Duh, but still. You can’t serve them and eat them if you don’t bring them home from the store or farmer’s market, so I felt it was worth a mention. Get into the habit of spending several minutes in the produce department each time you’re at the store. Look for sales, look for a variety, fill your cart. Shop for them when you’re hungry (something I would not recommend if I were to send you down the candy aisle).
2. Keep frozen fruits and vegetables in the freezer at all times
They aren’t expensive (generally). They aren’t difficult to store. When I have frozen green beans and peas in the freezer, I can easily cook them to go with our lunch or dinner. Our family goes through about two – 5 pound bags of these frozen veggies every month. It’s one of the easiest foods to prepare, and they taste delicious with our meals.
3. Corn is not a vegetable
Sorry, but it’s a grain. Enjoy it every once in a while (with butter!), but don’t rely on it as a vegetable side dish.
4. French fries don’t count
But you knew that, right?
5. Keep containers of fruits and vegetables in the fridge, ready to eat
See that picture above? Cutting those veggies into a bowl took about 7 minutes, and will last our family through a couple of lunches. Washing the blueberries and grape tomatoes took just a few seconds. That picture shows what I have now gotten into the habit of putting out to go with our main dish at lunch. The kinds of fruits and veggies vary depending on what I find at the store that is reasonably priced and looks good. But quickly pulling those foods out of the fridge to go with a meal is crazy easy.
6. Serve salads often
Don’t tell me it’s hard. A two year old can tear lettuce.
7. Enjoy smoothies frequently
Smoothies are a delicious way to load up on the good stuff! As an added nutritional perk, I almost always add fresh spinach or other salad greens to my smoothies, along with different frozen fruits and some yogurt or kefir. You can’t taste the greens, but you still get the nutrients. Score!
8. Just do it!
I don’t care if all you do is (lovingly) slap a simple peanut butter and jelly sandwich onto the table or into a lunchbox for your kids. Take two minutes to serve or pack fruits and veggies too.
By the way, I also try to always have Homemade Ranch Dip in the fridge to put on the table with our veggies. There are many fruit and vegetable options – and eating a variety, buying in season, and watching for sales is very helpful. Here are some great, basic options to keep on hand to serve with meals or as snacks:
It breaks my heart when I hear moms longing to be at home with their children but have to send them off to daycare everyday. It’s the worst when after a too-short maternity leave a mom returns back to work daily in tears missing her baby.
For many women, working full time is simply not a choice. Perhaps she is a single mom or the family budget is truly just too tight. For many of us though, we believe that being a stay at home mom isn’t financially possible at first glance.
However, if you’ve been longing to be a stay at home mom, a closer look at your budget may show it’s more financially possible than you think with good money management.
It turns out working moms spend quite a bit of money just for the privilege of going to work. Once you take yourself out of the work force, you can save a surprising amount out of your budget.
How to Afford to Be a Stay at Home Mom in 3 Simple Steps
7 Ways you Save Money by Not Going to Work
Step one is easy. Just by quitting your job you can save a ton of money. You might just be surprised at how much going to work actually costs you!
1. Taxes
When you’re working, a big portion of your income goes to paying taxes. This will obviously vary depending on your household income, but it could be anywhere from 15-40% for federal taxes alone.
State taxes vary up to 11% of your income. There’s nothing like paying the government to go to work everyday.
2. Daycare
Daycare is a huge expense for working moms. The average cost of daycare for one infant in the US is $1000 per month. Having additional children in daycare adds on even more.
It may also be more convenient for stay at home moms to exclusively breastfeed.
(There are certainly many exceptions to this rule. One amazing mama from my La Leche League group just completed a full year of pumping at work!) If you do avoid buying formula you can save $150 per month.
4. Eating out
It is no doubt exhausting to be a mom who works full time outside the house. It would be very tough to come home every night day in and day out and make dinner and pack a lunch for the next day.
When you wake up exhausted in the morning, it would be really hard to drag yourself past Starbucks. If you had just one coffee, one lunch out, and one dinner per week, that could quickly add up to over $200 per month.
5. Clothes
When you don’t have to keep up appearances at work everyday, you can spend less on clothes.
You certainly don’t have to look like a scrub just because you’ve become a stay at home mom, but you can set the standard and decide whether spending a lot of money on clothing is a priority for you. You can probably dress a little more casually and at least avoid dry cleaning expenses.
6. Transportation
If you’re careful, your transportation expenses could go down when you are no longer commuting daily to work. The average worker spends somewhere around $400 a month commuting. If you pay for parking now, that will be another cost savings.
Would-Be Stay at Home Mom Budget
Allow me to make some hypothetical assumptions about the average working mom and how much she could save by not going to work.
The thing I’m obviously leaving out is health and retirement benefits. This can vary greatly depending on whether your spouse has a health plan you can join.
(Update: with the new “Obamacare” rules, your health insurance costs may go down drastically if your income goes down, but this isn’t an option if your spouse’s employer offers benefits.)
If you have savings you may opt for an health insurance plan with a high deductible to keep premiums more affordable.
As for retirement, it’s a sacrifice I’m willing to make as I know I won’t be at home forever and hopefully I’ll be able to make up for it later in my career.
Those two issues aside, you can see that there is a ridiculous amount of work related expense gobbles up most of a working mom’s pay check.
$3000 gross monthly median income for women in the US
-$600 in taxes
-$1000 in daycare expenses
-$250 in diapers and fomula
-$200 eating out
-$50 on clothing and dry-cleaning
-$200 on transportation
______________________________________
$700 net income
Step 2: Make Up the Difference with Budget Reductions
As you can see there is a fairly small difference in income once you look at how much is saved by not going to work.
You might be able to reduce other expenses through different lifestyle decisions to help make up the difference.
Could you cancel cable or shop around for a better insurance rate? Maybe you could choose to move to a more affordable home.
Then there is all of the indirect savings you could achieve by being a stay at home mom. Your kids won’t be picking up every little illness going around when they’re in daycare, and you won’t be taking time off to take care of them or taking them to the doctor.
If you’re able to cook healthier meals at home instead of going out, that will also help get your entire family healthier and reduce medical expenses.
Step 3: Make Up the Difference with Work at Home Income
Many stay at home moms supplement their income by working at home. The good news is you won’t have to make up 100 percent of your former income by working at home.
As shown above, you are actually savings quite a bit of money by being a stay at home mom. There is relatively little left over that you would need to earn to make up the difference.
You may be able to get contract work within your industry, or you may choose to try something completely new.
When deciding your contract rate, be sure to account for paying your own taxes, insurance, and retirement. Also, factor in for paid time off that you would usually get with full time employment.
How to Afford to Be a Stay at Home Mom
Everyone’s individual financial situation is different, but I hope this look at the budget of the average American family has given you a new perspective on how to afford to be a stay at home mom.
After all the expenses associated with going to work, many families will be very close to being able to afford to have mom stay at home. With a few more money saving strategies and a couple hundred dollars a month of work from home income, it really is financially possible to stay at home.
If you deeply desire to be a stay at home mom, I believe you can make it work with a bit of determination!
Do you want to be a stay at home mom but don’t think you can afford it? Are you making staying home work for your family? Please share your story in the comments.
Original article and pictures take growingslower.com site
I’m often asked how much Sucanat to substitute for white sugar, or if whole wheat flour can be substituted one for one with white flour. I decided to share a little bit about how I adapt “regular recipes” to make them healthier! Please know that when I say “healthier”…I’m not talking low fat. To me, healthier means real, whole food. Click on the following links so read about how I feed my family and why I love real, whole foods!! Be sure to also check out this entire series on Simple Steps Toward Healthy Eating.
Fats
If a recipe calls for vegetable or canola oil I switch it out one for one with melted coconut oil or melted palm shortening. It’s a little bit tough to measure out solid coconut oil to an exact needed amount. I just kind of “eyeball it”. If a recipe calls for 1/4 cup of vegetable oil, I make my best guess at how much 1/4 cup of coconut oil (or palm shortening) is while I’m scooping it out…then I melt it down in a small saucepan on the stove. If you are new to cooking/baking…you may prefer to melt it, then pour it into a measuring cup to be sure you have the correct amount.
If a recipe calls for margarine (I gag and then) I switch it out one for one with real butter. This means that if the recipe calls for 1/2 cup margarine, I use 1/2 cup of butter.
Usually butter and coconut oil can be used interchangeably. For instance, when I make muffins…sometimes I use coconut oil and sometimes I use butter. It depends on what I have on hand and what sounds good at the moment (coconuty goodness, or rich buttery flavor). If you are unable to eat dairy, you can substititute coconut oil for butter in most recipes.
I almost always use melted palm shortening to fry foods (like french fries, onion rings, homemade corn dogs, etc.). Palm shortening does NOT create the same freaky effects from frying that vegetable or canola oils create. This means that foods fried in palm shortening (or coconut oil) are NOT unhealthy!
I use olive oil if a recipe calls for just a few teaspoons or Tablespoons of vegetable oil.
Sucanat (or Rapadura, which is the same thing…just under a different name) can be substituted one for one with white or brown sugar. This means that if a recipe calls for one cup of white sugar…you can instead use one cup of Sucanat. However, I generally cut the Sucanat down just a hair because the flavor is stronger…and because it is more expensive…and because wow…do we really need that much sugar? :) Sucanat, by the way, is dehydrated cane sugar juice and the healthiest form of cane sugar I’ve found. You can read more about it here.
Honey can be substituted for white or brown sugar, but I usually use 1/2 to 2/3 the amount the recipe calls for. This means that if a recipe calls for one cup of white or brown sugar, I only use 1/2 to 2/3 cup of honey. Honey has a rich flavor and is sweeter than sugar. I have not found that substituting honey causes much difference in the consistency of a recipe, even though honey is a liquid and sugar is not. If anything, I find that honey makes quick breads, muffins and cookies more moist…and that’s never a bad thing if you ask me!
Real Grade B Maple Syrup can be substituted for white or brown sugar, but I don’t often bake with it (ooh, except for Coconut Macaroons!). I use maple syrup for liquid treats like Chocolate Milk and Smoothies and Ice Cream. If a recipe calls for corn syrup, I use Grade B Maple Syrup instead, substituting it one for one.
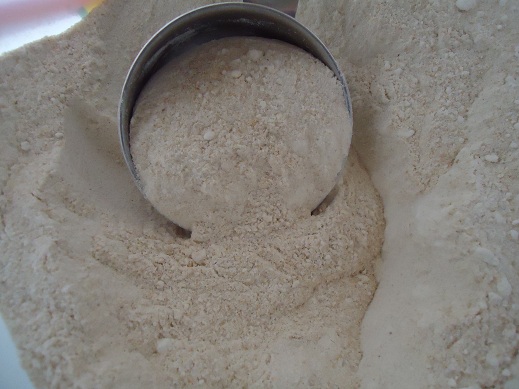
If you are using store-bought whole wheat flour, I find that this seems to be a heavier flour. Therefore, I recommend using a lesser amount than the white flour that is called for in a recipe. You may find that this is even true with my recipes that call for whole wheat flour, since I am using freshly ground flour. I receive quite a few comments, particularly on my Honey Whole Wheat Bread from people using King Arthur’s whole wheat flour or another store bought flour that they didn’t need to add in all of the flour the recipe called for. I suggest just adding flour until the dough is the correct consistency…then stop.
To make things a little bit easier…I created a free printable “Healthy Recipe Substitutions” download. Click the following link, print it off and keep it in your kitchen as a handy reference!