пятница, 29 апреля 2011 г.

DIY Homemade Conditioner

DIY Homemade Conditioner
Get soft and shiney hair without the chemicals! Get the cheapest recipe on the internet for homemade conditioner that costs just 2¢ per batch! Plus see why other recipes don't work! :: DontWastetheCrumbs.com

One of my goals for this year is to figure out a better hair care routine for both myself and my daughter…


But it seems like a vicious cycle!


You shampoo, you condition… something in the conditioner makes you have to shampoo again so the cycle starts all over.


After some research, I figured out that using conditioner isn’t THE reason why we have to continuously shampoo our hair, but I do know that using commercial conditioner certainly doesn’t help the cause.


So as I’ve been experimenting with various natural shampoo methods, every day has allowed me to experiment with various natural conditioning methods too.


And I think we’ve found a winner!


Before I jump in to the recipe, it helped me to to understand the purpose behind a conditioner in the first place, so I’m sharing that with you. Knowing this also helps to decide which avenue to take with your own homemade conditioner.


How Conditioner Works


First, do you remember those old Pantene commercials?


You know, the one that showed you what “normal” hair looked like under a microscope (a stick with tiny little sticks, coming straight off the sides) and then a side-by-side to what hair looked like with Pantene conditioner (a smooth, straight stick without any other sticks coming off of it)?


For those who don’t remember the Pantene commercials, imagine two trees, each with bark. On one tree, the bark sticks up and out from the tree. That’s shampooed hair.


On the other tree, the bark lies flat. So flat that you can barely tell there’s even bark. That’s conditioned hair.


The purpose behind conditioner is to close the cuticles (bark) of the strand of hair (tree), making the cuticles lie down close to the strand and in turn create smooth, supple and manageable hair.


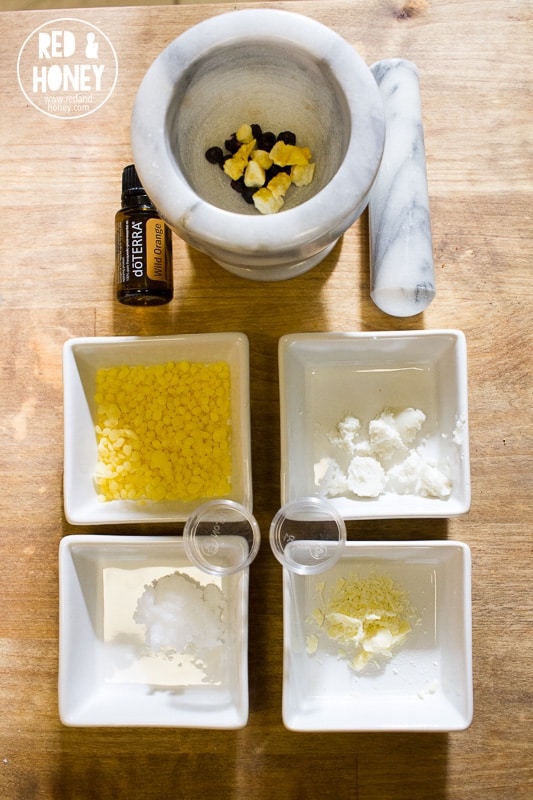
All-Natural Conditioner Options


Commercial conditioners rely on all sorts of weird and unnatural ingredients to do this, but fortunately, you can achieve soft, pretty hair naturally with a few items that you likely already have in your kitchen:


  1. Acids. Specifically, apple cider vinegar, lemon juice or whey.
  2. Oils. Nourishing oils like olive, coconut, vitamin E and jojoba are the most common.
  3. Cold Water.

Are you switching out your body products for natural ones? Go no farther for conditioner! This recipe is so simple and cheap!

How Do I Know Which All-Natural Homemade Conditional is Best for Me?


I’ve broken this potentially complicated question into three simple questions. Your answers to these questions determines which conditioner is best for you.


  1. What do you have on hand?
  2. What can you afford?
  3. What’s easiest for you?

Super technical, right?


There is no one-size fits all recipe for homemade conditioner that will really truly fit 100% of everyone, so it boils down to having to test out a few options to see which works best for you. And if the above mentioned oils, herbs and seeds all do the same thing, then it just seems logical to start with what you already have, right?


But if by chance you experiment and don’t get the results you’re wanting, determine what you can afford. 4 oz of marshmallow root costs $5.50 while I can buy the same amount of flax seed at Costco for 22¢.


Plus I can put flax seed in my oatmeal.


Lastly, and what I consider most important, what’s easiest for you? It does no good to add a homemade conditioner to your routine if it’s difficult to make. We want this natural living baby step to be effective yes, but it needs to be easy in terms of practicality.


Get the best shiny hair with this simple homemade conditioner recipe. This one is super easy and cheap to make. You'll wonder why you haven't tried it sooner!

Methods We Tried and Failed


I first found a super cool recipe for turning flax seed into a homemade conditioner. Essentially you combine ground flax seed with water, let it sit, strain the resulting gel and then dilute the gel with water to make conditioner.


Except I couldn’t strain the gel for the life of me! I tried this twice, stirred for what seemed like forever on both attempts, and not a single drop of gel came through my fine mesh sieve.


Super cool recipe fail.


With flax seed out of the picture, I tried subbing chia seeds instead. I KNOW those things gel up like crazy, so why not, right?


Wrong.


I couldn’t get the gel to strain from the chia seeds either, and I tried this twice too.


With Mr. Crumbs staring at me in the kitchen, hovering over a pot claiming to make homemade conditioner and yet NOTHING to show for my efforts except a bunch of gelled up chia and flax in my sink, I started to wonder why I was trying to reinvent the wheel…


So I went back to the cupboard, and pulled out what I needed to start testing for myself the most popular homemade conditioner.


Washing your hair with natural options can leave your hair dull and limp. Try using this conditioner to add back the shine and bring some life into your lovely locks!

Methods We Tried and Worked


Diluted apple cider vinegar is by far the most popular conditioning rinse, but apple cider vinegar isn’t the only acid you can use. Lemon juice has a slightly higher pH but works just as well, and some of you readers out there shared that you use homemade whey to conditioner your hair.


Go you!


To keep the playing field fair, I broadened the testers to include both myself (short hair, above the shoulder) AND my daughter (long hair, down to the small of her back)… whom the latter is prone to extreme tangles and random shouts of “OUCH!” during the combing process.


We went out on a limb and tried all three, and even a few combinations of them together. To start, we tried pouring it on in the shower and leaving it on, as well as pouring it on and rinsing it off.


We also tried spraying it on and leaving it in post-shower.


Of all the rinses we tried, diluted apple cider vinegar worked the best when we poured it on and rinsed it out. It worked well on my own hair, and surprisingly very well on my daughter’s hair too!


Yes, the big long mop that sometimes misses a brushing and is often found in the swimming pool was a tamed beast with this homemade version.


Minor tangles, no tears and beautiful hair. I can handle that.


Try this homemade conditioner for super shiny hair! With only two ingredients, you'll be saving tons of money on hair care!

Our Current Conditioning Method


The only downside to using diluted apple cider vinegar as a homemade conditioner is that it can cause the hair to feel dry. We’ve since reduced how often we use the rinse to every other day in the shower, and using it as a spray-in conditioner on an as-needed basis.


To combat the “excessive” dryness (that really isn’t that excessive), I rub less than a pea-sized amount of coconut oil in just the ends of my hair. This is fairly difficult to do, since my hair is short in the first place, but I imagine all is well (i.e. don’t look like a grease ball) so long as I avoid the hair line.


Here’s my daily routine:


  1. shampoo
  2. apply homemade conditioner
  3. rinse with cold water (doing my best to get just my hair, and not my body!)
  4. applying coconut oil to the ends once every 7-10 days

We do the same routine with my daughter, except that she doesn’t shower every day and we usually use the full rinse every time.


You can get a FREE jar of coconut oil at Thrive Market through this link! Get a free 15 oz jar of coconut oil AND a 30-day free trial to Thrive Market when you spend $29 or more (free shipping on orders $49+).


DIY Homemade Conditioner


Supplies


Method


Combine the ingredients in a 16 oz glass jar and shake well to combine. To apply, shake well and pour directly on the hair. Rinsing is optional.


Cut out the chemicals in your hair care routine! With this easy to make conditioner recipe, you can still have soft shiny hair and no nasty ingredients.

Additional Recipe Notes


This recipe is what works for us, right now. You might need less or more acid depending on your hair type.


Some people don’t rinse out the conditioner, but I’ve found that this reduces the chance of my hair feeling straw-like when it’s dry.


Turn this simple conditioner into a nourishing conditioner by infusing the water with herbs. Simply use the herb infusion technique described in this post and swap it in place of the plain water in this recipe.


Since keeping a whole jar of conditioner in the shower isn’t ideal with a long-haired 5 year old nearby, I keep the jar under the sink and keep a small plastic travel-sized bottle in the shower, refilling it as needed.


Cost Breakdown


  • lemon juice: $0.02 (per Tbsp)
  • apple cider vinegar: free (we make our own from apple cores and peels)
  • water: free

Total cost of DIY Homemade Condition is 2¢ per cup. One cup lasts about a week, so your total cost for one month is 9¢.


Wow! I had NO idea we could save so much in conditioner alone!


Other Natural Hair Care Posts You Might Enjoy:


Where are you in your natural hair care routine? Does anyone make their own conditioner? What do you use?


Some Other Posts You Might Like:


Original article and pictures take dontwastethecrumbs.com site

среда, 27 апреля 2011 г.

DIY Homemade Bug Repellent with Essential Oils

DIY Homemade Bug Repellent with Essential Oils
Just in time for camping season! Make your own bug spray with essential oils. This homemade bug repellent works for mosquitoes, gnats, flies and ticks depending on what oils you have! So easy to make, much more affordable and non-toxic for kids! :: DontWastetheCrumbs.com

Camping, picnics, evenings on the back porch. What do these things have in common? SUMMER! FUN! BUGS! And the fact that you need homemade bug repellent.


You know, but there’s no summer without summer bugs, and really, I could do without the bugs. That’s one reason why we make this homemade bug repellent AND homemade citronella candles.


Our last canoe trip was almost ruined by horseflies. Dealing with the mosquitoes and flies can make a fun outdoor activity lose its appeal. But it doesn’t have to be that way!


If you’re like me, you aren’t going to run out and buy the first bug spray you see on the shelf at Walmart. Personally, I like to avoid pretty much all store bought body products and make my own instead. I don’t care for applying many chemicals to my body and bug sprays are full of harmful and unpleasant ingredients. Plus they just don’t smell good.


What we need is a chemical free homemade bug repellent!


It’s very easy and very cheap to make your own homemade bug repellent. There are two different ways you can make some depending on your preferred application: rub on or spray on.


The key ingredient for either recipe is essential oils. The strong scent of essential oils will repel bugs away as well as give you added aromatic benefits!


The best essential oils for bugs are as follows:


  • Mosquitoes: Peppermint, Lemon, Lavender, Eucalyptus, Thyme, Geranium, Clove, Sage, Cinnamon, Rosemary
  • Flies/Gnats: Peppermint, Eucalyptus, Geranium, Cedarwood, Patchouli, Melaleuca, Rosemary
  • Ticks: Peppermint, Geranium, Thyme, Melaleuca, Cedarwood

Note: I prefer to buy Young Living essential oils, but I’ve heard good things about Rocky Mountain Oils and Plant Therapy as well.


Easy recipe for homemade bug repellent that works for flies, gnats, mosquitoes and ticks. Just in time for the summer, and so much healthier for your than the store-bought stuff with harmful chemicals. :: DontWastetheCrumbs.com

DIY Homemade Bug Repellent: Rub On


This is a crazy simple recipe. You only need two ingredients: a carrier oil and a mix of essential oils.


Rub On Homemade Bug Repellent Supplies


  • carrier oil (I like sweet almond oil or avocado oil they are light on the skin and not too greasy)
  • 10-20 drops of preferred essential oils (see above or below for some great combos)

Note: You can find avocado oil for a great price on Amazon, but also consider Vitacost which saves you $10 off a $30 order when you click through this link… AND/OR, you can take advantage of my partnership with Thrive Market, who has graciously offered Crumbs readers a FREE jar of coconut oil! Get a free 15 oz jar of coconut oil AND a 30-day free trial to Thrive Market when you spend $29 or more (free shipping on orders $49+).


Rub On Homemade Bug Repellent Method


In a small bottle or re-use an old jar add 2 tablespoons of carrier oil. Add in 10-20 drops of your preferred essential oil.


To apply, simply shake the bottle well and rub a small amount of oil on exposed skin. The bugs will stay away and your skin will be nourished!


DIY Homemade Bug Repellent with Essential Oils: Spray On


If you prefer a spray on repellent this works great although it uses a few more ingredients.


Spray On Homemade Bug Repellent Supplies


  • carrier oil (I like sweet almond oil or avocado oil they are light on the skin and not too greasy)
  • 10-20 drops of preferred essential oils (see above or below for some great combos)
  • distilled water
  • vodka or witch hazel

Spray On Homemade Bug Repellent Method


In a 2 ounce bottle or jar add in 1 1/2 Tbsp of distilled water, 1 tsp of carrier oil, 1 tsp of vodka or witch hazel, and 15-25 drops of essential oils. Shake well before spraying on your skin.


This recipe could easily be doubled or tripled for a camping trip or frequent outdoor activity and put in a larger glass spray bottle.


With both of these recipes, avoid getting the repellent in your eyes or mouth!


Make your own homemade bug repellent for ticks, mosquitoes, gnats or flies with a combination of essential oils and nourishing carrier oils. :: DontWastetheCrumbs.com

Here are some of my favorite essential oil combos for repelling bugs. They seem to all work the same; it depends on what kind of scent you desire!


  • Campfire: 10 drops Rosemary, 6 drops Cedarwood, 4 drops Cinnamon
  • Floral: 8 drops Geranium, 5 drops Lavender, 5 drops Rosemary, 2 drops Patchouli
  • Hippie: 10 drops Lavender, 6 drops Cedarwood, 4 drops Patchouli
  • Fresh: 12 drops Lemon, 5 drops Peppermint, 3 drops Eucalyptus

Note: I prefer to buy Young Living essential oils, but I’ve heard good things about Rocky Mountain Oils and Plant Therapy as well.


Don’t forget to experiment with some different combos and mix it up! Your bugs may be repelled better by some essential oils more than others.


Homemade Bug Repellent Without Essential Oils


If you’re in a pinch and don’t have the chance to get these essential oils, or if you’d just simply prefer not to use them, we’ve made our own homemade bug spray using herbs and extracts instead with good success.


The best part is that you likely already have everything you need at home, and if you don’t, you can get it all at the grocery store.


Store-bought Bug Repellent


I know some families aren’t the DIY-ers and would prefer to buy it ready to go. If that’s you, here are the top bug repellents I recommend:


I am so happy to keep the bugs away by using a natural product that is free of nasty chemicals. Plus when you think of the money you save by making your own bug repellent, I don’t know why you wouldn’t do it yourself!


What do you use to naturally keep the bugs at bay? Have you tried making your own homemade bug repellent?


This post was written by Heather Robertson at Neverlackingzeal.com


Original article and pictures take dontwastethecrumbs.com site

понедельник, 25 апреля 2011 г.

DIY Herbal Tincture for Immune System Support

DIY Herbal Tincture for Immune System Support
'Tis the season for sniffly, runny noses! Time to boost your family's immune system so that you can ward off the germs at every turn. This DIY is seriously easy, and requires very little time to put together. // I'm totally getting some herbs to do this ASAP!

Herbs are one of my favorites ways to help build up a healthy immune system. This immune boosting tincture will help kick the winter germs to the curb!


While there are many ways to keep your immune system healthy during the cold and flu season, I find even the healthiest immune system needs a little boost now and then.


When the body is bombarded with germs, your immune system fights to keep up. I like to help my family along with herbal tinctures when I know we have been exposed to germs or are just stressed or tired.


The holidays can be a major time for stress. It’s not always bad stress, but diet changes, travel and lack of sleep can tax a body.


Herbal tinctures are my key to aiding our bodies, and they’re super easy to make!


DIY Herbal Tincture Supplement - R&H1

I find herbal and natural remedies are rock stars when it comes to preventive care. This means I like to use them before we are even sick just to help kick start the immune system.


I love using this combination because it will help fight germs, get your immune system working a bit better, and provide a bit of extra mineral and vitamins.


(And let’s face it, we can all use that!)


Immune boosting tincture can also be used during illness as it contains one of my favorites for colds and viral infections, elderberries. I also like to keep extra elderberry syrup on hand for when we are really sick to help get through an illness faster.


If you have never made a tincture before, no worries. It is one of the easiest herbal preparations to make, I promise.


You can’t mess it up. How awesome is that?


Print

  • 1 part dried elderberry
  • 1 part dried echinacea
  • 1 part dried astragalus
  • ½ part dried red raspberry
  • ¼ part dried peppermint
  • Vodka or rum (enough to cover your herbs)

  1. Mix all herbs in a bowl and pack into a glass jar
  2. Cover the herbs with alcohol
  3. Put lid on jar and shake
  4. The next day, check to see if you need to add more alcohol (some will be absorbed, add more if needed)
  5. Put lid back on and shake
  6. Let sit for two weeks, shaking jar on occasion
  7. When ready, put funnel in the extra jar and cover with cheese cloth
  8. Pour herb solution in the jar and allow the herbs to sit and drip
  9. Then squeeze the herbs to get all the liquid out
  10. Throw away the herbs
  11. Put the lid on your jar and label

See? Totally easy and doable and you will have an awesome blend to get you through the cold and flu season.


This recipe can also be adjusted for the amounts you want or you may add other herbs. I love trying and blending new herbs to see what works best for my family.


For an excellent source of quality herbs, check out Mountain Rose Herbs. Click the image below to see their extensive selection, and place your order online.

Purveyors of fine herbal products

Original article and pictures take redandhoney.com site

четверг, 21 апреля 2011 г.

DIY Heat Therapy Pad {Handmade Christmas 2012}

DIY Heat Therapy Pad {Handmade Christmas 2012}
SchneiderPeeps - DIY Heat Therapy Pad.  You can use the same technique to make diy handwarmers.

Welcome to this week’s link up of Handmade Christmas gifts. All the categories will be open for links through Nov. 31st so make sure to go back through and see what everyone is linking up. Also, feel free to link up items as you complete them.


The hardest people for me to make gifts for are men. Partly because men are usually a little more utilitarian than women and they just don’t see the need for more than one tote bag, for instance. As my boys grow into teens and adults they’re not quite so excited about mama made stuff as they used to be.


But that’s ok because I know you guys are going to link up some amazingly awesome gifts that we can make for the guys in our lives this holiday season.


With the cooler weather coming I decided to make a “rice warmer” to send to Christian. These are realy called heat therapy pads but we call them “rice warmers”. Not really a Christmas gift but more of a “I love you and miss you” gift. A “rice warmer” is a tube sock filled with about 3 cups of rice with a flannel case over it.


Supplies


Men’s tube sock


3 cups rice


flannel (5.5″ X 42″)


Heat therapy pad (2)

The first step is to get a tube sock and fill it with about 3 cups of rice and then stitch the top closed.


Heat therapy pad (3)

Fold down one short end of the flannel and stitch a hem.


Heat therapy pad (4)

Lay the flannel out, right side up. Fold down the end that has the hem about 4.5″ down.


Heat therapy pad (5)

Fold the other end up so that it overlaps the hemmed piece about 1.5″-2″. You might need to cut some off the end, you want the whole thing to be about 36-38″ long.This doesn’t need to be precise but you don’t want it extra long nor do you want it so small the tube sock doesn’t fit. Stitch along both sides.


Heat therapy pad (6

Now the fun part. Put your hand into the tube, you should have a hole where the fabric overlapped, grab the end of the sock and begin pulling it into the tube. As you pull the tube down over the sock, the tube will turn right side out. This will take a little work as the rice tends to bunch up at the bottom, so just go slow and it will all work out.


Heat therapy pad (7)

Voila!

You heat it in the microwave for 2-3 minutes to warm up and it will stay warm for a long time. It’s really good for when you have muscles aches and need a hot pack or when it’s cold and you want to snuggle under blankets. If you get really cold feet these are great for warming them up.

You can also use field corn – it will stay warm a little longer. We’ve used these for years and have never had a problem but I have read reports of people catching their microwave on fire by leaving them in too long. But you guys are smart so I know you would never do that.

Your turn…


Original article and pictures take www.schneiderpeeps.com site

понедельник, 18 апреля 2011 г.

DIY Hand Sanitizer with Essential Oils

DIY Hand Sanitizer with Essential Oils
Store bought hand sanitizers are great at killing germs but are full of chemicals. You can make your own DIY hand sanitizer with essential oils that works just as well without the harsh chemicals.

Store bought hand sanitizers are great at killing germs but are full of chemicals. You can make your own DIY hand sanitizer with essential oils that works just as well without the harsh chemicals.


Let’s face it, kids are germ magnets. If there is something gross to be touched, their little hands will find it. And, if your child is like my youngest, their hands go in their mouth immediately after touching said gross object. Ick.


Being in tune with trying to avoid chemicals always make me feel vulnerable when we are visiting places that I know are LOADED with germs (like those icky toys at the doctor’s office).


I want to let my kids enjoy playing with the toys but I also don’t want them touching all of the toys. And, I really don’t want to use toxic chemical-filled hand sanitizer, either.


When we got sick (again) after a visit to the dental office, I decided I need to figure out the best way to help avoid some of the germs.


That’s when I realized just how awesome essential oils are for this kind of job.


Essential oils are not only effective at killing germs – they’re natural too. It’s a total win/win in my book.


While I know people consider essential oils to be pricey, if you look at the break down of how long a bottle of oil can last you, not just the up front price, it really is a steal.


They have so many uses, you really can’t go wrong with investing in a few oils to keep on hand.


[Related: 50 First Uses for Essential Oils (and the First 3 Things I Tried)]


When making a homemade hand sanitizer, I like to look at a few factors – you can use a ton of different oils to accomplish the same job, but certain ones will yield better results.


I like to pick oils that kill germs but also that are easy on the skin. Two of my favorites are tea tree oil and lavender.


I also make sure that I am not using a citrus oil as they can lead to a problem if you are exposing your skin to the sun after use. It just seems easier to not use them for topical use. I save those for cleaning products like this citrus cleaner.


If I want something heavy duty, I like to use the onGuard blend, or something similar. This works super well and I really enjoy the scent.


To really maximize the benefits of your DIY hand sanitizer, use it before and after your outings. Most people use it after, but adding a spray before you touch things also helps prevent the germs from even being on your hands.


I have seen a HUGE improvement in the colds we bring home since using homemade sanitizer.


Hand washing is important, but a little spray bottle is much more convenient for us busy moms to keep those hands germ-free!


  • 4 ounces of aloe juice (Make sure you are not getting the gel)
  • 2 tbsp of witch hazel
  • 10 drops of lavender essential oil
  • 10 drops of tea tree essential oil

  1. Gather your tools: a glass jar (to store your extra spray in), and a small spray bottle
  2. Put all your ingredients in a jar with a lid and shake well
  3. Pour off some of the liquid into a small spray bottle

My favorite DIY items are ones that are easy. I also love that I can help my kids stay healthy without using harsh chemicals. It really is great for the entire family!


I keep a small bottle in my purse, diaper bag and an extra in the car. Along with a healthy diet, some winter time immune boosting herbs and this blend of hand sanitizer, we have been able to stay pretty germ free during the cold and flu season!


[Related: How to Fight the Cold & Flu Season Naturally]


What are some of your favorite tips on avoiding germs?


Original article and pictures take redandhoney.com site

пятница, 15 апреля 2011 г.

DIY Fruity Summer Lip Balm

DIY Fruity Summer Lip Balm
DIY Fruity Summer Lip Balm - R&H top

[Note from Beth: My month-long publishing hiatus is over, and I’m excited to kick things off around here again with an awesome tutorial for luscious fruity lip balm from contributing writer, Cheyenne. I look forward to sharing again, including some things I learned while on my month-long break! I’m also working on a new ebook that I’m excited to share more about soon. :)]


We’re heading into the end of the summer– can you believe it? I, for one, am happy to see it go–it is way too hot here in Texas. But there are things about the summer that I will miss, especially having delicious, juicy, ripe fruit whenever I want it. There’s little better than fresh fruit, am I right?


While I know I can’t have fresh fruit into the fall and winter, I thought maybe I could preserve a little bit of the “feel” of summertime by making myself some fruity summer lip balm that will last me well into the chapped winter months.


It’s so easy and quick to make! Here’s how to do it:


This fruity summer lip balm is so simple to whip up, and it lets you enjoy the scents of fresh fruit all year long!


Ingredients


(If you’re buying a lot of these ingredients for the first time, you’ll be able to use them for many other body care recipes, so consider it an investment!)


Directions


1. Combine the beeswax, coconut oil, cocoa butter, and shea butter into a double boiler or (as in my case) a glass measuring cup set carefully in a pan of hot water. Melt the oils and wax together.


2. While the mixture is melting, using a mortar and pestle, grind your freeze-dried fruits into a fine powder. Strain any larger bits using a fine mesh strainer.


3. Once the oil & wax mixture is melted together, take it off the heat and let it cool just a bit before adding your essential oil and the ground fruit powder. Mix all ingredients together.


4. Pour the mixture into small lip balm jars or any other small jar you have. I stuck mine in my fridge for a few hours to hurry the hardening process but once they’re hard you can keep them out at room temperature.


5. Use your balm into the cold months and dream of summer!


Easy peasy, right? And so yummy and fruity! These would make great gifts for teachers for back to school too! Happy end-of-summer!


Original article and pictures take redandhoney.com site

среда, 13 апреля 2011 г.

DIY Disinfectant Cloth Wipes

DIY Disinfectant Cloth Wipes

All of the convenience of the disposable store-bought chemical-laden version, only without the price tag, the negative environmental impact, and the nasty toxic chemicals to wipe all around your home.


A Brief History of Disinfectant Cloths in Our Household: The Early Years


(Gosh, that title just has timeless classic written all over it, doesn’t it?)


When I was a newlywed (long before I started my natural living journey), I refused to buy Clorox disinfectant wipes. How very trendy and non-mainstream of her, you might be thinking. Saving the earth since 2003. Go team!


Actually, the plain old unromantic truth is that I was just too cheap to pay that much money for something you use once and throw out, especially when it’s something that I could so easily make myself!


If I’m going to splurge on something it will probably involve fancy fair-trade coffee or organic, grass-fed steak. You know – the important things in life. A throw-away paper cloth to wipe the yuck of life is just not high on my wish list.


It wasn’t until a few years later that I also became passionate about treating the earth with kindness and becoming mindful and conscious of the types of products I consume and support with my buying habits.


My mom always stored a bag of rags in the bathroom cupboards and used them for cleaning. They were literal rags – cloths and dishcloths that had gotten too worn and holey to be in regular use, and thus cut up for dirty cleaning jobs. (She was doing the eco-friendly and reusable thing long before it was hip and trendy.)


At first I just used them with some water or cleaner for random cleaning jobs, but now I use them for pretty well anything (Although I fully admit to using toilet paper for cleaning up cat barf. Ewww.)


In the past when I’ve needed to disinfect something I’ve reached for my big honkin’ jug of vinegar that lives under the sink. White vinegar is amazing and I use it all the time to wipe down countertops after handling stuff like raw meat. That was a bit of a clunky system, and most of the time way more than enough would pour out which gave me a frugal-heart-attack.


Then I moved on to some vinegar and H20 in a spray bottle. That works nicely, and is pretty simple to spray and wipe with a clean cloth. But what about when you want just a little extra oomph in your cloth – some cleaning power in addition to the disinfecting properties?


The vinegar disinfects, but it’s not the best at removing grime on the bathroom sink.


I was still committed to never buying Clorox wipes for a variety of reasons (Mainly: wasteful one-use products full of toxic chemicals that harm me and the earth. Compelling, right?)


Enter: DIY disinfectant cloth wipes (angelic chorus). All of the convenience of the disposable store-bought chemical-laden version, only without the price tag, the negative environmental impact, and the nasty toxic chemicals to wipe all around your home. Hello common sense, nice to see you again!


mason-jars

DIY Disinfectant Cloth Wipes


Emily says: “The vinegar and lemon have disinfecting properties and the lemon also gives it a pleasant scent. The dish soap is for extra cleaning power. The combined scent of the dish soap and lemon essential oil smells really fresh and clean, and covers up any smell of the vinegar in this recipe.”


Step 1


You can use any sort of washable cloth or rag for this job. I like true rags – clothes that were demoted due to holes and stains and such. Using old clothes as rags makes me feel all Ma Ingalls and stuff (only with hot showers and a heated home and also: chocolate, because: duh), which is always fun.


Any sort of bar mop towels or cheap washcloths would work. Even old receiving blankets cut up would be great. Be sure to choose an absorbent material, like cotton or microfiber.


Step 2


Once you have small squares (or squarish shapes) of cloth, decide how neat and tidy you want your system. You have two options: lay them out carefully with slightly overlapping corners on an angle so that when rolled up you can grab a corner from the inner one and pull it out continuously, like with the store-bought version… or (my personal fave) stuff ’em all into your container willy-nilly.


Then douse ’em with the vinegar solution you’ve mixed up, and use as needed! Any sealed container would work, even a mason jar, which would be very hipster-trendy of you, of course.


Step 3


Revel in the magic – cleaning is crazy fun again!*


(You can see more instructions and details over at Em’s blog, Live Renewed, along with an alternate recipe in case you don’t have the ingredients for this one.)


*This has not been verified by any sane person ever. Be highly suspicious of false advertising claims. Ie. this one. Cleaning is not fun. Tolerable, yes. Rewarding, maybe. But fun? You need to get out more, my darling.


If you think these wipes sound awesome, you would be correct. They are brilliant. You can’t beat the convenience, the price tag, and the safe and natural aspect.


Now, I mentioned that this was Emily’s recipe. She graciously gave permission for me to publish it here for you lovely peeps so that I could show you just a teeny taste of how totally-freaking-awesome her new ebook is: Green Your Life: A Guide to Natural, Eco-Friendly Living.


Green Your Life: Get Started Today!

I happen to have edited this book for Emily, which means that I have read every single word from start to finish, and I can confidently say that it is an absolutely stellar resource.


It is 268 pages packed full of information – there are a ton of DIY recipes just like the wipes recipe I posted here, tips for green living (I bet you’ll find several you’ve never heard of even if you’re a more seasoned eco-friendly enthusiast).


I want to emphasize just how packed with helpful information is in this book… and how finding all of that information would take forever on your own. The internet is an amazing thing but it is vast and never-ending. You could spend literally weeks culling information from various websites to find this stuff, but even then it would not be shared from the expert perspective of someone who has been there, done that.


Emily has gleaned the best information and compiled it together into one jam-packed resource that you can trust without reservation.


This book is pretty well the best go-to guide for green and natural living that I could possibly recommend. It also struck me how accessibly the information is presented for newbies, but how more experienced folks in this lifestyle, like me, also can find it super useful.


You can get your digital copy here, along with more details on exactly what it contains. Right now the book is just $5.00!


Head over to download your copy today – you won’t regret it!


“Treat the Earth well. It was not given to you by your parents. It was loaned to you by your children.” – Kenyan Proverb


Affiliate links included in this post.


Original article and pictures take redandhoney.com site

пятница, 8 апреля 2011 г.

DIY Diaper Rash Spray – Avoid Tugging at Tender Skin

DIY Diaper Rash Spray – Avoid Tugging at Tender Skin

Share with:


All-Natural Diaper Rash Spray, made with essential oils -- Titus 2 Homemaker #t2hmkr #baby #essentialoils

We’ve used some pretty good diaper rash creams/butters/salves over the years. But they all have one negative thing in common: simply by their design, they require that you “tug at” the baby’s tender skin to apply them when they’re needed. I wanted something soothing & healing that I could apply to an irritated or raw baby bottom and not have to rub it in or spread it on. The most logical solution was a spray. This is what I came up with.


Ingredients

This recipe uses aloe juice, not aloe gel. It's a liquid, so don't try to substitute or you might gunk up your spritzer.


The essential oils in this recipe make a just-under 1% dilution. If you’re uncomfortable with that (have an itty-bitty baby, or whatever), just halve it. (2 drops lavender and 1 drop tea tree, if you still want to use both)


Also, you can eliminate the tea tree oil if you prefer and just replace it with more lavender. The tea tree oil is good for fungus, like if you’re dealing with a yeast-based rash. But personally, I’m not crazy about the smell of tea tree. And the very youngest babies may be better off with lavender alone.


Now, I should probably warn you, lest someone should freak out, that my little guy acts like this is not comfortable the moment it hits his bottom. It only seems to bother him for that first split second, though, when it makes contact.


The spray can also be used on cuts, scrapes, and bruises, and it’s a good blend because the essential oils used here are oils that are okay for little tiny people. (Some essential oils shouldn’t really be used on babies and toddlers.)


Do keep in mind, though, that it’s liquid and does not contain preservatives, so it’s not going to last forever.


SAFETY NOTES: This is intentionally kept at a low dilution, and the essential oils were carefully selected. However, babies still have tiny bodies, thinner skin, and less-developed metabolisms than older folks, and essential oils should be used sparingly with them. So I would recommend against this for tiny newborns (under about 3 mos.), and I recommend that it be used for occasional diaper rash, not at every diaper change.


All-Natural Diaper Rash Spray, made with essential oils -- Titus 2 Homemaker #t2hmkr #baby #essentialoils

You know the drill. I’m a mom, not a doctor. The FDA doesn’t approve anything on this site – like the comments in this post – and even if they did, I wouldn’t consider that meaningful. Use this for informational/educational purposes and take responsibility for your own health and your children’s.


This post is being shared at Wildcrafting Wednesday, Mostly Homemade Mondays, Titus 2 Tuesdays, TipJunkie’s “Gifts for Babies” linkup, Whip it Up Wednesday, Simply Natural Saturdays.


Share with:


Original article and pictures take titus2homemaker.com site

понедельник, 4 апреля 2011 г.

DIY Decongestant Rub

DIY Decongestant Rub
Make your own decongestant rub with Essential and Coconut oil to get relief from colds, coughs and congestion. The Homesteading Hippy #homesteadhippy #fromthefarm #essentialoils

The cold and flu season is nearing rapidly. If we get a cold where we have stuffy noses, or coughs, I want to be ready.


In the past, I would use the OTC name brand vapor rub to help relieve symptoms.Of course, after learning what the ingredients in the OTC rub were, I wanted to avoid that like the plague. I mean, really, why do you need paint thinner in there?? I figured though, I make other stuff, why not this? So, after a bit of trial and error, I came up with my own diy decongestant rub.


We call this DIY Decongestant Rub “Special Tissue Lotion”


because when my kids were little, and my mother still with us, if they got a stuffy nose, she would put a bunch of vapor rub on a tissue for them to smell the vapors in as they wanted. Ah, memories. This stuff is great because it works just as well, and there is no questionable ingredients.


So, without further ado, here is my DIY Decongestant Rub.


All you need is

1/4 cup Coconut Oil, softened

10 drops lavender oil

10 drops eucalyptus radiata oil

Carefully stir the softened coconut oil with the essential oils until well blended. Store in a container like this or upcycle an old candy tin (like this-which is what I used here.) To use, simply rub 1/2 teaspoon on the chest 2-3 times a day. Even though it’s coconut oil, it’s still fairly easy to get out, even in colder conditions. If you find it’s too hard for you, simply rest the container in a bowl of warm water for a minute or two for easier use. Not for use on children under the age of 2.


stocks and broth newsletter

Original article and pictures take thehomesteadinghippy.com site

DIY Cloth Baby Wipes

DIY Cloth Baby Wipes

By contributor Erin Long of Home & Grace


When I found out I was (surprise!) pregnant with my daughter, I hadn’t made many decisions about parenting. I thought I had a good half-decade before I needed to choose a stroller, decide what kind of birth I wanted, or actually need to know what really is necessary for a baby (do I need a swing and a bouncy seat? Why are there so many kinds of carriers?)


But without a doubt, I wanted to cloth diaper. I saw cloth diapering in action with my niece and immediately knew I wanted to do the same with my kids.


One of my happiest moments of those early days of motherhood was when I wrapped my daughter in a soft cloth diaper for the very first time. I didn’t even mind the extra loads of laundry.


But I quickly realized I had a problem.


I used, threw away, and wasted money on disposable wipes with toxic ingredients, which was the main reasons I didn’t use disposable diapers.


I had reusable cloth diapers, and I wanted reusable cloth baby wipes.


So I sewed simple flannel cloth baby wipes that I washed with the diapers and made an all natural, non-toxic cleaning solution (plain ol’ water works, too) to keep my baby’s skin clean.


My first set of cloth baby wipes made it beautifully through two children but now that I’ve got baby #3 in cloth diapers, it is time for a new set of baby wipes.


DIY Cloth Baby Wipes

*Full disclosure: I do have disposable, non-toxic wipes for super messy diapers and when we’re away from home. Kudos to you if you do use cloth baby wipes full-time!


These baby wipes are super easy to sew. I only have very basic sewing skills so if I can do this, so can you!


You could make up a whole batch of these in an afternoon or sew a seam here and a seam there if you only have limited amounts of time (or older children around!)


You can use this same method for making family cloth and disinfectant cloth wipes. Or you can re-purpose the baby wipes once your little one is potty trained!


Here’s how to do it:


  1. Get fabric: For 12 wipes you need 1 yard of flannel fabric. Flannel is absorbent and durable so it’ll do the job well. You can use one pattern for both sides of the wipes or use two patterns, one for the front and one for the back. Or do as many as you like. They’re baby wipes – go crazy and have fun if you want!
  2. Cut: Cut fabric in 9×7 rectangles. You can go bigger or smaller depending on what works for you but this is the size of a disposable wipe and it works well with the 1 yard of fabric.
  3. Assemble: Put two pieces of fabric together inside out and pin if you prefer. You want the side of the fabric that will be on the inside of the wipe showing.
  4. Sew: Using a 1/4 inch seam sew three sides together, leaving a short side unsewn.
  5. Trim: Trim the corners. This will help the wipe to lay flat.
    DIY Cloth Baby Wipes - R&H1
  6. Turn right-side out: Turn the wipe right side out and fold both pieces of fabric in about 1/4 of an inch and iron them down.
  7. Sew: Sew the last side. This stitch will show.
    DIY Cloth Baby Wipes - R&H2
  8. Sew a star or firework: Now for the fun part! It’s time to sew the pieces so they stay together and don’t turn the wipe into a balloon when you wash them. You can sew any design or shape that you want, just be sure to cover enough surface area to keep the wipe together. Here’s what I did: starting in one corner sew a line to the opposite corner and do the same with the other corners. You now have an X. Next sew lines from the top to the bottom of the wipe and then from the left side to the right so it looks like a star. Or a firework as my 4 year-old describes it.
    DIY Cloth Baby Wipes - R&H3
  9. Use and enjoy!

Wash your wipes with your cloth diapers and enjoy saving money and keeping toxins away from your baby!


Do you use cloth baby wipes? Would you like to try making your own?


Original article and pictures take redandhoney.com site