среда, 28 ноября 2012 г.

Homemade Toothpaste (that’s just like Earthpaste!)

Homemade Toothpaste (that’s just like Earthpaste!)
We started making homemade toothpaste for a fraction of the cost, and it tastes just like Earthpaste! Just a few ingredients and you'll have homemade toothpaste in whatever flavor you want! :: DontWastetheCrumbs.com

Confession: I make homemade toothpaste because I’m a toothpaste snob.


I fell in love with Earthpaste after using it only once, and the whole family has been happily brushing their teeth with dirt ever since. In fact, we credit my husband beating gum disease to the clay.


However, when our supply of Earthpaste began to run low, I started to panic.


You see, I was so in love with all-natural Earthpaste and so against conventional toothpaste (because of the glycerin and fluoride), I never wanted to go back and use the old stuff again..


So in a temporary moment of temporary mom-gone-too-crunchy, I threw every other tube of toothpaste we had away.


In one fell swoop, every last box and tube was gone. Even the tiny samples!


Don’t get me wrong – I’m SO glad we’ve switched to an all-natural toothpaste. But without a backup in the closet, when the toothpaste was gone, it was gone!


In all the stores I shop locally, I’ve never seen Earthpaste on the shelves.


I know Whole Foods carries it, but since the I always walk out of there spending more money than I planned, I just try to stay away in the first place. I’d probably pass out at the price tag anyway.


I know I can get Earthpaste from Amazon, but that usually means waiting a couple days for delivery.


Our experiment to see if cutting the tip off the end of toothpaste saves money worked, and it would stretch what toothpaste we had on hand for a little bit. But I had to come to terms with the inevitable: A day would come when the tubes would be completely empty and we would officially run out of toothpaste.


That day came sooner than later and I was forced to make a decision: Either fork over the money for more Earthpaste, or try my hand at homemade toothpaste.


Pssh, as if there’s an option in this frugal crunchy house.


I thought it would be super cool to make homemade toothpaste with coconut oil, and I know that the benefits of coconut oil are pretty amazing, so my first batch included it plus clay, peppermint essential oil, salt and tea tree oil. The flavor wasn’t bad, but it made for a really weird brushing experience.


Because coconut oil is solid at room temperature, you can’t just dip your toothbrush into the jar. I had to scrape some out first and then put it on my brush. Then in my mouth the homemade toothpaste felt like little pieces of hard-ish clay were floating around until the heat from my mouth finally melted it.


And then suddenly my mouth become oily and minty and I wasn’t really sure if I was actually brushing with it or if the melted toothpaste was just hanging out under my tongue.


Let’s just say my first batch of homemade toothpaste with coconut oil was weird.


Too weird in my book and if it’s weird to me, it’ll definitely be weird to the rest of the family. And who wants to feel weird when they’re brushing their teeth?


 After reading the benefits of clay, we starting making homemade toothpaste and we love it! Not only are we saving money by making homemade toothpaste, but our dentist says our teeth have never looked so good! :: DontWastetheCrumbs.com
After reading the benefits of clay, we starting making homemade toothpaste and we love it! Not only are we saving money by making homemade toothpaste, but our dentist says our teeth have never looked so good! :: DontWastetheCrumbs.com

So I moved on to plan B and what should have been plan A in the first place: Make homemade toothpaste that’s just like Earthpaste.


The list of ingredients on a tube of peppermint Earthpaste is pretty simple and straightforward: water, clay, xylitol, peppermint essential oil, menthol, real salt and tea tree oil. Lucky for me, I had everything but xylitol and menthol.


Xylitol is a sweetener (with some beneficial properties for teeth), but I did have stevia and figured it would do the job as a sweetener just fine.


Menthol is often used for its breath-freshening qualities, but using both tea tree oil and peppermint oil would work.


Neither of these substitutions were deal breakers in my book – we still needed toothpaste, remember?!


My second batch of homemade toothpaste included water, clay, stevia, peppermint essential oil, real salt and tea tree oil. Dare I say, it was just like Earthpaste?!


I got brave and branched out beyond peppermint, mixing and matching the essential oils I had with the flavors of stevia in my pantry. In the end, I was able to create three flavors of all-natural homemade toothpaste that replicate Earthpaste so much so that my family can’t even tell the difference!


All three flavors are Mr. Crumbs and kid approved, verified by eating AND brushing. (The Boy is actually the one that said the lemon flavor wasn’t lemon-y enough!)


How to Make Homemade Toothpaste (that’s just like Earthpaste!)


Homemade Toothpaste Supplies


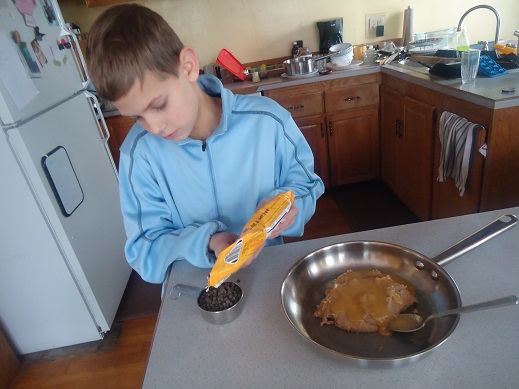
  • 2 Tbsp bentonite clay
  • 3-4 Tbsp distilled or boiled water that has cooled
  • 4 drops tea tree oil**
  • 5 drops liquid stevia OR xylitol (optional, to taste)
  • 10-15 drops essential oils** in peppermint, lemon or orange (depending on what flavor you choose)
  • tiny pinch of salt
  • plastic or wooden spoon or spatula

**Note: I prefer to buy Young Living essential oils, but I’ve heard good things about Rocky Mountain Oils and Plant Therapy as well.


Homemade Toothpaste Method


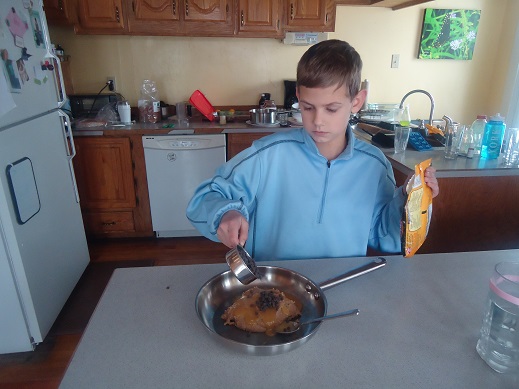
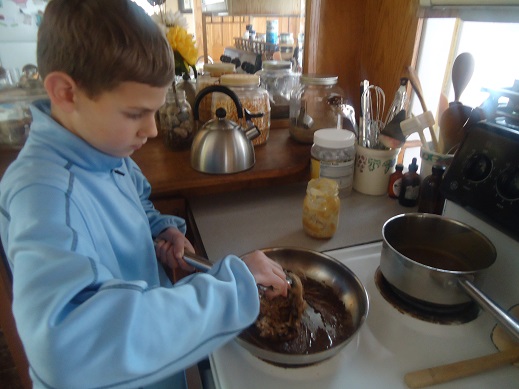
Combine 3 Tbsp of water with clay in a non-metal bowl and mix well using a non-metal spoon (the clay should never come in contact with any metals). Add tea tree oil, stevia and 10 drops of desired essential oil (peppermint, lemon or orange). Mix well.


Add a pinch of salt, mix well and taste. Add additional stevia and/or peppermint essential oils and/or water to taste and texture, adding oils one drop at a time and water 1/2 Tbsp at a time. The flavors will meld together over time, so wait 48 hours before making significant adjustments to the flavor.


Our homemade toothpaste that tastes just like Earthpaste is our favorite of all time. The kids love the lemon flavor, and my husband loves peppermint. I love that it only takes 5 minutes to make! :: DontWastetheCrumbs.com

Cost Breakdown for Homemade Toothpaste


The best price on Earthpaste I can find is through Azure standard, where you can get one tube for $4.20. The next lowest price is at Amazon for $5.15 per tube. Since not everyone has access to Azure, let’s use Amazon’s price of $1.56 per ounce for comparison purposes.


The recipe above will yield approximately 1.5 ounces and here’s the breakdown of the cost of each ingredient:


  • clay: $0.60
  • water: $0
  • tea tree oil: $0.05
  • peppermint essential oil: $0.18
  • liquid stevia: $0.08
  • salt: $0.01

Total cost of all-natural, homemade toothpaste that’s just like Earthpaste: $0.61 per ounce. That the same as $2.45 for one 4oz tube, or a savings of over 60%!


So far, the only downside I can see from making your own toothpaste is the up-front cost of ingredients. However, one 10 oz tub of bentonite clay can make over 34 batches of the recipe above and each 1 oz bottle of essential oil will make over 37 batches.


To say you’ll have enough ingredients on hand to make toothpaste for awhile is an understatement!


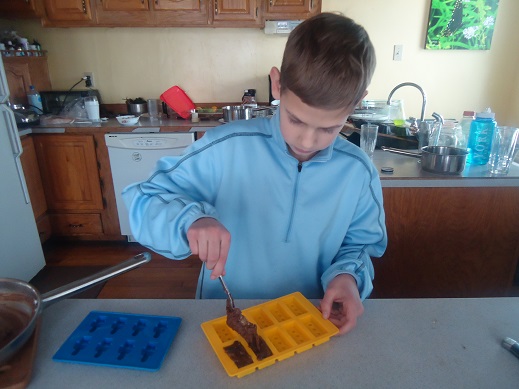
Using and Storing Homemade Toothpaste


We use this toothpaste by simply dipping our brushes in the one jar. However, if you’d prefer everyone to have their own containers, here are a few options:


  • Mini Plastic Pots: These are about the size of a single eyeshadow container and take the issue out of sharing one bigger jar. One batch will fill 2-3 pots, depending on how well you pack it in.
  • Reusable Plastic Tubes: These allow you to squeeze the toothpaste out, instead of dipping into a jar. Each holds 3 oz, so roughly one batch of toothpaste per tube.
  • Small Glass Jars: Each jar is 4 oz, so one batch of toothpaste fills each about halfway. This is what I use personally, since each jar can serve many functions beyond the bathroom.
  • Mini Glass Jars: Similar to what we use, except that each jar is only 2oz and comes with a plastic lid. Perfect for those concerned about the clay touching metal, and traveling!

Side note:


You might be asking, why bentonite clay? Bentonite clay has so many amazing health benefits (you can read more about that HERE and ways to use it!). One of the benefits is the remineralizing effects clay has on your body (and teeth!). This could be one reason why my husband was able to heal his gum disease naturally.


Are you a toothpaste snob? Would you fork over the money and pay for toothpaste, or would you try to make it yourself? What flavor would you make?


Original article and pictures take dontwastethecrumbs.com site

вторник, 27 ноября 2012 г.

Homemade Sunscreen with Just 3 Simple Ingredients

Homemade Sunscreen with Just 3 Simple Ingredients
We're making this recipe for non-toxic homemade sunscreen this summer because it's SO easy. It's just 3 ingredients, ready in less than 5 minutes and costs only $2 - WAY less than the sunscreen at stores! :: DontWastetheCrumbs.com

When we lived in California, we didn’t worry much about sunscreen and chose other methods for avoiding sunburns when we were outside for a long period of time.


Now that we live in Georgia and there are many pool days in our future, I’m ready to jump in with two feet and make my own homemade sunscreen.


But with 50% of the family having fair skin that’s prone to burn easily, it was important that our homemade sunscreen worked.


Reasons to Make Homemade Sunscreen


For a long time, I bought whatever sunscreen was cheapest. Whether that was store brand or name brand, buying in bulk or using coupons – it didn’t matter. I bought it and we used it whenever we needed it, which really wasn’t that often.


We lived in an area that was typically cool and overcast. While you can get sunburned on a cloudy day, I was more concerned about our getting enough Vitamin D than getting burned. Family vacations aside, I can probably count on one hand the number of times we used sunscreen in the average year. Since we didn’t use sunscreen that often, I wasn’t too concerned about what was in it.


The weather where we live now is very different. It’s mostly sunny the majority of the time and we’re outside enjoying every minute we can. Our neighborhood pool has only been open a week and we’ve been there every single day.


As we gradually learn more and more about what we put on our skin, and balance it against how often we do it, making homemade sunscreen has become more of a priority for me.


You see, my daughter inherited my fair skin and together we cover ourselves head to toe with sunscreen. If we don’t, we burn after just 30 minutes in the sun. Summer days at the pool means applying and reapplying sunscreen on a regular basis.


The more often we use a product or eat a food, the better quality I want it to be, and we’re finally to the point where it’s time to upgrade our sunscreen. The top of my concerns are toxins, the cost of quality sunscreen and the fact that traditional sunscreens may even increase the risk of skin cancer.


Parabens


With the amount of sunscreen we use in the summer, our sunscreen needs to be free of toxins and parabens is at the top of the list. According to the Environmental Working Group (EWG),


Parabens act as a synthetic estrogenic compound and can alter hormone signaling… Proper endocrine signaling is particularly important during critical windows of development – while in the womb and during childhood and adolescence. Chemicals that disrupt hormone signaling can lead to adverse effect on development, reproduction and the neurological and immune systems.


Vitamin A


A study conducted by the National Toxicology Program (NTP) found that a form of vitamin A, retinyl palmitate, may increase the development of cancerous skin tumors and lesions.


This ingredient is found in all sorts of make-up and skin care items because it has anti-oxidant properties that slow the aging of the skin. However, this same ingredient that can cause a “greater sensitivity to sunlight” is also attributed to “enhancing the photocarcinogenic activity,” of sunlight according to a panel of independent scientists convened by the NTP.


Fragrance


The Federal Drug Administration (FDA) doesn’t require the term “fragrance” to be broken down any further. Many companies hide their trade secrets behind this term on ingredient labels, and it might very well include something that is fragrant. But it can also include preservatives for the fragrance and other chemicals we’d never even know.


Because I don’t know what “fragrance” includes, I avoid it whenever possible.


Cost


With four people in our family who all love to spend days at the pool, I anticipate going through a lot of sunscreen this summer. We spent 3 weeks in Costa Rica last year and as a family, we went through an entire 8 ounce bottle of sunscreen each week!


We won’t be in the sun all day every day, so estimating about 4 ounces each week seems fair. The best, most affordable non-toxic sunscreen on the store shelves comes in a 2 ounce container and costs almost $10. If we went this route, we’d be paying nearly $160 in sunscreen alone this summer!


Your actual cost to make your own homemade sunscreen will vary since the main ingredient will depend on your brand preference. Buying both zinc oxide and carrot seed oil is an up-front cost, but they’ll last at least through the summer, if not longer. The carrot seed oil will make 8 batches of homemade sunscreen and the zinc oxide will make 14!


When I figure the cost of making one batch of homemade sunscreen every week this summer, I’m saving over $125!


Pure Ingredients


I’ve been dealing with acne-prone skin for as long as I can remember. It wasn’t until I switched to an all-natural soap that my skin finally cleared up.


Ever since, I avidly read every label of any product I put on my skin. I even make my own tinted moisturizer and powdered foundation so that minimal ingredients are used on my face.


The rest of my body isn’t quite as prone to breaking out as my face, but I’m still hesitant about ingredients. And since I don’t want to have a separate bottle of sunscreen just for my face, I’d rather make a homemade sunscreen that worked for the entire body, for the whole family.


Finding safe sunscreen can be a challenge. We started making this homemade sunscreen and love it! Only 3 ingredients and only $2 a batch!

Most homemade sunscreen recipes include ingredients like coconut oil and shea butter or cocoa butter to make a lotion as a base. I’ve been trying various homemade lotion recipes using these ingredients for two years now and for one reason or another, my family doesn’t like them.


So it shouldn’t be a surprise that the homemade sunscreen recipes that also use these ingredients would create a texture that I wouldn’t like either:


  • Some were way too thick.
  • Some were sticky.
  • Some smelled awful.
  • Some wouldn’t rub in (at all).
  • Some were too oily.

For one reason or another, every homemade sunscreen recipe I tried was a no-go.


However, one common thread I did find was that the homemade sunscreens with zinc oxide worked. And that’s what spawned me to create my own homemade sunscreen recipe with just 3 ingredients, using our favorite lotion as a base!


One batch of homemade sunscreen costs just $2 to make - compared to $20 for the cheapest non-toxic sunscreen in stores. It's ready in 5 minutes and works great on my daughter's fair skin! :: DontWastetheCrumbs.com

Controlling the SPF of Homemade Sunscreen


My homemade sunscreen recipe relies on two ingredients to provide SPF: zinc oxide and carrot seed oil.


You can increase the amount of SPF you want in your homemade sunscreen by adding more zinc oxide, or by using less, in relation to the amount of lotion you’re starting with. Here’s a general chart for zinc oxide recommendations:


  • SPF 2-5: Use 5% zinc oxide
  • SPF 6-11: Use 10% zinc oxide
  • SPF 12-19: Use 15% zinc oxide
  • SPF 20+: Use 20% zinc oxide

If you wanted to make homemade sunscreen with an SPF of 20, you would calculate 20% of the amount of lotion you’re starting with. So if you have 4 ounces of lotion, you would use .8 ounces of zinc oxide.


This is where a kitchen scale is very handy when making homemade sunscreen, although you can make do with measuring spoons if that’s what you have. One ounce is about the same as 2 tablespoons, so .8 ounces would be 1 tablespoon + 2 teaspoons.


Carrot seed oil has a natural SPF ranging from 35-50. While this won’t add to the total SPF of the homemade sunscreen, I like to add some because of it’s own SPF properties. We have fair skin, remember? Better safe than sorry.


And if you don’t have carrot seed oil, raspberry seed oil has a similar SPF profile of 30-50.


This homemade sunscreen recipe takes just 5 minutes to make and only uses 3 ingredients. It's non-toxic, won't leave your skin white and really works. Plus it costs 80% less than store bought! :: DontWastetheCrumbs.com

Tips for Successful Homemade Sunscreen


Depending on the type of lotion you use and oils you have on hand, you might have to add other ingredients to make it a bit more user-friendly as a sunscreen.


For example, my husband’s favorite lotion absorbs really quickly. This is fine as a lotion, but when I use it to make homemade sunscreen, it absorbs before I’ve had a chance to rub the sunscreen over the area. Adding 1-2 tablespoons of a nourishing oil helps to thin the homemade sunscreen just a bit so I have extra time to rub it in.


Zinc oxide is famous for leaving a layer of white on the skin. Depending on how much zinc oxide you use, the layer might be thin and barely noticeable, or it might be thick and quite noticeable. You can tint homemade sunscreen though, to better match your skin. To do this, add cocoa powder 1/2 tsp at a time until you reach the desired color.


You can see the white sunscreen two pictures above, and the tinted sunscreen in the previous picture. I used 1 tsp of cocoa powder in that batch and found it to be good for my fair skin.


Finally, raspberry seed oil also has SPF properties if you’re unable to find carrot seed oil. Use the same amount as you would for carrot seed oil.


How to Make Homemade Sunscreen with Just 3 Ingredients


Homemade Sunscreen Supplies


  • 4 oz of your favorite non-toxic lotion (I prefer the lotion from Bend Soap Company while my husband likes Aveeno)
  • .8 oz zinc oxide for about 20 SPF (about 1 Tbsp + 2 tsp)
  • 12 drops carrot seed oil** (scant ¼ tsp)

Optional Ingredients (see “Tips for Successful Homemade Sunscreen” for how to use)


**Note: I prefer to buy Young Living essential oils, but I’ve heard good things about Rocky Mountain Oils and Plant Therapy as well.


Homemade Sunscreen Method


Measure lotion into a small bowl. Add the zinc oxide, oil(s) and any other optional ingredients as needed and mix well.


Store in a glass jar or in a squeezable tube like this one. This recipe makes about 1/2 cup. Multiply as needed to make as much as you need.


This recipe for homemade sunscreen is so easy to make and it costs 80% less than what you buy at the store. Plus it's non-toxic sunscreen, and it works even on my super fair skin! :: DontWastetheCrumbs.com

How to Make Homemade Waterproof Sunscreen


The recipe above makes a sunscreen that rubs in easily and doesn’t feel greasy. I attribute this largely to using a lotion that we already like.


If you want to make a sunscreen that’s waterproof and will stand up to time spent in the pool, use this recipe.


Homemade Waterproof Sunscreen Supplies


  • 1 oz beeswax pellets (about 2 Tbsp)
  • 4 oz of your favorite non-toxic lotion (I prefer the lotion from Bend Soap Company while my husband likes Aveeno)
  • .8 oz zinc oxide for about 20 SPF (rounded 3/4 Tbsp)
  • 12 drops carrot seed oil** (scant ¼ tsp)

Optional Ingredients (see “Tips for Successful Homemade Sunscreen” for how to use)


  • 12 drops raspberry seed oil** (scant ¼ tsp)
  • 1/2-2 tsp cocoa powder

**Note: I prefer to buy Young Living essential oils, but I’ve heard good things about Rocky Mountain Oils and Plant Therapy as well.


Homemade Waterproof Sunscreen Method


Make a double boiler by placing a glass or metal bowl over a pan of boiling water. Measure beeswax and allow to melt.


Remove the melted wax from the heat and let it cool just slightly. Add the lotion and zinc oxide and stir until it’s completely incorporated.


Add the essential oils and any other optional ingredients as needed and stir well. Allow to cool before using. Although I really like using these squeezable tubes at the pool, homemade waterproof sunscreen is easier to clean out of glass jars.


Tip: Working with beeswax can be messy. Be sure to use bowls and spoons you won’t care to get dirty. For tips on how to clean beeswax and butters off your kitchen gear, read the tutorial on this post.


Best Natural Sunscreens to Buy


I was overwhelmed at the mere thought of making homemade sunscreen for a long time. If that’s where you are right now, there’s nothing wrong with going store-bought for now. Here are the top recommended sunscreens by the EWG and from fellow moms!


Have you made homemade sunscreen before? How do you like it compared to traditional sunscreen?


Some Other Posts You Might Like:


Original article and pictures take dontwastethecrumbs.com site

пятница, 23 ноября 2012 г.

Homemade School Lunch

Homemade School Lunch

I may receive a commission if you purchase something mentioned on this page. See more details here.


Are you out of ideas when it comes to packing your child's lunch? Do you just throw a Lunchables in a bag with a juice box and call it a day? Well, I have some good news for you! Packing a wholesome and nourishing lunch for your child isn't difficult. I have put together some ideas to help get your creative homemade school lunch packing juices flowing!


When I send lunches with my kids to school, I pack them in this awesome lunch box! It is durable, doesn't create trash, and it keeps the food cold with a cold pack on top. The kids like the different sections and they are really easy to clean. Plus these little containers are great for holding dips and yogurts.


Usually, when I prepare a lunch for my kids I include a sandwich. My kids LOVE sandwiches, so I make them. But I don't HAVE to include a sandwich. However, since we are talking sandwiches, I will tell you about their favorites.


  • Lox with cream cheese and capers
  • Salami with mustard and cheese
  • Peanut Butter and Honey
  • Peanut Butter and Jelly
  • Cream Cheese and Jelly
  • Cream Cheese and Turkey with Lettuce
  • Pastrami and Swiss with mustard
  • Cheddar cheese with mustard
  • Ham and cheese with mustard
  • Egg Salad

Along with the sandwich I include cut up cheese, some fruit, and something fun (popcorn, dilly carrots, a cookie, etc).


Do you have to do it like this? No! Everyone has different tastes and preferences as well as dietary restrictions. But, I am pretty willing to bet that most parents get bored of what they are packing in their child's lunch.


Here are some ideas on ways to fill your child's homemade school lunch with a nourishing meal they can enjoy while they are at school.


Some Guidelines for Homemade School Lunch


  • Keep it simple. Whole foods will suffice. No need to get all fancy.
  • Keep out the crap! No artificial colors, flavors, or high fructose corn syrup. These aren't going to help your child at school, so leave them out! Read those labels to help you find the junk!
  • Let your child help you pack their lunch! If they get to pick out some of the foods, they will be excited to eat it!

  • grapes, berries, kiwi, oranges, apples, cherries, pineapple, peaches, melon, avocado
  • dried fruits like raisins, dates, apricots, mangoes, pineapple

Sliced Veggies


  • cucumber, carrots, bell pepper, jicama, snow peas, broccoli, cherry tomatoes, green beans, cauliflower, celery (ants on a log!)
  • DIPS! homemade ranch, hummus, homemade dressings

Sandwich Alternatives


  • Hard boiled eggs
  • rolled deli meats and cheeses
  • rolled lox with cream cheese (and capers)
  • Pasta Salad, Tuna salad, Chicken salad
  • Homemade muffins
  • Bacon wrapped dates, prosciutto wrapped around melon
  • Build your own TACOS!
  • Bean and cheese tortilla roll up
  • Cold quesadilla
  • Nut butter on a tortilla

Other Fun Foods


  • Popcorn, nuts
  • Applesauce, yogurts, fruit leathers
  • chips and salsa (or guacamole)
  • Block cheeses (cut into sticks or cubes)
  • Homemade trail mix
  • A square of dark chocolate

Oh! We can't forget the drink! My favorite beverage for a child's lunch? Water. Just plain old water. Sometimes they like mint water. But for the most part I just send water. There are tons of flavored water recipes on the web! Go look. Lemon and lime are popular, too.


Packing a homemade school lunch for your kids doesn't need to be complicated or labor intensive. Providing a variety for them and switching it up can keep lunch time exciting AND nourishing.


What are your favorite foods to pack for your kids?


Homemade School Lunch

Oh Lardy! is a participant in the Amazon Services LLC Associates Program, an affiliate advertising program designed to provide a means for us to earn fees by linking to Amazon.com and affiliated sites.


9a87c3db63071476855326-51332711_m.jpg

Original article and pictures take ohlardy.com site

вторник, 20 ноября 2012 г.

Homemade Remedies for Colds & Flu

Homemade Remedies for Colds & Flu

Struggling to stay healthy? Kick that infection to the curb with 20+ Homemade Remedies for Colds & Flu (that really work!).


20+ Homemade Remedies for Colds & Flu (that really work!). RaiasRecipes.com

It’s that time of year again when everyone starts coming down with something. Ironically, as I write this, I’m struggling with some of the worst allergies I’ve had in a while. Oh the joys of living in the south, where something’s always blooming, no matter what time of year it is!


Thankfully, other than my environmental allergies, my family doesn’t get sick that often. We help keep our immune systems strong by eating smart: saying no to refined sugar and processed foods, and upping the bone broth and other immune boosting foods when the weather gets cooler.


If you’re wanting to head into the fall & winter months well prepared, here are some natural ways to combat unhealthy bacteria and viruses. Please note, you don’t have to wait until your sick to try these! Everything listed will not only help you heal, but will keep you healthy, as well.


Let’s start out with a list of herbs, spices, and natural foods with immune-boosting properties:


20+ Homemade Remedies for Colds & Flu (that really work!). RaiasRecipes.com

Cinnamon


The bark of cinnamon holds unique healing abilities because of the essential oils found in it. It is a nutritional powerhouse and a powerful anti-bacterial. With antioxidant properties that protect cells from oxidative stress and free radicals, it is one of the most effective substances against Ecoli, and Salmonella. It’s notable that true cinnamon, often labeled “Ceylon cinnamon,” has higher levels of antioxidants than the cinnamon commonly sold, cassia.


Citrus Fruits


All citrus holds high amounts of vitamin C, boosting your immune system and filling your body with antioxidants. They’re always a good addition to your diet!


Echinacea


Also known as purple coneflower, echinacea stimulates the cells responsible for fighting infections, making our immune system more effective at attaching viruses and bacteria. Please note that echinacea also stimulates the Th1 system, so use with care if you have Th1 dominant Hashimoto’s.


Elderberries


With amino acids, carotenoids, flavonoids, vitamins A & B and copious amounts of vitamin C (even more than oranges!), elderberries are an anti-viral, antibacterial, antioxidant and immune-boosting powerhouse. Their bioflavonoids are even capable of destroying the ability of cold and flu viruses to infect a cell!


When using elderberries, remember that most uncooked berries from this genus are poisonous. But the variety of elderberry that is usually used for health benefits is the only one considered to be non-toxic even when raw.


Some doctors suggest pregnant or nursing women should stay away from elderberries, but I’ve never experienced any negative effects from consuming them while either.


Garlic


Most of garlic’s health benefits come from the sulfur compound allicin, that is released when the cloves are chopped, crushed, or chewed. It’s known for it’s benefits in controlling bacterial and viral infections. Garlic is my go-to when I come down with anything viral, it’s an amazing natural antibiotic.


Ginger


With anti-inflammatory benefits that rival those of NSAIDs, and gingerol, which helps to lower the risk of infections.


Honey


Full of vitamins and minerals (niacin, thiamine, pantothenic acid, riboflavin, vitamin C & B6, calcium, and iron, to name just a few), honey also has large amounts of friendly bacteria and is anti-fungal, and probiotic. Honey is also full of phenolic acids and flavoniods (antioxidants), which help eliminate free radicals. Generally speaking, the darker the honey, the higher the antioxidant levels.


Slippery Elm


The healthy benefits from slipper elm come mainly from its inner bark. This contains nutrients such as calcium, iron, magnesium, manganese, phosphorus, potassium, selenium, zinc, beta-carotene, vitamins B1, B2, B3, and vitamin C. It’s mostly used for its soothing properties. It’s interesting to note that in “the olden days” it was used as a mechanical irritant to abort fetuses, so I’d suggest staying away from it if you’re pregnant.


Thyme


The healing power of this herb is relatively new to me. Its fresh leaves are packed with vitamins C, A, K & E, potassium, iron, calcium, manganese, magnesium, and selenium, and contains flavonoids, making it an antioxidant-rich option. It’s antibacterial capabilities are even said to combat E-coli, as well as other bacteria and fungi. Because of the relaxing effect thyme has on muscles, it’s helpful for relieving asthma, whooping cough, laryngitis, bronchitis and dry coughs.


20+ Homemade Remedies for Colds & Flu (that really work!). RaiasRecipes.com

Teas & Drinks


Chen Pi (dried tangerine peel) Tea

Cinnamon Sore Throat Tea (pictured)

Cinnamon Thyme Tea

Elderberry Kefir

Fizzy Ginger Lemonade

Ginger & Scallion Tea

Ginger Thyme Tea (pictured)

Homemade Electrolyte Drink

The Hot Honeyed Lemon

Hot Garlic-Ginger Lemonade

Soothing Herbal Tea

Spicy Ginger Smoothie (pictured)

Vitamin C Herbal Tea


20+ Homemade Remedies for Colds & Flu (that really work!). RaiasRecipes.com

Tonics & Tinctures


Soups

Soups


Beef Bone Broth (pictured)

Healing Chicken Alphabet Soup (make sure to use gluten-free pasta)

Healing Chicken, Garlic & Ginger Soup (pictured)

Thai Turkey Cold Busting Hot and Sour Egg Drop Soup (pictured)


20+ Homemade Remedies for Colds & Flu (that really work!). RaiasRecipes.com

Misc.


Want to save these tips for later? Pin it!


20+ Homemade Remedies for Colds & Flu (that really work!). RaiasRecipes.com

Much thanks to these bloggers who contributed their recipes:


A Calculated Whisk

Attainable Sustainable

And Here We Are

Dr. Jean Layton

Farm Fresh Feasts

Kitchen Treaty

Life Currents

Natural Fit Foodie

Raising Generation Nourished

Recipes to Nourish

There’s A Cook In My Kitchen

Wicked Spatula


Original article and pictures take raiasrecipes.com site

понедельник, 19 ноября 2012 г.

Homemade Real Food Tootsie Roll Candy – Perfect for Kids to Make!

Homemade Real Food Tootsie Roll Candy – Perfect for Kids to Make!

You don’t have to make this real food tootsie roll recipe into the shape of Legos, but for real. They do taste better this way.


Malachi's Lego Fudge

When I decided to be intentional about helping Malachi learn to cook, I knew I’d need to start him with something simple, sweet, and fun. Hey, Malachi! Want to put your soccer ball away and come make a boring meat and vegetable casserole all by yourself?!! You don’t?!?


My Peanut Butter Honey Fudge recipe seemed like a fun and perfect choice…except for the fact that Malachi hates peanut butter. “Hey, Malachi! Want to come make something that will make you totally gag? You don’t?!?


So I decided to go ahead and use the fudge recipe but adapt it in two ways:


  1. Use almond butter instead of peanut butter.
  2. Cut down the honey to make it less sugary.

He was on board to “try making fudge,” then he remembered his Lego Shape Molds. “Can I make this into Legos, Mom?” Well, yeah!! What a great way to make this project even more perfect for him!


malachi fudge 1

Be sure to admire the messy counter-top behind my kid. Whoever was supposed to load the dishwasher that morning hadn’t done it yet. I figure you’ve seen a messy counter-top before, but if not, I’m thrilled to offer you your first experience with this. #embracethemess #constantdishesandlaundry


malachi fudge 2

malachi fudge 3

malachi fudge 4

malachi fudge 5

malachi fudge 6

Malachi made some of the mixture into Lego Bricks, some into Lego Mini-Figures, then patted the rest into a small container which we cut into squares later. When all was said and done, we decided that these actually don’t taste like fudge at all. But they do taste like an amazing homemade tootsie roll!!!! To eat a tootsie roll made with real food and shaped like a Lego – that Malachi had made by himself?! Well, it was a kids-cooking success!


Homemade Real Food Tootsie Roll Recipe


Homemade Real Food Tootsie Roll Candy

Use my recipe and instructions for making Homemade Almond Butter if you like. You can switch out the almond butter for Peanut Butter if you prefer.


This Tootsie Roll recipe is what launched Malachi into his new world of discovering that cooking isn’t so bad!


If you’re wanting to pull your kids into the kitchen to launch them into their own journey to learning cooking skills, I recommend that you:


  • Begin with a very easy recipe – like these Homemade Tootsie Rolls!
  • Pick something fun – like these Homemade Tootsie Rolls!
  • Choose something you know your child will like to eat.
  • Be relaxed. (You can do it!)
  • Get out (or have your child help you get out) the ingredients your child will need before you start the cooking process.
  • Be open to your child’s suggestions.
  • Don’t back down. Your kids NEED to learn how to cook.

I’m excited to show you the fun Recipe Card Holder craft! Plus more kid-friendly recipes throughout the rest of this week! As you can tell, teaching my kids to cook has been so boring and sad we can’t even stand it. Eating Homemade Tootsie Rolls is so difficult and turning over a big part of my kitchen workload to my kids has been such a challenge. Somehow I’ll make it through. #yeahright #lovingthis #teachyourkidstocookalready


Psst!


Teach your kids some great cooking skills through the Kids Cook Real Food video series. Learn about it here. The knife skills series is free, but we loved it so much we went through the entire course. Malachi learned a ton and is now so much more confident with his cooking skills!


This recipe contains affiliate links.


Original article and pictures take heavenlyhomemakers.com site

вторник, 13 ноября 2012 г.

Homemade Pumpkin Larabar Bites

Homemade Pumpkin Larabar Bites
Make pumpkin larabar bites at home in 5 minutes with a few basic ingredients. Great for school lunches, snacks and cost 50% less than the store. :: DontWastetheCrumbs.com

Ever since I started training for my first marathon, I’ve been more particular about the food I eat.


Plain pancakes become protein pancakes, plan smoothies become protein smoothies and I’m making homemade larabars when I have to replenish lost carbs ASAP.


Aaaand since it’s the season for everything pumpkin, I’ve given homemade larabars a new twist: pumpkin larabar bites!


In their simplest form, larabars are dates and nuts. They’re super convenient to have on road trips, on long flights or when you got to keep the kids entertained as you finish up the last bit of your grocery shopping.


But they’re NOT super cheap, hence the reason I’m making them on my own (and trimming the cost by around 50%).


I’m also making them because after awhile, dates + nuts = boring. Let’s interject some flavor in there!


I don’t like waiting on a big honcho to officially declare pumpkin “in season” (which is always not soon enough in my opinion), so having a pumpkin larabar recipe means making them anytime I want (which is all the time, really).


pumpkin-larabar-bites-4

Inside Look at Pumpkin Larabar Bites


Dates + Nuts


For the best homemade pumpkin larabar (or for any flavor really), you want whole pitted medjool dates. You can find dried dates, dates with the pits in them and even a different variety of dates, but you don’t want those.


I repeat: whole pitted medjool dates.


I found mine at the local grocer, in the produce section, usually on a shelf on the end cap of a row of produce. If you can’t find it, ask someone in the store to help you. The containers aren’t that big and if you don’t know what you’re looking for, you might miss them.


Or you can get them in bulk on Amazon and have them shipped to your door in 2 days. Boom. Done.


As for the nuts, I specifically chose walnuts for pumpkin larabar bites because they’re high in omega-3 fatty acids, which is important for eye health. Walnuts also compliment the season of pumpkin well and they tend to be on sale this time of year.


You can substitute other nuts in lieu of walnuts if you’d like – cashews and almonds would work well and they’re a bit cheaper in general. Or when the holiday season is over, dump the last bit of nut crumbs from all the bags into the blender. That would work too.


pumpkin-larabar-bites-1

Coconut + Pumpkin + Spice


Similar to when we make sweet & salty energy bites, we’re adding shredded coconut to create a bit of a textured binder so the bites stay together.


Coconut has healthy fats that help refuel the body, but if you don’t like coconut, oats are a great replacement. Almond meal would work too if that’s what you have.


As for pumpkin, both canned pumpkin and homemade pumpkin puree work here – pick your poison. Since pumpkin is somewhat bland on its own though, we’re adding a hefty dose of pumpkin pie spice to liven it up.


I normally don’t have pumpkin pie spice on hand, but since I knew I’d be testing a lot of pumpkin-pie-spice recipes this season, I caved and bought it. You can easily make your own though (this recipe makes 2 ½ tablespoons):


  • 1 ½ Tbsp ground cinnamon
  • 1 tsp ground ginger
  • 1 tsp ground nutmeg
  • ¾ tsp ground allspice (substitute cloves)
  • ¾ tsp ground cloves

pumpkin-larabar-bites-3

Equipment for Making Pumpkin Larabar Bites


Normally I’d recommend a food processor when you’re chopping up things like dates or nuts because the average blender doesn’t do the job well enough. But thanks to a totally awesome splurge of a birthday gift, I don’t have the average blender!


I used the Twister Jar with my Blendtec and the dates were nice and mushy after just one round. If you don’t have a fancy blender, definitely use a food processor. Or even go old school and use a wooden spoon to really mash the dates to smithereens.


Once you’ve got everything combined well and good, you’ll want to use a cookie scoop to make the pretty little bites. You CAN use your fingers, but it’s definitely messier. Plus cookie scoops are pretty cheap, and I use them ALL.THE.TIME. in my kitchen. From breakfast cookies to meatballs to energy bites – even pumpkin or strawberry lemonade donuts – I love my cookie scoop.


pumpkin-larabar-bites-6

Storing Pumpkin Larabar Bites


Because pumpkin larabar bites are soft, you’ll want to store them in the freezer. Don’t worry – they won’t freeze solid. You’ll be able to bite into them straight out of the freezer, but they will be solid enough to not turn to goo in your hands.


I pack these in school lunches, but they are soft by mid-day. The kids don’t seem to mind, but I give them a spoon just in case and pack them in the small section of this Planet Box container or in a small glass container on their own so they don’t “melt” into another part of their lunch.


If you don’t want to mess with packing them, just keep them in the freezer and offer them as an after-school snack, part of lunch at home on the weekends or as a healthy dessert.


And if you’re still craving pumpkin after you devour these pumpkin larabar bites, give my overnight pumpkin French toast casserole a try!


pumpkin-larabar-bites-2

  1. In a food processor or a high powered blender (I have a Blendtec), combine dates and up to 1 cup of nuts. (If you want a more textured larabar bite, add ⅓ cup of of nuts. If you want a completely smooth larabar bite, add all the nuts.)
  2. Process the nuts and dates until you have a thick, yet mostly smooth mixture. Remove mixture to a medium bowl.
  3. Add the remaining ingredients and mix well with a spoon. Line a cookie sheet with parchment paper.
  4. Using a cookie scoop, scoop the mixture into balls onto the parchment paper. If desired, gently roll the balls with your fingers to shape.
  5. The larabar bites are ready to eat at this point, but we prefer to eat them after they've firmed up in the freezer for at least 30 minutes. Store pumpkin larabar bites in the freezer.

What’s your favorite larabar flavor?


Original article and pictures take dontwastethecrumbs.com site

четверг, 8 ноября 2012 г.

Homemade Peanut Butter Cups (no refined sugars!)

Homemade Peanut Butter Cups (no refined sugars!)
Homemade Peanut Butter Cups (no refined sugars!). These things are AMAZING!

There are only nineteen days until Easter.


(Cue bugged eyes from some of you… c’mon, admit it)


It really sneaks up on you, doesn’t it? It always catches me by surprise when it’s in March. I just feel like it’s an April holiday, ya know?


Although it has nothing at all to do with Jesus, one of the biggest parts of Easter for many (including us Jesus-lovers) is the chocolate! In my house growing up we always had the usual egg hunt with annual new jammies and a chocolate bunny, and a book. I loved it.


Whether it’s spiritual or just for fun – I want my kids to have some treats for Easter too. Unfortunately the usual Easter candy that you buy in stores is not so great for us. I’m not saying a little bit of sugar once in a while is gonna kill ya.


Unfortunately, however, that candy is not just a little bit of sugar. Between the high-fructose corn syrup and the regular sugar (often both are ingredients in the same product) most conventional chocolate and candy is pretty unhealthy. Then there are the artificial colours and dyes – those things have been proven to affect children’s behaviour – drastically in some cases.


It’s definitely a personal decision – even among the natural living/real food communities, some choose to go the conventional route for a rare occasion. For our family I choose to do what I can to make healthier treats that taste amazing (usually better!) that aren’t full of junk. (And yes, we compromise at other times in other areas!)


Anyway, on to the healthy decadence that I’m currently enjoying. I first got the idea of these when I saw a pin on Pinterest of fudge that was made in muffin cups. I thought of making my own peanut butter cups, so I played around and came up with something pretty darn yummy.


The chocolate part is based off a recipe I got from a friend (without a source given) so I googled it. I found that it was pretty well the same as this recipe on my friend Mindy’s blog (it’s a small interweb, I guess), and she based it off of The Nourishing Gourmet’s recipe, who based hers off of Sally Fallon’s in Nourishing Traditions! The peanut butter part I just totally made up, hoping it would work out (which, ohmygosh did it ever!)


You will love these homemade peanut butter cups!


Ingredients


for the chocolate part

1/2 cup coconut oil

1/2 cup cocoa

1/3 cup honey

1/2 cup almond butter

1 tablespoon butter*


for the peanut butter filling

1/2 cup peanut butter

1/3 cup honey

1/4 teaspoon sea salt

1 tablespoon butter*


*use coconut oil if you want it to be dairy-free


Instructions


1. Melt and stir all chocolate ingredients together over low heat.

2. In a separate pot, mix and stir all peanut butter filling ingredients together over low heat.

3. Prepare a muffin tin with muffin papers. I used mini muffin papers. (It made just over a dozen).

4. Pour some chocolate into each cup – less than half full.

5. Freeze for 15 minutes.

6. Spoon some peanut butter mixture on top of each frozen chocolate cup. Smooth it down to get into the cracks of the muffin paper so that it looks pretty. If you care about that sorta thing.

7. Freeze for 15 minutes.

8. Pour more chocolate on top of each cup to finish off.

9. Freeze for 15 minutes.

10. Once they are nice and firm, go ahead and store them in a sealed container in the fridge or freezer. They’ll stay fresh longer than it’ll take you to eat them! Enjoy!


Thanks for visiting Red & Honey. Take a moment to like me on Facebook, follow me on Pinterest or Twitter, or subscribe using the box in the sidebar!


Original article and pictures take redandhoney.com site

вторник, 6 ноября 2012 г.

Homemade Oreos (Gluten Free, Paleo)

Homemade Oreos (Gluten Free, Paleo)

Lately I have been thinking about Oreo cookies and how I can create a gluten free, paleo version of it. I have to say this is an impossible thing to do because the original Oreo cookies taste super sweet and highly processed. Also to give the cookie that dark chocolate color I would have to use cocoa powder instead of raw cacao powder, which is lighter in color and this is not something I want to do since cocoa powder is highly processed. I guess I could have used an 100% dark chocolate in place of the raw cacao powder and maybe I will try doing it this way next time. For now I have to say that this cookie, even though it does not taste like the Oreos you remember, tastes a lot better in my opinion.


Paleo Homemade Oreos

The cookie part of my Homemade Oreo is made with almond flour and has that same crunch of the original Oreo cookies. The buttercream filling consists mainly of coconut butter and honey instead of your typical buttercream made with butter and lots of sugar. These Homemade Oreo Cookies are 100% grain free and gluten free.


I am very happy with how this recipe turned out and I thought it would be a great recipe to share with everyone here. I hope you enjoy it and I would love to hear your feedback if you make this.


Paleo Homemade Oreos

Recipe makes 6 Oreo Cookies


Note: With time the cookie will loose it’s crunch.


Original article and pictures take livinghealthywithchocolate.com site

понедельник, 5 ноября 2012 г.

Homemade Lemonade with a Sugar-Free Option (and FREE Lemonade Stand Printables!)

Homemade Lemonade with a Sugar-Free Option (and FREE Lemonade Stand Printables!)

Lemonade is the perfect refreshing summer treat. Not only that, but lemonade stands are a fun way for kids to make a little cash during the summer.


Lemonade stands have been one of my son’s favorite ways of making money. He now has a few different ways to make money, but this was one of his first entrepreneurial endeavors. With a little help from mom, he made fresh squeeze lemonade, put together a sign and price sheet, and set up shop.


HomemadeLemonadeWithASugarFreeOption-Printables
Homemade Lemonade With A Sugar Free Option Printables

We were both surprised at the amount of money he was able to make. And unlike his mama, he’s an extrovert who loves meeting and chatting with new people so this also happened to be a very fun job for him too.


As his mom, I was happy that he was able to learn a few lessons in the process too:


1. In business, you often have to invest money to make money. Bradley used some of his own money to purchase supplies for making the lemonade. He was a little nervous about spending all that money without a promise of return, but he was pleased with how it all turned out.


2. It takes hard work to make money. This mama didn’t make all of the lemonade for her son. Oh no, he worked in the kitchen squeezing lemons for quite some time. I instructed and supervised, but he did the work.


Print


Homemade Lemonade with a Sugar-Free Option


Ingredients


  • 2 cups fresh-squeezed lemon juice
  • 2 cups sugar
  • 1 cup hot water
  • cold water (to make 1 gallon)
  • *For sugar free substitute sugar for 1.5 cups of xylitol and 1/8 teaspoon of pure stevia extract (or to taste).

Instructions


  1. Squeeze lemons to make 2 cups of lemon juice. We use a contraption like this, and it makes it a fairly easy task.
  2. Add the juice to a 1 gallon container.
  3. Heat 1 cup of water in a small saucepan over medium-high heat until it begins to boil.
  4. Turn the water off as soon as the water boils and add sugar*. Stir until dissolved.
  5. Add the sugar-water to the lemon juice.
  6. Fill the 1 gallon container up with cold water and ice to make a full gallon.
  7. Serve with ice and fresh lemon slices or a sprig of mint!

*If making the sugar free version, simply substitute the xylitol and stevia for sugar. I've given the amount of stevia and xylitol I like to use in this recipe, but I'd suggest starting out with less and adding more to taste. Different brands of stevia can vary widely in their sweetness. If you'd prefer to use a different sweetener like honey, coconut sugar, or erythritol they can easily all be substituted for the sugar as well!


Whether you use this recipe for a lemonade stand, a fun summer party, or just for your family – it is sure to be a refreshing treat!


Free Lemonade Stand Printables


Are your kiddos planning on setting up shop? Download this free set of printables! They can set up shop in style now


FreePrintableLemonadeStand-IOL
Free Printable Lemonade Stand IOL

Your kids can set up a lemonade stand in style with these free printables! Included is a “LEMONADE” banner, menu, and small poster. Download here!


Original article and pictures take www.intoxicatedonlife.com site