Why is it that when a girl has had a variety of guests moving in and out of her house for three weeks straight and needs to get three of her sons packed and ready to head to camp for a week…
Her washing machine breaks?
It waited until the exact moment we used our last clean towel and needed to put clean sheets on the bed for our oldest son who was coming home from traveling (with a full suitcase of dirty camp clothes). No big deal.
I actually had to laugh when it happened because this was the fourth break-down in a series of doozies. “Of course my washing machine just broke,” I said to my dirty sheets as I pulled them back out of the washer. “The timing couldn’t be better; I can’t wait to tell Matt.”
Ahhh, Matt. At the time of my broken washing machine discovery, that guy was on our roof trying to find the source of a major leak issue. And the day before he’d been on the roof of one of our rental houses doing the exact same thing.
We still haven’t made a decision about buying a new-to-us vehicle since our van died a few weeks ago. And did I mention my grill won’t stay lit? Eh…who needs grilled steak or my very favorite grilled chicken? Who even does?
One might say, “The Coppingers sure are having a rough summer,” but I’m here to say that I’m actually having a great summer! When I look at the big picture of my life I see what’s actually true:
No fewer than four families offered to loan us a car until we get our van situation figured out. Four families! We took one family up on their offer because they had a car they weren’t even using right now. God provides.
Matt was able to stop the roofing work he was doing in order to spend a few hours fixing our washing machine. It was ready to go again just before the boys needed to wash laundry and pack. God provides.
We haven’t had rain since the leaky roof discovery, and while we always welcome rain for the farms and gardens, we are thankful that Matt was able to fix the leak situations before the next downpour. God provides.
I miss the grill but until we can figure that issue out, I’ve got two crock pots, a stove-top, and have recently come up with a passel of Waffle Iron Recipes that help me avoid heating up the house with an oven. All together now…God provides.
Inconvenience isn’t the same as heart-ache. Broken things are just broken things. So who even cares that my coffee pot stopped working? Oh yeah, by the way, my coffee pot also stopped working. Now that one did threaten to push me over the edge into a pit of despair. I don’t even need transportation or clean clothes, but I do need coffee. I kid, I kid. Also, Mr. Coffee himself sent me a new one at no charge so does God provide? Oh yes I think He does.
And with that, I shall share with you 20 No-Bake Snack and Treat Recipes. We all need these whether we have a grill, a working vehicle, or a washing machine. Avoid turning on the oven and fill your fridge and freezer with these. They are low in sugar and super refreshing and tasty!
I’m going to start this post off by saying that this soup can be made from start to finish in about 20 minutes, but it actually only takes about 5 minutes of effort on your part, so you can be even happier about this Taco Soup than you were when you first saw the title.
The Simple Crock Pot Chicken Soup with a Kick recipe I shared a couple weeks ago has been such a hit that I decided to try the same idea, subbing hamburger meat for the chicken. You know me. I love me some beef.
You guys, adding beef to this soup was a very, very good idea. The soup came together very quickly and my family loved it like crazy. I served it with homemade applesauce (because applesauce is what October is made of) and carrot sticks (because I needed to quickly throw out a veggie to compliment this meal before we left for a soccer game).
The very next day, I made this soup again because at the last minute it was decided that our oldest son, Asa, and a couple of his college buddies were going to come have dinner with us. I quickly thawed some hamburger in hot water like this (best trick ever!), made the soup, sliced some peaches and strawberries, cut up some sweet peppers, and set out a buffet.
Everyone who has tried this Taco Soup loves it, and seeing as it only takes a few minutes to make, I see myself falling back on this recipe often this winter!
Why shouldn’t you make this soup in the crock pot like the chicken version? Because it’s not necessary and will not save you time. The chicken soup does best in a crock pot because you can dump the chicken in while frozen and the crock pot will thaw and cook it and after a few hours you’ll have soup. For this hamburger version, you simply need to brown the meat, stir in the other ingredients, let the cheese melt, and serve it right away.
This soup and the Chicken Version are about to become your frequent dinner guests.
16-ounces salsa (more or less is fine; mild to hot is fine - your preference)
32-ounces (1 quart) chicken or beef broth
8-ounces cheese (Colby jack or cheddar)
In a medium to large sized pot, brown the hamburger meat until no longer pink.
Stir in salsa and broth and heat with the meat.
Cut cheese into small chunks and stir into the soup, whisking until melted.
What to serve with this 20-Minute Taco Soup:
Tossed salad
Fresh fruit
Applesauce
Raw veggies
Consider adding to your bowl of 20-Minute Taco Soup:
Crushed tortilla chips
Sour Cream
Sliced Olives
Black Beans
Corn
Don’t miss our other Simple Recipe ideas shared here so far:
This series has been so much fun so far and I’m excited about more new simple recipes I’ve been playing with to share. More to come!
20-Minute Ab and Butt Workout Guaranteed to Leave You Sore Tomorrow
It's time to get specific and target a couple of body parts that rarely see the sun: the abs and glutes. This workout only takes about 20 minutes from warmup to cooldown, so it should be a breeze to fit into your day. In the first circuit, we recommend using 10-pound weights, but these moves will still be effective with lighter weights or no weights at all.
Original article and pictures take media1.popsugar-assets.com site
I may receive a commission if you purchase something mentioned on this page. See more details here.
Oh Lardy loves taking care of our guts by eating fermented foods, taking probiotics, reducing stress, drinking bone broth and more. We also have started adding colostrum to our daily diets as well.
You can purchase raw colostrum from your local dairy, if you have that kind of access. We prefer to take ours in powdered supplement form. Why?
Benefits of Colostrum:
Supports a healthy immune response.*
May enhance stamina and normal lean muscle re-growth after strenuous physical exercise, when consumed at about 20 grams per day.*
Promotes healthy intestinal flora and the normal functioning of the entire GI tract.* (hello! This is what Oh Lardy loves!!!)
Contains naturally occurring growth factors in colostrum may encourage cellular re-growth for healthy skin, bones, muscles, nerves and cartilage.*
We particularly like Symbiotics® colostrum. It comes in a powder, a capsule and a flavored chewable tablet (my daughter LOVES these!). We use all 3 types and love them all.
There are many ways to add colostrum to your diet in addition to just taking it like a supplement. If you are creative, you can mix it in to a variety of foods you eat each day!
Add to mayonnaise before spreading on a sandwich or adding to tuna/chicken salad (just add to taste)
Add to guacamole. (just add to taste. I added several tbsp.)
Mix 1-2 scoops into your pancake or waffle mix before making them
Add to pudding or custard
Mix into cottage cheese or applesauce
Coupon Code
Our friends at Symbiotics® have generously offered our readers a 10% discount code for you to use on ANY Symbiotics® product! Go to their website and use code OHL10 upon checkout!
Oh Lardy! is a participant in the Amazon Services LLC Associates Program, an affiliate advertising program designed to provide a means for us to earn fees by linking to Amazon.com and affiliated sites.
Original article and pictures take ohlardy.com site
You’ve probably heard more and more recently about how some of the products we use everyday contain toxic chemicals that can be harmful to our pets, ourselves, and the environment.
But for newbies to going green, it can be difficult to navigate the various ingredients, what kind of alternatives exist, and how to reduce one’s exposure.
I’ve spent the past few years slowly switching over to products with safer ingredients, and have gathered a lot of tips along the way.
When I first started to experience chronic health issues, and realized the importance of reducing the toxic burden on my body, I was shocked at how harsh the products are that we use in and around our bodies every day!
I started reading labels, doing my own research, and becoming more aware of how harsh chemicals were affecting my health. I also found that my super sensitive skin cleared up, and I felt better all around after getting rid of a lot of the chemicals around me.
After cutting out the toxic chemicals in many areas of my life these past few years, I’ve noticed a huge difference in how I feel.
I’m nowhere near perfect with the products I do use, but I believe every little bit of safer alternatives helps.
1. Cleaning supplies
Get rid of your toxic cleaning supplies, and try using non-toxic cleaning products to avoid bleach, ammonia, and synthetic fragrances and dyes. There are some good, natural options on the market (here’s one of my favorite brands), or it’s also super easy to make your own.
2. Water
Filter your tap water for drinking and cooking. I’ve used the Environmental Working Group’s water filter guide to figure out which filter is best for my home.
3. Food storage containers
Ditch the plastic food containers and use glass storage containers instead – my favorite is Pyrex – you can find affordable sets online or at most grocery stores.
Switch your plastic water bottle to one made of glass or stainless steel. Lifefactory is my favorite brand! (Get it here.)
5. Reusable straws
How about glass straws rather than plastic? Glass Dharma has great glass straws (get them here), and stainless steel straws are also an excellent option (get them here).
6. Smoothies or salads in glass jars
Reuse old jars to hold salads or smoothies – they’re perfect for keeping smoothies fresh (just shake up and drink!)
7. Pantry goods in glass jars
Reuse old jars or glass containers to hold flours, nuts, and seeds.
8. Less processed food
Eat real food, and try to stay away from overly processed, artificial ingredients that you can’t pronounce.
9. Be mindful of pesticides
Prioritize buying organic produce on the Dirty Dozen list (see the newest release here), if you can afford it at all.
10. Home gardening
Growing your own produce at home saves money, and is another way to avoid exposures to toxic pesticides.
11. Fresh instead of canned
Opt for fresh or frozen fruits and vegetables instead of canned to stay away from BPA – and look for products that are packaged in glass or lined in cardboard. (This applies to commercially processed tin cans, not home canned goods.)
12. Store receipts
Don’t take paper receipts unless you really need them (BPA hides in that paper).
13. House paint
Use low or no-VOC paint, and air out the room you’re painting before spending a lot of time in there.
14. Pest control
Avoid pesticide sprays, and try using baits or traps, or search Pinterest for natural pest control ideas.
15. Vacuum filters
Use a HEPA-filter vacuum and wet cloth to regularly get rid of dust where contaminants and chemicals can build up.
16. Door mat
Use a door mat at your front door to catch pollutants from the street.
17. Hand soap
Ditch the triclosan and anti-bacterial soaps to avoid endocrine-disrupting chemicals.
The average house may contain as many as 400 chemicals and most of them are toxic. There are many ways to detoxify your home. Below are 20 tips to get you off to a good start.
Our family has spent several years slowly clearing away the toxins in our home. You don’t have to tackle this in a day, or even do everything listed here. These are tips not musts. We just do what we can and know that it is enough.
Some of these are simple ideas that you are probably well aware of and already doing. While others you may feel not want to do at all. Do what works for you and your family in whatever ways you can. Every little bit helps both your family and the environment.
This post contains some affiliate and independent distributor links — opinions are my own. Thank you for your support!
1. Leave your shoes at the door
When you take off your shoes you eliminate a lot of toxins that get tracked into your house.
2. Dust Often
Dust is filled with toxins — Get rid of it as often as possible using natural ingredients.
3. Clean Mold the Second You See it
4. Replace Toxic Cleaning Products with Non-toxic Cleaning Products
I use natural products including vinegar and essential oils to clean my home — they get the job done and smell fantastic!
5. Replace Toxic Cosmetics, Shampoo & Skin Care Products with Natural Ones
Use mineral based natural cosmetics. Many natural foods stores carry a great selection.
Use lotions and creams with ingredients you can pronounce or make your own!
Useparaben & sulfate free shampoo’s, soaps and replace them with products made from natural ingredients.
Use natural deodorants without Aluminum.
6. Avoid Toxic Pest Control & Replace Harmful Pet Care Products
Use natural remedies in your home.
We use BestYet CedarCide for insect and pest control. It is a natural contact killer for bed bugs, fleas, ticks, lice, mites, ants, roaches, carpet beetles, silverfish, flies, mosquitos, chiggers, earwigs, gnats and an array of other non-beneficial insects. It kills insects on contact using cedar to attack their breathing system. It is deadly to pests and harmless to humans and pets. You can even spray it on skin as a natural mosquito and flea repellant!
We also use essential oils to eradicate pests and care for our many pets.
9. Keep Plastics out of Your Home [And Help Save Our Oceans]
Plastics contain toxins such as BPA’s that leech into the air and into anything that touches them. It’s best to keep them out of the house.
Plastic shower curtains can be especially harmful.
Stay away from children’s toys marked with a “3″ or “PVC.”
Avoid plastic food packaging (when you can).
Don’t wrap food in plastic.
Choose baby bottles made from glass or BPA-free plastic.
Avoid vinyl teethers for your baby.
Don’t purchase bottled water. Plastic water bottles are bad for your home and the environment.
10. Filter your Tap Water or Order Spring Water
More than 700 chemicals have been identified in tap water. Drinking bottled water in plastic bottles is not a good alternative for our environment. See #9 above.
Order Mountain spring water in 5 gallon glass jugs from a local water delivery service you trust.
11. Get Rid of Your Microwave
I know this one is not going to go over too well on many of you. My husband was reluctant to get rid of his when we met but now he is one of the biggest advocates of trashing microwaves that I know.
Microwaves make your food totally toxic. They jiggle the atoms in food to heat it and this strips all nutrients while leaving only toxic waste behind. I had an argument with a physicist about this once. He apologized and got rid of his microwave after he researched the matter. You can too. You will be better off without it — trust me. I grew up without one. My mother has never owned one in her entire life!
12. Beware of EMF’s & other Micro-waves
Wireless technology is bad for our bodies in so many ways — We are literally microwaved by it.
Wire in as opposed to going wireless in your home if possible. This can be inconvenient at times but we think it’s worth it.
EMF’s and other microwaves are especially harmful to the developing brains of our children.
We use Earth Calm in our home to protect us. It gets the highest reviews of any other device on the market by those that are sensitive to EMF’s.
Opting out can be done with a few quick clicks online.
A technician will come and replace it with an old school meter that works just as well without all the extra EMF’s you and your family don’t need.
14. Get Rid of Non-stick Pans & Bakeware
Teflon is toxic no matter what advertisers tell you. It contains PFC’s that have been linked to cancer and other developmental problems.
There are lots of quality pots and pans out there without non-stick surfaces.
I’m a big fan of cast iron and stainless steel cookware.
For more information:
15. Avoid Stain Guard Carpets & Clothing Items
Use natural fiber wool & cotton rugs and clothing.
If possible, replace your wall-to-wall carpeting with hardwood floors, all natural linoleum or ceramic tiles. Use nontoxic glues, adhesives, stains or sealers for installation.
16. Avoid & Replace Particle Board
Particle board often contains formaldehyde, which can emit irritating and unhealthy fumes for decades.
Avoid plywood, fiberglass, fiberboard and paneling if at all possible.
17. Avoid & Replace Toxic Lawn & Garden Products
Avoiding chemical fertilizers, pesticides, herbicides, fungicides, etc. is an important way to keep your family safe and detoxify your home.
18. Purchase & Grow Organic Foods
There is nothing better for your family, home, and planet earth than growing your own organic food.
If you can’t grow it yourself purchasing from farmer’s markets and local natural food stores before supermarket chains is best.
I often post about organic gardening and will be adding lots more soon. Check under the Gardening tab above and sign up for my newsletter so you don’t miss anything.
19. Use a Vacuum Cleaner with a HEPA Filter
HEPA-filter vacuums capture the widest range of particles and get rid of allergens.
For more eco-friendly tips follow my “Green Living” Pinterest board!
Subscribe to our mailing list so you don’t miss anything!
Disclaimer: These statements have not been evaluated by the Food and Drug Administration. This information is not intended to diagnose, treat, cure or prevent any disease. The information on this site is not intended or implied to be a substitute for professional medical advice, diagnosis or treatment. Please confirm any information obtained from or through this website with other sources, and review all information regarding any medical condition or treatment with your physician. Never disregard professional medical advice or delay seeking medical treatment because of something you have read on this website. Please keep essential oils out of the reach of children.
Original article and pictures take rhythmsofplay.com site
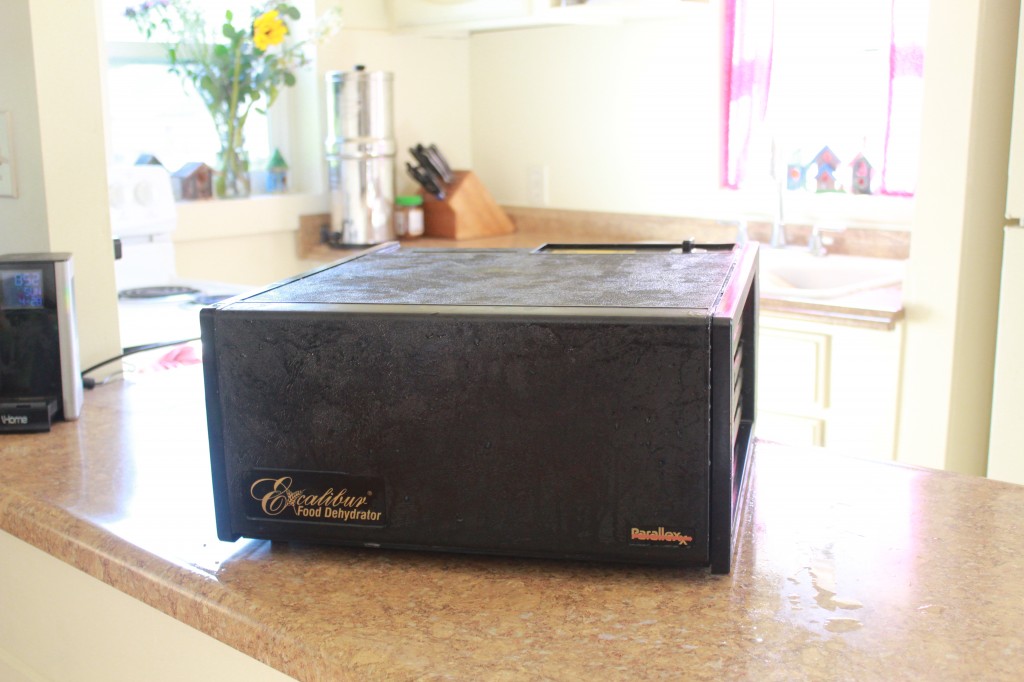
20 Things To Do With Your Dehydrator, kid friendly, sweet and savory
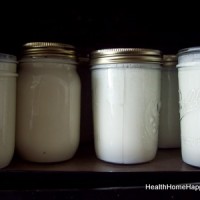
I wasn’t sure how much I would use a dehydrator, so I first borrowed one from a friend. It turns out I had that thing running day in and day out, so I quickly purchased my own. I like the Excalibur (buy here) because the large square trays are easy to arrange any shaped food on, the trays remove to culture yogurt, and the temperature dial allows you to choose the temperature you want.
I wanted to share with you 20 different recipes you can do in a dehydrator. I’m sure you can think of others as well!
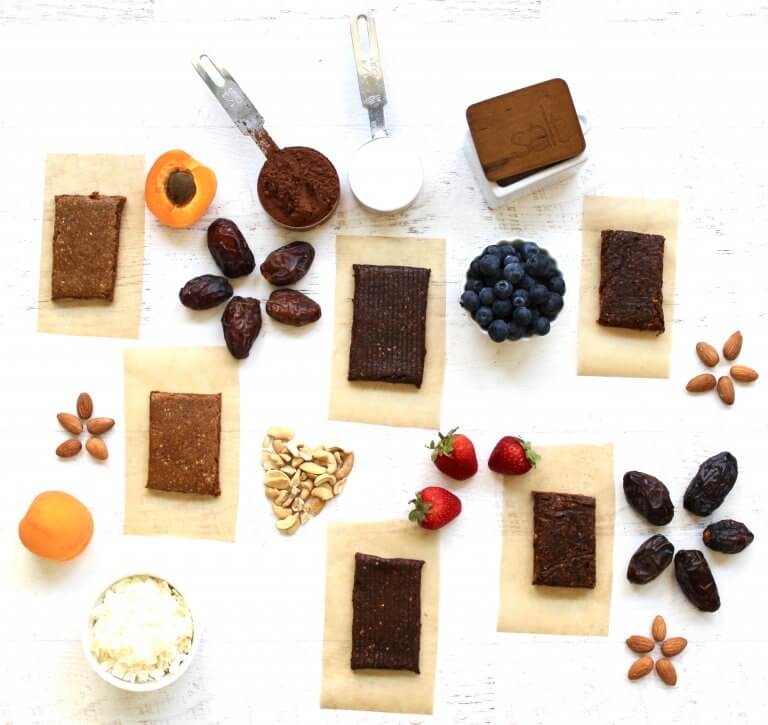
Homemade RX Bars are a delightful easy-to-digest alternative to the much-loved bar available in many grocery stores. They use hypoallergenic collagen protein, dates, and are made in just minutes.
Dehydrated strawberries are a favorite for everyone. Their bright color, sweet taste,a nd how it makes the entire house smell like strawberry fields as they dry makes this simple recipe a winner. See the recipe here.
Excalibur dehydrators are my favorite – their square shape is easy to store, and the removable trays make the dehydrator suitable for things like yogurt as well as dried fruits and veggies. Click here and read the reviews – I’m not the only one who loves their Excalibur!
Original article and pictures take healthhomeandhappiness.com site
I may receive a commission if you purchase something mentioned on this page. See more details here.
One of my favorite uses for essential oils is using them in the bath. It is so nice to have a good soak. Sometimes I like to soak to relieve my occasional sore muscles but oftentimes the soak is to help me relax. Taking a hot, relaxing bath is a great way to unwind!
I like to mix my essential oils with epsom salts first to not only help the oils disperse throughout the water, but to experience the benefits of the magnesium rich epsom salts.
Benefits of Epsom Salts
Many people are sorely lacking in magnesium. Epsom salts can be an easy way to help replenish magnesium in the body.
Epsom salt is made up of naturally occurring minerals magnesium and sulfate, which can help improve health in numerous ways. A lack of magnesium—which helps regulate the activity of more than 300 enzymes in the body—can contribute to high blood pressure, hyperactivity, heart problems and other health issues, doctors warn. Sulfate is essential for many biological processes. It helps to flush toxins and form proteins in joints, brain tissue and mucin proteins.
Many athletes use Epsom salt as a natural remedy to help their bodies recover faster.
If you aren't the bath type, you can easily reap the benefits of epsom salts by soaking your feet!!
Essential Oils for Relaxation
There are many oils that people like to use for relaxation purposes. I like to diffuse them, rub them on my body with a carrier oil, add to a spray bottle and use as a pillow spray and add to my epsom salts for a relaxing bath. I love adding oils and epsom salts to my daughter's baths as well!
My general rule of thumb is 4-8 drops of essential oils for 1-2 cups of epsom salts. Here are 20 of my favorite relaxing bath salt recipes!
4 drops Lavender, 2 drops Geranium and 2 drops Roman Chamomile
add 1 drop of Rose or Neroli to any of these combos if you are lucky enough to have a bottle!!!
What is your favorite combination for a relaxing epsom salt bath? Please share in the comments!
Exclusive Discount for Our Readers
And guess what? Our friends over at SKS Bottle and Packaging have offered a 10% discount on these awesome jars! Use coupon code SKSCoupon03when purchasing item number: 4021-12. How awesome is that??? You can get a case of jars and use them for gifts, make and takes or try some other recipe combos!!! So head on over there and get your jars!
Original article and pictures take ohlardy.com site
I may receive a commission if you purchase something mentioned on this page. See more details here.
As someone who suffers from an inordinate number of stomach ailments, I can honestly say I’ve tried just about everything to ease my symptoms. Although I’ve been known to toss back some Pepto or pop a few Tums, I often turn to natural remedies to knock down a bout of indigestion or heartburn. If you’re reading this now, it’s likely you’re in need of relief. Maybe you’ve run out of over-the-counter medication, can’t take it because of side effects, or just don’t care for it — whatever the reason, I’m here to help.
Heartburn is not only incredibly common, it’s incredibly unpleasant. Characterized by a painful burning sensation behind the breastbone (often creeping up the throat), heartburn is triggered when stomach acid backs up into the esophagus. Luckily for frequent sufferers, heartburn can be quashed fairly quickly with a number of natural remedies.
Chewing gum relieves heartburn by stimulating the salivary glands and increasing the flow of saliva, which is an acid buffer. As you chew, you swallow more often, diluting any acid that has built up and washing it away. After a meal, simply pop in a piece of sugar-free gum and chew for 30 minutes to help avoid heartburn.
Baking soda is a base substance — it has a pH higher than 7.0 — meaning it can neutralize stomach acid. If you’re feeling the burn, mix a teaspoon of baking soda with a glass of water and drink it. Baking soda should only be used for occasional heartburn relief, as it’s high in salt and can cause swelling and nausea.
Ginger is the holy grail of fixing stomach ailments, so it’s no surprise that it fights acid reflux and heartburn. To transform ginger into a soothing tea, simmer three quarter sized slices of ginger root in two cups of water for 30 minutes. Remove the ginger pieces and pour the brew into your favorite mug. Drink 20 minutes before a meal to help calm your stomach and act as an acid buffer.
Anyone who suffers from heartburn regularly can attest to the fact that it often gets worse when lying in bed. In a prone position, gravity works against you, causing acid and the digested contents of your stomach to back up into your esophagus. To combat heartburn and acid reflux at night, sleep with your head elevated. Sleeping on a gentle incline is best, as piling up pillows can cause you to bend in the middle and make matters worse. Place bricks, books, blocks, or a wedge shaped pillow under the mattress at the head of your bed to raise it about six inches.
Indigestion, also known as dyspepsia, is discomfort or pain in the upper abdomen — it’s pretty much the classic tummy ache. Symptoms include bloating, gas, a burning sensation in the upper abdomen, and vomiting. Indigestion can be triggered by gastroesophageal reflux disease (GERD), irritable bowel syndrome, ulcers, stomach infection, smoking, and certain medications. Chronic indigestion can also be the result of stress. If symptoms are severe or last for more than two weeks, talk to your doctor, as this may be the sign of a more serious issue.
As with heartburn, ginger works marvelously when it comes to settling stomach upset and improving digestion. To treat indigestion, drink ginger tea, enjoy it candied, or take it in capsule form.
Though vinegar is naturally acidic, it has the amazing capability to settle indigestion. To sooth an upset tummy, combine one tablespoon of unfiltered apple cider vinegar, one teaspoon of honey and one cup of water. Drink this solution two to three times a day as needed.
If indigestion has you bloated and gassy, this mix of tasty seeds can offer relief. Mix one teaspoon each of fennel, dill, anise, and caraway seeds. Chew a half-teaspoon of the mixture to help expel excess gas.
A warm mug of herbal tea after a heavy meal is a fantastic way to avoid indigestion. Peppermint or chamomile tea, in particular, are helpful in relieving digestive problems. Peppermint aids in digestion while camomile calms the stomach and soothes the intestinal tract. If indigestion is ongoing, drink a few cups of the tea during the day.
At one point or another, most of us have felt that familiar hot wave of nausea. Often it’s a harbinger to vomiting, but, regardless, it’s a wretched thing to have to suffer through. Nausea can be caused by a variety of situations, including motion sickness, morning sickness, stomach flu, and food poisoning. Other times, it’s a result of a concussion, heart attack, cancer, or chemotherapy. Understanding the cause behind it is incredibly important, as it will help decide the appropriate treatment.
If your nausea is caused by a stomach flu or food poisoning — and you’re having trouble keeping food down — turn to the the BRAT diet.
R: Rice
A: Applesauce
T: Toast
These four foods are not only easy to digest, they also contain energy rich carbohydrates and nutrients to help you regain your strength.
Seeing a theme here? Ginger is perhaps the best remedy for nausea, as it neutralizes stomach acid, relaxes stomach muscles, and soothes irritated stomach tissue. Sip a warm cup of ginger tea, or if you’re feeling like you can keep food down, try eating a few gingersnaps.
Like ginger, peppermint has a calming effect on the lining of the stomach. While drinking a cup of peppermint tea is always a great option, you can also use peppermint essential oil. You can rub one to two drops onto the back of your neck and bottoms of your feet, or add you can add five to 10 drops to your bath.
Combined with any of the above treatments, applying a cool compress to the back of your neck when you’re feeling nauseated is a great way to get relief. An ice pack that’s been sitting out for a few minutes works well, as does a washcloth doused in cool water. If you’re lying down, place the compress under your neck. If you’re sitting, drape it across the back of your neck.
Constipation is equal parts uncomfortable and inconvenient — and it’s a problem millions of people face every day. The most common causes of constipation include a diet low in fiber, dehydration, and stress. If you’re having a hard time (no pun intended) going poo, consider one of the following remedies.
It may seem cliche, but prune juice is a natural laxative. This tasty beverage is high in fiber and contains sorbitol, which softens stools by absorbing water as it passes through the intestines. One eight ounce glass of prune juice should get things moving. Make sure to give it time to work before drinking more, as too much fiber and sorbitol can cause gas, bloating, and diarrhea.
Dark-roast coffee contains fiber, oil, and water, all of which stimulate digestion and keep the bowels moving. Drink a cup or two first thing in the morning and matters should be afoot in no time. As with prune juice, watch your intake as more than a couple cups can cause diarrhea.
Pure olive oil works to relieve constipation by stimulating and lubricating your digestive system. One tablespoon of olive oil on an empty stomach should do the trick! You can also mix it with a little bit of lemon juice to lighten the flavor.
Flaxseed oil contains fiber and will help increase the number of bowel movements you have. Mix one tablespoon of flaxseed oil into a glass of orange juice. Drink as needed, but again, give it a few hours to work before having more.
Epsom salt alleviates constipation by drawing water from its surroundings, softening the stool, and making it easier to pass. Furthermore, the magnesium in the salt stimulates contraction of the bowel muscles, which also makes passing easier. Simply dissolve two teaspoons of epsom salt in one cup of water (or fruit juice) and drink it. If you have not had a bowel movement within four hours of the first dose, you may take one more. When preparing this mix for children, only use one half teaspoon of epsom salt.
An acute bout of diarrhea not only makes getting out and about difficult, it can take a lot out of you. Diarrhea occurs when the digestive system isn’t functioning properly, leading to frequent loose or watery stools. Diarrhea is often triggered by viral and bacterial infections, contaminated food or water, food intolerances, and intestinal diseases. Try one (or more) of the following treatments to lessen diarrheal episodes, but remember to be patient — it will take time.
Yogurt with live bacterial cultures — such as lactobacillus acidophilus and bifidobacterium — can help restore the balance of bacteria in your gut when you’re in the throes of diarrhea. As little as two bowls of unflavored yogurt per day can offer noticeable relief. For added benefits, eat a banana with your yogurt.
Fenugreek seeds have high mucilage content, which delivers a strong antidiarrheal effect. Eat a teaspoon of fenugreek seeds with a tablespoon of yogurt three times a day for quick relief from diarrhea.
Coming to save the day yet again, ginger calms inflammation in the intestines and eases the symptoms of diarrhea. Drink a cup of fresh ginger tea, or take 500 mg in capsule form every two hours.
No matter what the cause, stomach aches can leave you absolutely miserable. Fortunately, many natural remedies can be found in our pantries or around the house. As with all things health related, consult a doctor or your pharmacist if you have any questions regarding safety, drug interactions, and side effects.
Liz Greene is a dog loving, beard envying, pop culture geek from the beautiful city of trees, Boise, Idaho. You can catch up with her latest misadventures on Instant Lo or follow her on Twitter @LizVGreene.
Oh Lardy! is a participant in the Amazon Services LLC Associates Program, an affiliate advertising program designed to provide a means for us to earn fees by linking to Amazon.com and affiliated sites.
Related
Original article and pictures take ohlardy.com site
Have you been dreaming of getting your garden started? Me, too. You’ve spent the winter with your nose in those seed catalogs, and you’ve probably placed an order or two (or three).
Do those dreams include an apothecary in your backyard? You know, a place where you can grow healing herbs to dry and store. To use for balms and teas, tinctures and oils.
DISCLOSURE: In order for me to pay my blogging expenses, I may receive monetary compensation for my endorsement and/or link to products mentioned on this blog. I am a participant in the Amazon Services LLC Associates Program, an affiliate advertising program designed to provide a means to earn fees by linking to Amazon.com and affiliated sites.
Next time you visit your local nursery, check out their section of medicinal herbs. Chances are the variety will be less than inspiring. Oh, you’ll find lavender and peppermint. Maybe even chamomile and lemon balm. But if your daydreams include herbs like arnica and comfrey, you’re probably out of luck.
Thankfully, there are lots of medicinal herbs you can grow from seed. I’ve included 20 of them here. And if you’re looking for a good source of medicinal herb seeds, I’ve got you covered there, too. Most may be purchased here.
20 Medicinal Herbs You Can Grow From Seed
Arnica
Arnica is great for pain relief; I love it in this DIY Healing Balm.
Zone: 5 – 9
How to Plant: Sow within a mix of loam, peat moss, and sand in the spring. Barely cover seed; needs light and warmth to germinate. Keep in a pot for about a year before transplanting to the garden. Plant 2 feet apart.
Sun/Shade: Full Sun.
Germination: 1 – 3 weeks.
Days to Maturity: Very slow growing.
Other Needs: Likes acid soil, moisture, and a high altitude. Those living at lower altitudes might do better with A. chamissonis, rather than A. montana.
Annual/Perennial/Biennial: Herbaceous perennial.
Height: 1′
Harvesting: Harvest the flowers in their early stages. Dry until crisp.
Use: Used for sprains, bruises, soaks, compresses, and as an ingredient for salves and oils.
Calendula
Calendula self seeds and pops up in my garden in places where I’ve never planted it. Even so, I wouldn’t consider it invasive. I find it so cheery that I tend to let it grow where it will. 5 Ways to Preserve and Use Calendula has some tips you’ll find useful.
Zone: 3 – 9
How to Plant: Direct seed 1/4″ deep in well-drained soil in the spring. Space 6″ apart.
Other Needs: Deadhead spent flowers and pinch back to keep bushy.
Annual/Perennial/Biennial: Annual and self seeding.
Height: 18″
Harvesting: Harvest bright orange flowers throughout the growing season.
Use: Healing agent in salves and tinctures, or can be masticated and applied to external injuries.
Catnip
I like to add catnip when I’m brewing coffee. It’s calming effect keeps the coffee from making me jittery.
Zone: 3 – 9
How to Plant: Direct seed or start in flats in mid-spring. Prefers warm soil. Lightly scarify (rub on sandpaper) the seeds and sow in spring. Plant 1 – 2 feet apart.
Sun/Shade: Full/Partial Sun.
Germination: 1 – 3 weeks; can be slow to germinate.
Days to Maturity: 75 – 85 days.
Other Needs: Likes a dryer, slightly alkaline soil once the plant is established. Like mint, it can take over a garden; overwatering it will help to control it.
Annual/Perennial/Biennial: Herbaceous perennial.
Height: 12 – 36″
Harvesting: Harvest leaves and young flowers. Dehydrate.
Use: Gentle sedative, aromatic and calming. Can relieve coughs.
German Chamomile
Chamomile, German
Chamomile is gentle enough for little ones to help them sleep. One great way to use this herb is in Herbal Dream Pillows.
Zone: 3 – 9
How to Plant: Direct sow in spring or fall; likes cool soil for germination. Chamomile seed needs light to germinate; scatter the seed and press firmly onto the soil, but do not cover the seed with soil.
Sun/Shade: Full/Partial Sun.
Germination: 7 – 14 days.
Days to Maturity: 60 – 90 days.
Other Needs: Prefers a drier soil once the plant is established.
Annual/Perennial/Biennial: Annual and self seeding.
Height: 1 – 2 ‘
Harvesting: Harvest the flowers when fully open.
Use: Perfect for gentle bedtime sedation or for treating stomachache.
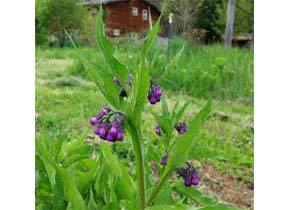
Comfrey
I use comfrey to mulch my apple trees, and I dry the leaves for use in salves and balms. I find it very healing to the skin. This post, Growing Comfrey, has more growing tips.
Zone: 3 – 9
How to Plant: Sow the seed in pots indoors just under the surface and tamp in securely; keep warm and moist. Transplant to the garden after 3 months. You can also direct sow outdoors once the soil warms up a bit in the spring. Note: 30 days of cold/moist stratification before planting improves germination. See the video at the end of this post for information on stratification.
Sun/Shade: Full/Partial Sun.
Germination: 10 – 30 days.
Days to Maturity: 1 year
Other Needs: Prefers rich, moist, well-drained soil.
Annual/Perennial/Biennial: Herbaceous perennial.
Height: 3 – 5′
Harvesting: Allow comfrey to mature before harvesting; at least to the second year. Harvest leaves before the plant flowers. Dehydrate.
Use: Comfrey salves are used to heal bruises as well as pulled muscles and ligaments, fractures, sprains, and strains.
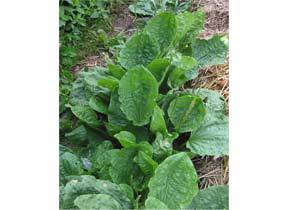
Dandelion
This power house is completely edible – the roots, the leaves, and the flowers. This post has lots of ideas for using it.
Zone: 3 – 10
How to Plant: Sow seed 1/4″ deep in flats in the spring, and transplant to rows in the garden, or direct sow into the garden in early spring. Space plants 1 foot apart, and keep well watered.
Sun/Shade: Full/Partial Sun.
Germination: 7 – 21
Days to Maturity: 85 – 95 days
Other Needs: Prefers well-drained, fertile soil.
Annual/Perennial/Biennial: Herbaceous perennial.
Height: 8 – 18″
Harvesting: The roots, leaves, and flowers are all edible. Harvest the greens and flowers throughout the growing season, although the greens are most tender in the spring. Begin to harvest roots in the fall of the second year.
Use: Dandelion is a gentle liver tonic and diuretic.
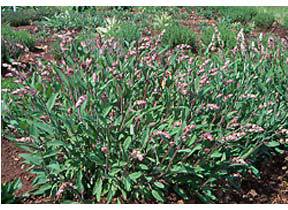
Echinacea
Echinacea, or Purple Coneflower, is often grown just for its beauty, but it’s also a powerful medicinal herb. Sowing, Growing, and Harvesting Echinacea is full of helpful tips.
Zone: 3 – 10
How to Plant: Sow seed outdoors in spring or fall. 7-day stratification enhances germination. Keep moist and thin to 1′ apart.
Sun/Shade: Full Sun
Germination: 14 – 21 days
Days to Maturity: 1 year
Other Needs: Prefers well-drained, limey soil and regular watering.
Annual/Perennial/Biennial: Herbaceous perennial.
Height: 3 – 4′
Harvesting: Normally grown for 3-4 years before harvesting sizable roots. The flowers are not as concentrated medicinally as the root, but may be harvested and used to make a tincture.
Use: Used for its immune enhancing properties.
Evening Primrose
This beauty blooms at night. Years ago, we lived next to 2 elderly women who grew evening primrose. They would go out on summer evenings to watch the fragrant primrose bloom and would clap when it did. Some would think them eccentric, but I love that they found joy in such simple pleasures.
Zone: 3 – 10
How to Plant: Scatter seed on surface of disturbed soil in fall or early spring, or start on surface of flat and transplant. Seed requires exposure to light in order to germinate.
Sun/Shade: Full Sun.
Germination: 14 – 21 days.
Days to Maturity: 2 years.
Other Needs: Drought tolerant; be sure the soil is well-drained.
Annual/Perennial/Biennial: Self-seeding biennial.
Height: 3 – 6′
Harvesting: All parts of the evening primrose are edible.
Use: Some women report alleviation of PMS by eating the plant and the seeds.
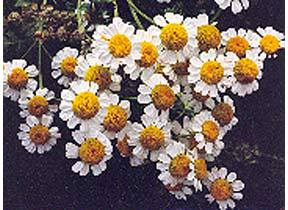
Feverfew
I know several people who swear by this pretty perennial for warding off migraines.
Zone: 4 – 7
How to Plant: Sow in flats 8-10 weeks before last frost, or direct seed as soon as soil can be worked. Feverfew needs light to germinate; scatter seed on surface of soil.
Space 8 – 12″ apart.
Sun/Shade: Full Sun/Partial Shade.
Germination: 10 – 14 days.
Days to Maturity: 80 – 90
Other Needs: Feverfew requires 16 to 18 hours of daylight to flower and achieve height.
Annual/Perennial/Biennial: Herbacious perennial.
Height: 24 – 36″
Harvesting: Cut feverfew leaves and flowers when the flowers are in full bloom; dehydrate.
Use: Fresh leaves are a tonic to prevent migraines.
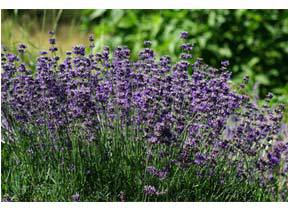
Lavender
I don’t think I need to convince you that lavender is one of the most wonderful aromatic herbs around.
Zone: 5 – 9
How to Plant: Seed is very hard and will benefit from a brisk sandpaper stratification, followed by sowing on sandy soil in the light, kept moist and cool until germination. Sow in flats and keep in partial shade, or sow dry seed in the fall or early spring in outdoor nursery beds. Transplant to pots or out to the garden after the slow-growing seedlings produce 4 or 5 leaves.
Sun/Shade: Full Sun.
Germination: 4 – 6 weeks.
Days to Maturity: 90 – 200 days.
Other Needs: Lavender prefers a moderate supply of nutrients, lime (which will enhance it’s fragrance) and a well-drained soil. Drought tolerant.
Annual/Perennial/Biennial: Woody perennial.
Height: up to 2′
Harvesting: Harvest the flowers in early flowering stage. Dehydrate.
Use: Useful for treating minor burns, anxiety, insomnia, depression, and restlessness.
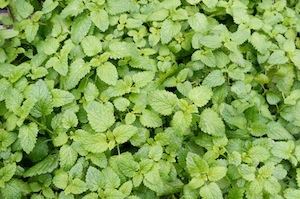
Lemon Balm
Delicious as a tea, and in cooking. For more ideas, be sure to check out this post 10 Ways to Use Lemon Balm.
Zone: 4 – 9
How to Plant: Scatter seed on surface of disturbed soil in fall or early spring, or start on surface of flat and transplant. Seed requires exposure to light in order to germinate. Keep soil consistently moist.
Sun/Shade: Full/Partial Sun.
Germination: 7 – 14 days.
Days to Maturity: 50 – 70 days.
Other Needs: Cut back occasionally to rejuvenate growth.
Annual/Perennial/Biennial: Herbaceous perennial
Height: 2′
Harvesting: Lemon Balm should be harvested in late afternoon when the oils are strongest and most aromatic.
Use: Favorite tea herb for its aromatic and sedative uses. Mildly anti-viral.
Licorice
Licorice seems to be one of those love it / hate it herbs. I happen to love it and often add it to tea blends.
Zone: 7 – 10
How to Plant: Pre-soak the seed for 24 hours in warm water, then sow in warm soil in flats, or direct seed in the early summer.
Sun/Shade: Full Sun.
Germination: 14 – 20 days.
Days to Maturity: 3 years.
Other Needs: Prefers dry, alkaline soil.
Annual/Perennial/Biennial: Herbaceous perennial.
Height: 36 – 72″
Harvesting: The part used is the root, which can be harvested in the fall after 2 or 3 years of growth. Cut the root into 8″ pieces and dry for later use.
Use: Licorice root is a fine-flavored demulcent and expectorant, essential herbal treatment for Chronic Fatigue Syndrome, adrenal exhaustion or gastric ulcer.
How to Plant: Sow seed on surface of disturbed soil or on surface of flat. Compact down hard. If starting indoors, a 30 day period of cold stratification is recommended. Mix seeds with a moistened medium and place into plastic bag in refrigerator. Then sow in flats 1/2″ deep. Keep consistently moist.
Sun/Shade: Full Sun.
Germination: 7 – 21
Days to Maturity: 6 – 15 months.
Other Needs: Tolerates poor, gravelly soil.
Annual/Perennial/Biennial: Biennial.
Height: up to 5′
Harvesting: Collect flowers in late summer, once they have opened. Collect leaves in the first year (they bloom in the second year).
Use: Used medicinally as tea or tincture for moistening mucous membranes; a great soothing agent for the throat, bronchi and lungs.
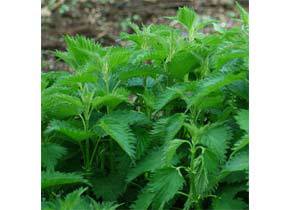
Nettle
Nettle tea has been really helpful; I use it to keep seasonal allergies at bay.
Zone: 3 – 10
How to Plant: Nettle seeds are light dependent germinators that can be started indoors or out. Sow seed indoors late winter early spring, transplant in spring after the last frost.
Sun/Shade: Partial Sun.
Germination: 10 – 14 days.
Days to Maturity: 80 – 90 days.
Other Needs: Prefers a damp, rich soil.
Annual/Perennial/Biennial: Herbaceous perennial.
Height: up to 4′
Harvesting: Harvest in evening or early morning for highest essential oil content. Wearing gloves, carefully collect spiny leaves before plant flowers in spring. Do not harvest when flowering.
Use: A popular tea for its nutritional value. The entire plant is covered in stinging hairs which cause painful welts. Saute or steam for a fresh spring green, or include with tea for nutritive and medicinal benefits.
Peppermint
Iced mint tea with a little raw honey on a hot summer day – perfection!!!
Zone: 4 – 9
How to Plant: Sow seed on surface, tamp securely, and keep evenly moist until germination. Thin or transplant to 6 inches apart.
Sun/Shade: Full/Partial Sun.
Germination: 14 – 21 days.
Days to Maturity: 70 days.
Other Needs: Can be invasive.
Annual/Perennial/Biennial: Perennial.
Height: 18 – 30″
Harvesting: Begin to harvest peppermint when the plants are about 12″ tall. Pick the larger outside leaves as the plant grows to encourage more leaf growth.
Use: Mint is excellent for making a stimulating and digestive tea, and it tastes great!
How to Plant: Germination can be enhanced with a one week period of cold stratification prior to sowing. Press into surface of soil and keep moist. Prefers cool soils for germination.
Sun/Shade: Full/Partial Sun.
Germination: 7 – 14 days.
Days to Maturity: 30
Other Needs: Plantain will tolerate a wide range of soil conditions, including rocks and sand.
Annual/Perennial/Biennial: Herbaceous perennial.
Height: 8 -12″
Harvesting: Leaves can be harvested at any time.
Use: Anti-microbial and anti-inflammatory. Particularly useful as a first-aid poultice and for dental infections.
Sage
I’ve used this in my cooking more than medicinally, and I especially love this Brown Butter Sage recipe. But sage can surely be used medicinally, and this tea is a great place to start.
Zone: 3-5 (annual) and 6-9 (perennial)
How to Plant: In the spring, sow seed 1/4″ deep in pots or directly in the garden 4″ apart. Thin to 12″.
Sun/Shade: Full Sun.
Germination: 7 – 21 days.
Days to Maturity: 80 – 90 days.
Other Needs: Plant thrives in sunny, dry and well-drained soil.
Annual/Perennial/Biennial: Woody perennial.
Height: 18 – 30″
Harvesting: Harvest leaves as desired. Dehydrate.
Use: Tea from the leaves acts as an astringent and can help relieve itching; makes an antibacterial mouthwash or gargle for sore throat.
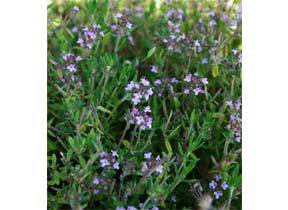
Thyme
Herbalist Rosemary Gladstar has called thyme “one of our best medicines”. Learn more about it here: Spotlight on Herbs: Thyme
Zone: 5 – 9
How to Plant: Sow seeds directly once the soil has warmed up in the late spring, cover lightly with soil. keep warm and moist until germination.
Sun/Shade: Full Sun.
Germination: 14 – 21 days.
Days to Maturity: 90 – 95 days.
Other Needs: Thyme requires a well-drained soil.
Annual/Perennial/Biennial: Woody perennial.
Height: 12″
Harvesting: Harvest leaves and sprigs all summer.
Use: Thyme is effective against infections, especially respiratory and digestive.
Valerian
This is the one herb I keep in my nightstand. Generally just a whiff helps me to get to sleep on night’s when I’m having trouble.
Zone: 4 – 8
How to Plant: Valerian is a light dependent germinator. Sow seed in spring, tamped securely into surface, and keep evenly moist until germination.
Sun/Shade: Full/Partial Sun.
Germination: 7 – 21 days.
Days to Maturity: 1 year.
Other Needs: Valerian likes moist, but well-drained soil.
Annual/Perennial/Biennial: Herbaceous perennial
Height: 3 – 5′
Harvesting: Harvest dormant root in the fall after second year.
Use: Valerian has a strong sedative action (although not common, some people are stimulated by valerian).
How to Plant: Sow seeds directly in early spring. Grows vigorously in any kind of soil and requires little water. Requires light for germination, so sow shallowly.
Sun/Shade: Full Sun.
Germination: 8 days.
Other Needs: Requires little water.
Annual/Perennial/Biennial: Perennial.
Height: 24″
Harvesting: Harvest flowers on a dry morning when the plants are in the early stages of bloom.
Use: Yarrow flowers are fabulous for their anti-septic and anti-inflammatory properties.
And for helpful tips on stratification, scarification and soaking seeds, be sure to check out this video:
Thank you for visiting LearningAndYearning. May “the LORD bless you and keep you; the LORD make his face shine upon you and be gracious to you; the LORD turn his face toward you and give you peace.” Num 6:24-26
Original article and pictures take learningandyearning.com site