вторник, 30 сентября 2008 г.

7 Ways to Get Your Child to Love Real Food

7 Ways to Get Your Child to Love Real Food

Like many parents, I struggle to get my children to eat real food –whole grains, fresh vegetables, healthy salads. There are, however, a few tricks I have learned over the years that have been successful. Here are 7 ways to get your child to love real food:


1. Bury it under something they love.


My daughter loves red sauce. So the first time I tasted spaghetti squash in tomato sauce a few years ago, I knew it would be a great way to get her to like squash. I roasted it according to a recipe I found and served under fresh, homemade tomato sauce. It was a hit! The key to this success is that squash has a mild flavor. Think long and hard about what your child’s favorite sauces or toppings are, and what milder produce or grains you can get into those dishes.


2. Presentation is everything.


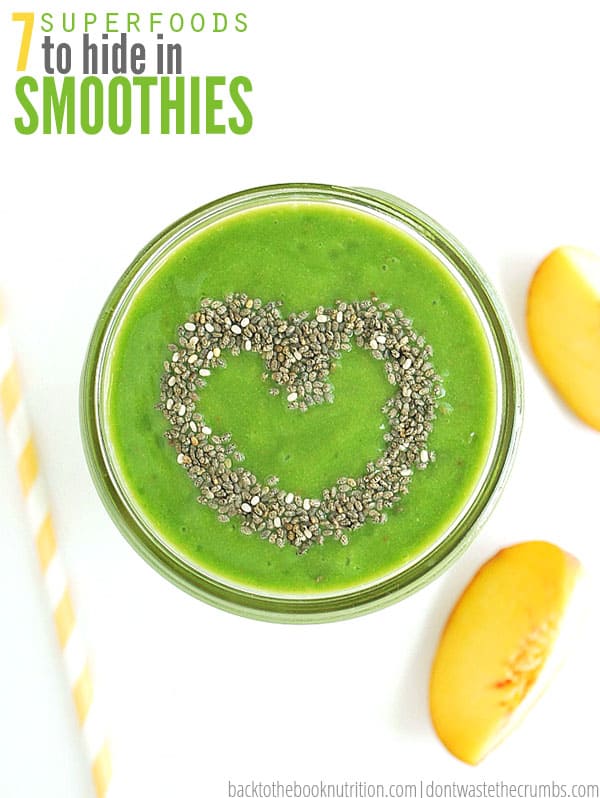
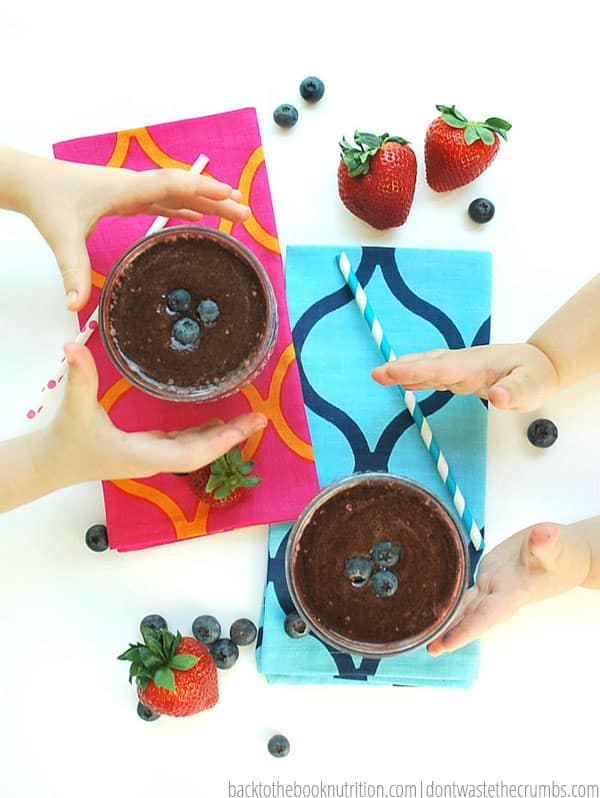
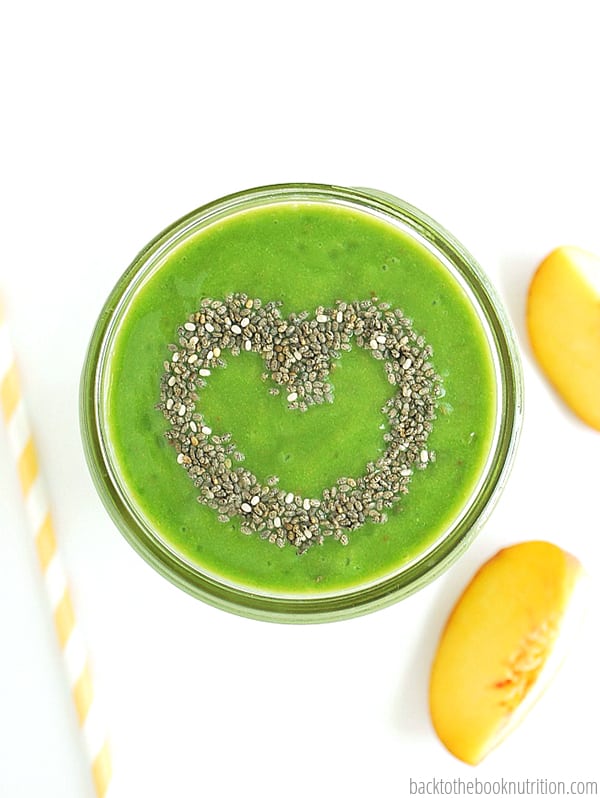
By “presentation,” I mean not only how the food looks on the plate, but also how the food itself looks! My kids don’t like anything with dark colors. That means green or grape smoothies are out, but a strawberry colored smoothie is right up their alley! Then I add a dollop of fresh whipped coconut cream on top to make it beautiful and a straw . To encourage them to eat celery and broccoli, I cut them into small pieces and put them in different spots on a 12-cavity Christmas candy mold. Then I put some dip on the side and they loved it. What you call the meal or dish is critical too. A “holiday veggie feast” is much better than just a “snack”!


3. Make a big show of how much you love it.


This has yet to work on my youngest, but my 11 year old is now a fan of popcorn cauliflower because of this technique – it does help that it’s called “popcorn” since my kids cannot eat the real thing. I rave about it every time I make it – especially if I load it up with cayenne and paprika. My daughter gobbles it up.


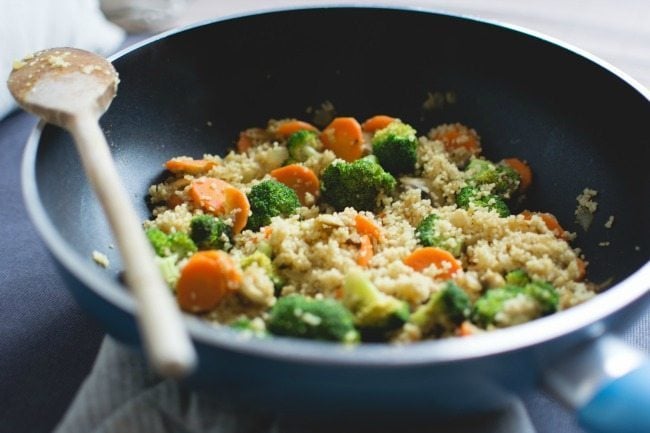
4. Get them to prepare and cook it themselves.


One thing I can count on: they will eat anything that they put a significant amount of effort into cooking. This technique is hit or miss if they just do a little so it’s important to let go of control and let your kids take charge as much as they safely can. You may need to buy kid-friendly knives or have them place a pan in the oven before it’s turned on, for example. Don’t let a big mess upset you and do buy aprons for the kids (they love that). This also has the added benefits of teaching them critical life skills and creating great family memories.


5. Put it on their plate every night.


Carrots were a struggle for my younger daughter, but I wanted her to eat them since they can help her with critical oral sensory issues. I simply put some small carrots in a little bowl near her plate every night. After a while, she began to touch them, and then lick them. Finally came that awesome day I found her on the couch munching away at a carrot…success! Keep in mind that this process took a few months – yes, months. It requires patience and repetition but it can work.


6. Make a big show of not liking something.


We have some pretty strict rules for what we eat in my house: no gluten, dairy, soy, MSG, preservatives, dyes or GMOs, but every now and then a few “bad” food items get through. The good news is that once you have cleansed your palette of all these foods, they don’t taste very good anymore. I discovered this little trick by accident when I was eating a toxic treat I used to like that now tastes like chemicals. My kids looked at me so I made a big show of it. I’d keep it up whenever I saw the food. After a while, I noticed that my older daughter would not go near those kinds of food when we were at parties or gatherings that featured a buffet of off-limits foods.


7. Don’t sweat it too much.


The reality is that your child may not like squash or rice or beans or some other food that is one of your healthy favorites. After a year of putting it near her plate, Zoe still won’t look at spinach but she’s made progress with other vegetables. Amelia still won’t eat anything with the texture of rice, pasta or quinoa, but she loves spinach salad. Some things won’t fit your child’s taste buds and never will; other foods they will grow into. To this day, I still cannot stand either fresh fish or lima beans, but I now love chickpeas even though I hated them for a long time too.


Getting kids to love real food requires patience, care and creativity. Don’t cave into your child’s poor eating habits. Keep cooking healthy meals and find new ways to get those foods in front of them with a positive spin and you just might end up raising a real food foodie!


Original article and pictures take thesoftlanding.com site

четверг, 25 сентября 2008 г.

7 Ways to Get a Baby to Sleep

7 Ways to Get a Baby to Sleep

After welcoming a new nephew and watching my amazing friends adopt a beautiful baby girl in the last few weeks, I’ve been realizing that we’re really not dealing with baby years around here any more. How is it that I have three children who aren’t babies already? We were cleaning out some old boxes the other day and found a graduation cap and gown. It actually crossed my mind that we should save it in case we have homeschool graduation in a few years. I might be jumping ahead a bit.


When Lola was born I thought like any reasonable human being she would go to sleep when she was tired. I had no idea how many naps a day a baby should have or how many hours of sleep she should be getting at night. We just kind of went wherever and did whatever and prayed that she would sleep at night. She didn’t. We tried many different techniques to get her to sleep including bouncing, sitting silently next to her crib, and playing gentle music in her bedroom. Nothing seemed to work and when she was about six months old she was averaging seven hours of sleep a day. Total. Naps and all. I knew that even I needed more sleep than that and something had to be done.


I read tons of books at that time, but the one I really recommend is Solve Your Child’s Sleep Problems by Richard Ferber. Yes, this is the controversial “cry it out” guy, but let me tell you why I love it. This book is full of scientific research on how babies and people of all ages sleep and how much sleep they need. I found that once I was familiar with my baby’s sleep rhythms and needs they didn’t need to cry it out. I was able to give them what they needed when they needed it and we were all a lot happier and well rested.


Now I’m certainly not a doctor, so if you have concerns about your baby’s development I would urge you to turn to a trusted professional. But from one mom to another (or dad, or grandma, or whoever you may be), here are seven ways to get a baby to sleep that worked for me. I highly recommend following these tips from birth for the best results, an older child will definitely require some special attention if other habits have been formed.


1. Keep it dark.


This is a great tip for babies who have their days and nights mixed up. It’s also a hard one for new parents who might not yet be comfortable changing and feeding a baby in the dark. I like to keep a dim night light on hand and turn it on just when I’m up with the baby for a little light to get around with. Lamps, overhead lights, and electronic screens all emit too much light to keep a baby (or possibly you) in the sleep zone. As soon as light hits the back of the retinas all bets are off and you might want to be prepared to stay up for a while. Room darkening shades are great for daytime naps because the darkness will help signal that it’s time for sleep.


2. No talking.


Of course you can’t help the shushing or the little “I love you”s as you deal with a fussy baby. But save the big lectures for daylight hours. Staying silent helps your baby understand this isn’t playtime. The night is a time for quiet and rest, and that doesn’t include talking or playing.


3. Swaddle.


Swaddle, swaddle, swaddle. My husband is a master swaddler and can wrap a baby up so tight and cozy that you’d think he worked in a Cuban cigar chop. Swaddling makes a baby feel secure like they’re back in the womb. There are special swaddle blankets you can buy but I’ve had the most success with a large, soft, stretchy blanket that will continue to work as the baby grows. As the child gets older they’ll begin to break out of the swaddle but will still appreciate the routine and warm comfort of the secure blanket.


4. Have a routine.


Some people call this a schedule. But for me, I found it much more helpful to follow a routine rather than a set time during the day. If the baby woke up at 8, I knew he would be ready for a nap two hours (or however long) later. I would generally let them get the sleep they needed, however long that may be, and follow a more strict awake time in between. This was really the trick for me in not needing to have them cry when they went to bed. Knowing how long they needed to be awake before being ready for a nap made sure I was putting them down at just the right time. I also have a physical and verbal routine with my kids. I tend to touch their face in the same way and say the same loving words each time I put them to bed. This lets them know no matter where we are that this is bed time and they can feel safe and confident that I’ll be just on the other side of the door, ready to come in when they wake up.


5. Blankie love.


Lots of babies love their blankies, but I found an extra trick that I think helped my kids settle from my arms into their bed. I would stretch a super soft baby blanket (similar to this Circo blanket) over the mattress so when I laid the baby down their head was resting on something soft. These blankets also don’t get cold like sheets do, so it wasn’t a shock for them to lay their head down in bed. Some may find this tip controversial because you’re not supposed to have loose bedding in with a small baby, but I found these blankets stick to the sheets and stay tight pretty well. If you’re swaddling well, by the time they’re old enough to pull the soft blanket to their face their also old enough to turn their head away from it or roll over if they need to. As my babies got older they loved these blankets and would find great comfort in them, pulling them to their noses and settling in for sleep. Of course if you’re uncomfortable with loose blankets in your baby’s bed do what makes you feel most comfortable.


6. Know the cry.


All babies are different, but I found that if my kids woke up crying it meant they were, in fact, not ready to wake up. They would often start crying about 45 minutes after falling asleep when I would expect them to sleep for two hours or more. This can be really disheartening, especially if you’re sleep deprived or dealing with other children. Yet, it’s hard to hear your baby cry and do nothing about it. If I knew they weren’t crying for another reason (illness or injury), I would set a timer for five minutes. This seems like an eternity when a baby is crying but it really isn’t that long. If the baby was still crying after five minutes I would go get him. More often than not the baby would stop crying in less than five minutes and settle back in to sleep for the expected amount of time.


7. Be constantly transforming.


Babies are constantly changing. What works one day might not work the next day. Try to roll with the punches and not get too frustrated when something works one day and not the next.


Of course everyone has different priorities in parenting, and I urge you to figure out what those are. As a stay at home mom, I was really ready for them to go to sleep when the time came. If you’re working outside the home or are trying to build attachment you might love that special time of rocking your baby to sleep or co-sleeping so you can be together. Please know that there’s nothing wrong with that! These tips are for those of us who need a little space, especially after a long day. What are some of your favorite tips for getting a baby to sleep?


Original article and pictures take theliveinkitchen.com site

вторник, 23 сентября 2008 г.

7 Ways to Avoid Exposing Your Baby to Chemicals

7 Ways to Avoid Exposing Your Baby to Chemicals

If you have a little bundle of joy coming into your house, you’re probably concerned by now. Here are my Top 7 tips to avoid exposing your baby to chemicals.


If you have a little bundle of joy coming into your house, you're probably rightfully concerned by now. And if so, here are my Top 7 tips to avoid exposing your baby to harmful chemicals.

By Jennifer Taylor of Mom Tricks


Like many people, I’m concerned about our exposure to chemicals in daily life. These days, you really have to check every label and research every ingredient to make sure you’re making a safe choice.


And this becomes even more important when it comes to protecting our little ones!


When I was researching products for my son, I was surprised (and shocked) at what I found.


If you have a little bundle of joy coming into your house, you’re probably rightfully concerned by now. And if so, here are my Top 7 tips to avoid exposing your baby to harmful chemicals.


1. Get an Organic Crib Mattress.


What could possibly be toxic in a mattress?


I was surprised (and disgusted) to find out that most crib mattresses are full of chemicals!


The reason is that all mattresses sold in the USA have to pass safety standards, and the easiest and cheapest way to meet these requirements is by spraying them with fire-retardant chemicals.


So that’s what they do.


Thankfully, there are manufacturers that don’t use these chemicals and meet the fire safety requirements by using higher quality, organic materials that naturally withstand combustion without needing to douse them full of nasty and toxic chemicals.


If you have a little bundle of joy coming into your house, you're probably rightfully concerned by now. And if so, here are my Top 7 tips to avoid exposing your baby to harmful chemicals.


2. Make Your Own Baby Food.


I’m a huge fan of making my own baby food, and you should be, too!


The fact that we don’t know exactly what goes into store bought baby foods is enough to make me want to make my own.


If you look around, you’ll read facts like how a 2012 study found that 92% of pears used in baby food contained pesticide residue. And there’s another 2012 study in Europe found that many baby foods contain toxic metals and arsenic!


Making your own baby food is simple, and anyone can do it!


You can easily do it by hand, or get a baby food maker which makes it even easier. What’s even better is that you could grow your own organic fruits and veggies, and then you’ll know exactly what’s going into your little one’s food.


3. Make the Home a Clean Environment.


This probably goes without saying, but the home should be where it all starts.


Don’t use chemical air fresheners or cleaning products that are full of toxic chemicals. Avoid fabric softeners when cleaning baby’s clothes, as well as the use of disinfectants. All of these things have chemicals that are linked to human health issues.


Of course, having a smoke-free environment is crucial too.


There are lots of natural, chemical-free alternatives available, so if you’re used to using regular cleaners, you’ll have an easy time making the switch.


4. Make Your Own Baby Wipes.


Baby wipes are really, really useful! They make it easy to clean up faces and tushies, and I always have them on hand. But most of them have awful chemicals that I wouldn’t want anywhere near me, let alone near my precious little one!


There was a big news story recently about how kids were breaking out with allergic reactions due to the use of wipes. Some of the kids were even misdiagnosed as having a skin condition, and prescribed medications!


I have a guide on choosing good, safe baby wipes, or you could check out Wellness Mama, where she has a great guide to making your own homemade wipes out of paper towel using water and all-natural ingredients like aloe and witch hazel.


She even has instructions on how to make them reusable with old receiving blankets or t-shirts!


5. Use Alternatives to Baby Oil.


Mineral oil is often sold as “baby oil,” which is a combination of mineral oil and fragrance, two things you would do best to avoid.


Mineral oil is a nasty chemical that’s a byproduct of the manufacturing of petroleum. Since the molecules of mineral oil are too large to be absorbed into the skin, it acts as a “wrap” on the skin, clogging the pores and preventing it from releasing toxins.


Even worse: if it’s ingested, it absorbs vitamins and nutrients, robbing them of these crucial elements they need.


Safe, natural alternatives include coconut oil, olive oil and shea butter. They’re awesome, natural and nourishing!


If you have a little bundle of joy coming into your house, you're probably rightfully concerned by now. And if so, here are my Top 7 tips to avoid exposing your baby to harmful chemicals.


6. Cloth Diaper Instead of Using Disposables.


Every baby wears diapers, so they must be perfectly fine, right?


Nope, think again! According to The Real Diaper Association, disposable diapers contain traces of Dioxin, which is a carcinogenic chemical that’s banned in most countries.


But it’s still perfectly legal in the USA, and they also contain other harmful chemicals, such as Tributyl-tin and sodium polyacrylate.


I know what you’re thinking: it’s not easy to cloth diaper. But that couldn’t be further from the truth!


Another huge benefit of using cloth diapers is that they’re way cheaper! It’s a win-win.


Learn all about the many benefits (and varieties) of cloth diapers in Erin’s eBook, Confessions of a Cloth Diaper Convert.


7. Choose Natural Bug Repellents Without DEET.


It’s very important to avoid mosquitoes and ticks, which can transmit many deadly diseases.


But it’s equally important to avoid typical bug sprays with DEET, which is an effective but unfortunately very toxic chemical that has been linked with neurological damage and seizures.


Although DEET is found in the majority of repellents, you can still get very effective ones that use natural ingredients and essential oils. On my blog, I have a guide that features 5 effective and natural bug sprays for babies!


If you have a little bundle of joy coming into your house, you're probably rightfully concerned by now. And if so, here are my Top 7 tips to avoid exposing your baby to harmful chemicals.


Do you have any more suggestions on ways to avoid exposing your baby to chemicals?


Jennifer Taylor
Jennifer Taylor is a coffee-addict, part-time blogger and full-time mama of two wonderful kids. You can find her blog at MomTricks or follow her on Twitter, Facebook and Pinterest!

Original article and pictures take thehumbledhomemaker.com site

четверг, 18 сентября 2008 г.

7 Tips To Saving Money While Eating Healthy

7 Tips To Saving Money While Eating Healthy

Saving money while eating healthy may sound impossible. Often, we get sidetracked by how expensive healthier foods are and forget that our health needs are just as important as saving money. To make it affordable to eat healthy, we've come up with some tips that are functional for anyone to use.


7 Tips To Saving Money While Eating Healthy

I always think about saving money when it comes to groceries since it is, by far, one of our largest monthly expenses. With larger families, especially, it is tough to manage to eat healthily and staying on a budget. These tips are things that any family can incorporate to begin saving more on their healthier eating habits.


7 Tips To Saving Money While Eating Healthy


Create meal plans around sales. Many of the healthier items on your grocery list are going to be at their lowest prices during seasonal sales. Shopping smart means saving money comes easily. What your local store sales each week for the healthy items on sale. In the summer months, that may mean that lean ground turkey and fresh produce are at lowest prices. In the fall, it may be turkey breast or whole turkeys and gourds or greens. Take advantage of the healthy items on sale to build your menu around instead of creating a menu and shopping whether it is on sale or not.


Grow your own produce. One of the easiest ways to begin saving money on your groceries is to grow your own produce. Even a small vegetable garden can make a huge impact on your weekly budget. Things like lettuce, herbs, onions, garlic, tomatoes, and cucumbers are the basic items of many meals and are very easy to grow in almost any climate. Corn, peas, beans, broccoli, asparagus, and more may take more work, but depending on your time and ability they can bring even larger savings.


Shop TJMAXX
Shop TJMAXX

Can and freeze for the future. Whether you stock up during seasonal sales or grow your own produce, storing for the future is always a great way to save money on healthy foods. When items are on sale you can buy extra to freeze for future use. Growing your own produce means you can plan ahead for larger crops to sustain your menu until the next season arrives.


Canning many items like soups, salsa, sauces, and similar has become a much more popular method of preserving foods again. While I know many prefer to can their vegetables, I don't care for the texture as much as if I have them fresh or frozen. So, I prefer to use a Food Saver to freeze at least a portion of my fresh produce for future use. This gives our family a variety of healthy options that I know have limited if no chemical additives, and are already on hand so no further expense.


Make more vegetarian meals. This is a common suggestion, but it truly does work. For a large family, adding meat to a meal can add easily $10-$12 for just one meal. A roast, whole chicken, turkey breasts, or even bison or venison range in price but add up fast when you are trying to feed growing boys. The cost of produce and things like lentils, quinoa, and dry beans is much less than meat products. We try to incorporate vegetarian meals into our menu by having soups, casseroles, and things like tacos or fajitas that are easy to create with just vegetarian or vegan produce and grain options.


Go hunting. During the annual hunting season in your area, go hunting for deer, turkey, rabbit, squirrel, and duck. While some of these meats may not sound great to you, there are many that are delicious. Deer (venison) and Elk or Bison are commonly sold in our local markets. These lean meats are excellent substitutes for beef in your recipes, and by hunting your own, the only cost is processing. You can find a local butcher or learn how to butcher the meat yourself and save hundreds of dollars per year providing your family with excellent healthy and delicious meats.


Raise chickens. Another huge expense in our grocery budget is eggs. Raising chickens requires a bit of work, but it is still cheaper than paying for free range eggs in the market. A bonus is that when a chicken is past the age of laying eggs, you can butcher and use that chicken in stews, soups, or meals your family loves.


Shop your local farmers market. We love going to the farmers market in our area because of the great prices on local produce. I prefer hitting the market toward the end of the day to grab discounted prices. While the selection may not be as good as early in the day, there are many vendors who would prefer to not pack everything to take home. Instead, they will give you a great deal on what is left in their booth. This means I often get great healthy produce at a fraction of the cost.


What are your best tips for saving money while eating healthy?


More tips for Saving Money:


7 Secrets To Saving Money While Eating Healthy

Original article and pictures take midwestmodernmomma.com site

вторник, 16 сентября 2008 г.

7 Tips For the Cloth Diapering Newbie

7 Tips For the Cloth Diapering Newbie

This is a guest post from Calley Pate of The Eco Chic, a cloth diaper and green living blog. If you’re new to cloth, you’ll love my individual reviews of 25 different cloth diapers at this massive cloth diaper review!


You’ve decided to give cloth diapers a try, congratulations for taking a leap and entering a brand new world of parenting.


Awesome tips that really help with cloth diapering - Saved my natural mama life!
7 great tips if you are new to cloth diapering!

You may notice that over the next few months you will become a little obsessed with all things diaper related. Poop and pee have now become topics you actually enjoy talking about. You’re learning a new language that includes words and phrases such as; fluffy mail, CD safe, hemp, suede cloth, and microfleece.


Welcome to the world of CLOTH DIAPERING!


Below are some tips that will get you on your way to mastering this new parenting skill while keeping your sanity and not becoming too overwhelmed with all of the new information.


Katie’s notes: Here’s my tell-all post on the first few months of cloth diapering, including laundry routines and learning the vocabulary.


How to Get Started with Cloth Diapers


1. Speak the language – the first few days you may be a little overwhelmed with all of the new terms and phrases but with a little practice and guidance you’ll grasp this new language quite quickly. To help you learn the language here are some of my favorite cloth diaper dictionaries: Cloth Diaper Terminology, Cloth Diaper Terms and Definitions, and Cloth Diaper Slang. If in doubt, don’t be afraid to ask what an acronym or word means.


2. Start simple, start small – many parents start our their cloth diapering journey by trying to pick one brand and style that they feel will be perfect from birth to potty training. While there is no wrong or right way to start, it is less stressful to start with a sampling of different styles and types to find out which diaper is right for your baby and your lifestyle. What works for the mom who stays at home with their baby might not work for the mom who has to leave their baby with a caregiver.


Cloth Diaper Guide

Click HERE to get my favorite eBook on cloth diapering, Confessions of a Cloth Diaper Convert!


Try pockets, all-in-ones, flats, and even prefolds. Don’t be scared to try something that looks difficult, it might just become your favorite system. You can always continue to build your stash as you find out what you like.


Katie’s notes: If the 25-diaper review is a bit much for you, here are my ultimate cloth diaper recommendations, sorted by budget, nighttime, and more.


3. Start at any age – that’s right, with cloth diapering you can start at any age. Most newborn parents are completely overwhelmed with all of the choices to be made that diapering choices might not even be considered until you experience your first diaper rash or until you meet your first cloth diapering parent.


Newborns go through a ton of diapers in the first few weeks and while it would be nice to save all of those disposables from the landfill new parents may just be too tired to manage one more load of laundry.


Don’t be afraid to give cloth diapering a try as you become more accustomed to your routine as a parent. I have friends who have openly accepted cloth diapering (and loved it) once their child turned one, two, and even three once they’ve entered potty training.


Katie’s notes: For us, it was third child, five months old. For real!


4. Embrace the poop – because all babies do it! Regardless of if your baby is in cloth diapers or disposable diapers your baby is going to poop. You’re going to have to grab a baby wipe and clean that babies bottom. How you handle the poop from there is what matters most.


Poop can take the form of a solid, liquid, and even a gas! Be thankful for those solid poops which will easily dump into the toilet and flush way. Liquid poops (especially those exclusively breast fed poops) aren’t as difficult to deal with as you think. Most breastfed poops will rinse right out in the wash and don’t even need a pre-rinse (although a pre-rinse is a good idea since stains can happen as your babies are introduced to solids). Parents find that investing in a diaper sprayer that attaches to your toilet helps handle any type of poop – especially the peanut butter sticky poop!


Katie’s notes: I admit similar in the post 7 Cloth Diaper Myths – That are Totally True!


5. Going out isn’t challenging – don’t be afraid to take cloth diapers on day trips or even on vacation. The only difference is that instead of leaving that diaper behind (no pun intended) in the changing room you now dump the poop and store the dirty diaper safely within a sealed wet bag. Wet bags will keep your diaper bag dry and keep the smells (yes – even those poop-plosions) hidden safely inside and no one will know what’s inside.


Katie’s notes: I posted some wet bag reviews as well – they make a difference!


And be honest…how many of us try NOT to change our babies until we’re ready to leave the mall (or destination of choice) so you’ll only be carrying the dirty diaper for a few minutes until you get back to your car. You may enjoy these Tips for Traveling with Cloth Diapers for longer trips and vacations.


6. Try cloth wipes – because traditional wipes are full of chemicals that can dry and irritate your babies skin. I know disposable wipes are nice to have for those extremely nasty messes and I admit that I keep a pack on hand for my husband when dealing with the poopy messes. Don’t rule out cloth wipes though because that rash that popped up on your babies bum might be caused from the alcohol and added ingredients in the package of wipes you just opened.


Cloth wipes are easy to use and can be thrown in with the load of cloth diaper laundry you already do. Grab a spray bottle of wipes solution (you can even make your own) and spray your babies bum before gently wiping away with a velour, cotton, hemp, or fleece wipe. With 8-12 diaper changes a day your baby will thank you for giving their bum some extra gentle love. Toss the wipe in your wet bag and wash just like you do your diapers.


Katie’s notes: I reviewed some purchased cloth wipes and made my own – totally for free! Guess which ones I like better... You might also want to make your own diaper cream and more – check out the My Buttered Life – Baby Edition eBook for how-to recipes and the DIY kit for all the ingredients you’ll need.


7. If at first you don’t succeed – try, try again! Accidents happen whether you choose disposable or cloth diapers. In your struggle to wrestle your wriggly little baby (usually while you are half asleep) you might not have put the diaper on incorrectly and the pee has found a place to escape. While that place is normally on your babies bed, car seat or your favorite outfit, don’t let it get you down.


Leaks can happen but you will quickly learn the tricks of the trade! Before long you will become a pro and you’ll know all the secrets. Don’t forget though that cloth diapers aren’t filled with those little gel crystals that absorb 10 times their weight in liquid – once cloth is full it will leak! To be safe remember to change your baby every 2-3 hours (or more frequent as needed) and remember that what goes in your baby eventually has to come out!


Bonus tip: Don’t be afraid to ask for help! There are forums, blogs, Facebook pages, manufacturers and retailers out there ready to help you with your cloth diaper questions and problems.


Katie’s notes: We’re still using cloth diapers one year later. Read 5 Cloth Diaper Problems that Haven’t Sent Me Running Back to Disposables (and One That Might), supporting the cause along with some laundry problems you’ll want to know about! Don’t forget to check out the full cloth diaper review to find the best cloth diaper for you!


Update 2015: Find out the ONLY cloth diaper I bothered buying for baby #4!


Awesome tips that really help with cloth diapering - Saved my natural mama life!
7 great tips if you are new to cloth diapering!

Calley Pate web res.

About the Author: Calley Pate is a wife and mom of 2. She began cloth diapering with her second who is now a cloth diaper graduate (except at night) and continues to advocate and educate parents about how easy cloth diapering can be. Calley is a blogger and social media junkie at TheEcoChic.com where she enjoys sharing tips on cloth diapers and going green with kids. You can find her on Facebook, Twitter, and late at night surfing Pinterest looking for inspiration!


Disclosure: Affiliate links to MadeOn are included in this post. I am also an affiliate of the eBook and will receive commission for purchases. See my full disclosure statement here.


Original article and pictures take www.kitchenstewardship.com site

четверг, 11 сентября 2008 г.

7 Tips for Moms of Kids with Food Allergies

7 Tips for Moms of Kids with Food Allergies

Overwhelmed with your child’s food allergy diagnosis? These 7 tips will help!


Overwhelmed with your child's food allergy diagnosis? These 7 tips will help!

Last week I wrote a letter to moms of kids with food allergies. Among my family of 5, we deal with gluten, dairy, egg and tree nut allergies. I feel your pain, Mama. I really do.


Today I’ve decided to give 7 tips for moms of kids with food allergies.


I wanted to take the inspirational to the practical level. Especially for you newbies, I know life with food allergies can be utterly overwhelming. But it doesn’t have to be as daunting as it seems.


Two years into this food-allergy-mom gig,


here are my tips for moms of kids with food allergies:


1. Make a list of the foods your child can eat.


This list will help you look on the positive. Even if it’s just one food–it’s one food he can consume that will nourish his little body. Try to focus on the positive and forget about the negative.


Not sure where to start? This baby food allergy site is very helpful.


Here are some practical tips for navigating food allergies with your children!

2. Check out food allergy blogs.


Most of these are run by mamas who have been in your shoes; most of them still are in your shoes!


Some of my favorite food-allergy focused blogs include:


Chocolate Covered Katie: This is a healthy desserts blog, but she used to be vegan, so a LOT of her recipes are dairy free, and most of them are gluten-free as well. She includes subs for a lot of the major allergens.


In addition, know that most of the recipes I post on this blog are gluten, egg, dairy and tree nut- free. You can browse my Recipe Index here.


3. Meal plan.


I won’t pretend that this won’t be one of the most frustrating parts of your week–at least until you get the hang of things. Making that list I suggested in tip #1–and adding to it specific meals and not just foods–will be crucial to meal planning success.


Here’s a post with meal planning tips to help you get started. A really great meal planning resource for ANY homemaker is Stephanie Langford’s Plan It, Don’t Panic.


4. Always keep on hand quick, portable snacks your kids can eat.


You don’t want to get stuck somewhere with a hungry child and nothing to feed him or her because there is no store nearby that sells what he can eat. I like to keep rice cakes or rice crackers on hand. Fresh fruit–as long as it won’t spoil!–is an excellent choice. Here’s a list of 101 healthy snack ideas (many of which are portable!)


Every mom of a child with food allergies will appreciate these 7 tips!

5. Keep some special treats for your child in the freezer.


I like to keep this garbanzo bean chocolate cake, which is gluten, dairy, egg and tree nut free, made up into cupcakes. They are always ready to be thawed out any time my girls are invited to a birthday party or other special celebration. I just have to whip up a quick batch of dairy-free cake icing to top them–or, sometimes, I just sprinkle them with some dairy-free chocolate chips.


6. Notify your child’s preschool, school, church nursery or other activity-group leaders of your child’s allergy.


This is crucial. I cannot emphasize it enough! I have heard too many horror stories of children accidentally ingesting an allergen-food while at school or church.


It would be nice if all of these groups would provide allergy-free snacks, but very few have the resources to do so. Be prepared, and send your child with his own snack.


We also send our gluten-free girl with her own playdough, as commercial playdough contains gluten.


7. Join an Allergy-Friendly Support Group.


These groups are popping up all over Facebook, and there are even some areas with real-life meet-ups! I think it’s really helped me not to feel alone to have some friends–both online and in person–who also have children with food allergies. We share recipes and just serve as listening ears for each other.


Lastly, don’t forget to pray. I sometimes forget that God has all the answers–even when I feel like there are none! Take your burdens to Him and be enveloped in His grace, even in the midst of difficult circumstances–like while dealing with food allergies.


I’m not going to pretend that I don’t experience both fear and frustration about food allergies on a regular basis. I do. Prayer helps.


What are your best tips for moms of kids with food allergies? Share them in the comments and be encouraged that you are not alone!


Original article and pictures take thehumbledhomemaker.com site

вторник, 9 сентября 2008 г.

7 Superfoods to Hide in Smoothies

7 Superfoods to Hide in Smoothies
Liver in smoothies?! Yes! Love the awesome list of superfoods you can hide in smoothies - like liver, chia and so many more - thanks to the ideas in this article. The bonus smoothie recipes are really good too, and a perfect place to start when looking for a new smoothie recipe! :: DontWastetheCrumbs.com

We all know smoothies are a healthy and convenient way to get more fruits and green vegetables into our diets.


Berries, bananas, greens, and yogurt are healthy mainstays of smoothie making.


But today I’m sharing seven superfood ingredients you can hide in your smoothie to add an even bigger boost of nutrition. And, what’s more, no one will suspect a thing!


7 Superfoods to Hide in Your Smoothie


#1. Liver


Why add it:


Stay with me, here. Yes, you absolutely can add liver to a smoothie and not taste it. Pinky promise. I’ve done it multiple times and the kids didn’t suspect a thing.


Liver is one of the most nutrient dense foods on the planet, with three times more iron than red meat, more folate than leafy greens, and more vitamin A than any other food! These nutrients are important for oxygenation of the blood, energy usage, fetal development, thyroid function, immune function, and more.


How much to add:


1 tsp per serving. It doesn’t sound like much but, due to its nutrient density, a little goes a very long way!


More info:


I buy my livers fresh, blend them in a bowl with an immersion blender, then freeze in an ice cube tray or in small scoops, similar to Tiffany’s method for freezing tomato paste. The frozen balls can be tossed straight into the blender when making a batch of smoothies (I typically blend at least three servings of smoothie at once, so 1 frozen ball is perfect).


Here are more ways to sneak liver into your family’s food without anyone knowing! And if you like liver, you’ve got to try this amazing pate recipe!


#2. Egg yolks


Why add them:


Demonizing egg yolks is so last century. We now know that cholesterol and saturated fat are actually healthy and assist in hormone balance and immune function. Similar to liver, egg yolks are also rich in fat soluble vitamins – namely, vitamins A and D. Some omega-3 is also present in the yolks, especially if the hens have been raised on pasture.


How much to add:


1 yolk per serving. In addition to the nutritional benefits, it adds a super creamy texture to your smoothie! Plus it’s one of the key ingredients in an Eggnog Smoothie!


More info:


I would caution against consuming raw egg if you aren’t purchasing pastured eggs from a farmer you trust. I buy my eggs from a local farmer whose farm we’ve visited and whose methods we’ve observed ourselves.


Liver in smoothies?! Yes! Love the awesome list of superfoods you can hide in smoothies - like liver, chia and so many more - thanks to the ideas in this article. The bonus smoothie recipes are really good too, and a perfect place to start when looking for a new smoothie recipe! :: DontWastetheCrumbs.com

#3. Elderberry syrup


Why add it:


Elderberries have more vitamin C than blueberries or raspberries, and have been shown to shorten the duration of flu symptoms by a few days.


I make my own homemade elderberry syrup in about 15 minutes, using 3 ingredients, and it costs 75% less than store bought! It’s something my entire family takes at the first sign of sniffles and sneezes, and we’ve noticed a significant difference in how quickly we can kick a cold when I make it!


How much to add:


2 Tbsp per serving. The flavor would blend best in a smoothie that uses other berries.


More info:


Elderberry syrup can also be added to popsicleshere’s a recipe for Elderberry Juice Pops that my kids LOVE!


To save money, I stock up on dried elderberries during the warmer months – prices go up by 50-100% once flu season hits.


#4. Kefir


Why add it:


Milk kefir – especially if you’ve cultured it yourself at home using Tiffany’s easy tutorial – has a higher concentration of beneficial yeasts and probiotic bacteria than yogurt. One study estimated 1.5 billion colony forming units (CFU’s) of probiotic bacteria per tablespoon!


The lactose content of traditionally prepared kefir is also considerably lower than milk, so it tends to be better tolerated than milk by those with lactose intolerance. Of course, water kefir can also be used.


How much to add:


2-4 Tbsp per serving. If you are unaccustomed to consuming probiotic rich foods, you may want to start with 1/2-1 Tbsp and increase gradually.


More info:


Preparing kefir at home will save you money (at least 50%) since you only purchase the kefir grains once, and then just add milk each time you make a fresh batch. If you have a friend who makes their own kefir, ask for some of their extra grains to start your batch at no cost!


Liver in smoothies?! Yes! Love the awesome list of superfoods you can hide in smoothies - like liver, chia and so many more - thanks to the ideas in this article. The bonus smoothie recipes are really good too, and a perfect place to start when looking for a new smoothie recipe! :: DontWastetheCrumbs.com

#5. Raw cacao


Why add it:


Obviously, adding chocolate to a smoothie will change the color and flavor so please excuse me for including it in this list of hidden superfoods.


But, really – it’s chocolate! Why hide it??


I guarantee, no one complains when I serve Chocolate Peanut Butter Smoothie Bowls for breakfast!


Raw cacao is cocoa powder that hasn’t been alkalinized with chemical agents. Because of this, it contains a dramatically higher concentration of antioxidants than Dutch processed cocoa – even higher than strawberries, raspberries, or cherries!


Cacao also provides some extra fiber and minerals, including magnesium, which many of us are lacking in our diets.


How much to add:


1-2 Tbsp per serving.


More info:


Raw cacao is definitely more expensive than your average Dutch processed cocoa, but I like that the nutrition hasn’t been compromised through alkalinization. The flavor of raw cacao is also much stronger so you can use less of it than you would a Dutch processed cocoa.


#6. Coconut milk


Why to add it:


Coconut milk offers similar health benefits to coconut oil – it’s rich in medium chain triglycerides (MCTs), which are an easily metabolized form of fat (more likely to be burned, not just stored). Studies show that the fat in coconut milk (and oil) aid in heart health, blood sugar control, weight management, and skin aging, just to name a few!


How much to add:


1/4-1/2 cup per serving


More info:


To save money (and avoid harmful dairy additives), you can make your own coconut milk at home. The texture is slightly different than store-bought, but you won’t notice it in the finished smoothie anyway.


Liver in smoothies?! Yes! Love the awesome list of superfoods you can hide in smoothies - like liver, chia and so many more - thanks to the ideas in this article. The bonus smoothie recipes are really good too, and a perfect place to start when looking for a new smoothie recipe! :: DontWastetheCrumbs.com

#7. Chia seeds


Why add them:


Whole chia seeds are a great source of fiber and ALA, which the body converts to healthy omega-3 fatty acids. It’s not as potent a form of omega-3s as you’ll get from eating fish or taking cod liver oil, but it’s healthy nonetheless!


I love adding them to smoothies because they’re flavorless, and don’t need to be ground like flax seeds do. The kids really like chia in their smoothies, so I don’t always need to hide them – in fact, they often request I add a chia seed design on the surface!


How much to add:


1-2 Tbsp per serving.


You’re Also Going to Love


If you’re looking for some great smoothie recipes to hide these super foods in, start here:


All of these superfood additions would be great if you wanted to try 5 Day Smoothie Fast. You can also add more protein to your smoothies without the scary powders High Protein, No Powder!


What superfoods do you hide in your smoothies?


Some Other Posts You Might Like:


Original article and pictures take dontwastethecrumbs.com site

пятница, 5 сентября 2008 г.

7 Steps to Prep for a Healthy Home in Colder Months

7 Steps to Prep for a Healthy Home in Colder Months
Photo by Pixabay

By Danielle, Contributing writer


With the fall breezes finally blowing, and winter just around the corner, we are all stocking up on pumpkins, cough syrups, and even holiday decorations and shopping lists.

But, is your home ready for the colder months?


I am not talking about the oodles of toys you need to keep your children entertained during a blizzard, nor gallons of bone broth, but preparations you can take to make your home a bit more healthy.


Most don’t think that there are actual steps you can take to keep your home healthy outside of using disinfectant, like bleach or your handy essential oil spray, to boost the health in your home, but there are!


Let’s first look at some of the reasons we get sick more often during the winter.


Why do we get sick in the fall and winter?


– Less vitamin D exposure. Vitamin D, the best source being the good old sun, is increasingly shown to be one of the best supporters of overall immune health. With virtually no sun exposure in the winter months, our system is sorely lacking.


– Limited exercise. Let’s face it. Even if you get to the gym often, you are not exercising, touching the dirt, or doing anything that sounds like that when it’s cold. I don’t blame you for opting for some cocoa and a warm blanket. But, this also means our muscles, ligaments, blood, and endocrine organs and fluids are also taking a break. More movement in the warmer months means more movement of our precious lymph fluid, which cycles and cleans toxins out of our system. In the winter? Not so much (turns on electric fireplace).


– We eat fewer fresh fruits and vegetables. With no farmer’s markets, our gardens frozen over, and produce prices up in the winter, we are simply consuming less vitamins, minerals, enzymes and phytonutrients from raw fruits and vegetables, which normally keep our immune system in top shape.


  • – Toxic air. Most of us, especially those in the north, get very little fresh air during the colder months. Our windows are always closed, and our heaters are cycling dusty air through our air vents (yuck!).

These few reasons, along with a host more, explain why we simply are more open to illness in the colder months. Now, there are tinctures and tonics, remedies and juices which can get and keep you healthy in the winter, and by all means get those brewing. Luckily, there are also steps you can take to make your home and its lifestyle ready to beat the winter bugs, as well.


7 Steps to Prep for a Healthy Home in Colder Months

Image by Pixabay


7 Steps to Prep for a Healthy Home in Colder Months


  1. Open the windows! OK, no, not all the time. But find a day per month at least, once a week at best, and open up your windows. This allows all the nasties out, and some fresh air in. I check the weather and find the warmest and dryest day of the week, and open those babies up for 30 minutes in the afternoon. Yes, it’s chilly. Yes, I wear two pairs of sweatpants. But, we then huddle by a fire, turn the heat back on, have some cocoa and breathe in the fresh air.
  2. Switch out the light bulbs. Those fancy, twisty CFL light bulbs may promise energy savings, but they also promise ill health. Go old school and use incandescent bulbs (230 Hz) or LED (350 Hz), not the new Compact Fluorescent Lights (CFL) bulbs (236,740 Hz). CFLs emit electromagnetic radiation which can cause headaches, fatigue, skin problems and even cancer. These bulbs contain enough mercury to 6,000 gallons of water when broken, so dispose of properly.
  3. Turn down the heat! Please keep reading! I know you don’t like the idea of this, but hear me through. Aside from your bill, too much heat can actually breed those germs you are trying to kill. It takes a lot of energy for your body to acclimate to drastic temperature changes, energy it could be using to digest your latest meal or fight off a viral bug. Have you ever noticed, even in the summer, when going outside after being in the home how different the temperature is? It’s okay to be chilly in the winter – winter. is. chilly. Your body will acclimate (and so will your wallet) to cooler temps, and you will not suffer such a bone freezing when you walk outside. Fifty-five to sixty degrees is the lowest you want to go, so that your pipes will not freeze. Consider turning down the heat one degree or two until you find the temperature that keeps you warm, but not freezing. We keep our home at fifty-five degrees during the day when we are not home, and no warmer than sixty-two when we are home. Of course, we wear warm layers, but we do not suffer the temperature shock that others do.
  4. Use natural disinfectant only when necessary. We are over-sanitizing everything today. Studies are showing that more disinfectant we use, the more ill we become. Opt for natural cleaners, or make your own natural disinfecting spray.
    Quick Recipe: 4 cups of white vinegar and 2 dried orange peels and 2 cinnamon sticks or your favorite essential oils. If using the oranges and cinnamon, place in vinegar for up to two weeks, then remove. If using the oil, add 4-5 drops of your favorite essential oil (Thieves, lavender, tea tree) to vinegar.
  5. Turn off the cell phones and WiFi periodically. Cell phones and WiFi emit EMF’s, which can cause headaches, digestive issues, hormonal imbalances, and even cancer. Turn your cell phone off or in airplane mode when not needed. Consider also getting an EMF blocker on all your technological devices. Also consider putting your internet on cables, or turning off when not in use. I keep mine on a power strip, and turn it off every night.
  6. Replace chemical air fresheners and candles. Air fresheners and candles contain harsh toxins shown to cause allergies and asthma. This is not what you want to be using during months when you are shut in! Opt for soy or beeswax candles, and make your own essential oil sprays (with water), or diffuse them. Another timeless way to bring good smells to your home is warming orange peels, cinnamon sticks, or pine needles in a saucepan on your stove.
  7. Bring in the dirty! I did something a little crazy last year, I must admit. I was desperate to keep my little one playing in the microbial-rich dirt last fall, so I brought in an old sand table with dirt from our garden. I can’t tell you how many hours that entertained my little one in the basement! Throw a few tractors and trucks in, and you have days of fun, all while keeping those warm, healthy bugs in your life. Get creative and find ways to still enjoy the outdoors in the colder months.

So, there you have it. While we enjoy all the wonders of fall, we can still look ahead to the colder months knowing we have the resources to keep our little ones – and homes – healthy!


How do you prep to keep your home healthy in the colder months? Share with us!


Original article and pictures take modernalternativehealth.com site

вторник, 2 сентября 2008 г.

7 Steps to Avoiding the Flu without a Shot

7 Steps to Avoiding the Flu without a Shot

Some people label us “crunchy.” A few years ago I had no idea what that term meant. I now know it refers to folks who are health-conscious, environmentally-sensitive types. It seems to have become a junk-drawer term for anything that sounds remotely hippie-ish: wearing babies in a sling, owning chickens, breastfeeding a 6-year-old in public, thinking coconut oil is the nectar of the gods, drinking black-market raw milk, thinking circumcision is heinous mutilation, using cloth diapers, following paleo or gluten-free diets, making your own toothpaste, using midwives to help with your home-birth, and eating placentas.


Like I said, it’s a junk drawer term and we don’t meet all of the descriptions of a crunchy lifestyle, but when it comes to vaccines, we tend to avoid the ones certain ones. We are “selective vaccinators.” We vaccinate ourselves and our children based on what the research says: if benefits outweigh the costs, we’re okay with it.


For this reason, we don’t get flu shots, but not because we love the flu.


Learn how you can avoid the flu without getting a shot. These 7 steps to boosting your immune system will have you ready for flu season!
7 Steps To Avoiding The Flu Without A Shot 1

I understand that medications have their place. I am thankful for science, doctors, and researchers that have made them available. I still avail myself to modern medicine. I still see a regular doctor—albeit one who is open to natural alternatives and doesn’t seem to think I’m too crazy. But when there is a good natural approach, an approach that may work as well or even better than the alternative, you better know I’m signing up for that option.


Tips for those who choose not to get the flu vaccine


That’s where I am at with the flu vaccine. The benefits of the flu shot are just not that convincing. But, you still may be interested in knowing how to protect yourself. Thankfully, there are some things you can do to boost your immune system.


1) Avoid Inflammatory Foods


It’s very, very important to decrease inflammation in your body. The best way to do this is by watching what you eat. Below are a list foods you should avoid in order to decrease inflammation:


  • Sugar (even natural sugars should be limited)
  • Alcohol
  • Wheat (even if you’re not ready to go completely gluten free, it would be worthwhile to cut back on wheat or switch over to using traditionally prepared real sour dough bread).
  • Margarine, canola oil, all trans-fats (for a complete list of fats to avoid see this post)
  • Any foods you are sensitive or allergic to.

2) Eat Foods that Decrease Inflammation


So what should you eat instead? Below are a list of foods that are anti-inflammatory:


3) Protect Your Gut


I can not stress the importance of this enough. Think about it. Every single thing you eat or drink passes through your gut. If you can’t assimilate nutrients because of poor gut health, you’ve got problems. If your gut is leaky, you’ve got problems. If your gut isn’t healthy, you’re not healthy. Simple as that.


Besides eating an anti-inflammatory diet, here are some important things you can pay attention to.


7StepsToAvoidingTheFluWithoutAShot-FB
7 Steps To Avoiding The Flu Without A Shot FB


4) Vitamin C


Vitamin C with Flavanoids is a power-house antioxidant. Supplementation with vitamin C can do great things to boost your immune system.


If I find myself beginning to get sick, I start to mega-dose with Vitamin C.


5) Optimize Vitamin D Levels


It is well documented that optimal levels of vitamin D play a huge role in your immune system function. Research has shown that vitamin D supplementation resulted in a decreased rate of influenza. In fact, researchers have found that the better your vitamin D levels are, the less likely you are to succumb to the flu and not just the flu, they’ve found this to be true for upper respiratory infections too!


The first step, is to get your lab work done. It’s best to find out where your levels currently are before just randomly supplementing. The range of “normal” on the lab tests is quite large. I try to keep our levels to the upper half of the range.


The sun in the very best source of vitamin D. Be sure you’re spending enough time outside in the sun with no sunscreen to make plenty of D! Although, Living in Michigan, especially during the dark winter months, means I need to supplement. This is my favorite Vitamin D supplement. We also supplement with fermented cod liver oil capsules for the adults and liquid fermented cod liver oil for the kiddos. It is very important, whatever vitamin D supplement that you use, that it is prepared with oil because Vitamin D is fat-soluble and requires fat in order for your body to use it.


As with Vitamin C, I use mega-doses of Vitamin D when I begin to feel under the weather.


6) Plant Based Therapies


There are a plethora of plant-based therapies that can help boost the immune system. A few of them include:


  • Echinacea is a popular immune stimulant. The flowers, roots, and leaves of this plant are known to both help prevent and treat infections. Studies have found that both white blood cells and spleen cells increase when echinacea is taken and also the core body temperature increases.
  • Astragalus is one if the top immune boosting and modulating herbs. It works very similarly to echinacea. It not only boosts your immune system when you’re trying to avoid getting sick, but can also help you recover more quickly after getting sick.
  • You might also try incorporating elderberry syrup (or gummies)! Elderberrys have been used as a remedy for the flu and other viruses for centuries. These berries are high in antioxidants and naturally high in bioflavanoids. Bioflavaoids and other proteins in this berry help destroy the ability of the virus to infect a cell.

7) Plenty of Sleep


Last, but certainly not least is sleep. In today’s busy-paced world, sleep is undervalued…but ask anyone who knows me and they’ll tell you I certainly am not one to undervalue sleep! Working on little sleep is almost considered a virtue. It’s not. Sleep is important. Sleep is when your body has a chance to recover. If you are sleep-deprived, your cytokines (proteins that help fight infection) and infection-fighting antibodies are reduced.


Are you crunchy…or on your way to becoming crunchy? What strategies have you found that work the best at keeping the flu at bay?


*FDA disclaimer: “These statements have not been evaluated by the Food and Drug Administration. This product is not intended to diagnose, treat, cure, or prevent disease.”


Original article and pictures take www.intoxicatedonlife.com site