Childmade shows you how to make an Ice Cream Chore Chart and has a free downloadable template you can use. Instead of fabric, you could make this with cardstock and laminate it.
Original article and pictures take moneysavingmom.com site
Grocery prices are going up everywhere.The other day, I took my husband grocery shopping with me and I sighed when I looked at all the prices.
“I remember when that cream cheese was only $1.09 a block. Now, it’s $2.50 on SALE”
“See that sour cream there? It used to be $1.50, now it’s $1.99”
“Ugh! Why on earth is the ice cream $7.00 a bucket now?” (don’t judge…it’s a staple in our house)
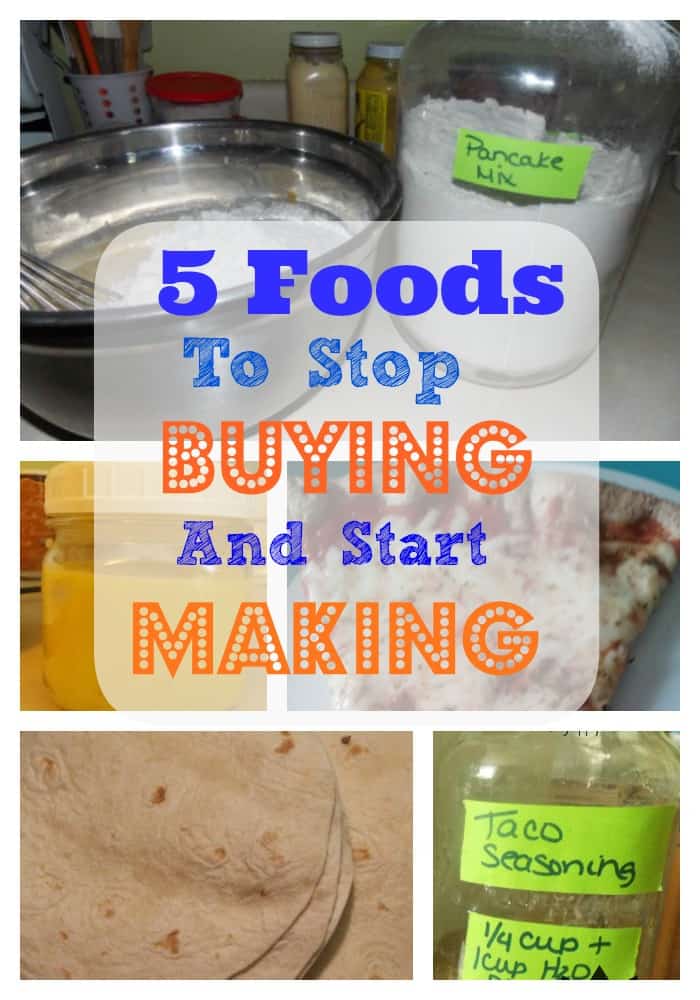
You get the idea.It actually was quite disparaging to me, because it means our grocery budget is stretched out to the max these days. And, it may be that way for many of you as well. I want to show you how we save money starting with making these 5 foods to stop buying and start making at home. Simple, easy and far more nutritious for you, too!
5 Foods to Stop Buying and Start Making at Home
Homemade Pizza
A frozen pizza will cost you about $4.00 and take out pizza can cost up to $10 for a medium. With hungry teenagers who practice TaeKwonDo 3 hours a day, we need about 4 pizzas for my family. And $16-$40 for one meal just isn’t in my budget. Not to mention the questionable ingredients! So, I learned to make my own!
For the crust you will need:
1 cup warm (100°) water
1 T. dried yeast
2 T. sugar (or honey)
2 T. olive oil
3 cups flour (I use whole wheat, but you can use white if you like)
1 tsp salt
1 tsp garlic powder (optional)
Begin by sprinkling the yeast over the warm water. Add the sugar and oil, and stir to combine. Let sit for 5 minutes to “proof”, then add the flour in 1 cup increments. Mix on medium speed with dough hook (or get some really good arm exercise and knead by hand) for about 1 minute, then add the garlic powder and salt. Mix together well for 5 minutes to allow gluten in flour to develop.
Allow to rise for 5-10 minutes, while oven is preheating to 450° degrees. Roll out the dough onto a cookie sheet, pizza pan or baking stone. Pierce with a fork all over, also called “docking the crust”. Bake the crust for 7 minutes alone. Remove from oven, and top with sauce, cheese, and toppings. Return to oven and bake for an additional 20 minutes, or until cheese is nicely browned and bubbly.
**TIP**
Allow the pizza to cool for 5 minutes before you cut it. This will help the cheese to stay in place, especially if you are like my family and pile that cheese on high.
Premade Pancake Mix
You’d be amazed at how long I bought into the notion that I *needed* to actually buy the dry boxed pancake mix! I’m almost embarrassed at the fact that it took me YEARS to figure out that all I really needed was flour, salt, sugar, baking soda, and baking powder! Add to that some milk, melted butter and eggs…and voila-pancakes!
So, here’s my go to recipe for pancakes:
For the dry mix:
12 cups of whole wheat pastry flour, or a combination of white/wheat
2 Tablespoons of baking powder
2 Tablespoons salt
4 Tablespoons sugar (sucanat, organic cane juice, other dry form of sweetener)
Mix the above ingredients and store in a tightly closed container. I put mine in a gallon sized glass jar on my pantry shelves. Use within 6 weeks.
To make pancakes, simply take 2 cups of the mix, add 4 tablespoons melted butter, 2 eggs and 2 cups of milk. Mix gently and use 1/4 cup of mix per pancake.
**TIP**
Wait until the pancakes are all bubbly and dry on the top side before flipping over. You only want to flip them one time, otherwise you may end up with tough pancakes.
Taco Seasoning
At the average price (in my area) of $1.39 for a couple ounces of questionable seasonings, it’s a wonder more people don’t make this on their own. Here’s my favorite recipe:
1/2 cup chili powder
1/2 cup paprika
1/2 cup cumin
1/2 cup garlic powder
1/2 cup dried onion, or onion powder if you prefer
1/2 TEASPOON cayenne pepper (more or less, to taste for spiciness) Mix all together and store in a covered jar or container for up to 6 months. To use, simply add 1/4 cup of mix and 1/2 cup of water for each pound of browned meat.
**TIP**
This is also great sprinkled on roasted potatoes or on chicken.
Homemade Tortillas
We can easily go through about 50 tortillas a week, especially if my daughter makes lunch. Her favorites to make are quesadillas and tacos. Of course, they are really only flour, salt, fat and water and take about 10 minutes to make. Just long enough to grate cheese, or brown some taco meat. And, for some reason, I felt that I was buying time or something when I bought them in the plastic little packages each week. They were nice, but these homemade ones ROCK!! All you need is
3 cups flour
1/2 cup fat (lard, tallow, shortening…butter won’t really work well here)
1 tsp salt
up to 3/4 cup water
Mix together the salt and flour and cut fat into it until it’s about the size of peas. Add water, 1/4 cup at a time until dough comes together. Knead together for about 2 minutes until smooth. Allow the dough to rest, under a damp cloth for about 5-7 minutes. Divide the dough into 12 little balls. Roll out with rolling pin and place on a dry skillet. Cook for about 1 minute on each side. Remove to a plate with a towel covering to help hold in heat.
**TIP**
If you happen to have any left over, heat up some coconut oil, or tallow the next day to 350°. Cut the tortillas into triangles with a pizza cutter and fry up. Season with salt, pepper, and garlic powder for some delicious chips for snacking!
Homemade Mayo
When I tell people that I make my own mayo, I have gotten responses from “oh, cool!” to the blank stares as if I told then I could transmute base metals into gold. It’s so simple, so easy to whip up a batch of your own mayo that you’ll wonder why you should buy the store bought stuff ever again!
You’ll need:
4 large eggs, brought to room temperature, with 3 separated
1 Tablespoon mustard (yellow is fine, but I like to use the brown for a different flavor)
1 cup extra virgin olive oil
1 tsp salt
In a blender or food processor, add 3 egg yolks and 1 whole egg, the mustard and salt. Mix on high for a minute. While the mixer or food processor is still running, gently drizzle the olive oil in a little stream. This will begin to coagulate and thicken as you do. Store in the fridge for up to a week.
**TIP**
You can lacto-ferment your mayo by increasing the salt to 1 Tablespoon, and stirring in 1/4 cup whey to the finished mayo. Allow to sit at room temperature for 7 hours before storing in the fridge.
What foods are you making at home that you used to buy?
Every parent knows that diet is a major part of success in competition. The problem is understanding the when, how, and what. Sometimes, the healthiest meal, isn’t the best game-day meal. And sometimes no food, is better than too much.
The following are practical food tips that can help your children perform their best in competition.
Obviously, I’m not a doctor and every kid is different, so please consult a doctor about what is best for your individual kids. And remember that the following are tips, not laws. But when it comes to food and competition, the following tips made all the difference to me.
1: Is Breakfast really for Champions?
Conventional wisdom tells us that kids need to eat a good breakfast the morning of competition. But is it really that simple?
My junior year in high school, I competed in a Chess Championship. My mind was sharp and fast, and completely focused. I breezed through my first three games. The next thing I knew, I was in the Championship match. But before the final game commenced, the tournament broke for lunch.
Wanting to be my best, I ate a huge lunch. After all, I needed the energy. However, the opposite happened.
When I faced off with my opponent, my mind was running in slow motion. It was cluttered and I couldn’t focus. A few moves into the game, I lost my rook and in a Championship match, that is usually gameover.
It was many years before I understood what happened. When you eat a large meal, the energy rushes from your brain to your stomach as the body focuses on digestion. That is why we get so sleepy after a big meal. It takes several hours before we benefit from an energy boost.
2: Don’t eat “meals,” eat snacks.
Kids should never eat a full meal just before competition. If your kid is involved in a day-long tournament, feed him snacks. Maybe a small, healthy snack, once or twice an hour and try to avoid heavy foods. Smoothies, fruit, salads, etc. are best.
3: Not all healthy food, is competition food.
Beans, broccoli, and cabbage, just to name a few, are terrible game-day foods for athletes. These foods cause lots gas.
If your kid is nerious, odds are, his stomach if producing more acid than normal. Adding these foods to his diet will likely cause more gas than normal, and could even lead to trapped-gas. If you’ve ever suffered from severe trapped-gas, you know it is a game stopper.
4: No new food.
My senior year in high school, I was invited to the “World Leader Summit” in Washington D.C. I spent a week playing United Nations with juniors and seniors from around the world.
I made friends with a large group kids from Honduras. If I remember right, there was one or two boys, and seventeen beautiful girls. I had a great time learning their culture.
They taught me to salsa dance, and speak some Spanish, and they also introduced me to a new “drink”. It was something that I had never tasted before, but it was all they seemed drink.
So, I copied their order, “I want an Extra Tall Latte with three shots of espresso.” And like them, I ordered this drink every hour, or so.
That night I called home to tell my father how sick I was. I couldn’t explain it. I didn’t have a fever or cough, but I couldn’t eat anything and was forced to keep a close proximity to restrooms.
What horrible luck. I should have been having the time of my life with my new friends, but I was sicker than sick.
Years later, when I discovered coffee is a natural laxative, it all made sense. Since I had no tolerance to coffee, its powerful effects just about ruined me!
This can happen with all kinds of unfamiliar foods. If your kids are used to eating corn dogs and cheese sticks, game-day is not the time to introduce a salad. Or if your children only eat fruit and salad, game-day isn’t the day to try fast-food.
Changing your kids’ diet so drastically might shock their stomachs. And nothing kills energy, like an upset stomach.
If you want your kids to eat better on game-day, change their diet progressively, a week or two in advance.
5: Don’t Over-hydrate Your Athlete.
My coaches were always telling me to, “hydrate, hydrate, hydrate.”However, it’s more complicated than that. Dehydration can be deadly, so by all means hydrate your kids – just do it wisely.
The worst mistake kids make is coming to the big game dehydrated. Have them drink lots of fluids the day and morning before competition.
Too much water can flush vitamins and minerals, so be sure to include juice. Also fruits and vegetables are a good source of hydration.
Just before the game, cut off chugging! Your kids should drink as much water as they want, but make them spread it out.
When they come rushing off the field, they will want to guzzle all the water that they can. This doesn’t necessarily help, because the body still has to process the water.
In the meantime, that guzzled water sloshes around in the stomach and can make them nauseous and sleepy. And ten minutes later, when halftime is over and the game begins again, they are going to have a full bladder and need to pee.
The better way is to have them drink a few sips, constantly. It is the same concept of substituting many snacks for large meals. The idea is to give them the same amount of water, but spread evenly out.
Be aware of cotton-mouth. When kids are nervous, their mouths can go dry. No matter how much water they drink, they will feel thirsty even if their belly is full of water. During my wrestling days, I fell for this all the time, and guzzled water until I was sick.
All that said, make sure that your kids drink lots of water because dehydration really is very dangerous.
Finally, I hate to even mention it because it is very rare and the danger of dehydration is much greater, but there is a danger of over-hydrating. When I went through basic training, there was a guy in another class who died from drinking too much water.
This is very rare and it takes a ton of water, but it does happen. So, if you see your young athlete walking around the house chugging gallon after gallon, that isn’t necessary, and could even be dangerous.
I hope these tips help. If you have questions, or suggestions of your own, please leave a comment.
Original article and pictures take www.trueaimeducation.com site
Welcome back to First Year Friday–and the 4th installment of the Starting Solids series.
For today’s post, I decided to list 5 Finger Foods for Baby. I’ll be honest, I sometimes too often fed my girls the typical puffs (albeit organic) or cheerios. These seemed like ideal finger snacks for baby. And there may be nothing really wrong with them.
But…like I mentioned in this post, I don’t know if I will even feed grains during the first year to any future babies. So if we give up puffs and cheerios, what will baby eat? There’s plenty!
Check out this list of my top 5 finger foods, and please add your own in the comments!
Babies can easily mash small chunks of banana, and, again, the choking hazard is minimal.
3. Small chunks of ripe avocado
If the avocado is not ripe enough, there is a bigger choking hazard, so make sure it’s just ripe enough to cut into chunks (but not totally mushy). If you can mash a chunk between your fingers, it should be fine.
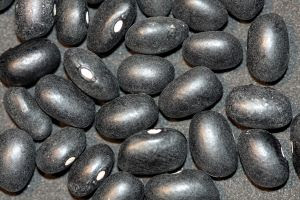
My girls still LOVE beans! I would make sure they are cooked to be very, very soft, and I don’t recommend lima beans, as the outer skin can be tough and a choking hazard (you can peel them, but that takes forever!). My girls especially like black beans.
5. Bite-size pieces of cooked carrots
Again, make sure they are cooked to be very, very soft! You do not want to feed raw carrots to your baby for quite a while (like, until they have teeth!).
The following foods are choking hazards and shouldn’t be fed to baby whole until at least age 3:
1. Grapes
This is a big one. Little Girl is 3 1/2, and she JUST started eating grapes whole. (And it still scares me some–especially if she spills them on the floor, where Baby Girl can find them!). When babies are small, you can peel and quarter grapes. As they get a little older and are more comfortable chewing (and have all their teeth), you can just quarter them, then slice them in half.
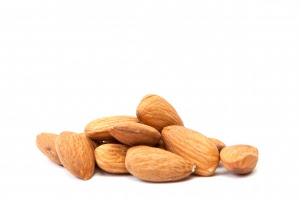
If there is no family history of nut allergies (there is in our family), you can give baby nuts after a certain point (consult your physician), but they need to be chopped finely or made into a butter that is very thinned out.
What are your favorite finger foods for baby? What foods do you avoid?
*Disclaimer: Please consult your trusted medical professional before deciding what to feed your baby.
Top image from Pixabay.com
Original article and pictures take thehumbledhomemaker.com site
You only have to be hanging around the natural living community for about five seconds before hearing someone mention essential oils. However, finding truly unbiased, trained expert advice for proper essential oil usage is a little tougher.
I’ve been a big fan of using EO’s (essential oils) for several years now, but I was once a total newbie. I doubted their ability to really do much beyond smell nice, and I had absolutely no idea just how powerful they can be.
Once I started learning it was like an avalanche of information, opinions, and hot-tempered brand wars. It turns out that there are actually a ton of myths and misunderstandings floating around out there in internet-land about how to properly, safely, and effectively use essential oils. I dutifully began wading through it.
I was first introduced to the world of essential oils via a well-known MLM (multi-level marketing, aka direct sales – think tupperware, avon, etc.) company. While I appreciated their high quality oils, I’ve since learned that they (and other EO MLMs) give advice that many essential oil experts believe to be unsafe. For example – not diluting properly (or at all), not paying attention to age restrictions, unsupervised internal usage, etc.
It can be tough to discern which companies offer a high enough quality in order to use the oils for medicinal or therapeutic purposes. Of course, the MLMs each claim to sell a higher quality as compared to their competition. Allow me to let you in on a little secret: these claims are unfounded in anything objective, and any special marketing terms (about the grade or quality) are not regulated by any industry. The only regulated term is “certified organic”.
As I’ve done my research I’ve discovered a newer company that is just as high quality, yet much more reasonably priced (because they cut out the “middle man” of the direct sales approach).
The company that has very quickly become my new favourite is Plant Therapy. They work closely with Robert Tisserand, a world-renowned essential oils expert, and they have a number of certified aromatherapists on staff who are available to assist customers with any questions. They also run a super helpful Facebook group called Safe Essential Oil Recipes which is open to absolutely anyone, where their trained aromatherapists answer your essential oil questions.
Quality and transparency is extremely important to Plant Therapy, which is why they release the GC/MS Reports (the gold standard laboratory testing for essential oils) from each of their batches.
Personally, I love that they take this really seriously so that I can use the oils without worrying about their purity or effectiveness. Some essential oils sold in places like grocery stores are very low quality, sometimes even diluted with cheap industrialized oils but misleadingly labelled as “pure”.
From the Plant Therapy website where their quality is discussed at length:
“Our oils are sent to one of several third-party laboratories where they undergo multiple tests including Gas Chromatography and Mass Spectrometry (also known as GC/MS testing). Every batch of oil we receive goes through both rounds of testing, and these tests will show us the quality of the oil and also what is in the oil. Most contaminants or adulterants show up with these tests, and for those that don’t, if we suspect that some of what looks like a natural constituent of an oil might be a synthetic addition, we use chiral analysis – a more sophisticated form of gas chromatography – to find out if it is in fact, a natural constituent or a synthetic addition. Even though we work with distillers and farmers who have repeatedly proven to provide excellent quality essential oils, when Plant Therapy claims that our oils are 100% pure and of the highest quality, we want to make sure that we are doing everything possible to guarantee that.”
You can go to any oil on their website and click “tests” to see the lab results for that specific batch.
If you’re anything like I was, learning about essential oils can feel a bit like drinking from a fire hose – totally overwhelming! I made a lot of mistakes in the beginning due to misinformation I received, or from being unknowingly ignorant about proper usage.
Here are the five biggest and most common mistakes I’ve made. They say that once you know better, you do better, so consider this another step in your EO education. If there’s anything here that you didn’t know already, take the information and move forward in safer and more effective essential oil usage for you and your family. Happy oiling!
1. Not diluting enough
Essential oils are extremely concentrated, and as such – they can pack quite a punch. When I first learned about essential oils I was told that there are a number of oils you can use neat. (“neat” = undiluted.)
However, there are some significant risks involved with using undiluted oils. There are skin reaction risks (such as irritation, sensitization, and phototoxicity), and there are systemic toxicity risks (such as fetotoxicity, hepatotoxicity, carcinogenicity and neurotoxicity) which are less obvious when they happen. On other words – you may have used undiluted oils in the past and saw no adverse reaction, but the effects may have still been present. (source.)
In addition, essential oils are volatile compounds which means that they evaporate very quickly. Using a non-volatile carrier oil (for example: fractionated coconut oil) allows you to use less essential oil to achieve the same result because the evaporation process is slower. The carrier oil that you choose can also be beneficial to your skin with its own moisturizing properties, vitamin and mineral content, etc.
This is a good article with safe dilution guidelines for all ages. Personally, the only time I’d ever use an oil neat is in an acute situation such as the time I had a majorly infected finger and used tea tree oil to beat it. (The infection had gone on for weeks and taken my finger nail with it, but the tea tree oil reversed the infection literally overnight.)
2. Placing too much trust in one single company (or not enough)
I’ve made it clear that I’m a huge fan of Plant Therapy, but there are several other essential oil companies that offer a high-quality product (many of them vetted by other health and wellness blogging friends of mine). While I still have a few bottles of essential oils from other companies in my EO organizer that I use, when I need to buy a new EO, I personally choose Plant Therapy for their top-quality product as well as their much more affordable price point, and their expert advice on safe usage.
It’s fine to have a favourite company. That’s great! But when you buy into the hype that company X is the ONLY high-quality brand out there, that’s problematic. If any company is feeding you that sort of line, be wary.
Plant Therapy doesn’t spend time knocking other companies because they can simply let their quality, customer service, and affordability speak for itself. As a customer, I appreciate that!
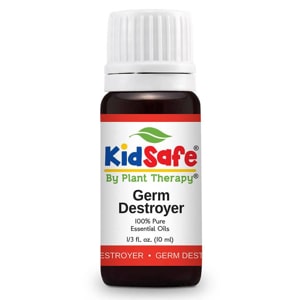
3. Remaining ignorant about age restrictions
Children are much more susceptible to the effects – good and bad – of essential oils. When it comes to using essential oils safely on our kids, there are definitely some guidelines to follow. Most oils are not recommended before the age of two (except in acute cases for a short period of time), and some are not recommended at all until after the age of twelve.
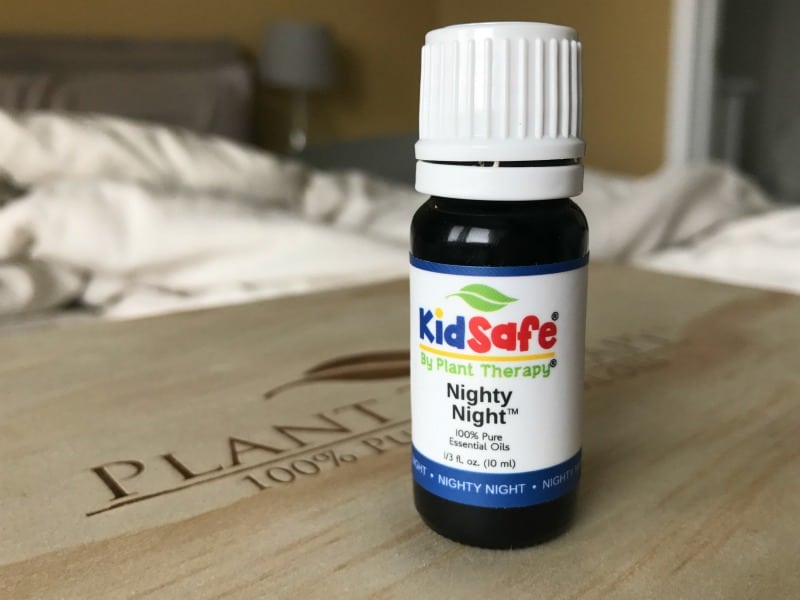
Several years ago, Plant Therapy recognized that people were having a hard time figuring out which oils to use on their kids, in what combination, and at what dilution. So they worked with Robert Tisserand to create the first KidSafe line of synergies (EO blends) and synergy roll-ons (pre-diluted blends).
These blends have quickly become the most-used oils at our house.
Side note: I’ve seen particularly awesome results with their Nighty Night oil (one of the KidSafe blends from PT: a blend of lavender, marjoram, mandarin, cedarwood atlantica, patchouli, clary sage, chamomile roman and blue tansy) when our oldest (age 8) is having trouble sleeping at night. He struggles with some anxieties that tend to come out at night and can sometimes take 2-3 hours to fall asleep. On particular tough nights, I massage some of this oil (diluted, of course… they also sell a pre-diluted roll-on) onto his back and neck, and he’s out like a light 5-10 minutes later. It has worked every single time so far.
4. Applying oils primarily to the bottoms of your feet
Original article and pictures take redandhoney.com site
[Guest post by Angela of Mama Rosemary. Take a moment to check out her site – it’s a wealth of information!]
Are you curious about herbal medicine and all it has to offer yet perhaps you don’t know where to start? Here are 5 easy and fun ways to introduce herbs into your life.
1. Add Herbs To Your Food
Did you know that common culinary herbs add more to food than just taste? Herbs such as thyme, sage, garlic, turmeric (found in curry powders), basil, ginger and cinnamon are chock full of antioxidants, vitamins and minerals. [Try Red & Honey’s Curried Chicken, Aunt Beulah’s Saucy Crockpot Chicken, or Classic Chicken Noodle Soup, to start with.]
These herbs have varied helpful properties for enhancing health from being antiviral and warming to the digestive and circulatory systems to nourishing and supporting the nervous system.
And, it is so easy to use them! Simply add them to your food. Are you making a salad for dinner? Throw some fresh herbs into your salad green mix. Fresh basil, sage and even mint and lemon balm are wonderful choices for salads.
Crafting a lovely soup on the stove? Be sure to add lots of garlic, ginger and thyme to suite your fancy. Not sure if the herb will taste good in your creation? Taste it by itself to get an idea of it’s flavour.
Notice how the herb makes you feel when tasting. Does it warm you up? Does it give you a little zing in your sinuses? Tasting herbs by themselves is a great way to learn about their properties.
2. Try Drinking Herbal Tea
Herbal teas are delicious and are a wonderful way to enjoy the benefits of herbs. These teas are made from medicinal plants which normally do not contain caffeine, and should not to be confused with the common black or green teas made from the plant Camellia sinensis.
To start, try experimenting with simple herbs such as peppermint, chamomile, sage and lemon balm. Brew herbal tea from loose dried herbs by steeping 1 teaspoon to 1 tablespoon of your herb of choice per cup of boiling water for 5 to 15 minutes. Then strain out the herbs, add honey if you like and enjoy!
Or choose boxed, bagged herbal teas from the store. Companies I like are Traditional Medicinals, Numi, Yogi and Rishi because they use high quality herbs. Check out the ingredients in these lovely tea blends to get an idea of what plants you are tasting.
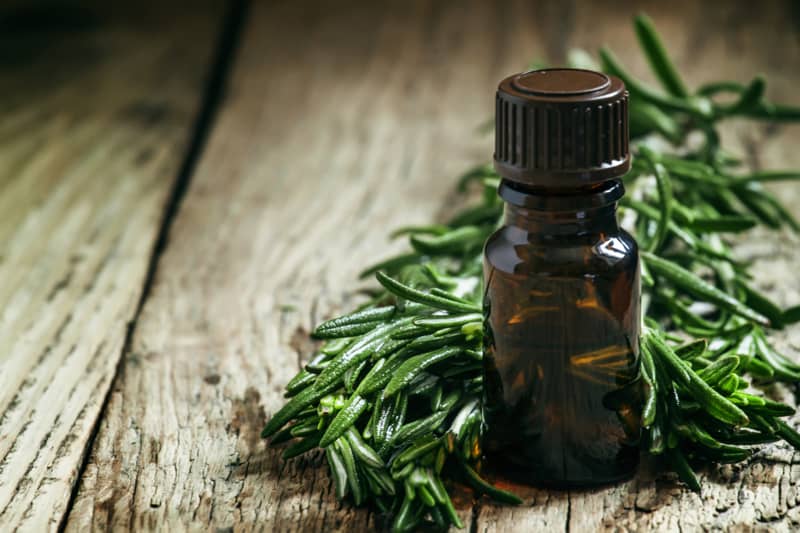
Nowadays most of us have heard of lavender and it’s relaxing effects on the mind and soul. An easy and wonderful way to reap the benefits of lavender is to use the essential oil.
Lavender soothes the nerves and eases the mind. Use it for stress and anxiety, insomnia and headaches. It is also cleansing, antiseptic and healing, use it for colds and flu, skin abrasions, insect bites, burns, rashes, and acne.
*Lavender essential is one of only two essential oils that some say can be used directly on the skin, the other one is tea tree. Essential oils should be used cautiously as they are very concentrated and strong. Please read more here to learn more about essential oils and how to safely use them.
One of my favorite ways to invite herbs into my life is to take fragrant, healing baths.
Our skin is highly absorbent, letting the healing qualities of herbs permeate us right in the tub.
How you make your herbal bath is up to you. It can be a simple as using a few drops of lavender essential oil or dumping a cup of chamomile tea in the tub. Or make it more elaborate creating from a multitude of herbs and essential oils.
Get lots of herbalicious botanicals for making your very own baths from the lovely Mountain Rose Herbs!
5. Enjoy Reading A Well Written Herbal
Really one of the best ways to learn about herbs besides hands-on experience is to study and learn. In other words: do your research.
Luckily for us in this day and age, learning about herbs is highly accessible with many amazing herbals (books about herbs) written by wonderful herbalists. These books are full of information about specific herbs, how to use and prepare the plants, lovely stories and herbal wisdom.
Healing Wise by Susun S. Weed goes into great depth about 5 different commonly found herbs with lively stories, recipes and inspiring wise woman knowledge.
A Modern Herbal by Maud Grieve is offers an in-depth view a tremendous number of herbs complete with historical uses, plant description and more.
The world of herbalism offers us a vast, inspiring journey. Each foot step into that world will bring you new experiences and knowledge making you not only healthier but also adding a richness of scent, texture and taste to your life.
How have you used herbs?
My name is Angela, I am a certified herbalist, mother and preschool teacher with a background in science, botany and nutrition. Plants, children, and healthy, inspired living are my passion.
Mama Rosemary is a place for sharing all the great things I have learned along the way on the path of Motherhood and beyond. I am excited to share herbal ideas, tips and information for Mamas and their families, as well as fun herbal, craft and science ideas for working (playing) with children!
Disclaimer: I am not a doctor or medical professional, and this post should not be taken as medical advice. Please do your own research. Material on this blog is provided for informational purposes only. It is general information that may not apply to you as an individual, and is not a substitute for your own doctor’s medical care or advice.
Original article and pictures take redandhoney.com site
5 Easy Tips to Keep your Child Healthy this Winter
The best method to keep your child healthy this winter is to make their immune system strong for fighting off all the bacteria and viruses that come its way.
Kids are bombarded with germs at school, on the bus, at a friend’s house, etc. Many children don’t remember to wash their hands very often. Because of this perfect storm, it’s very likely that children will still get sick, but if their immune system is strong, their sickness will likely be minor and short lived.
5 Easy Tips to Keep your Child Healthy this Winter
First and foremost, ditch the sugary drinks!
Sugary drinks are one of the main sources of sugar for kids. I see kids drinking apple juice, orange juice and even sports drinks on a regular basis. Most of these drinks are water with sugar. There are no nutrients from fruits left. Their body doesn’t need that.
For energy, a better option would be fresh fruits, vegetables, nuts, seeds, whole grains, foods rich in iron (beans, lentils, spinach, etc.).
It’s best if you make juices at home, especially vegetable juices with a bit of fruit. All the vitamins and enzymes found in the produce you use will still be present in the juice your child drinks (unlike a store-bought juice).
Sugar doesn’t only make kids hyper, but if too much it’s consumed on a regular basis it causes cavities and inflammation in their body which will make them more prone to chronic diseases down the road (obesity, diabetes, heart disease, etc.).
Fruits and vegetables every day (best if organic)
Fruits and vegetables, fresh or cooked (especially fresh since their vitamins and enzymes are still preserved) keep your child and their immune system.
Here are some ways to incorporate fruits and vegetables into your child’s diet on a regular basis:
Children need to move. Their immune system stays strong if they move. The lymphatic system, which is the core of the immune system, relies on the body’s movements to stay active and work well. The more children move, the less likely they are to be sick.
Take your child for a walk or a bike ride after dinner or enroll them in a physical activity class (gym, karate, etc.). Or even better, enlist the whole family in an evening dance party, race, obstacle course or other fun activities where everybody needs to keep moving.
Good night sleep
If your child is not well rested, they are more likely to become sick and stay sick for a long time.
Set an early bed time if they have to wake up early to go to school. It’s better for them to wake up on their own then to be regularly woken up to get ready for school. At some point, the lack of sleep will catch up with them and they will catch colds more frequently.
Lack of sleep also makes children forgetful and irritable, and lowers their ability to handle stress as well as their ability to focus in school.
Nutritional supplements to complement a healthy diet
The right dose of vitamin D, omega 3s, probiotics and vitamin C supplements will help your child’s immune system stay strong all year round.
This is my favourite omega-3 fish oil supplement. My whole family takes it (4-year old daughter, 7-year old son, husband and myself) and it’s also the brand I recommend to all my clients.
I talked about a few of the main factors that make the immune system strong to keep your child healthy. There are, of course, many other important ones (washing hands frequently, not touching eyes or mouths with dirty hands, cover mouths when sneezing, etc.)
Which other tips would you add to help keep your child healthy? I would love to know your thoughts! Share below so we can all learn.
Please note that this post contains affiliate links and I only mention products my family loves and uses. If you choose to buy the products through my links, I will receive payment. However, the price of the product stays the same. Thank you for supporting my website and my mission to help families lead healthy and happy lives!
5 Easy Real Food School Lunches Ready in 30 Minutes for Less Than $5
The back-to-school season brings mixed emotions for parents. Some are excited for the kids to start the new school year in a new grade, with a new teacher. For those that homeschool, you might look forward to new curriculum or repeating a tradition of supply shopping with create-your-own smoothies. Kids, no doubt, look forward to seeing their friends again and going on fun, exciting field trips.
Unfortunately, there’s one big obstacle that every parent will encounter regardless of where their child goes to school: lunch.
In my opinion, the only thing worse than meal planning for dinner, is meal planning for school lunches. It’s not easy coming up with new, fresh ideas to feed our family real food on just $330 each month. Plus, there seems to be unwritten rules, precautions to take and things to consider before the lunch can even be made!
We want our kids to eat healthy… but vegetable sticks just aren’t cool.
However, we don’t want to buy special, expensive ingredients just for lunch… but packed lunches can’t be boring.
We save money and waste less food by packing leftovers… but bringing the same thing two days in a row is a no-no.
As health-conscious parents, it’s a battle to find the balance between packing wholesome lunches and packing something the kids will enjoy. Fortunately, this school lunch meal plan satisfies everyone involved:
It’s fun. What kid doesn’t like pizza or a box full of items to dip?!
It’s frugal. One week of healthy lunches can be made for less than $5. Really!
It’s easy. These ideas don’t require special kitchen skills and can be made in a few minutes while preparing or cleaning up dinner.
It’s fast. From start to finish, you can have an entire week of lunches ready in less than 30 minutes.
It’s healthy. There’s nothing processed in these lunches – just real, delicious food!
Note: This plan is written for one elementary-aged child. Modify serving portions as needed.
5 Easy Real Food School Lunches Ready in 30 Minutes for Less Than $5
Big and Little Dippers, Total Approximate Cost $1.19
Tip: Some ideas for lunch-box friendly dipping vegetables include broccoli florets, cauliflower florets, celery sticks, carrot sticks, cucumber slices, tomato wedges and sweet potato fries. Choose 2-3 that are affordable and in season.
Buffalo Chicken Strips, Total Approximate Cost $1.08
Tip: Save money by choosing a dip based on what you’re already using in the current meal plan, what you currently have on hand and your child’s preferences.
Real Food Lunchables, Total Approximate Cost $0.86
Tip: Here is an excellent way to pack homemade hot pockets so that they’re warm for lunch. These too can be made ahead of time and frozen. Just be sure to re-heat before you send the child off to school!
Homemade Uncrustables, Total Approximate Cost $0.86
Tip: Only buy special tools like this sandwich cutter and sealer if your kids really don’t like crusts and you make these often. Otherwise, save your money and use a wide-mouth jar or a glass to cut the sandwich instead. Also, these sandwiches can be made ahead of time and frozen!
Total Cost of 5 Real Food Lunches = $4.80
Healthy food doesn’t have to be difficult and it certainly doesn’t have to be boring! Think outside the box when you’re meal planning and give lunch an extra dose of creativity. With a mere spin on conventional school lunch ideas, you can send your child off to school with a healthy school lunch that will make even the pickiest eater proud to say they packed!
What is your greatest struggle with school lunches? How do you overcome that hurdle?
Want even more healthy lunch ideas? Kitchen Stewardship’s The Healthy Lunchbox has 45 real food recipes, plus 8 colorful printables. You’ll be ready to pack amazing lunches for your family this fall! Pick up your copy HERE!
Disclosure: This post contains affiliate links. Thank you for supporting this site!
Original article and pictures take thehumbledhomemaker.com site
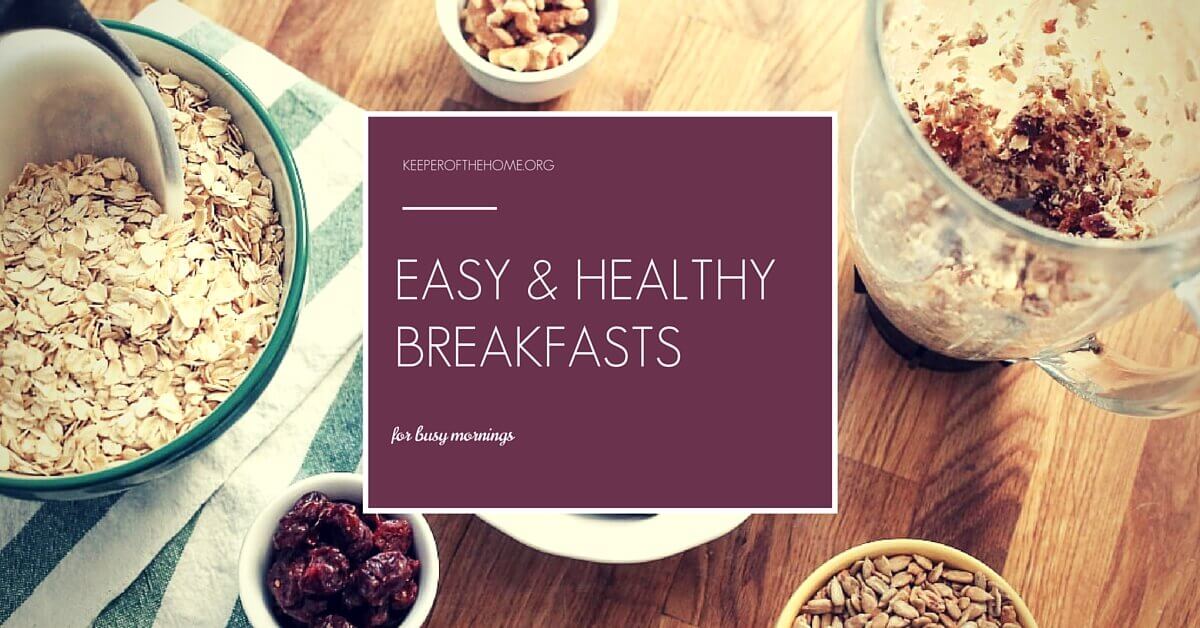
5 Easy and Healthy Breakfasts for Busy School Mornings
On hectic, busy mornings, don’t lose hope for healthy breakfasts. Here are five easy and healthy alternatives to the cereal box.
School mornings can be such a hectic time.
Whether you’re homeschooling (as we did for seven years) or your kids to go to school (as ours currently do), most mornings are a bit of a chaotic rush to get everyone properly dressed, fed, packed up and out the door on time (or ready to sit at the table/couch and get started).
I know it can be SO tempting to just pull out the cereal box, or make toast and peanut butter your default, especially as we get this far into the school year and our inspiration begins to run dry.
But it’s honestly easier than you think to make healthy breakfasts that are more wholesome, protein and fat-rich in order to keep tummies full, blood sugar steady, and brains fueled for learning.
Here are five easy but super wholesome and healthy breakfasts that are perfect for school mornings:
Whatever-you’ve-got Breakfast Casserole
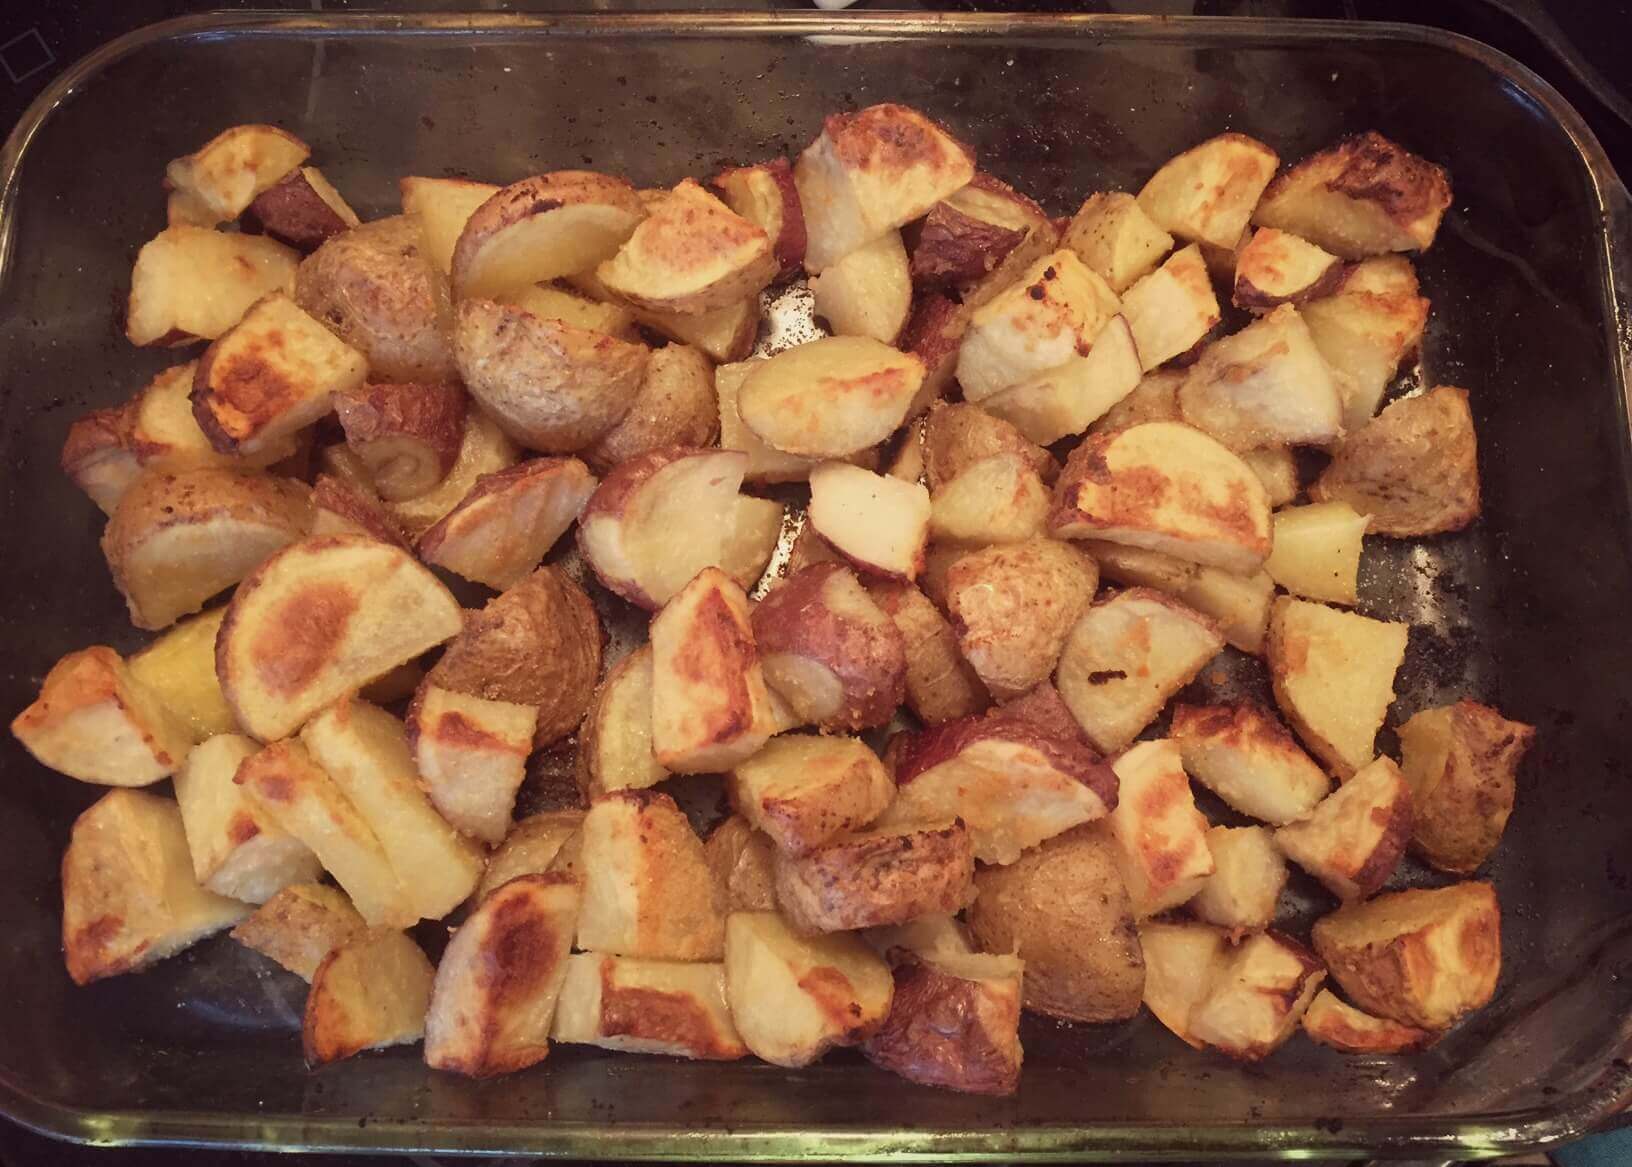
This is less of a recipe and more of a general method. I came up with this one night when I had leftover roasted potatoes from our dinner (like the photo below) and wondered if I couldn’t use them for breakfast more creatively than just making fried potatoes.
I turned it into this very flexible breakfast casserole “recipe” that uses whatever I have on hand and always tastes delicious!
Here’s how I do it:
I raid the fridge for whatever leftover meat I have (chicken, turkey and ham are all nice), or else I crack open a new package of breakfast sausage and chop that up.
For our family of 6, I mix up about 8-10 eggs with some salt and pepper for seasoning (onion and garlic powder are also nice).
I literally leave the potatoes in the same casserole dish I cooked them in for dinner (unless I’m using baked potatoes in which case I quickly chop them up and toss them with some oil in a clean dish), sprinkle my chopped meat of choice over top, sometimes add chopped veggies (peppers, onions, green onions, mushrooms are all nice- and it’s a great way to use leftover veggies, too), and then pour the egg mixture over top.
Finally I sprinkle it literally with shredded cheese and then let it sit covered overnight in the fridge.
The next morning I pop it in the oven while I’m taking a shower or the kids are getting ready. It usually takes about 30-40 minutes to bake at 350 F depending on how many eggs I use (but it’s all hands-off time so that’s no big deal). If I’m in a hurry, I bump the temp to 400 F and just watch it more closely. It’s done when the eggs in the center are cooked and the cheese is a bit browned.
Total time:12 minutes hands on, but 45+ including cooking. This includes 10 minutes to prep it the night before with my pre-cooked potatoes. 2 minutes to get it in the oven in the morning. 30-40 minutes for it to bake while we get ready for the day.
Fancy “Coffee Shop” Oatmeal
Perhaps your kids are sick of plain old oatmeal. Maybe you are, too.
Fancy oatmeal to the rescue. I came up with this a few years back when my husband and I wanted a way to dress our oatmeal up a little more.
Truthfully, I probably still serve my kids a pot of plain old soaked oatmeal with some honey or maple syrup, a handful of raisins, and raw milk at least once a week. They love it and it’s very quick and easy.
You can make the mixes ahead of time so there’s really no more time required than making the pot of oatmeal (which requires less than 5 minutes of hands on time and cooks while you get ready).
These mix-ins take oatmeal to a whole new level and might even help oatmeal find a regular place in your weekly breakfast rotation.
Total time:10-15 minutes. Oatmeal = 3 minutes to measure oats and water the night before. That morning, 1 minute to turn it on, another minute to stir and turn down the temp when it boils, then 5-10 minutes cooking with a lid on low heat. The mix I make ahead of time and only takes 5 minutes.
French Toast
When we think of French Toast, many of us think of lazy Saturday morning breakfasts, along with other family favorites like pancakes, waffles or quiche.
But a while back I realized it was actually quick and easy to make and with minimal cleanup, too (one wide, shallow bowl, one fork, one large frying pan, one spatula). Just keep it simple, not gourmet, and I think you’ll feel the same way.
Because I’m not a fan of serving carb-heavy toast for breakfast on its own, I really prefer French Toast for its higher protein count. To add even more protein, I usually cut the bread slices in halves or thirds, so that each piece gets more egg/milk coating.
Toppings we like:
classic butter and maple syrup
honey and peanut butter/almond butter (this is a good option if you need them to grab it so you can rush out the door!)
berries and whipped cream (I just thaw frozen berries overnight in the fridge)
Note: For the most easily-digestible grains, it’s best to opt for bread that’s either sourdough, sprouted or soaked. I often buy double packs of organic sprouted grain bread from Costco to use as a once-in-a-while convenience, as well as gluten bread for a couple family members.
Total time:15-20 minutes. Depending on how hungry everyone is, I can do it all start to finish in 15-20 minutes and I can often help them with lunches while I’m frying and flipping slices.
Protein-Rich Smoothie
When we’ve slept in and literally have to get breakfast made and consumed in 10 minutes, this is our go-to.
Here’s how I make my smoothies:
Add about 2 cups liquid of choice (yogurt, kefir, raw milk, almond milk, coconut milk, etc.)
Add about 4 cups frozen fruit of choice (we keep a selection in the freezer – our favorites include strawberries, cut-up bananas, blueberries, mango, pineapple, cherries and raspberries, and sometimes I add fresh oranges as well)
Superfood extras – for us these include chia seeds, hemp seeds, gelatin power or collagen powder, Vega protein/green powder (it’s made with mostly seed and rice-based protein along with powdered greens and veggies), probiotics, spirulina powder, free-range egg yolks, fresh greens. I just change these up from smoothie to smoothie.
I add the ingredients in this order (liquid, fruit, extras) and then as it blends, I add a little water as needed to keep it blending well.
Total time: 10 minutes. 5 minutes to make the smoothie, 5 minutes to chug it down. ��
Cheesy Scrambled Eggs
It’s hard to get more simple and genuinely nutritious than good old eggs. But to make them a little more interesting, I make them into a cheesy scramble.
I just mix up my eggs with a little bit of milk, salt and pepper, then fry them either in coconut oil, butter or bacon fat in my cast iron pan.
Once they’re almost cooked, I turn the pan off to reduce the heat (cast iron pans retain their heat for quite a while still) and then sprinkle about a cup of cheddar cheese on top and let it rest for a few minutes as the eggs finish cooking and the cheese melts.
Then I use my spatula to divide it into pie-shaped pieces and dish it out. If they kids are especially hungry that morning, they can make themselves a piece of toast or grab some fresh fruit to go with it.
Total time: 13-15 minutes. 5 minutes to crack eggs and mix, 5 minutes to cook (pre-heat your pan while you’re cracking). I shred the cheese while they’re cooking, then let it sit about 3-5 minutes at the end for the cheese to melt.
I hope that gives you some fresh breakfast inspiration for those busy mornings!
Note from Ann: Stephanie this came at just the right time for me! We started the new school year with fresh breakfast ideas, but over the course of the year we got busy and started to get stuck eating mostly the same breakfast every morning or none at all per teenage kids (cough, cough, ahem), I’m glaring at them over the computer as I type �� New recipe ideas are just the thing to get us back on track especially now that testing and the end of year big projects are all underway. I can’t wait to have them try the Protein Rich Smoothie, how can they turn that down!
What do you do when you’re feeling out of ideas for meals or just run down?
Up Next:
Ann Timm considers herself blessed to be the wife of a Christ follower and mother to six amazingly cool kids. She strives to keep a happy, healthy home, although she openly admits to failing often. She loves to share her foibles and encourage other women on their journey to healthy living.


