Seven summers ago, my life became healthier all because of a tiny baby. I was pregnant with my first child, and as I researched how to take care of a baby, I found that so many of my habits and choices had been unhealthy. They were unhealthy for me, as an adult, and definitely unhealthy for any infant, toddler or child.
I did what any good mom would do – I started making changes:
I began to green my cleaning.
I dumped all my favorite (toxic!) personal care products and switched to safer brands.
I researched if I could and how I might be able to have a drug-free childbirth. (I quickly learned the unpredictability of childbirth, the need to give myself grace, and to make the best of what happened with my first and second childbirths.)
I took breastfeeding classes.
I looked into every variety of cloth diaper.
It might have taken nine months, but I finally was prepared for my baby – with a radically different life. The good news was that my changes weren’t painful to make; they were sensible. And once I adjusted my thinking and got used to them, they were completely normal.
Unfortunately, babies are born into a world full of toxins. Parents can protect their young ones from a lot of harm, though. To help you make healthy choices – and to create your own little baby-safe world (even if it’s only in your own home) – check out my past Accidentally Green posts:
Diapers
Medical
Safe and Simple Teething Remedies
Does Your Infant Suffer from Acid Reflux?
How to Remedy Infant Reflux
Baby products
Home
Childbirth
Breastfeeding
Becoming Your Own Breastfeeding Advocate
Breastfeeding’s Benefits to Babies
Breastfeeding’s Benefits to Mothers
Does Formula Fail Babies?
Recalling Formula’s Dangers
First foods
Pregnancy
Original article and pictures take accidentallygreen.com site
Create an Easy Lunch Packing Station for Under $10
This shop has been compensated by Collective Bias, Inc. and its advertiser. All opinions are mine alone. #HorizonLunch #CollectiveBias
Packing lunches can be such a hectic and time-consuming ordeal. My children always want to ‘help’ pack their lunches by choosing what goes in the cooler. While I love knowing that they are going to eat their lunch because they like what is packed, I don’t like repeating the lunch options 6 times over, or feeling like a bad guy when I don’t agree with their lunch choices.
To streamline lunch packing, while still giving my children some control, I created this easy, DIY Lunch Station for under 10 dollars!
Supplies:
6 shoebox size plastic containers
Markers and colored pencils
Clear mailing or packing tape
Directions:
Print out the label sheet and add some color. No need to stay in the lines, since you’ll be cutting the labels out!
Cut out the colored labels. Attach the labels to your plastic containers with a piece of clear tape. If you already have extra containers at home- use them! My white-topped containers were less than a dollar each at Walmart, while the blue container I had at home already.
Load the boxes up with lunch packing supplies and get ready for an easier way to pack lunches! When it’s time to pack lunch, I remove the Dairy and Veggie boxes from the fridge, and the other boxes from the pantry.
The children can pick one item from each box for a complete packed lunch. If we aren’t in a hurry, I will help them substitute a sandwich or tortilla wrap for the protein.
Need some ideas for filling the boxes?
Protein:
Granola bars
Peanut Butter Crackers
Dairy:
String cheese
yogurt
Fruit:
Fruit such as apples, bananas, and oranges
Horizon Squeeze Pouches
Applesauce packs
Fruit cups
Veggie:
Bag washed and cut fruit in snack size sandwich bags- celery and carrots are favorites here.
Small containers of peanut butter, humus, and ranch to choose from
Snack:
Chips
Cookies
Raisins
Crackers
Drink:
Horizon Kids Aseptic Milk Boxes – Isn’t the Peanuts movie packaging adorable? My family can’t wait for the upcoming The Peanuts Movie in theaters on Nov. 6th. You can also enter to win The Peanuts Movie Red Carpet Experience here.
Juice box
Bottled water
This easy lunch packing station, plus lots of choices means quick and painless lunch packing! Set set out the labeled and filled boxes, then allow your child to choose one item from each box.
We just discovered Horizon’s shelf stable milk and my children cannot get enough! Containing calcium, 8 grams of protein, and no high fructose corn syrup in each box, I feel great buying them for my kids. And the squeeze pouches also contain calcium and 5 grams of protein. Including these items in their lunch choices ensures they have plenty of energy to for whatever outing I have planned! Walmart will have demos for Horizon Squeeze Pouches between 11/5/2015 – 11/8/2015. See if one is scheduled at your local Walmart.
Don’t miss the Horizon Milk Boxes, in my Walmart they were on the baking isle with the milk alternatives such as coconut milk and almond milk. I almost missed them looking in my usual drink aisles!
This new lunch packing method cuts my lunch making time in half (at least) and since getting prepared the night before an outing has not been my strong suit lately, that’s important. No flustered mess of a Momma trying to throw lunch together and get out the door 5 minutes ago! My big kids can even independently pack their lunches (and help a younger sibling) without any direction from me at all. Maybe now I’ll actually leave for an outing with dry hair!
I hope this easy and inexpensive idea saves your lunch packing experience as much as it has mine! Check out other great lunch packing ideas here.
Original article and pictures take bigfamilyblessings.com site
When it comes to getting my kids to eat more green veggies, sometimes I feel like Sam-I-Am. You know the fuzzy little guy in the famous Dr. Seuss book.
I don’t know why most kids see anything green as a red alert. But alas, most kids do – mine included! And as much as I try to coax them into giving healthy greens a try, I’m often met with the same resistance that good ole Sam-I-Am experienced.
Of course, I haven’t tried offering them the opportunity to enjoy a meal with a mouse, fox or goat … but I have made it a point to continually offer a wide variety of veggies and to get my kids in the kitchen cooking with me, which has worked over time to open up their eyes to the fact that green things can be good! Surprise, surprise!
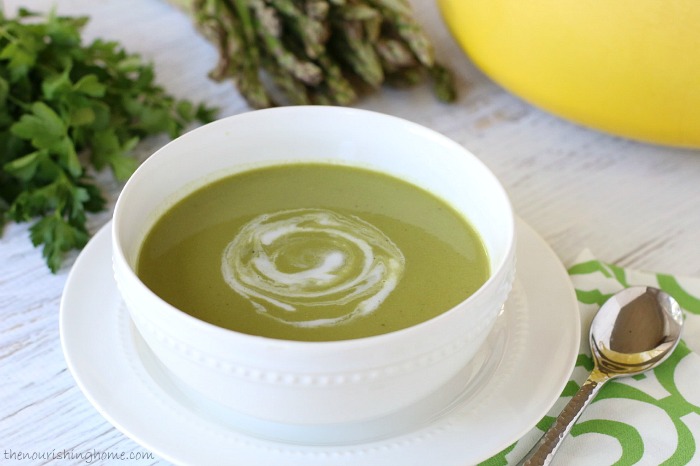
That’s where this soup comes in … it’s so incredibly simple to make and is just as incredibly delicious to eat. Those green-phobes out there just have to get past its verdant color and be adventurous enough give this tasty soup a try.
What makes this creamy, dairy-free Spring Greens Soup “Mmm, Mmm Good?”
The combination of fresh seasonal asparagus, baby spinach and flat leaf parsley gently simmered in homemade bone broth with just the right touch of seasonings not only makes this soup have standout flavor, but also provides a healthy dose of important nutrients, such as magnesium, iron, folate and vitamins A, C, E and K.
As delicious as this soup is, I must admit that some of the more obstinate green-haters in my family have yet to give this savory soup a try, but I don’t give up easily. I’ll stay the course and keep quoting the wise ole adage of Dr. Seuss … You do not like green soup you say. Try it! Try it! And you may! Try it and you may, I Say!
You Might Also Like:
Original article and pictures take thenourishinghome.com site
Creamy Coleslaw Recipe Creamy Coleslaw Recipe photo by Taste of Home
Place coleslaw mix in a large bowl. In a small bowl, combine the remaining ingredients; stir until blended. Pour over coleslaw mix and toss to coat. Refrigerate until serving. Yield: 6 servings.
Test Kitchen Tips
For a change of pace, try this recipe with broccoli slaw mix.
Greek yogurt can be used instead of sour cream for less fat and more protein.
If you like your coleslaw tart, add 1/4 cup vinegar or lemon juice or maybe even a julienned Granny Smith apple.
Creamy Carrot Ginger Puree {Homemade Baby Food in a Pouch}
It’s hard to believe that this photo was from a whole year ago, last night:
Homemade Carrot Baby Food - super simple and packed with nutrition because of one ingredient
Our Gabe is truly overflowing with joy, with more smiles that you can imagine every single day.
Just yesterday he climbed right into the lap of a stranger at Bible study and snuggled into her shoulder for 5 minutes, ready to fall asleep, then when we took a break and he was roused from his cuddle, he didn’t complain but smiled at everyone passing by on their way to the biscotti.
Happy birthday, little guy.
The year has truly flown, and I have to admit that for a foodie who likes to cook, this recipe today is the first recipe that I’ve made especially for my baby eater (other than baking a sweet potato).
Perhaps it’s because I recoil at the idea of being a short order cook. Or just that with four kids, ain’t nobody got time to make special homemade baby food purees anymore like I did with number one.
It turns out Gabe is a huge fan of the reusable food pouches we have from Squooshi, so I’m glad they sponsored this post and gave me an excuse to do something special for him!
“Food in a Pouch” Recipe
Homemade Carrot Baby Food - super simple and packed with nutrition because of one ingredient
It turns out that making recipes for food pouches isn’t really all that hard, and it didn’t take much time at all (especially if you don’t have to take photos of every step for your blog readers!).
Debra of Worth Cooking shared the idea with me to blend steamed carrots with yogurt, ginger, and a little salt. Here’s how it turned out:
Homemade Carrot Baby Food - super simple and packed with nutrition because of one ingredient Homemade Carrot Baby Food - super simple and packed with nutrition because of one ingredient
And here’s why it’s better to put it in a Squooshi, even though bowls are easier to wash:
Homemade Carrot Baby Food - super simple and packed with nutrition because of one ingredient
So proud of himself for getting his fingers into the bowl, the little photo shoot bomber…
Homemade Carrot Baby Food - super simple and packed with nutrition because of one ingredient
Creamy Carrot Ginger Puree
Homemade Carrot Baby Food - super simple and packed with nutrition because of one ingredient Homemade Carrot Baby Food - super simple and packed with nutrition because of one ingredient
Now I have all sorts of ideas for other food pouch baby food recipes that I could make following similar proportions:
Sweet potato/coconut milk/nutmeg
Cauliflower/yogurt/Herbs de Provence
Spinach/sour cream/garlic
Beet/coconut milk/dill
Turnip/yogurt/smoked paprika
Of course, add plenty of butter (or coconut oil) to each of them! The process is simple:
1. Steam Vegetable
Homemade Carrot Baby Food - super simple and packed with nutrition because of one ingredient
2. Puree with Something Creamy + a Flavor
Homemade Carrot Baby Food - super simple and packed with nutrition because of one ingredient
3. Fill Pouch
Homemade Carrot Baby Food - super simple and packed with nutrition because of one ingredient
It’s pretty cool and can fill 6 of the large 4.5-ounce Squooshis at a time:
Homemade Carrot Baby Food - super simple and packed with nutrition because of one ingredient
I made my puree in the blender, but you could use an immersion blender and whiz it up right in the filling station container (bonus! Fewer dishes!!). It’s quite easy to fill, but it does take some time because physics only allows so much puree to move through a hole 1/2 centimeter in diameter.
I can see assigning this job to a child, as long as they hold the pouch spout. The only messy risk is that the pouch could pop off and you lose a little puree onto the counter. With this very thick puree, not much came out when that happened to me, but I can see it being a problem if you’re working with a thin smoothie or something. I really like how you can see the puree coming through the spout so you know it’s working.
I generally resist having an entire item for a single use, but I will start storing my Squooshi pouches inside the fill station now, since my current basket in the drawer wasn’t the best system anyway.
Did you know Squooshis come with a full year replacement guarantee if they aren’t durable enough for your household use? We’ve had a set for at least 3 years now, and we have yet to have a single problem of any kind. We generally freeze smoothie in them for backups in a school lunch when we’re out of homemade yogurt.
If you are in the market to grab some, be sure to use the code KS10%OFF for 10% off HERE – and I see the filling station itself is $10 off already at the time of this post!
I’d love to hear how you’d fill your Squooshi reusable food pouches —
Pin It!
Disclosure: This post was sponsored by Squooshi and they sent products for my review, but my opinions (and my messes) are 100% my own. Original article and pictures take www.kitchenstewardship.com site
This healthy, make-ahead snack is kind of a no-brainer, and not really a recipe at all. But it’s still worth mentioning as we focus on getting ahead with healthy snacks. Why? Because there’s chocolate in it. Obviously. And also because it’s easy and good for you and all that other stuff.
Last week, I mixed up a big bowl of Cranberry Nut Trail Mix with items we had on hand. Then, I scooped it into individual grab-and-go baggies. Don’t like the dried fruit and nut options I mention below? No biggie – just use what you have and what you like. No matter what, you’ll be putting together a healthy snack. (Unless you add candy corns or m&ms, c’mon.)
And have you purchased bagged trail mix? Talk about pricey! They can’t help but be. Ingredients like nuts and dried fruit can be expensive. Therefore, I’ve decided that I don’t need to pay someone to stir my ingredients and put them into a bag for me. I can do that myself thankyouverymuch and save some bucks while I’m at it. (I buy my nuts in bulk at Braga Farms.)
So here you go – Cranberry Nut Trail Mix, the recipe. Which isn’t a recipe. Far be it for me to tell you how nutty you should be on any given day.
Cranberry Nut Trail Mix
1
Almonds
Cashews
Dried Cranberries
Golden Raisins
Dark Chocolate Chips
Stir any combination of the ingredients together in a bowl. Store in an airtight container (like a jar!), or scoop mixture into individual baggies for grab-and-go snacks.
What other trail mix combinations do you like?
Original article and pictures take heavenlyhomemakers.com site
Yield – 18 regular sized muffins, or 12 regular sized muffins plus 12 mini muffins
Preparation Time – 10 minutes
Cooking Time – Regular sized muffins: 16-18 minutes. Mini muffins: 13-15 minutes.
Ingredients
4 eggs
1/2 cup sugar
1/2 cup applesauce
4 Tbsp canola or vegetable oil
1/4 cup milk
1 cup white flour
1 cup wheat flour
1 tsp baking soda
2 tsp cinnamon
1/2 tsp salt
1 medium Jonathon or Macintosh apple, peeled, cored and finely chopped
1/2 tsp cinnamon
1 Tbsp brown sugar
1 cup chopped walnuts (optional)
Directions
Preheat oven to 350 F. Grease 12 muffin tin wells and 12 mini muffin wells, or 18 regular size muffin tin wells.
In stand mixer or large mixing bowl, whisk eggs, sugar, applesauce, oil and milk.
In small mixing bowl, combine white flour, wheat flour, baking powder, baking soda, cinnamon and salt. Add to the wet ingredients in the mixer/mixing bowl and combine until batter forms.
In another small bowl, stir together cranberries, finely chopped apples, cinnamon and brown sugar. Fold the cranberries and apples into the batter.
Bake in preheated oven, using these time frames: Regular sized muffins for 16-18 minutes. Or mini muffins for 13-15 minutes.
**Note: If you don’t use all the wells in your muffin tin, just fill them with water so they don’t brown. Plus the water creates a nice steamy environment in the oven! Enjoy!
FREE DOWNLOAD! Get the Recipes for Eight 20-Minute Meals That Will Help You Survive Chaotic & Busy Weeknights! Register Now!
Original article and pictures take 344apz3bh6di1m0sag1etg3fxyz.wpengine.netdna-cdn.com site
Last week, I woke up to find my 4-year-old lying on the couch, coughing. Ah, a summer cold.
Some mulleintea and a probiotic later, and he was off and playing. It reminded me, though, that fall is coming, and that colds will be more common. I’m hoping to protect my family against most colds this winter, but I’m sure we’ll still get one or two. In that case, I need to be prepared with this simple cough-away tincture.
Tinctures generally take 6 weeks to make, so I’m starting mine now. (I’m also starting this teething tincture, since my new baby is an unbelievable 6 weeks old already, and he might need it by the time it’s done!)
The cough-away tincture is super quick to put together, and it’s filled with herbs to help with respiratory ailments. They’re some of my favorites, and they help my family quickly!
Cough Away Tincture
This tincture combines mullein, echinacea, elderberry, and marshmallow root. There are tons of other herbs you could include, like wild cherry bark, slippery elm root, colt’s foot, Oregon grape root, astragalus, and more. But these are the most basic ones, and the ones that work best for most people.
Mullein is known to help respiratory illnesses, including coughs, colds, flu, bronchitis, and more. Elderberry has been shown to be effective at shortening the duration of the flu, and may benefit colds as well. Echinacea is a general immune booster and may shorten the duration of colds. Marshmallow root is a “slippery” sort of herb that helps to coat the throat, reducing sore throat and coughs.
I promise this is easy…and little kids can take it too.
Step 3: Put a lid on the jar and shake to combine.
Step 4: Place the jar in a cool, dark place for 6 weeks. Shake occasionally.
Step 5: Strain through a piece of cloth, discarding the herbs and retaining the liquid. Store in a dark brown glass bottle with a dropper.
To make the “cough away” work, give 5 – 10 drops for kids under 6, or 10 – 20 drops for older kids and adults as needed. We like to mix tinctures with a bit of juice to make them easier to take. I also give cod liver oil and probiotics both preventatively, and extra if we are sick. This combination, plus extra rest and detox baths, works fast. Often we feel “okay” within a few hours, and symptoms are gone in a day or two!
What’s your go-to remedy for coughs and colds?
Original article and pictures take modernalternativehealth.com site
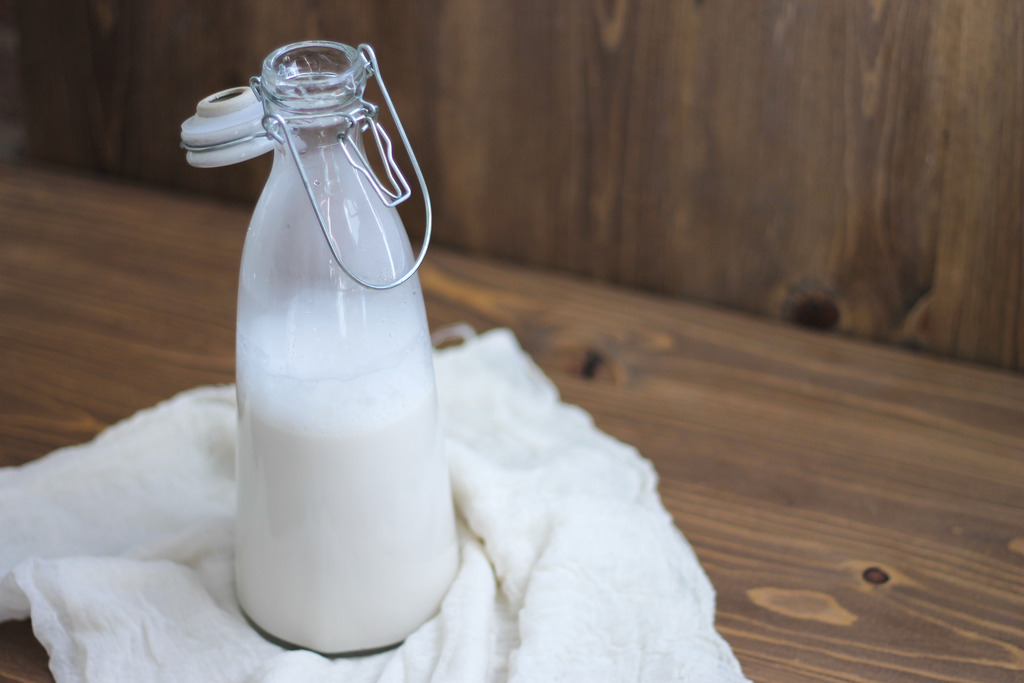
This month’s Recipe Redux theme is “DIY Kitchen Essentials.” Bloggers were asked to share recipes for items they used to purchase but now make themselves. I am a big fan of making my own nut milks as most store-bought varieties don’t taste as good, in my opinion. Most commercially-produced nut milks contain stabilizers to help extend shelf life, and when you make your own, you’ll notice shelf life is significantly shortened – homemade nut milks only last a few days in the fridge. Chances are it won’t last that long anyways!
This coconut-almond milk is particularly delicious served over granola, cereal-style. I also use it frequently in my Protein Power Smoothie. Make this recipe part of your pre-week meal prep and enjoy!
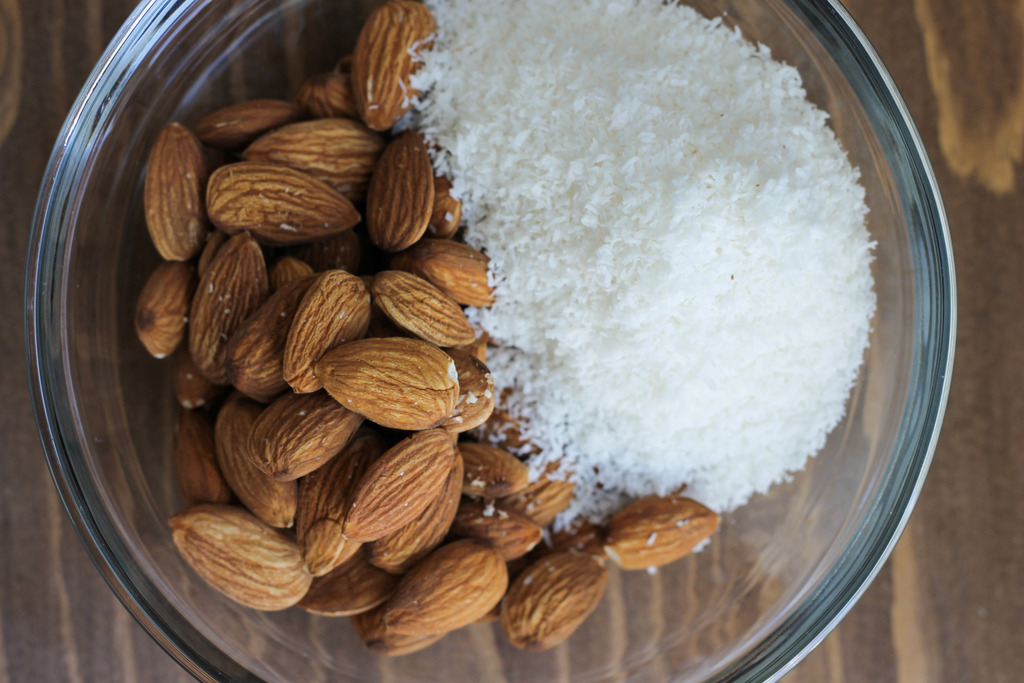
Combine the almonds, coconut, and salt in a high-speed blender and carefully pour in the hot water. Let the ingredients steep together for 10 minutes.
Put the lid on the blender, cover with a dish towel, and hold the lid down as you run the blender on high speed for 30 seconds. Leave the mixture to steep for an additional 10 minutes.
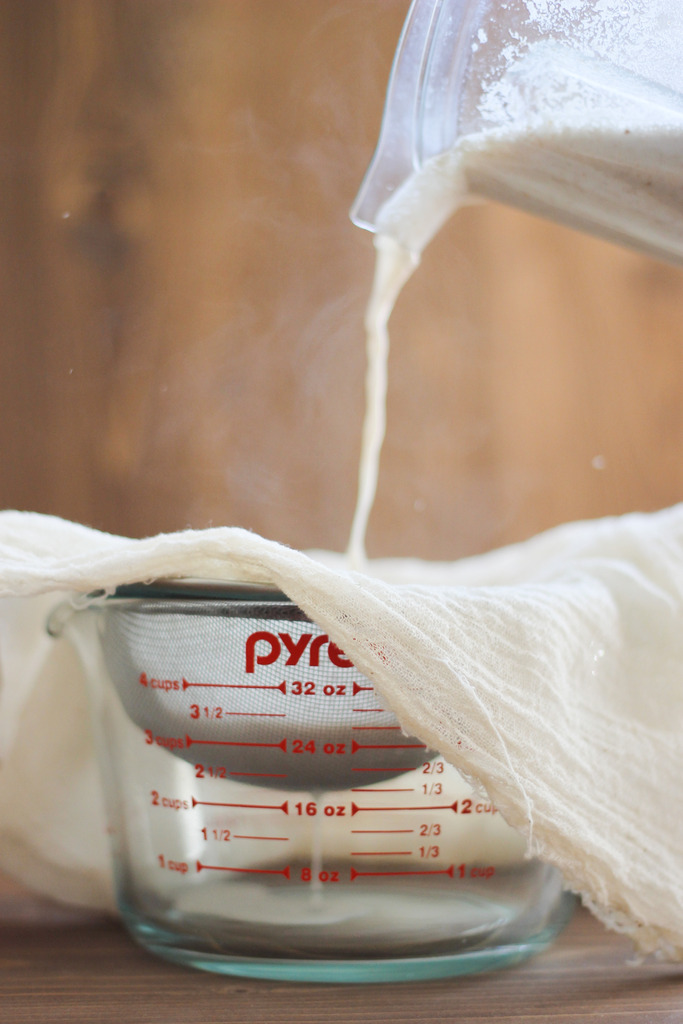
Position a fine mesh sieve over a bowl and pour the nut milk through. You can strain the milk more thoroughly if you choose to line the sieve with cheesecloth, but it's quite delicious if left slightly thick. I'd recommend using no more than 1 layer of cheesecloth. Cool completely before transferring to a bottle or mason jar with a tight-fitting lid. Refrigerate up to 4 days.
SR Clients: Almond milk is not nutrient-dense enough to be used as a part of the meal plan. One would need to drink 3-4 cups of almond milk to get the same nutrition as 12 oz. 2% or soy milk. Enjoy almond milk if you prefer the taste, but double up on juice or another meal plan component to complete the meal nutritionally.
Original article and pictures take www.strongrootsnutrition.com site