If you’ve ever been discouraged with potty training, you have to check out child-led potty training. This is a stress-free, laid-back approach to toilet learning! Hang in there, Mama. There is a light at the end of the potty training tunnel!
It’s been often said that your child won’t go to kindergarten in diapers, and, for most of us, that is true.
But when you’re knee-deep in pee, poop, and tears, and your child will still not use the potty, it’s easy to think they will never learn how to use the toilet.
So when my second child came along, I went back to the drawing board. Clearly, none of the methods I tried with my firstborn had worked, so I decided that this time around I wouldn’t push potty training at all.
Yes, you read that right: I would let her train herself.
It occurred to me one day that I believe strongly in baby-led weaning from the breast. Why would it be any different with potty training? Why would I want to push my girls into doing something before they were ready for it?
Although she was not quite as late of a trainer as my firstborn (who ended up training at 4 years and 2 months), my second child learned to use the potty at older than the norm–3 years and 4 months–but she did it herself.
She woke up one day and started using the potty. For about a week she worked on it, and I encouraged her. She had several accidents, but at the end of that week, she was potty trained.
My 3rd daughter just did the same–at 2 years and 9 months. Her training came overnight. She woke up one morning and said she was ready.
This is not considered anything extraordinary. Plenty of children are potty trained at a much younger age.
But guess what? She did it all by herself as well, and it equated to a stress-free, laid-back toilet learning experience for the entire family.
When I wrote about our potty training yesterday, a lot of moms (especially on Facebook) commented that they feel embarrassed when their children have trained later than age 2 when so many other moms are training their children at a younger age.
My thoughts? Who cares what the mom down the street is doing! Each child and each mother are unique, and I believe different training methods work better for different personalties.
The laid-back approach has been best for our family.
Where I went wrong with potty training our firstborn
Although she did have undiagnosed food sensitivities that I do believe played some part in her delayed potty training, one major mistake we made with potty training our firstborn was that we simply started too early.
As soon as she turned two, we started pushing the potty. It seemed to be what everyone else was doing, so why wouldn’t we do it as well?
But there was one big roadblock: She was not ready.
And her personality does not do well with pushing.
The more we tried to force her to potty train, the more she resisted.
Tips for Child-Led Potty Training
Yes, our second and third children did potty train themselves, but there are certain things we did to set them up for success.
1. Talk about going potty–a LOT.
While we never put any pressure on our second or third children to use the potty, we made it a part of our everyday conversations.
Starting at around age 2 1/2, each time I changed their diapers, I would say things like: “You know you can go potty one day!” or “You can go pee and poop in a potty like your sisters whenever you want!” or “You can put your poop in the potty and it won’t feel so messy.”
I always said these things in an encouraging tone, and when the girls would say: “No! I don’t want to go potty!” (which they would say sometimes!), I just laughed and said: “Ok! You don’t have to! It’s OK. You can stay in diapers for as long as you like.”
2. Let them see you and their older siblings go potty.
I don’t know about your kids, but mine love to follow me into the bathroom. Hopefully, the day will come when I can get some bathroom privacy again, but, for now, watching me use the toilet has helped my girls learn that sitting on the potty is a normal part of life.
When I sat on the toilet or when they saw their big sister sit on it, I would also initiate light conversation, saying things like: “You will go on the potty like Mommy and Big Sister one day! One day you will get to wear big girl panties, too! You get to decide when!”
3. Wait. Yes, wait.
There is no rushing with child-led potty training. You must exercise patience.
The whole point is that your child will train when he or she is ready–not when Mommy is ready.
It might be hard to keep buying diapers when your friends’ kids are in panties, but I guarantee that you will eliminate so much stress and experience fewer messes if you can just wait until your child is ready enough to initiate the potty training process.
(And if you want to eliminate the expense of diapers altogether, try cloth diapers! They really aren’t that scary!)
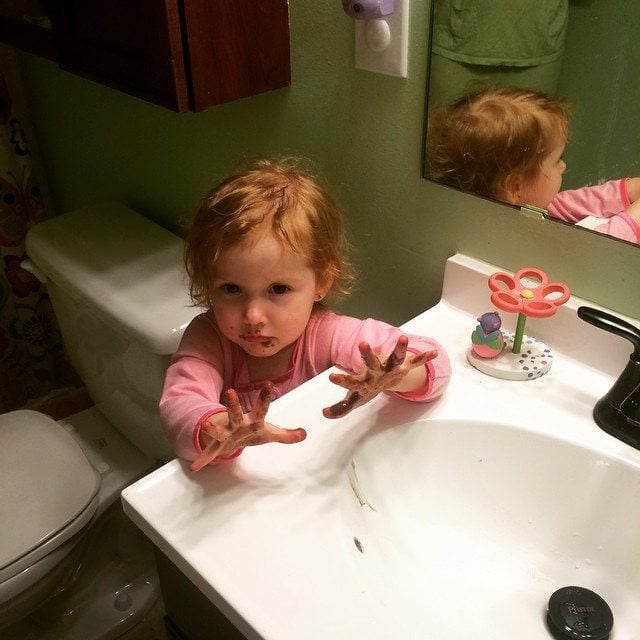
That is not poop. It’s chocolate. It’s the best picture I had.
4. Ask your child if he or she wants to use the potty. But don’t push.
5. Encourage them.
When I had such a hard time potty training my firstborn, several people suggested I spank her. I could never bring myself to do that. In fact, I do not believe in disciplining in this way for potty training.
Instead of giving my girls negative feedback when they’ve had accidents, I made no big deal of the accidents and, instead, showered them with “It’s OK! We will try again! Let’s go find some new panties!” encouragement and praise for when they made it through a day dry.
What about potty training tools? Don’t waste your money!
I don’t even want to know how much money we spend on potty training tools with our firstborn: We bought two potty seats–one for upstairs and one for downstairs. We then ended up buying the potty seat attachments that go on top of the adult toilet.
We bought a travel potty. We bought stickers. We bought a sticker chart.
Although we did keep these things around for our second child, I realized that we really didn’t need them.
I am now convinced that if your child is truly ready to use the potty, these extras just aren’t necessary!
So I got rid of them when our third was still a baby.
When she was ready to train, she hopped up on the regular toilet and did it. There was no emptying poop from a child’s potty chair into the regular toilet.
It was absolutely mess-free. (And I spent hours and hours scrubbing accidents from the carpet my first go-around!)
The only potty training tools we kept around were some storybooks that we would start reading every once in a while once our girls turned two.
We actually kept these books in the bathroom, so I could read them to the girls while I was using the toilet.
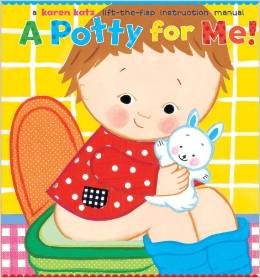
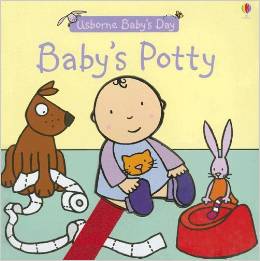
Now, they can “read” them to themselves! The only three books we have used and love are:
I think I have this one memorized. We’ve used it with all three girls. The child in the story actually has an accident, but the mom makes no big deal out of it! Three cheers for child-led potty training!
My mom bought this one for our 3rd on her second birthday. The panties the princess is wearing feel like real panties, so that makes it extra fun for little girls who are learning.
This is another one we have used with all three girls. You can actually move the potty seat around from page to page, and the storyline asks the question of “what is a potty for?” It’s a really cute read.
I hope that these tips will help you see a light at the end of the potty training tunnel and encourage you to give child-led potty training a try!
Have you ever tried child-led potty training? What are your tips for stress-free, laid-back toilet learning?
Don’t miss these other encouraging posts for the potty training mama:
Tired of spending money on diapers but have a child who’s not quite ready for potty training?
This cherry mango anti-inflammatory smoothie is a healthy and beautiful way to start the day!
Cherry mania is going on full force over here these days…I can’t stop buying them! My favorite thing to do right now is to pit them, and then freeze them to use in smoothies.
Well, about that…the other day I was merrily drinking a smoothie that I had made and I sucked up some pieces of pit through my straw. I guess a pit or two remained inside the cherries I had pitted, and my blender was strong enough to grind them up. I actually wound up calling poison control (Over a smoothie! Lol! Right?) and found out that the amount of cherry pit pieces was not enough to cause any harm. But they did tell me to throw the smoothie out. So always make sure you double-check for pits!
I love including sweet cherries in my smoothies because they have been shown to help with sleep, as they contain melatonin, and they also can help reduce inflammation. Mangoes are great for strengthening your immune system as they are high in vitamins A and C, and they are also full of antioxidants that help prevent cancer.
Cherries + mangoes = one healthy, delicious, anti-inflammatory smoothie! Of course you can just blend everything up together if you wish, I just separated it because it looks prettier.
Print
Have you ever had to call poison control over a recipe?
With each of my kids, the biggest thing I worried about in terms of having a baby wasn’t the actual childbirth part. Sure, that watermelon is supposed to fit through a hole the size of a golf ball, but no big deal! I’ve got that! The part I was the most worried about was having…
This post contains affiliate links. Toddlers are notorious for being rambunctious, wild, monsters, and if the thought of one ever sitting still seems laughable to you, you’re not alone. Trying to get your toddler to sit still and be quiet can be quite a task. And believe me, there are definitely some situations where you…
This post contains affiliate links. Cold and flu season is in full swing, and we have not been very fortunate this year. We’ve been on a vicious cycle of passing colds around the entire family, getting better, and then having it start all over again. But with a husband who works with sick people all…
Happy New Year! You may have noticed that I took two weeks off at the end of last month (at least I hope you did!). I love blogging, but it’s sometimes hard for me to separate my work life from my personal life, and I just needed to take some time off! It was super…
Hey mamas! Welcome to the fifth post in my Honest Birth series! I’m excited to share another real mama’s birth story, because I think it’s so important to share our childbirth experiences with each other. My goal with this series is to provide a place for women to share their birth stories without holding anything…
I received complimentary LEGOLAND California tickets in exchange for this post. This post also contains affiliate links. Last month we had the chance to visit LEGOLAND California as a family for the very first time! Our four-year-old is LEGO obsessed, and he had so much fun the whole day we were there. He was so…
My daughter’s sweet tooth is well-developed (read: if it has sugar in it, she will eat it). While I admire her unwavering dedication to knowing what she likes, her pursuit of the sweet stuff can be a bit “challenging for Mommy”. (read: daily fights over why endless consumption of lollipops is a no-go). My son is the exact opposite; he rarely, if ever, eats dessert or candy. (I have a strong suspicion that he is not actually my child).
Despite my repetitive effort to sneak protein, fiber, and other good stuff into my daughter’s diet while sneaking out the treats, there is another challenge her sugar crush presents: keeping her teeth healthy.
All those sweets can take a quick toll on young teeth. OTCSafety is super about keeping us parents in the loop about important wellness issues, and with their promotion of February’s National Children’s Dental Health Month, this is a great time to make sure you are properly caring for the little mouths in your home. Did you know that over 50% of children will have some tooth decay by age 5? Oral infection is the leading chronic disease in kids.
While I want my little gal to enjoy her treats in moderation (she is so excited about her Valentines candy from her party at preschool!), caring for her teeth is no joke!
How can I make sure I am doing a good job? Know the facts:
· Fluoride is an anti-cavity active ingredient available in over-the-counter (OTC) products that helps prevent tooth decay and cavities.
· Fluoride-containing products are typically not recommended for children under the age of 2.
· Children under the age of 6 should use a pea-sized amount of paste or gel to minimize swallowing.
· Children under the age of 6 should be supervised in order to develop good brushing and rinsing habits and to minimize product swallowing.
And the value of us setting a good example for our kids and teaching them how to brush properly cannot be overstated. For more information on proper oral care, check out this article.
With my kids, I try to make it seem fun (“Ooh, kids! We get to go to the dentist today!”). This won’t work as well as they get older, but for now? Dental care has somehow become cool.
My daughter’s preschool recently celebrated National Children’s Dental Health Month, having a dentist come in to chat and play games with the kids. I can’t tell you how excited my daughter was to come home and show me her toothpaste sticker!
And the toothbrush. AND THE TOOTHBRUSH.
It is orange.
We have discussed it for hours.
We have taken pictures with it.
We have called Grandpa and told him about it.
I’m thinking I may need to frame it when it has worn out.
The orange toothbrush has conveniently become the great love of my daughter’s 3 yr. old life. This makes brushing time a whole lot easier. But hey, even if you are lacking in the orange toothbrush department, you can figure this out. Let them pick out a fun toothbrush at the grocery store, put stickers on the toothpaste tube, sing a silly song whenever it’s time to brush…do whatever it takes, because it matters.
Just don’t bribe your kids with candy. My daughter would probably tackle them in an effort to steal it away anyway
****I am compensated as an OTCsafety blogging ambassador for this post, but my opinion are my own.****
Meredith blogs at The Mom of the Year, where she dedicatedly earns her title one epic parenting fail at a time, offering quick, relatable laughs for fellow parents and all their empathizers. She has been part of several best-selling anthologies, featured on prominent sites such as Huffington Post, In the Powder Room and BlogHer, and loves her role as the Executive VP/Operations Manager of The BlogU Conference. When she's not breaking up fights over Legos and juice boxes, she remains fully committed to sharing a less serious look at the world of parenting.
Original article and pictures take www.themomoftheyear.net site
For years and years and years (give or take a year or two), I’ve been wanting to find a good Caramel Popcorn recipe that did not contain corn syrup. The recipes I found that didn’t contain corn syrup were either complicated, or they contained other ingredients beyond corn syrup that I didn’t feel comfortable feeding my family.
But just leave it to you all to solve my Caramel Popcorn dilemma. A big thanks goes out to everyone who suggested that this new Caramel Sauce recipe might be able to be used on popcorn. Over the weekend, I decided to give it a try. I figured the outcome may not be blog-worthy, but surely my family would eat it regardless of whether it was great or not. My men are always so good to eat my experiments. Especially if it’s an experiment with Caramel Sauce on top.
This got rave reviews, which came, as you can imagine, while they were chewing. Since they were saying such nice things to me about my cooking, I lovingly allowed them to talk with their mouths full. Far be it from me to scold my popcorn munching children when they are in the middle of boosting my ego.
Caramel Popcorn
Pop 1 cup of popcorn and put it into two 8x13 inch baking dishes.
Stir together the caramel sauce ingredients, stirring in ½ teaspoon of sea salt.
Drizzle the caramel sauce over the popcorn.
Stir the caramel sauce all around the popcorn the best you can without making too many popcorny messes.
Bake in a 250° for 10 minutes, then stir the popcorn.
Bake for an additional 10 minutes.
Remove Caramel Corn from oven and serve.
If there is any left after you feed this to your family, package some up to give as gifts. Yep, people everywhere will be talking with their mouths full. It’ll be a beautiful, Christmas moment.
Original article and pictures take heavenlyhomemakers.com site
It’s been awhile since I shared any free printables, and since we are reading The Lion, The Witch, and The Wardrobe again over here, I thought I would share some of my favorite C.S. Lewis quotes in printable form.
Buying, Storing and Passing Along Children’s Clothes
Before I became a mom, I never imagined the sheer volume of clothing one child could accumulate.
I’ve discovered the clothing collection seems to be caused by three different issues:
1. Children are always growing – what fits them one week may not fit them the next. (I promise. I’ve witnessed this phenomenon.)
2. Different brands of children’s clothes are sized differently. Because of this, more clothes are in my family’s drawers and closets than logically should be.
Since my children were newborns, I’ve always had a variety of sizes of clothes washed and ready for them to wear. For example, right now my son’s drawers are filled with clothes is sizes 4, 5, 6, and 7 – and he fits into all of them.
3. As a bargain shopper, I love to stock up on clothing for my kids when I find a great deal. When I’m at a thrift store and discover a pair of boys’ jeans that barely look like they’ve been worn (don’t most boys wear holes in their jeans??) or a charming dress for my daughter, I buy them – it doesn’t matter if the clothes are in my kids’ current sizes or three to five sizes too big.
When my bargains are in sizes that are too big, I store them in our basement so I have a reserve for unpredictable growth spurts. While it’s incredibly handy to have a variety of sizes on hand, it also leads to the clothing accumulation predicament.
(For my thrifty ways, I’m more than willing to store clothes. I’d much rather spend $5 on a brand new, off-season winter coat than a $50 brand new, in-season one.)
Passing along clothing
Since my husband and I are fairly confident that we won’t be adding to our family any time soon (if ever), I don’t want to keep hoarding children’s clothes once our school-age children outgrow them. There comes a time for every family to part with baby belongings.
I reached my farewell to baby clothes a few years ago before a major move. I kept a very few outfits that I adored – for the sake of memories and the very off chance that we’ll have any more children – and I got rid of the rest.
How do I typically get rid of children’s clothing?
Depending on the clothes:
I give them away to friends, family members or local charities.
I sell them at an annual garage sale or a local consignment shop.
What do you do when buying, storing and passing along children’s clothes?
Original article and pictures take accidentallygreen.org site
As my blog was sneaking up on the day of its 10-Year Anniversary, I was putting the final touches on my book. Meanwhile, my friend Charlene was dreaming of some fabulous ideas.
See, Charlene’s the one who came up the idea of this blog in the first place. She helped me name it, helped me set it up, and spent hours and hours and hours teaching and guiding me in the beginning. She has been a part of Heavenly Homemakers since before it launched and continues to help me any time I call on her. She’s an amazing designer and creator and idea-thinker-upper.
And so, when she sent this to my inbox and said, “What do you think?” I jumped out of my chair and landed on the ceiling and haven’t come back down since.
Tone, firm and round your lower body with this butt and thigh workout for women. 10 exercises that will thoroughly engage your glutes and thighs for an effective burnout style routine!
Repeat this circuit 3 times and rest for 60 seconds between sets.
1. High knees: 60 seconds. Bring your knees up to waist level and then slowly land on the balls of your feet.
2. Front and back lunges: 30 seconds + 30 seconds. Stand with your feet hip-width apart, take a step forward with your right leg and slowly bend both knees. Stand back up, take a step back with your right leg and lunge. Repeat for 30 seconds and then switch legs.
3. Back leg lifts: 30 seconds + 30 seconds. Start on all fours and extend one leg behind you. Lift the leg to hip level and then slowly lower it back down.
4. Quick feet: 45 seconds. Start in an athletic position with your feet shoulder-width apart and your hips low. Run in place quickly and push through the balls of your feet.
5. Romanian deadlift: 45 seconds. Hold a dumbbell in each hand, keep your legs straight or only slightly bent and, as you lower the dumbbells, push your hips back.
6. Sumo squat: 45 seconds. Stand with your feet in a wide stance and your toes pointing out to the sides. Bend your knees, press your hips back and, once your thighs are parallel to the floor, come back up and repeat.
7. Side lunge: 30 seconds + 30 seconds. Start with your feet hip-width apart, step out to the side with your right leg and transfer your weight to that leg. Use your left foot to push you back to the starting position, repeat for 30 seconds and switch legs.
8. Heisman: 45 seconds. Stand with your knees slightly bent, jump onto your right foot and pull your left knee up and toward your right shoulder. Jump onto your left foot and pull your right knee up and toward your left shoulder. Keep jumping between feet until the set is complete.
9. Hamstring curls: 45 seconds. Lie on your stomach with your legs fully extended, chest up and your hands under your chest. Bend your knees, curl your legs up and squeeze the glutes.
10. Step up with knee raise: 30 seconds + 30 seconds. Place a box or a step in front of you and stand up straight. Step onto the box with your left leg and drive your right knee up. Step down, repeat for 30 seconds and switch legs.
Does your family get sick with colds and flu and fevers over and over again during the fall and winter? In order to stay healthy, it is beneficial to build up your immune system. Here are some well researched, tried and true ways our family has found that will help your family get well and stay well.
If you purchase anything using these links, I will earn a little money to help my family and keep my blog going, and it will cost you nothing extra!
VITAMIN D3
Vitamin D3 is vital as both a preventative and treatment for disease. The chief source of D3 is the sun. During the summer, if you spend 20 minutes in the direct sun at midday each day, without sunscreen, and with your sleeves rolled up, your body will have sufficient D3 to help keep you healthy. In the northern hemisphere, sunshine is virtually useless for vitamin D transfer once fall has begun, due to the sun’s rays being too indirect to be of benefit. This may explain why so many get ill in the fall and winter months.
Every cell in your body needs vitamin D3, and when the sun is NOT direct, which is all throughout the fall and winter, you must replenish it in your body through supplements. For years the recommended daily allowance has been around 400-600 iu of vitamin D3 per day. This is not enough to keep your immune system strong, and fight off colds, flu. arthritis, diabetes, cancer (especially breast cancer,) heart disease and the inflammation that is the root cause of so many serious diseases. The correct daily dose of vitamin D for adults is about 5,000 IU/day. Studies show that children who take 1,200IU daily will have 50% less chance of getting the flu.
MAGNESIUM:
Every cell also needs magnesium. Most people are deficient in magnesium. It helps prevent thyroid problems, enhances insulin secretion, which facilitates carbohydrate or sugar metabolism, cuts the risk of heart disease and stroke, helps prevent insomnia, aids in bone health, is believed to cut the risk of colon cancer, can help prevent migraines, and more. Take 500mg of magnesium or more every day. If your intestinal system cannot handle oral magnesium, you might want to try magnesium oil or lotion.
VITAMIN C:
Take Vitamin C, Airborne or Emergen C before you get sick. Most are aware that Vitamin C has been shown to help prevent colds, but it also has been known to fight cancer, lower the risk of heart diseases and stroke, regulates sugar levels in diabetics, helps in reducing arthritis symptoms, and so much more.
REGULATE YOUR BODY’S PH LEVELS:
Drink lots of fluids EVERY DAY make some lemonade to drink in the morning, or throughout the day. If you add a little baking soda to it, you’ll help alkalize your body. Our bodies need to be in an alkaline state in order to fight off inflammation, which is the cause of most diseases, with arthritis being the most obvious. For many years I have taken coral calcium every day, in order to maintain an alkaline ph. Taking magnesium, will help the body’s ph level as well.
Seven to eight hours of sleep each night seems to be the target amount of healthy sleep, with seven hours being optimum. My Daddy was a general practitioner. He believed that sleep was the great healer. He was a missionary doctor in West Africa and often instructed his orderlies at the hospital to let his patients sleep rather than awaken them to take medicine. If you can’t manage seven to eight hours of sleep each night, try to lay there for at least seven hours, or take naps. If your body wants to nap, do your best to fit one in. Without sufficient sleep, there is a greater likelihood of getting sick, of obesity, increased risk of diabetes, heart problems, and even depression. Please also realize that if you are currently healthy, it is can also be dangerous for an adult to sleep nine hours or more a night.
TAKE A GOOD PROBIOTIC:
Probiotics help keep bad bacteria from multiplying. They will help take control of your gut and help get rid of the bad bacteria that are in the small intestine before they take hold and cause harm. A study published by the National Institute of Health showed that healthy kids from 1 through 6 who drank probiotic milk had significantly fewer colds.” It would make sense that taking those probiotics in other natural ways, like yogurt, would also help.
EAT NUTRITIOUS REAL FOOD:
Avoid processed food as much as you are able. Technically this means anything with a list of chemical ingredients. These can be harmful to the body. Here is a partial list of those deemed most dangerous. MSG and its derivatives, high fructose corn syrup, artificial sweeteners, hydrogenated fats, food colors, sodium sulfites, potassium bromate, sulfur dioxide, BHA and BHT, should all be avoided. AND stay away from sugar (even the real cane stuff.)
The most nutritious food is in the perimeter (outer edge) of your supermarket. This is where you will find the real foods: fruits, vegetables, milk, eggs, butter, cheese, beef, turkey, chicken, and fish.
SOME BASIC REMINDERS TO HELP YOU STAY WELL:
Use those wipes at the entrances of stores to wipe off the cart handles – and keep a bottle of hand sanitizer handy – in your purse or car. We have a huge bottle at the back of our church sanctuary for folks to use as needed. One man in our church, who is a beef company executive, will often bump elbows rather than shake hands – in order to avoid transmitting illnesses or bacteria. It has become standard practice at their company.
DO NOT GET THE FLU VACCINE: Though getting the vaccine seems the logical and correct thing to do, and there are signs in every pharmacy to “get your flu shot here,” there is little proof that it helps. One reason is that it is always a best guess as to what the actual flu strain will be for any specific year, and it cannot protect against any other strain than the one contained in that particular vaccine. There is much information that it can actually cause significantly more upper respiratory illnesses and flu than those that are not vaccinated.
Consider avoiding situations where germs are rampant. If I’m walking down an aisle in the store where someone is coughing or sneezing, I turn around and walk the other way. Day care centers are notorious for transmitting illnesses from one child to another. If you need to put your child into someone else’s care, consider a home rather than a large business. If your child is exhibiting signs of illness, keep them home from school or daycare. You hate it when others bring their sick ones to school, don’t do it yourself. If you are starting to feel sick – especially if you have a fever – stay home.
IF YOU ARE STARTING TO GET SICK:
Keep following all the preventatives listed above.
* When you start to come down with the flu or a cold, meet it head on. Try using essential oils – a combination of lemon, peppermint and lavender can act as a natural form of antihistamine. Diffused, or massaged into the palm of the hand where it can be breathed in. Essential oils are like food, and need to be repeated every few hours to feed our bodies. Even a simple generic antihistamines can stop nasal drainage so that it doesn’t go into the chest. Our Doctor Daddy, always started us on antihistamines when we showed cold or respiratory (flu) symptoms. It often helped keep our family from getting sicker. Always remember to drink lots of water. This acts as a natural antihistamine, because it downgrades the productions of histamines.
Be wary of continually taking diphenhydramine (Benadryl) or chlorpheniramine maleate (Chlortrimeton,) because there is evidence that, taking it continually, can result in temporary memory loss. The good news is that this is reversible. Diphenhydramine is also an ingredient in many sleep aids. If you need a regular antihistamine, change to one like loratadine (Claritin).
* Sometimes Echinacea can be of benefit at the start of a cold or flu as well. A word of warning: those who have grass or ragweed allergies could have an allergic reaction to Echinacea.
* Take megadoses of Vitamin D3. Doctors recommend 50,000 iu of vitamin D3 every day. You can split it up morning and evening, for the first 3 days, at the first sign of flu or cold.
* If you a getting a lot of phlegm, be sure and take Goldenseal, Mucinex or a generic of it. Keeping mucous out of your lungs can help keep a cold from turning into bronchitis or even pneumonia.
* You can also take some natural antibiotics like Colloidal silver that may cost more at the start, but a little goes a long way and they are very effective, against both viruses and infections. Owning a colloidal silver generator to make your own can be very cost saving. Garlic and Goldenseal are less expensive antibiotics and they will also help greatly. Oregano oil is one of the best natural fighters of infections and flu. If you don’t like the taste or smell, try rubbing it on your feet. Buy good quality oils like doTERRA through my link.
* Make a good bone broth. There really is something to the saying that eating chicken soup will help you when you are sick. Don’t forget to drink lots of fluids too.
Get lots of sleep, AND stay home!
Disclaimer: I am not a trained dietitian, nutritionist, chef, or doctor. The information on this blog is based on facts, my research, and my personal experiences. This information is not intended to diagnose, prevent, treat or cure any disease. Please follow the advice of your doctor. Marjie Briggs
Original article and pictures take homeagainjiggetyjig.com site


![9038-superman-superman-flying-181x300[1]](http://homeagainjiggetyjig.com/wp/wp-content/uploads/2014/10/9038-superman-superman-flying-181x3001.jpg)