How to DIY~ Spill-Proof Mason Jar Lid with Straw Holder
How to DIY~ Spill-Proof Mason Jar Lid with Straw Holder
We like to use glass mason jars for our beverages. One, because I don’t use plastic, and two, we have a lot of them, and three, if the kids accidentally broke one of them, it wouldn’t be as “tragic” as they are easily replaceable. The biggest issue left was the fact that they were a bit hard for the kids to drink out of. So, we set about making a spill-proof lid mason jar lid!
We started by visiting Menards and going into the electrical section for the grommets. They were $.99 for the bag.
Then, hubby got out his 1/2″ drill bit, and made a nice hole in the top of a mason jar lid for me, and filed down the area a bit.
He inserted the rubber grommet into the hole. And, it was a tight squeeze and kinda frustrating at first, so I am glad it was him, not me.
We washed it out, then placed on a clean jar. Inserted a straw, and viola! A spill proof mason jar lid is born!
2012-04-21_12-02-59_257 (1) Original article and pictures take thehomesteadinghippy.com site
Ready to learn how to cut a boys’ hair like a pro?
Remember how I promised to show you how I give my boys’ haircuts…and then just at the moment I had my long-haired boys all lined up for haircuts and pictures…my camera batteries died? While we’re waiting for my boys’ hair to grow back for the photo op, Cheryl from Moms in Need of Mercy offered to guest post on this subject for us! And she got her PROFESSIONAL cosmetologist to help us out!
——————————————————–
When thinking about giving your son a haircut, do you:
a) shudder at the thought of what it might look like if you did it yourself,
b) reach for your scissors with a glint in your eye,
c) reach for your phone to make an appointment for him,
d) wish you knew more of what you were doing, so you weren’t just “winging” it (come to think of it, he kind of looks like he has wings when you’re done)
Haircuts, even for boys, are expensive. As often as their hair grows, this adds up to some serious cash. But if you know how to cut your son’s hair at home, and you know how to do it right, both of you will be pleased. He’ll be pleased at the result, and you’ll be pleased with how much you’re saving by doing it yourself.
If you’ve ever wanted professional lessons on how to cut his hair by yourself, my friend Liz–a licensed cosmetologist–agreed to show me (and you) the tricks of the trade. Normally, these lessons would cost you a partial cosmetology school tuition, but we are bringing them to you free! Now go pour yourself an ice water on me, and let’s get to work!
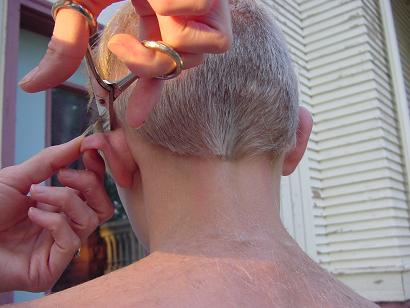
As you can see from the above picture, cutting hair successfully is all about the angles. To begin, you may want to start with the neckline. (Liz thought that beginners may want to start at the top. This way, you can set the top length as your guide and blend down from it, rather than having to cut everything again if it doesn’t blend properly when you get to the top last).
But let’s say you start at the neckline. Working on the back of the head, starting from the area of the top of the ear down, use your water bottle ($1 at the Dollar Store/Walmart/Target) to spray the hair down and cut at a 45-degree angle, slanting toward the neckline. You will hold the hair according to this angle and cut along your fingers, as you can see in these pictures.
Once you have worked your way across the back of the head, you can use your scissors to carefully go straight across to form the base of the neckline. As you can see Liz demonstrating, you want to make sure to hold the hair down firmly so you cut it evenly.
Liz says if you are right or left-eye dominant, it could make your haircut slant. So when you finish the neckline, get eye level with it and check that it does not slant. If it does, correct it!
Once the back area is finished, you can move up to the sides. You will continue with the 45-degree angle.
Do you notice all the different lengths in this closeup? You don’t want that. When you are making a cut, you will want to have a few hairs from the last cut you made included in the section you are currently cutting. These hairs will serve as your guide, and you will cut the hair to match the length of the previous cut (which should be the shortest hairs).
When you come to the ear, you will tuck the ear by folding it down gently, and then cut around the ear as if you were tracing the pattern of the ear.
Once you have completed the sides and worked back around the head in that section, you can move up toward the top. You will now pull the hair out at a 90-degree angle (the mathematicians among us may argue that this is actually 180-degrees) and cut it straight off of the head.
Just as your child’s patience has about reached its limit, you will reach the top. Reassure him that you’re almost done and you’ll give him a reward for sitting so nicely (or not so nicely!) when you’re finished. Take the hair from the center of the top of the head, lift it up, and cut it straight across. If the very front of the forehead looks too choppy when you’re done, you can point-cut it. This is where you will use the point of your scissors to cut small points in the hairline (you don’t want it to look like candy-corn) :)
If your son has cowlicks at the top of their head (mine do), you can leave the hair longer here to compensate. The extra weight will help prevent it from sticking straight up. To accomplish this, you will want to angle the hair slightly toward the front.
Now you’re just about done! The only thing left is to check the cut to make sure it’s even. You should be able to run your fingers through the hair, pull up various sections, and have the lengths line up evenly (angling in places, but with no long hairs jutting out). It should be well blended. Correct any mistakes you find, and try again in another 3-4 weeks, depending on how quickly your son’s hair grows!
If you’ve never tried Spaghetti Squash, I highly recommend you add this to your veggie eating repertoire.
For the record, I don’t think I can pull off correctly pronouncing the word repertoire. I just thought that sentence sounded better than me simply stating, “Yo. You should totally eat Spaghetti Squash.”
We were blessed with several fantastic spaghetti squash in our garden this summer and fall. I’m not sure there’s a better meal than home grown spaghetti squash, served with sauce made from home grown tomatoes. It’s delicious! Plus, practically free. Plus, super healthy. It’s merveilleux! ( I can’t pronounce that either, but it means “wonderful” in French. In other words: YUM.)
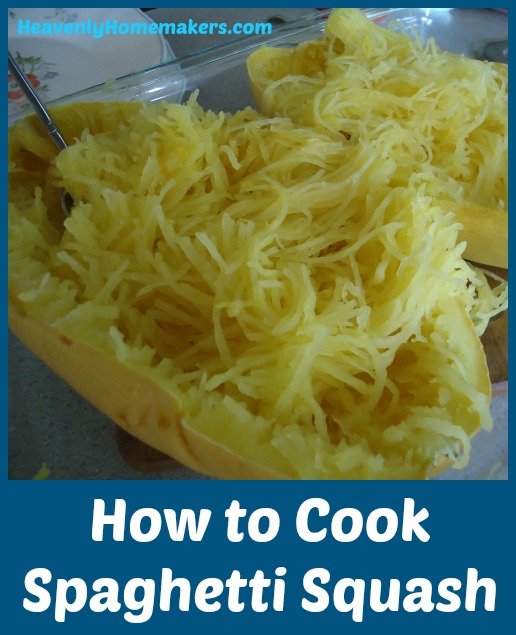
How to Cook Spaghetti Squash
1. Rinse outside of the squash.
2. Poke squash with a knife or fork 3-4 times.
3. Place squash in a baking dish, uncovered.
4. Bake in a 350° for 45-60 minutes or until squash is tender.
5. Cut squash in half to open.
6. Pull out seeds and discard.
7. Use a fork to pull “spaghetti” away from the inside of the rind. (This is the fun part!)
8. Serve cooked spaghetti squash as is, or serve with your favorite red or white sauce.
Are you a fan of Spaghetti Squash, or is this something you’ve not yet added to your veggie repertoire? What’s your favorite way to serve Spaghetti Squash? Can you pronounce the word repertoire?
Original article and pictures take heavenlyhomemakers.com site
Cooking beans is crazy easy. It’s remembering to soak them the night before that is the hard part.
My morning brain and my night brain are two completely different beasts. My morning brain is like, “Wooooo yeah! We gonna cook all day and do school work with the kids (let’s do art today!) and organize ourselves completely and make all the phone calls and make 20 quarts of applesauce and finish the laundry and write two blog posts! Let’s do this!”
As the days wears on, I knock out about three of my twenty lofty goals (because my time and energy always run out before my to-do list ends – and also because I hate making phone calls). After a full day of thinking hard and working hard and loving hard, my night brain is like, “I’m not speaking to you right now.”
This is why it is hard to soak beans.
The irony is that I never forget to grind coffee beans at night to put into my coffee pot for easy coffee making the next morning. Obviously, I have my priorities. Perhaps my two bean worlds could collide and I could let my coffee beans trigger a reminder about my pintos? It only makes sense.
On the rare occasion I do remember to soak beans, I feel so accomplished when I get into bed at night. Forget all the other stuff I did for 15 hours all day long. I totally put my beans in a pot with water! I am so very amazing!
Once the beans have been soaked, we can put them into a crock pot to cook all day for our dinner that night.
1. At night before bed, put about 4 cups of any variety of beans into a pot with 6-8 cups of water.
2. Splash in a little vinegar. It’s supposed to help with the toots. I offer no guarantees.
3. Let the beans soak overnight.
4. Strain and rinse them in the morning. Put them into a crock pot and cover them with fresh water.
5. Add a couple of chopped onions to the post for flavor. This is optional but yummy and recommended.
6. Cover and cook the beans on low for 8-10 hours or until they are tender.
At this point, you can enjoy your beans in any way you enjoy beans. Our favorites are:
What are your favorite ways to eat beans? Please tell me about your morning brain vs. your night brain. Which works better for you?
Original article and pictures take heavenlyhomemakers.com site
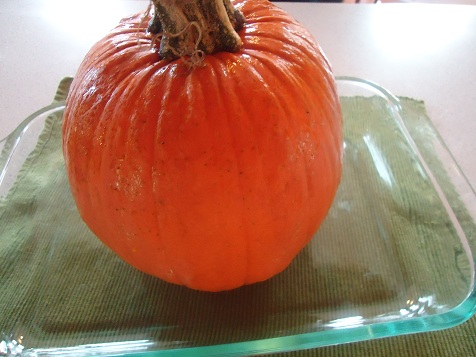
How to Cook a Whole Pumpkin (to make pumpkin puree)
Every year, the boys and I visit a pumpkin patch. Every year after visiting the pumpkin patch, I bake a few of the pumpkins we bring home so that I’ll have plenty of pureed pumpkin in the freezer for pies, breads, muffins and other treats throughout the year. Every year, in order to bake the pumpkins, I slice them in half to put them into a baking dish.
Ever tried slicing a raw pumpkin in half? It’s horribly not enjoyable or easy. Now don’t make fun of me, because it is a fact that I have very wimpy muscles. Therefore, I find that cutting a pumpkin in half makes me a little cranky -and also a little bit scared that I’m going to lose a finger.
This year, I decided to rebel – mostly because after the trip to the pumpkin patch with six boys (I took extras), I was a little tired and in no mood to lose a finger.
I’m not sure why I haven’t been cooking the pumpkin in its whole form all along – but now that I know it works so well, I will for sure be doing it this way from now on. Or at least on the days I don’t feel like losing a finger.
How to Make Pumpkin Puree from a Whole Pumpkin
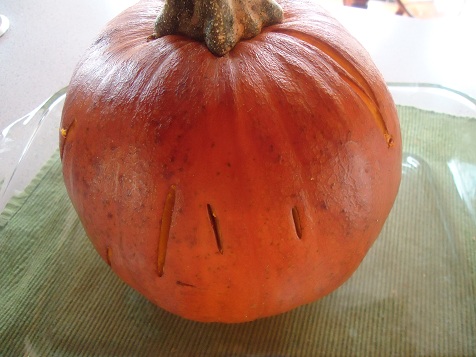
First wash your pumpkin so that there will be no chance for soil or squished bugs to be mistaken for raisins in your muffins on a cloudy, autumn morning.
Next, give your pumpkin 6-10 nice stabs with a knife. There’s no better way to say it – there’s no such thing as gently poking a fork into a raw pumpkin. It must be stabbed. Although, I’m the one with the wimpy muscles, so what do I know?
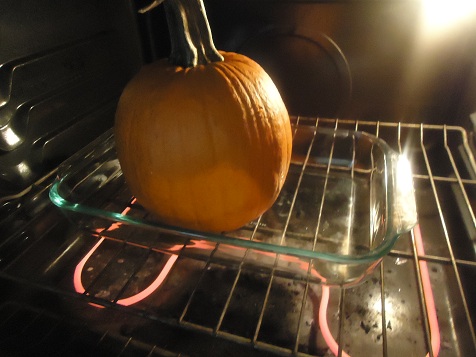
Third, place your pumpkin in a baking dish, then into a 350° oven. I had to remove one of my oven racks to make this happen, but I figured I’d just saved at least three fingers, so this five second bit of labor was worth my time.
Bake your pumpkin for about an hour and a half or until poking it with a fork has become effortless.
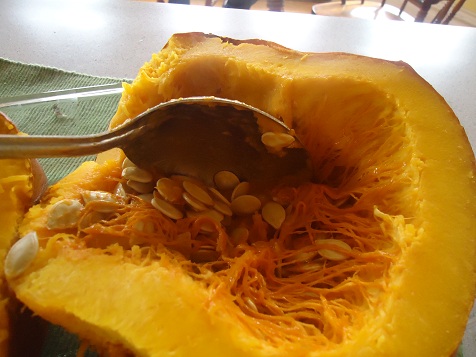
Now slice the pumpkin in half – see how easy that is? Allow pumpkin to cool for 15-30 minutes.
Use a metal spoon to scrape out the seeds and the stringy stuff. Save the seeds for making roasted pumpkin seeds if you’d like.
Someone tell me what the real name of that stringy stuff is. It probably has some technical name like “glutinous threads”.
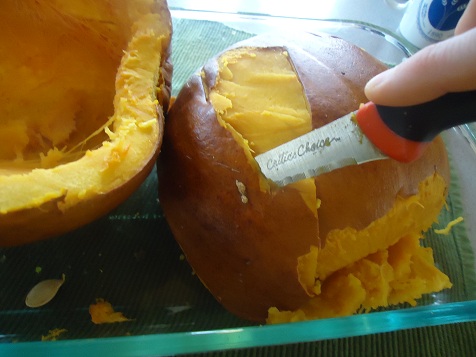
Scoop out the soft pumpkin – or turn the pumpkin over and easily slice away the rind.
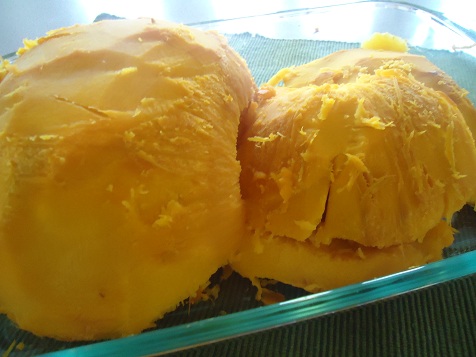
All done:
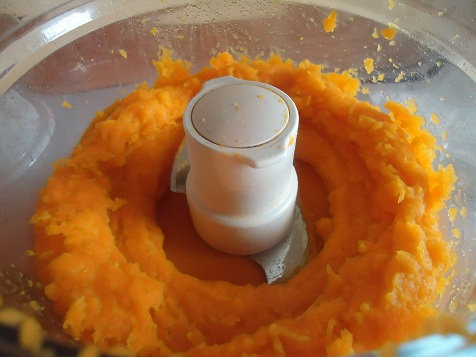
Place a few slices into a food processor and puree until smooth.
Continue pureeing pieces of pumpkin until you’re finished, because that is the point at which you will be done. (Sometimes it’s fun to simply state the obvious.)
Freeze pumpkin puree in jars or freezer bags. I like to freeze it in two-cup portions for easy measuring while baking.
How to Clean Your Whole House Without Nasty Chemicals
As I revel in these special days of newborn love and cuddles, I have a few guest posts lined up to share with you. This first one is from Kelly @ Imperfect Homemaking. Please welcome her and her fabulous natural cleaning knowledge!
***
When I got married six and a half years ago, I honestly didn’t care what was in my cleaning products. We lived in an old apartment full of character and cobwebs, and I considered bleach my new best friend. When I began having children I began to think twice about the products in our home. Surely the things we breathe and come into contact with on a daily basis would affect our health, right? I bought things with words like “organic” and “natural” and “pure” on the labels, but I was fairly certain I was being sold a lie (and, at least some of the time, I was).
And then my son was born sensitive to just about anything unnatural and we began switching full force to safe, non-toxic everything. I am so glad we did.
My new rule of thumb is that my cleaning products shouldn’t be more dangerous than the problem I am trying to solve. So I may use bleach to kill mold, but I won’t use it to make my white’s whiter. Here is how I clean my whole house without nasty chemicals.
All Purpose cleaner: Most things can be cleaned with a bucket full of warm water with either a squirt of a good, safe, non-toxic dish soap or a splash of vinegar. Either of these solutions are great for cleaning cabinets and walls, the inside of your refrigerator, and nearly any hard household surface that just needs a gentle cleaning.
Windows: I clean windows with a spray bottle full of vinegar diluted half and half with water.
Mini Blinds: Clean vinyl mini-blinds with a natural dish soap and some vinegar. I’ve shared before how exactly I do this on my own blog. You can read that here.
Floors: I mop my tile and laminate floors by adding a big splash of vinegar and a few drops of a favourite essential oil to a bucket of warm water. The vinegar smell will disappear as your floors dry. I promise your house won’t smell vinegary when you’re done!
Wood: Sealed wood can be polished with a soft cloth with a tiny bit of vinegar and olive oil on it.
Mattresses and upholstered furniture: To freshen your mattress or sofa, put some baking soda into a cheese shaker (or a mason jar with holes nailed into the lid) and add a few drops of a favourite essential oil (lavender will encourage good sleep, tea tree oil will deter bugs!) and sprinkle the mixture onto your mattress or sofa and leave it for an hour or so before vacuuming the solution up.
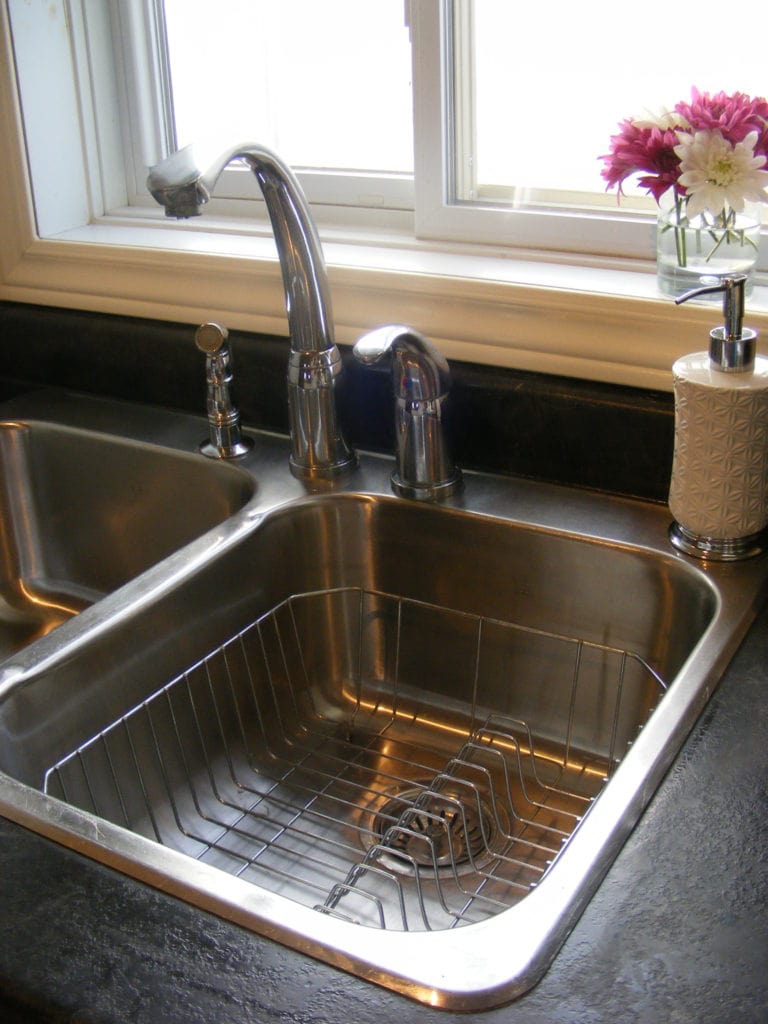
Sinks: I have an article on my own blog about how I clean and shine my sink naturally using vinegar, baking soda, and olive oil. You can read that here. If you have a dishwasher, I also have step by step directions on how to clean that.
Drains: To remove smells from stinky drains, sprinkle some baking soda down a stinky drain and follow with a couple cups of warm vinegar (you can kill two birds with one stone by doing this with the hot vinegar created by cleaning your microwave or kettle as detailed below)
Microwave: Put 1 cup of vinegar in a glass microwaveable bowl and microwave it on high until it’s boiling and has covered the walls of the microwave in vinegary condensation (this takes about 5 minutes in mine). Let sit 3 minutes. Carefully remove the bowl of vinegar. With a cloth or paper towel, wipe the surfaces clean. This is so easy and it works really really well.
Kettle: To descale your kettle, put enough vinegar in it to cover the lime scale and mineral deposits. Boil the vinegar in the kettle, and then rinse the kettle well.
Heavy Duty Cleaner for cooked on stove top gunk and any other hard to clean messes: Mix some baking soda in a small bowl with enough hydrogen peroxide to make a paste. Use a scrubby sponge to scrub the mess away. If you have sensitive skin you may want to wear rubber gloves. Try this on rust stains, soap scum and dirty grout lines.
Oven: Oven cleaner was the last cleaner I eliminated and the one I was most uncomfortable using in my home. I kept trying homemade solutions, discovering they didn’t work, and then going out and buying the can of spray on oven cleaner that works wonders but left me nervous to let my children breathe the air in our home!
The best natural oven cleaner I’ve found is Shaklee’s Scour Off. It works noticeably better than any of the homemade solutions I’ve tried. If you’d prefer a homemade cleaner, the Heavy Duty Cleaner listed above works pretty well with a generous dose of elbow grease.
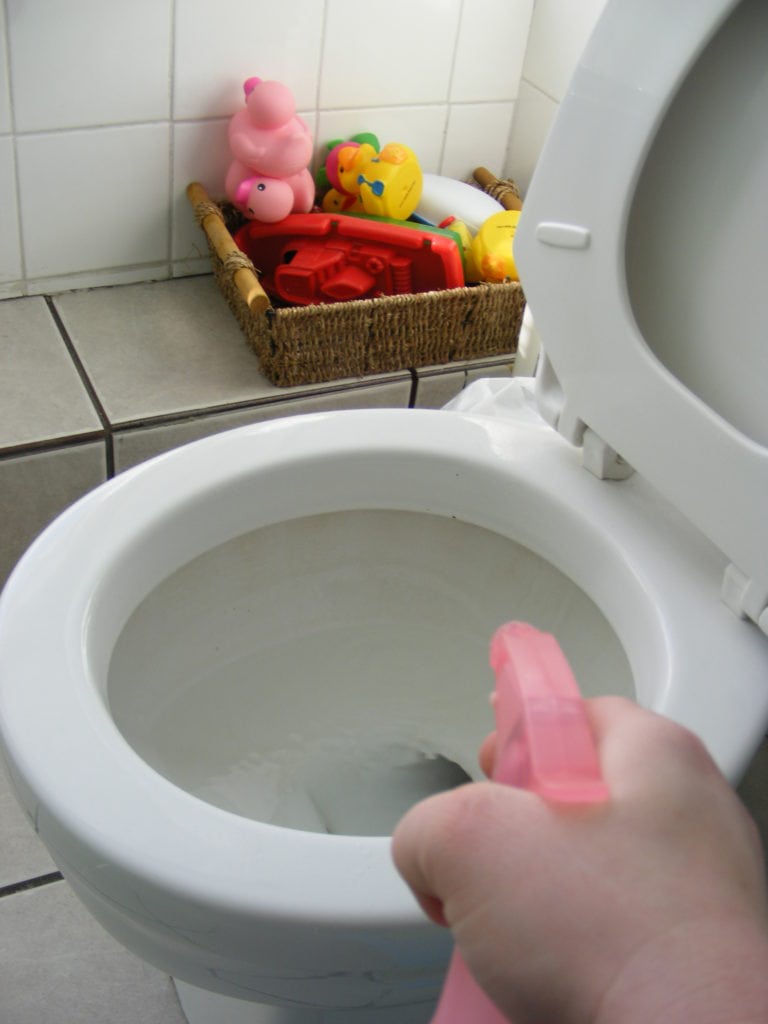
Toilets: What I liked about commercial toilet cleaners was the special bottle design that allowed me to get the cleaner right up under the rim of the bowl! You can accomplish this by putting straight vinegar in a regular spray bottle with the nozzle set to stream instead of mist. Squirt the vinegar right up under the rim where you need it and then scrub the bowl with a toilet brush as usual and flush.
Disinfectant: Tea tree oil, sometimes called melaleuca oil, has antibacterial qualities. I place some in a spray bottle filled with water when I feel the need to disinfect something. It also deters head lice, so I actually spray my children’s hair with this same solution when we leave for church on Sunday mornings!
Keep in mind that tea tree oil is toxic when swallowed. While I consider it reasonably safe to use around the house, you do want to keep it away from curious little hands! I suppose that goes for all home cleaning supplies, natural or not!
I love knowing that the products that come through the door to our home are safe and friendly and that the air we breathe is clean.
Happy Cleaning!
Psst – just a quick heads up. The Ultimate Homemaking Bundle sale 2016 is happening right now. It’s only for 6 days, so DON’T MISS OUT! Seriously, don’t miss it. Click here to see what’s included.
Kelly lives in rural Ontario Canada with her husband, their six kids, and a small brood of far-too-friendly backyard chickens. She blogs about cooking, cleaning and crafting at www.imperfecthomemaking.com.
Original article and pictures take redandhoney.com site
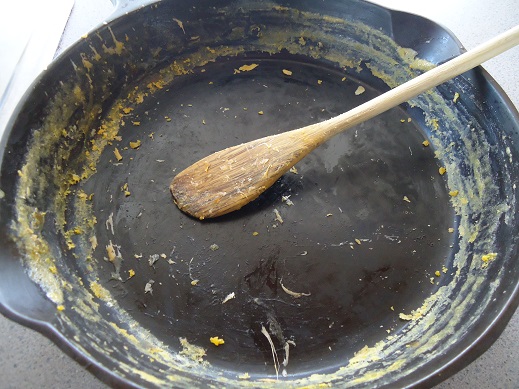
Today you will have the honor of seeing my cast iron skillet covered in a layer of crusty scrambled egg residue. This is so special. Thank you for sharing this fine moment with me.
In describing how I clean my cast iron, I’m also going to reveal to you what is, in fact, my favorite of all the gadgets in my kitchen. It’s something I use many times each day (even more than my blender, and that’s saying something). I use this little gadget on cast iron skillets, on stoneware, and on my counter-tops to easily clean up flour or dough. My friends, allow me to introduce you to my BKFF (Best Kitchen Friend Forever) –
It’s the best six dollars you’ll ever spend. Or if you already have the little brown ones that came with your Pampered Chef stoneware, you’re golden.
If you are one who hates cleaning your cast iron and even avoids using it entirely so that you don’t have to mess with cleaning it, I have two words for you:Rubber Scraper.
You guys. Cleaning cast iron is about the easiest job there is when you:
1) Soak the skillet or pot for a few minutes in hot water and
2) Use a rubber scraper to scrape all the food away.
If I didn’t have a rubber scraper, I would also hate cleaning my cast iron. I don’t even know how I would do it otherwise. Truly. How did Grandma clean her awesome skillets and griddle? I have no idea. Rubber scrapers rank up there in modern conveniences as high as cell phones and flush toilets. They are the exact same in their ability to improve life.
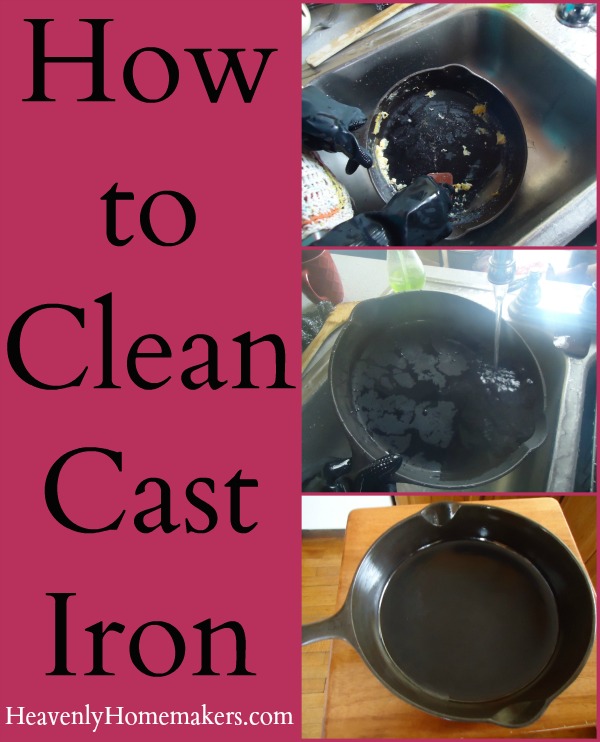
Allow me to present a step-by-step tutorial of my easy cast iron cleaning system:
1. Run hot water into the dirty, crusty skillet or griddle.
2. After a few minutes, use a rubber scraper to scrape away all the food residue.
3. Rinse the cast iron with hot water.
4. Allow cast iron to air dry, or rub it dry with a tea towel.
Before taking the above picture, I had just rubbed my skillet down with some coconut oil (or palm shortening – I can’t remember which). I rarely need to oil it down, but if you find your cast iron looking rusty or dry, rub in some coconut oil or palm shortening. They likes these fats as much as you and I do. Can you blame them?
Something to note:
Do not use soap on your cast iron.
It isn’t necessary and you don’t want it to absorb soap which will leech into your food. Hot water is all it needs. That anda rubber scraper.
Those babies get used all the time at our house. Eggs, pancakes, meat, hashbrowns – my skillet and griddle make all of these naturally taste so much better!
None of you need to fear using your cast iron since you now know how to clean it easily! Rubber scrapers to the rescue. Who knew such a small, simple square piece of rubber would play such an important role in the kitchen?
Have cast iron? How do you clean it?
Original article and pictures take heavenlyhomemakers.com site