понедельник, 30 декабря 2013 г.

How to Rebuild Your Child’s Gut After Antibiotics

How to Rebuild Your Child’s Gut After Antibiotics
How to heal your child's gut after a round of antibiotics - and when to start probiotics.
How long do I need to take probiotics to rebuild my gut after antibiotics?

For centuries, we’ve had relationships with other organisms to keep us healthy – it used to be external beasts like leeches, now we’re learning that it’s all about the internal relationship with our bugs and bacteria. The big question lately is what to do after we go nuclear on our own healthy bacteria with a round of antibiotics – how to fix the gut after that, especially for our kids?


A walk through medical history can be funny, yet alarming: the practice of blood-letting, with or without leeches, that persisted for 2,000 years; shock treatments for psychiatric patients; cocaine as a pain killer; and even trying to cure everything from scrapes to constipation to syphilis with mercury. Sources: 1, 2, 3


I certainly hope that in a hundred years, people don’t look back on our era and laugh at how ridiculous some of the cures of our day were. There’s a lot of research behind things like chemotherapy and antibiotics, and they have helped many people – but there are folks who question the real benefit vs. the risk.


Because there is a risk.


The new frontier of modern medicine and research, now that we’ve catalogued the human genome, is studying the human microbiome – the 3 trillion or so bacteria (and even viruses) that live inside our bodies, co-existing with us and likely playing a large role in our continued existence.


That’s a work in process. In other words, we don’t know what we don’t know.


And just like the docs giving shock therapy, the doctors of today can only prescribe treatments based on what they do know. It’s a “give it your best shot” kind of healing, which is all any of us can do.


This post is sponsored by WellFuture. I am not a doctor, naturopath, or trained clinician, and even if I was, this information would not be intended to diagnose, treat, or advise away any symptoms of your health. That’s not how the Internet works…


How do Antibiotics Harm the Gut?


Since we have so much to learn about our gut and other bacteria, we surely don’t quite understand the full ramifications of taking an antibiotic.


But we do know some things:


  • Antibiotics do damage gut bacteria/intestinal flora, causing an imbalance called dysbiosis.
  • The gut houses about 80% of the body’s immune cells.
  • Antibiotics can cause a reduced immune response (one known symptom is diarrhea).
  • Antibiotics in infancy have also been tied to an increased risk for infectious diseases, allergies and other autoimmune disorders, and even obesity, later in life.
  • Antibiotics may create an “obese environment” that causes people to gain weight; probiotics may reverse it.

I try to avoid anyone in my family taking antibiotics at all costs, and 3 of my children have never had them in their lives. In the last 10 years, I had one regimen (10 years ago) and I think my husband has had one or two in that time as well. Unfortunately my oldest son has had about four rounds, including at birth and then for strep and some ear infections, but not for about 3 years.


You could say I’m anti-antibiotics.


And since I’ve learned more about essential oils that have antibacterial properties without contributing to antibiotic resistance and superbugs, I’m a fan of always trying natural remedies first.


But I realize that sometimes, antibiotic drugs are the only thing that will keep you alive (or get you through a certain infection) and I’m not going to judge folks who accept them.


What you do after a round of antibiotics is really important though, and you can do a lot of good for your kids if you are careful to rebuild what has been lost.


How to Rebuild Gut Health After Antibiotics - children and adults need to fix their gut bacteria after wiping them out with antibiotics - find out how long you should take probiotics afterward
I get a LOT of questions about taking probiotics after a regimen of antibiotics, including:

  • What can I do after antibiotics to help build gut health again?
  • Can I take probiotics at the same time as my antibiotics or will it just cancel out?
  • How long should my child take probiotics after completing a round of antibiotics (if it’s not something we take regularly anyway)?

Let’s dig in!


What can I do after antibiotics to help build gut health again?


There are lots of things anyone can do to help heal their gut at any time – in fact, I listed 100 of them not too long ago!


I’m not going to reinvent that wheel here, but I would like to say that because antibiotics harm the gut’s flora, not the gut lining necessarily (as in other issues like leaky gut), taking probiotics and eating fermented foods are the most important steps to repair any damage from the medicine.


The antibiotics are going to wipe out both good and bad bacteria in your gut, so you need to replenish it with the good guys, lest the bad guys take hold.


Can I take probiotics at the same time as my antibiotics or will it just cancel out?


When on antibiotics, the NIH recommends taking probiotics twice a day, two hours away from the prescription to avoid killing the supplemented probiotics.


This recommendation seems to be based on common sense of digestion timing rather than specific research that I can source. Whether there’s been any official research on whether the antibiotics just wipe out all the probiotics the next time you take them – and therefore you should take a break from probiotics during your actual abx regiment – I am not sure.


But my own common sense says that we’re only talking about a 5-10 day period, and that’s not very much probiotics to “waste” if it’s going to be wasted anyway. If it doesn’t bother your stomach, I’d keep taking them right through the prescription.


A reader shared that taking them at the exact same time caused her extreme digestive distress (maybe a battle of the bugs inside her?) so do follow the 2-hour guidelines and listen to your body. Again, it’s only 5-10 days, so skipping probiotics during that time isn’t going to set you back so far that you can’t recover.


How long should my child take probiotics after completing a round of antibiotics?


This is the big one!


If you don’t regularly take probiotics (and you really should, but I understand they can be expensive), at the very least please please please give your gut a chance to bounce back after antibiotics by taking a probiotic supplement.


But for how long, minimum, if you’re not going to continue taking them regularly?


WellBelly probiotics

I asked this question of Catherine Clinton, naturopath and founder of WellFuture and the WellBelly probiotic that our 2-year-old has been taking since he started food:


“A disturbed flora from antibiotics can onset several weeks after completing a course of antibiotics, and the microbial ecosystem in your post-antibiotic gut is shifting dynamically for weeks, so a general guideline of continuing probiotic supplementation a week or two after completing the round of antibiotics is common.”


I responded and said I was surprised to hear “weeks,” as I had always thought it was at least two months. Her reply:


“Actually the advice does say weeks to months but I just hesitate because I’m the lady who sells probiotics so it makes me uncomfortable if there is no hard research. It is certainly clear that the damage from antibiotics can be quite long term.”


That’s great honesty and transparency from “the lady who sells probiotics” if you ask me!


Here’s some research to back all this up:


  • Probiotics cut chances of getting antibiotic-induced diarrhea by 20-50% (5, 6, 7).
  • Exciting! Probiotics may indeed reduce the need for antibiotics and fight superbugs if used regularly (more research needed though). (8)
  • Doses of probiotics should be more than 5 billion daily to help with antibiotic damage. (9)
  • A great overview of antibiotics, probiotics, and prebiotics – and questions that still need to be researched, such as what is the best delivery system for probiotics. (10)
  • What are prebiotics? Food for the good guys! There’s a little bit of info on that in this big ol’ post, but I have more coming next week, watch your email and the blog for more!

Sign up so you don’t miss it:


WellBelly is allergen-free, designed especially for infants and children, and you can check out the ingredients for yourself right HERE.


The Only Consistent Thing is Change!


The last thing Catherine threw out in our emails is something I just have to share with you, because it blows my mind and intrigues me (and underscores my first point about how quickly medical research and knowledge changes!):


So much neat info coming out about the length of prescriptions for antibiotics and stopping a prescription before it is over. Seems the old wisdom of never stopping a course of antibiotics to avoid superbugs is wrong. Longer regimens of antibiotics seem more at fault than the shorter ones or even stopping prescriptions early. Go figure.

I wish they would research how to put the gut back together again after antibiotics and start prescribing shorter courses of antibiotics like the research finally shows as super important.


Me too, Catherine, me too!!


Cheat Sheet Summary


The bottom line on antibiotics and probiotics is this:


  • You should definitely take probiotics after a prescription of antibiotics.
  • At least two weeks – but more likely two months.
  • Taking them during the prescription may help you avoid antibiotic induced diarrhea, and it definitely won’t hurt.

Disclosure: This post was sponsored by WellFuture and WellBelly, which is great, because I get to share important information with you about gut health and also earn an income to support my family, and Catherine’s. Win-win-win!


Original article and pictures take www.kitchenstewardship.com site

среда, 25 декабря 2013 г.

How to Raise a Child With Leadership Skills

How to Raise a Child With Leadership Skills
childwithleadershipskills_sized

An 8-year-old girl sits in my office, sharing her latest plan to get all of the girls in her class to get along and play together at recess. She talks at a rapid pace, her eyes wide with anticipation of my response to her plan. The biggest problem at recess, she tells me, is that the girls run off in different directions in small groups. This leaves some girls left out, and some girls unsure where to go or where they fit in. She’s sure that a “recess sign up plan” will give each girl a chance to find a group that works for her that day. It’s not that the girls argue or have cliques, she explains, it’s that recess is so short that girls don’t have the patience to spend time deciding what to do. It’s an insightful plan coming from such a young girl.


The problem is she lacks the leadership skills to attempt to put her plan into action. “They won’t listen to me,” she tells me. “They will talk over me. I’m not the kind of kid that other kids listen to.” Her eyes are glued to the floor as she utters that final statement. We sit quietly for a moment, as she considers her options. I break the silence with a plan to help her learn to lead. The first step: Practicing the art of assertive communication.


Some kids appear to be natural leaders, but most kids need guidance, practice, and the gift of time to hone these very important skills. The good news is there are simple steps to take at home to help plant the seeds of leadership.


1. Teach communication skills. A big part of being a leader is using clear and assertive communication skills. Leaders build relationships and solve problems. Leaders remain calm under stress and know when to ask for help. A great first step toward raising a leader is teaching your child how to communicate assertively. First, help her understand the differences between passive (afraid to speak up, avoids eye contact, hides in plain sight), aggressive (loud! Imposing! in your face!), and assertive (good eye contact, firm but clear voice, listens with interest) communicators. I often suggest using both role-play and books to understand these communication styles. Once your children understand how to use assertive communication, practice it at home. Hold an election and encourage her to run for some household office — complete with speeches!


2. Encourage them to dream big. Your kid spends a large percentage of his time completing tasks assigned by the adults in his life, both at home and in school, so it’s important to encourage him to find (and follow) his passion during his free time. Support your child as he chases his dreams, be it a lemonade stand to save an endangered animal or enrolling in a theater program to learn to act, and you’ll set him on a path toward leadership.


3. Find positive role models. It’s no big secret that many kids look to athletes and other celebrities as role models to some degree, but I find that local role models have much more to offer. Have a child who loves to bake but time spent in the kitchen isn’t your favorite? Look for a friend or neighbor who might want a little help in the kitchen from time to time. Does your child want to save every animal on the planet? See if a local animal shelter can use a helper. Role models are everywhere. Find someone local who shares your child’s interest and can help her learn the ropes and tap into her strengths.


4. Volunteer together. Serving humanity helps kids see firsthand that they have the power to make a difference in this world. When families volunteer together, they work together to improve the lives of others. That’s a powerful lesson in leading the way toward a better, more empathic, world.


5. Teach conflict resolution. You can’t act as a leader if you don’t know how to manage conflict. We all face conflict and learning to cope with those conflicts in a peaceful way helps build leaders. A great place to start is with sibling squabbles. I often hear that parents should step back and let kids “fight it out”, but I disagree. Yes, you should let your kids attempt to work out their differences at times, but playing mediator can also be useful. Ask your kids to state the problem, in their own words, using “I statements” (which help children to take responsibility for their own actions). Next, have them identify their needs. Third, work together as a team to find a compromise that suits everyone. Sometimes compromise isn’t possible and a break is necessary. That’s okay. Taking a break teaches kids that it’s okay to take time to work through conflict. They don’t have to solve every problem the moment it arises. All great leaders know this to be true.


6. Model perseverance. Leaders don’t quit. They might want to quit at times. They might walk away from a challenge and take a relaxation break from time, but they do know how to persevere and work through challenges. I encourage my kids to follow these steps when they encounter a challenge that makes them want to give up:


  • Regroup: Take a break and relax for a while.
  • Reframe: View that obstacle as a speed bump instead of a wall.
  • Retry: We don’t always get it right on the first try, but we can always try again.

7. Encourage teamwork. I recently attempted to describe the team of people who help the President on a daily basis. My kids were in awe of the amount of people working behind the scenes. Part of leadership is being a team player and being a team leader. All too often kids are taught to stand out and be the best, but this sends the message that the individual is greater than the team. Teach your kids about the power of teamwork. When kids learn to support others, cooperate, and problem solve as a group, they become better leaders.


8. Hone decision-making skills. A mom recently asked me why it’s so hard for her son to make decisions. She described him as kind, thoughtful, and bright, but terrible at making choices. When I asked her how often he gets to make decisions, I was met with a blank stare. The best way to hone decision-making skills is to practice making decisions! Give your kids the power of choice by letting him decide what to wear, how he likes his hair, and which notebooks to buy for school. So much of life is scripted for kids. If we fail to present them with options, they never learn to choose.


All young children have the potential to become great leaders as they grow. If we support their interests and teach them how to negotiate group dynamics and other social settings, they will learn to navigate tough decisions and resolve conflict with ease. All we have to do is believe in their abilities to make positive changes in this world.


Photo: Getty


Original article and pictures take cdn1-www.momtastic.com site

вторник, 24 декабря 2013 г.

How to Pull Off a Pixie Cut

How to Pull Off a Pixie Cut
  1. Image titled Pull Off a Pixie Cut Step 1
    1 Exude confidence in your cut. When your hair is short, you have no locks to hide behind—your facial features are on full display. In order to pull off the short hair cut, you must own your pixie cut! Show off your short hair with pride; radiate confidence as you are out and about town.[1]
    • If you are shy and prefer to avoid the spotlight, the pixie cut may not be for you.
  2. Image titled Pull Off a Pixie Cut Step 2
    After trading your long locks in for a short pixie cut, you may feel pressure from society to highlight or feature your femininity. Instead of altering your wardrobe, continue to rock your personal style. Wear your pant suits, baseball tees, and sweats with confidence!
    2 Maintain your personal style.[2]
  3. Image titled Pull Off a Pixie Cut Step 3
    3 Embrace the awkward growth phases. Maintaining a pixie cut requires regular trims. When you tire of the maintenance or are ready for a new look, be prepared for your cute pixie cut to go through some awkward growth phases. Don’t dread the grow out process. Instead, experiment with new styles and different lengths![3]
    • If you have always wondered what you would look like with a short layered do or a chin length bob, the growth period offers you a chance to find out!

Score

0 / 3


  1. Image titled Pull Off a Pixie Cut Step 4
    1
  2. Image titled Pull Off a Pixie Cut Step 5
    2 Add texture to your hair with products. Create a tough, perfectly tousled pixie cut with texturizing products. Place a dime-sized amount of light weight pomade, hair wax, or beach spray in your hand. Rub the product onto your fingertips.[6] Run the product through the ends of your hair, pulling up and out.[7]
  3. Image titled Pull Off a Pixie Cut Step 6
    3 Change up your hair part. Parting your hair differently will completely alter the look of your pixie cut! Try parting your hair on the opposite side of your head or opt for a center part. For an entirely fresh look, skip the part and slick back your hair instead![8]
    • To slick back your hair, comb your wet hair away from your forehead. Run a dime sized amount of gel, pomade, or hair wax through your locks. Use a comb to slick your hair back away from your face.
  4. Image titled Pull Off a Pixie Cut Step 7
    One of the many benefits of short hair is that it holds volume extremely well. Before blow-drying your hair, apply a lightweight volumizer to your wet locks. As you blow-dry your hair, lift the hair up.
    4 Add volume to your short hair.[9]
    • If you are trying to achieve extreme volume, blow dry your hair upside down!
    • In order to create the perfect faux hawk, you must add volume to your hair. After blowdrying your hair, use a lightweight gel, pomade, hairspray, or hair wax to shape and style your faux hawk.
  5. Image titled Pull Off a Pixie Cut Step 8
    5 Flat iron your pixie cut for a smooth, shiny finish. If you have naturally coarse, curly, and or thick hair, use a flat iron to achieve a sleek and shiny pixie cut. While your flat iron preheats, apply a small amount of heat protecting serum to your hair. Use the flat iron to straighten small sections of hair quickly.[10]
  6. Image titled Pull Off a Pixie Cut Step 9
    6

Score

0 / 3


  1. Image titled Pull Off a Pixie Cut Step 10
    A large headband with gems, flowers, or bows can over power your short do. For a chic, flattering look, don a thin, flat headband instead. Tuck the headband behind your ears or use it pull back your bangs.
    1
  2. Image titled Pull Off a Pixie Cut Step 11
    2 Wear a “Rosie the Riveter” head scarf. To complete your retro look, tie a colorful scarf into a “Rosie the Riveter” head wrap.
    • Fold your square scarf in half diagonally to create a large triangle.
    • Grab the left edge with your left hand and the right edge with your right hand.
    • Bend over and place the folded edge of the bandana along the hairline at the base of your neck. The apex of the triangle should hang down towards your forehead.
    • Pull both ends around your head and over the apex of the triangle. Tie the ends in a simple knot.
    • Stand up, tighten the knot, and tuck the two tails under the scarf.
    • Fold the center point over the knot.
    • Untuck the tails and tie a second knot.
  3. Image titled Pull Off a Pixie Cut Step 12
    3 Turn a scarf as a headband. A scarf headband is simple and chic! To achieve this look:
    • Fold the scarf in half diagonally.
    • Fold the scarf into a long rectangle—begin at the point and fold inwards.
    • Take one end in each hand and place the centre of the scarf at the base of your skull.
    • Pull the ends up towards the top of your head and tie a knot.
  4. Image titled Pull Off a Pixie Cut Step 13
    4 Pin back your hair with bobby pins. No hair accessory could be simpler than the bobby pin! If your pixie cut keeps falling in your eyes, bobby pins can help you tame your unruly hair. Twist your bangs and secure them on the top of your head with a bobby pin or two. Pin back the sides just above your ears to pull the hair away from your face.[15]
  5. Image titled Pull Off a Pixie Cut Step 14
    Wear a hat. Make the most of a bad hair day by covering your untamable pixie with a cute hat! Wear a beanie in the winter. Put on a cloche in the spring. Don a fedora in the summer. Rock a floppy wool hat in the fall.
    5

Score

0 / 3


wikiHow's mission is to help people learn

, and we really hope this article helped you. Now you are helping others, just by visiting wikiHow.


Direct Relief is a humanitarian nonprofit with a mission to improve the health and lives of people affected by poverty and emergencies. Recognized by Charity Navigator and Forbes for its efficiency, Direct Relief equips health professionals in the U.S. and throughout the world with essential medical resources to effectively treat and care for patients – without regard to politics, religion, or ability to pay.


Click below to let us know you read this article, and wikiHow will donate to Direct Relief on your behalf. Thanks for helping us achieve our mission of helping everyone learn how to do anything.


Original article and pictures take www.wikihow.com site

пятница, 20 декабря 2013 г.

How to Naturally Treat A Yeast Diaper Rash

How to Naturally Treat A Yeast Diaper Rash
How to Naturally Treat

We cloth diaper and have used the same cloth diapers for two kids over the past 3+ years. During that time we have had the occasional rash here and there, but nothing that a bit of Redmond clay couldn’t clear up in only an application or two. That is why I was confounded recently when my son woke up with redness on his rear that I had treated the night before. How could this be? How could my trusty clay fail me? I broke out the big guns and applied some coconut oil with a drop of lavender oil throughout the day, gave him lots of air time, and gave him another dusting of clay that night. The next morning the redness was worse, and there were blisters and little scaly areas. It looked really painful. My gut told me this was no regular rash and my sleuth-like research skills confirmed my suspicion – YEAST.


I did some research to find out what is natural and effective at treating yeast. I was hoping I could find something I had on hand. There seemed to be several options; grapefruit seed extract, Genetian violet, and/or colloidal silver. I had some silver on hand. In fact, every year at Christmas my mother provides us with a couple of bottles of Silver Shield to get us through the next year. I accredit this stuff with finally getting me well when I became so sick after the birth of my firstborn son. I can’t remember how many prescription medicines I had tried before I threw them to the side and gave the silver a chance. The Dr. told me it would be months before I was better if I didn’t take the prescriptions. Only one short week after taking the silver was I feeling dramatically better.


Silver Shield is a little different from most colloidal silvers on the market. It is patented, poses no risk of heavy metal contamination, won’t turn your skin gray if you take too much, is charged with two electrons instead of one (which makes it more effective), and has boatloads of research behind it.


Here’s a video on how they are using it in Ghana to save children from Malaria.


I’m pretty grateful that God designed an element that is so powerful it can kill Malaria, MRSA, and H5N1 to name a few. There’s even some research that suggests it leaves the good bacteria unharmed.


But, ahem, back to the topic. When I remembered that silver can kill yeast, I applied a small dab of some Silver Shield Gel to the affected areas on my child’s cute little bum (I’m a mom, I can say that.).


Silver_Shield_Gel

The next morning all the small areas were no longer oozing and had closed up and there was just one area left that had been really bad. I applied small amounts of the silver gel at each diaper change that day, and the next morning that last area was all closed up. During this time I switched him to disposable diapers because I needed to disinfect my cloth diapers to get rid of the yeast, however, I feel comfortable using the silver gel with my cloth diapers and will do so in the future if I need to.


The silver worked so quickly that I was kicking myself for not thinking of using it sooner. I wonder how many times I will say that as a mom?!


Have you dealt with a yeast diaper rash? How did you combat it?


You May Also Like


Original article and pictures take simplelifeabundantlife.com site

среда, 18 декабря 2013 г.

How to Naturally Boost Your Iron Levels

How to Naturally Boost Your Iron Levels
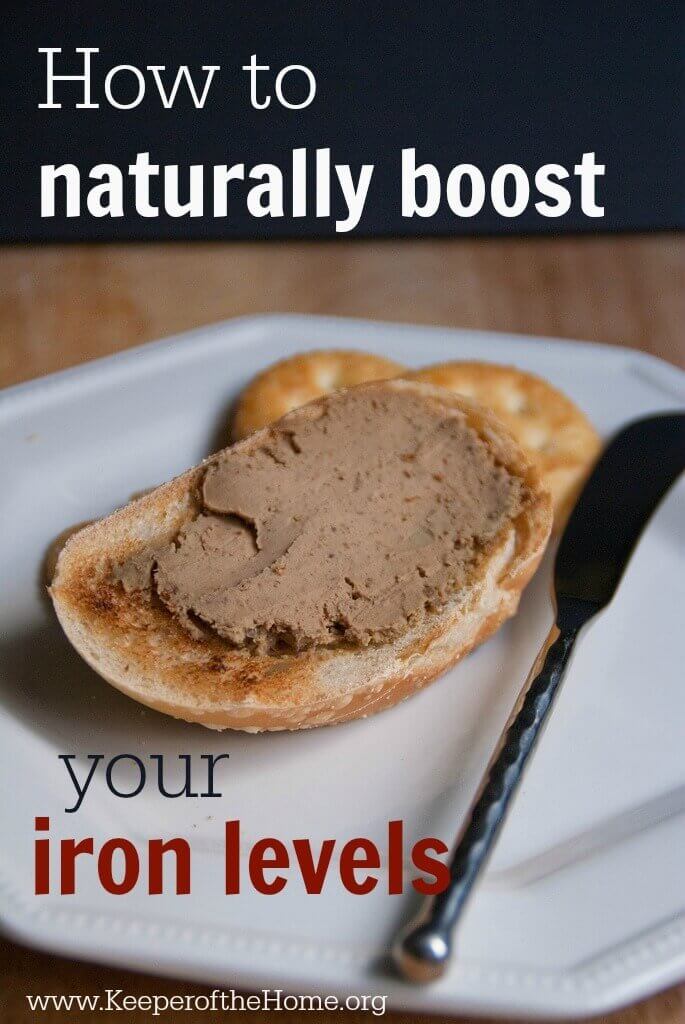
Suffering from iron deficiency? Not sure if you're suffering from low iron? Here's some natural ways to boost your iron levels. Plus information on iron deficiency & pregnancy.

Though I’ve been somewhat low in iron in previous pregnancies, this was the first time I truly felt the physical effects of the deficiency.


And in fact, this isn’t only a pregnancy-related issue, but being low in iron be a common struggle for women as we routinely lose blood (and therefore iron) with our monthly cycle. Many women are low or deficient in iron without actually realizing that’s the problem.


Ensuring that we maintain strong iron stores is crucial for our overall health and well being, and in seasons of pregnancy, it just becomes that much more important. With the expansion of our blood supply needed to nourish the baby and supply the placenta, our iron levels must increase or else we’ll quickly find ourselves anemic, or at least borderline anemic (where you experience some of the effects, even if a test doesn’t official declare you to have anemia).


This winter, as I neared the end of my first trimester, I was struggling with repeated colds and flus, which tend to plague me each time I’m newly pregnant (it’s normal for the immune system to be suppressed during pregnancy).


But along with that, I had other strange symptoms that were throwing me for a loop and seemed unrelated to the viruses I was battling.


They included:


  • Shortness of breath (this became obvious when I repeatedly found myself winded or much more tired than I normally would be from something only moderately strenuous)
  • My heart beating very quickly, especially at night when I was trying to fall asleep. It was difficult to relax because of this.
  • A general sense of fatigue that seemed to hang over me the whole day, no matter what I did.
  • And it’s possible that my recurring illnesses were exacerbated by my iron deficiency, as it can make you more susceptible to infection

How to Naturally Boost Your Iron Levels

Image by buboplague


Here’s a list of signs that you may be low in iron:


Extreme fatigue
Pale skin
Weakness
Shortness of breath
Chest pain
Frequent infections
Headache
Dizziness or lightheadedness
Cold hands and feet
Inflammation or soreness of your tongue
Brittle nails
Fast heartbeat
Unusual cravings for non-nutritive substances, such as ice, dirt or starch
Poor appetite, especially in infants and children with iron deficiency anemia
An uncomfortable tingling or crawling feeling in your legs (restless legs syndrome)
taken from Mayo Clinic website


It’s worth noting that children can become iron deficient as well, and this can actually harm their growth and development, so if you suspect iron deficiency in your child, it’s well worth getting them checked out to rule it out or know so that you can be proactive about increasing their iron intake.


For breastfed babies, the best thing that a mom can do is to up her own iron intake, to ensure that baby is getting plenty of it through her milk, at least until that baby begins eating solids and then you can ensure that they are also consuming iron rich foods in their diet.


There are blood tests to check for iron deficiency, and this is useful, but you want to make sure that the doctor or midwife checks both your iron blood levels (hemoglobin and hematocrit) as well as your iron stores (by testing your serum ferritin – probably the most reliable test). Once your stores begin to dip, even if your blood levels are still good, you can move into a state of deficiency quickly, particularly when you are pregnant.


How to Naturally Boost Your Iron Levels

Image by stefan koopmans


Addressing my own iron deficiency


After speaking to my midwife about it and researching a little, I concluded that low iron was the culprit and went straight out to purchase a bottle of my very favorite iron supplement, Floradix.


I use this supplement because a) it’s a highly reputable brand and recommended by several naturopathic doctors I respect, b) the iron is extremely absorbable and works very quickly, and c) it does not go along with those horribly uncomfortable side effects that other iron supplements are notorious for (constipation, nausea, etc.).


I have also had good experience in the past with the liquid herbal iron supplement from Trilight Health (and I love their other pregnancy-safe formulas – I’m currently using the mineral one).


After just a few days, I began to feel more like myself again. After a month of going through my large bottle, I felt fantastic and back to normal.


Fast forward two months… our family is currently working and living this winter/spring in Europe (follow us on Instagram here). At present, we just recently finished up a month of renting a home in a small town in France. After recognizing some of these very same iron deficiency symptoms creeping up again the past week or two, I began going to various pharmacies (which in France carry both conventional and natural remedies side by side).


But to my dismay, no one had ever heard of Floradix, nor could I even find a single type of liquid iron, let alone one that was plant and herb based, which would be gentle on my system.


In desperation (for real – the 300-year old house we were living in had 3 flights of very steep steps and I was huffing and puffing each of the ten times that I went up and down them every day – it felt a little pathetic!), I decided to figure out how I could boost my iron using just food sources and whatever else I could get my hands on until I can buy a proper iron supplement.


How to Naturally Boost Your Iron Levels

Image by freecandy13


As a huge proponent of using real food to nourish the body whenever possible, my plan was to eat as many foods naturally high in iron as possible.


Animal foods high in iron


  • Liver. This is the superstar, traditional foods iron-booster. If you can find a way that you don’t mind eating it, this is a first choice for boosting iron levels. Both beef liver and chicken liver are helpful.
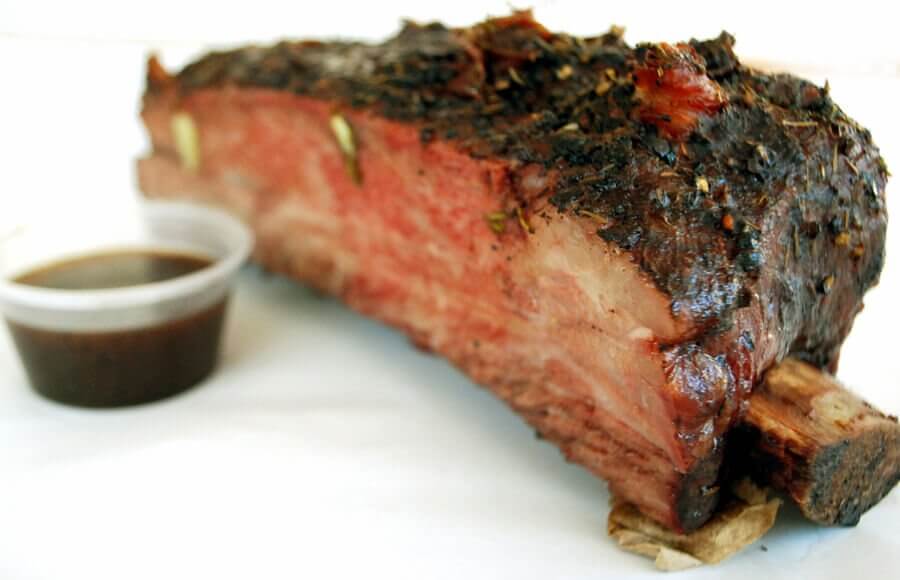
  • Beef. Good old red meat has high iron levels
  • Lamb
  • Oysters and clams
  • Eggs and turkey (not nearly as high as others, but higher than some animal foods)

How to Naturally Boost Your Iron Levels


Plant foods high in iron


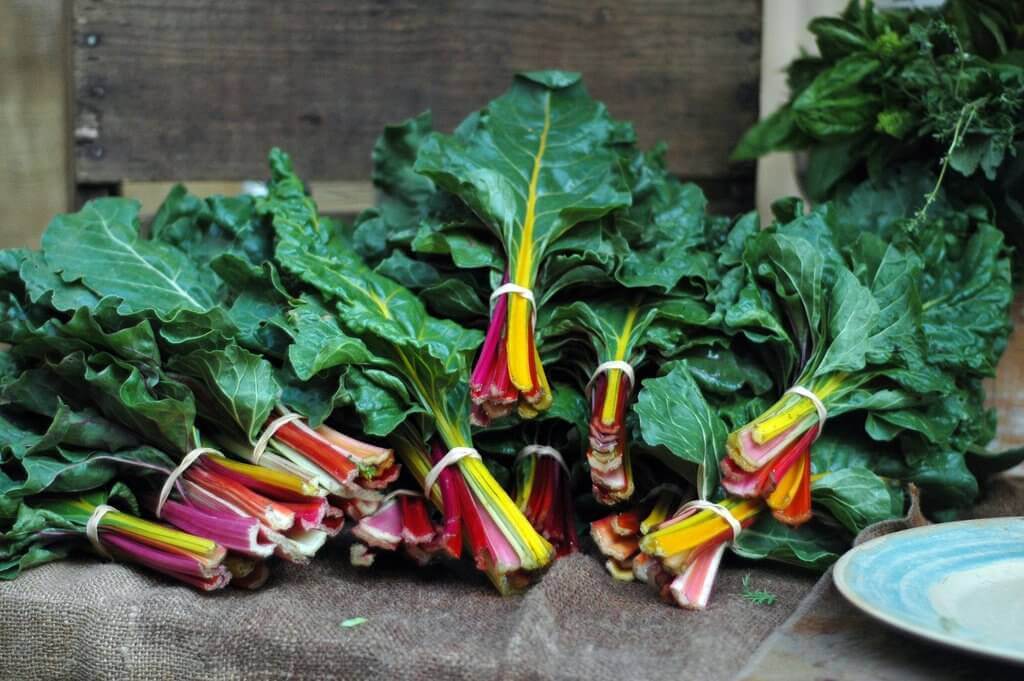
  • Dark leafy greens, particularly spinach and swiss chard (lightly cooked is best)
  • Beans & legumes – lentils, chickpeas, navy beans, kidney beans, lima beans.
  • Some dried fruits, particularly apricots (choose unsulphered), and also dried peaches, prunes and raisins.
  • Quinoa
  • Pumpkin seeds and sesame seeds

How to Naturally Boost Your Iron Levels

Other sources of iron


  • Seaweeds – Spirulina is especially high, and nori, dulse, and kelp are also helpful. Our family adds powdered spirulina and kelp to things like smoothies, and we also like to eat toasted, lightly salted sheets of dried nori (like sushi paper).
  • Blackstrap molasses
  • Herbal teas and infusions that you make yourself – Nettle, Yellow Dock and Dandelion are all good choices, but before using any herbal remedy, make sure you do your research to know what’s safe and what isn’t. I do know that Nettle in particular is safe in pregnancy and included in many nourishing teas for this purpose.

Make sure that you absorb it


There are people who will tell you that you should focus on plant sources of iron, and others (mostly traditional foods or paleo/primal advocates) who will insist that animal-sourced iron is the way to go.


Personally, I think it’s wise to include a mixture of both kinds of iron, as each person will absorb them differently. The more variety you give your body, the more likely that you will get enough overall.


It is worth noting that the iron in plant foods (called “non-heme iron”) is not always as easily absorbed by the body as that in animal foods. However, when consumed alongside Vitamin C, it becomes much more useable.


So whenever you eat these iron-rich plant foods, be sure to make sure you eat something with vitamin C at the same time – fresh citrus is a great choice, berries, bell peppers, etc.


fruits-oranges-3397
Image by tinyography

It also helps to pay attention to your digestion. The better your gut is working, the more that you’ll take in all of the nutrients in what you eat. Taking probiotics, eating cultured and fermented foods daily, reducing sugar in your diet – all of these things and more can help your gut to function as it should.


Also, consider reducing grain intake temporarily, or making sure that you only consume grains that are soaked, sprouted or sourdough to reduce their phytic acid content, as both phytic and oxalic acid (found in some raw veggies, such as spinach or broccoli, so eat them lightly cooked instead) interfere with iron absorption.


Reducing tea and coffee consumption is also wise, especially not having it after an iron-rich meal. Milk can also interfere with iron absorption so again, try not to have dairy and iron-rich foods too close together. For more specific suggestions on increasing iron absorption, read this post.


Pregnant or not, it’s just wise to keep your iron levels up.


It doesn’t need to be a stressful or particularly calculated thing, but more a matter of making sure you’re including iron-rich foods in your diet on a regular basis.


If you are deficient, it’s wise to supplement first (though I’d recommend at least a chat with your doctor or midwife before doing anything at all), and then make sure you are purposeful about maintaining your iron levels for future prevention. You don’t want to let your iron deficiency become a bigger issue or lead to further complications in the meantime.


What have you found to be effective for boosting your iron levels?


Top image from tulumba


Disclaimer: I am not a certified medical professional of any kind and am not qualified to give you medical advice, to diagnose any illness or prescribe treatment. My goal is to help to educate and inspire you to take responsibility for your own family’s health and make informed choices of your own, not to consult you on medical treatment.


Original article and pictures take keeperofthehome.org site

четверг, 12 декабря 2013 г.

How to Meet the Challenge of Nutrition for School-Age Children

How to Meet the Challenge of Nutrition for School-Age Children

Share with:


The following article (with slightly different formatting) was first turned in as an assignment for my nutrition class.


What Elementary School-Aged Children Need in Their Diets


What School-Aged Children Need in Their Diets -- Titus 2 Homemaker (img CC0 by PerWaernborg via Pixabay)

Elementary school-aged children, perhaps surprisingly, do not have radically different nutritional requirements than adults. They are, however, in a period of significant transition, from being fed to having a greater responsibility for their own diets, and this presents the greatest challenges to healthy eating during this period.


Most nutrient requirements in the 4-8 age group are remarkably similar to the adult requirements, although, of course, scaled for body size and daily caloric intake. The one notable exception is protein. Pound-for-pound, the recommended protein intake for children is slightly higher than (non-pregnant) adults: 0.95 grams per kilogram of body weight per day, versus 0.80 g/kg per day (Institute of Medicine, 2005). The increased protein requirement helps facilitate growth. In practical terms, this difference is somewhat negligible; the average consumer would never notice the difference in the underlying figures by looking at the recommended totals.


In addition to the slightly increased protein intake, the rapid growth during this stage probably makes it wise to also be vigilant about the intake of calcium and its sister mineral, magnesium. This will be supportive of the bones which are having to grow, solidify, and support an increasingly greater body weight. In this country, though, the greatest difficulty is typically not in having access to the right balance of nutrients; it is getting children to actually eat it.


Challenges


Up to this point, children’s eating habits have been highly dependent. They more or less eat what they’re fed. (They may balk, but they have had little control over what is available.) With the transition to school comes increased independence. They may begin to influence purchases by expressing their preferences, choose what goes in their lunchboxes, or purchase/borrow/beg/trade for foods outside the home. This makes it imperative to make healthy foods palatable for picky eaters and to influence the development of food-related habits and thought processes in a healthy way.


ECOlunchbox Three-in-One Stainless Steel Food Container Set

Waterproof Waxed Canvas All Purpose Lunch Bag Handmade by Hide & Drink


Depending on the community, a seemingly contradictory challenge may also present itself. Children who want to make healthy choices may find themselves stymied by their parents’ inability to cook. This may necessitate both educating parents and providing some easy-to-prepare, no-cook (or “low-cook”) options that children can handle on their own.


How to Cook Everything: Simple Recipes for Great Food

Solutions


Given all the points just presented, how do we address them? The approach is multi-faceted, and which aspects are emphasized will depend greatly on the setting. We can educate children, present appealing options, get them involved, teach parents, and advocate in our communities.


Educate Children About Good Nutrition


Educating children involves informing them of facts, and increasing their awareness. Children are never too young to begin learning that what they eat affects how they feel and how their bodies work. Their understanding will gradually increase with age, of course, but children can learn where food comes from, that some is more processed than others, that different foods present different nutrients, etc.


They can learn that every calorie they take in is like a “space” that is now occupied, and if those spaces are all filled up with “empty” calories, they run out of room for the foods with nutrients.


Perhaps most importantly, they can be made aware of how their food makes them feel, learning to pay attention to their bodies’ signals for hunger or thirst, or that a food gives them energy or makes them feel bad.


Present Them with Appealing Options


Choosing appealing options makes kids more likely to eat their nutritious food. (TItus 2 Homemaker) img license CC0 by Jill111 via Pixabay

We can also present children with appealing options. If the only vegetables a child ever sees are mushy, grey peas from a can, he probably will not like vegetables very much! Crisp red radishes and sweet, vibrant orange carrots on top of crunchy romaine lettuce is much more appealing. If he doesn’t like cooked spinach, maybe he enjoys it raw. If sauteed broccoli is not a favorite, maybe roasted broccoli is. The idea is to make healthy food a joy, not drudgery, even if it takes a little bit of experimentation to figure out what he likes.


It is also important to keep in mind that “good enough” that we actually eat is far better than “perfect” that we don’t. Raw carrots and broccoli with Ranch dressing is a vast improvement over an absence of veggies. If a little chocolate in the milk is what it takes for a child to find it palatable, the calcium might be worth the trade-off. A little of a not-so-healthy, but flavorful ingredient can go a long way toward making the really healthy foods edible. “A spoonful of sugar helps the medicine go down,” as Mary Poppins said. As long as the balance is healthy, it’s worth letting these little things slide.


The same is true of other lifestyle choices. Very few people are going to want to exercise if “exercising” means squat thrusts and ab crunches. Dodgeball in the backyard is a lot more fun. Teach the kids hopscotch or jump rope rhymes like we used when we were children. Get them riding bicycles or swinging. Or find an activity they enjoy, like baseball, dance, or horseback riding. Get them involved in active hobbies, and that will create healthy habits they can carry forward through life.


Get Them Involved


Radishes are an excellent option for little ones to grow, because they grow quickly. -- Titus 2 Homemaker (img CC0 by raspberryjam0314 via Pixabay)

One method that often helps to make the healthy options more appealing is to get the children themselves involved. A preschooler who “hates” radishes might relish eating the radishes he grew in the flower bed. (Radishes are a really good introductory plant for little ones, because they grow quickly.) A child who balks at vegetables might enjoy choosing something “weird” from the international market and learning about how to prepare it. The child who learns to cook is usually more interested in eating.


In order to get the children involved, though, we might need to educate the parents. Many of the parents in this generation never learned to cook. They stick with frozen chicken nuggets and boxed macaroni and cheese primarily because they don’t know how to prepare anything else. Community classes can be a help. Friendly neighbors can help. Even the children themselves can help, if we teach them simple skills they can then pass on to their parents. Something as simple as providing recipes that are wholesome but easy may be the difference between a family eating processed food and a family eating real food.


Advocate for Health in Your Community


Finally, we can advocate for health in our communities. Those community cooking classes? Somebody has to teach them. Somebody has to fight for the schools to serve proper food. Many schools have been cutting back on or eliminating recess. If we believe it’s important for children to move, we may even have to fight for recess! Community gardens might be a need in areas where homes often do not have yards with planting space. Even encouraging an appreciation for weeds can be beneficial to children’s health, if it decreases the amount of pesticides community residents spray on their lawns.


(bee on a dandelion) Learn to appreciate your

Recommended Eating


For the most part, the meals I would recommend for school-aged children would be the same I would recommend to anyone: whole, real foods, as unprocessed as reasonably possible. Particular recipes that would be helpful for this age, though, would fall into two categories: healthy snacks, and from-scratch versions of kid-friendly favorites. A few examples follow.


  • 2 c. warm water
  • 4 c. whole wheat flour (bread flour or all-purpose, not pastry flour)
  • 1 Tbsp. instant yeast
  • ½ tsp. salt
  • 8 oz. tomato sauce
  • 1 Tbsp. oregano
  • 4 c. grated mozzarella cheese
  • pizza toppings as desired

  1. Mix the warm water with half of the flour and the yeast. Let sit for 15-20 minutes.
  2. Add salt and remaining flour. Shape into two crusts on greased baking sheets or stones.
  3. Mix oregano into tomato sauce and spread over pizzas.
  4. Top pizzas with cheese and other toppings as desired.
  5. Bake in a preheated 450-degree oven for about 14 minutes.

Getting involved in making their own food increases children's likelihood of eating well. --- Titus 2 Homemaker (toddler making a banana sandwich)

References


Institute of Medicine. (2005). Dietary reference intakes for energy, carbohydrate, fiber, fat, fatty acids, cholesterol, protein, and amino acids. Washington, D.C.: National Academies Press.

Petersen, D. (2015). NAT 308: Holistic Nutrition. Portland, OR: American College of Healthcare Sciences.


How to Meet the Challenge of Nutrition for School-Aged Children -- Titus 2 Homemaker

Original article and pictures take titus2homemaker.com site
вторник, 10 декабря 2013 г.

How to Make Your Own Sunscreen #DIYFriday

How to Make Your Own Sunscreen #DIYFriday

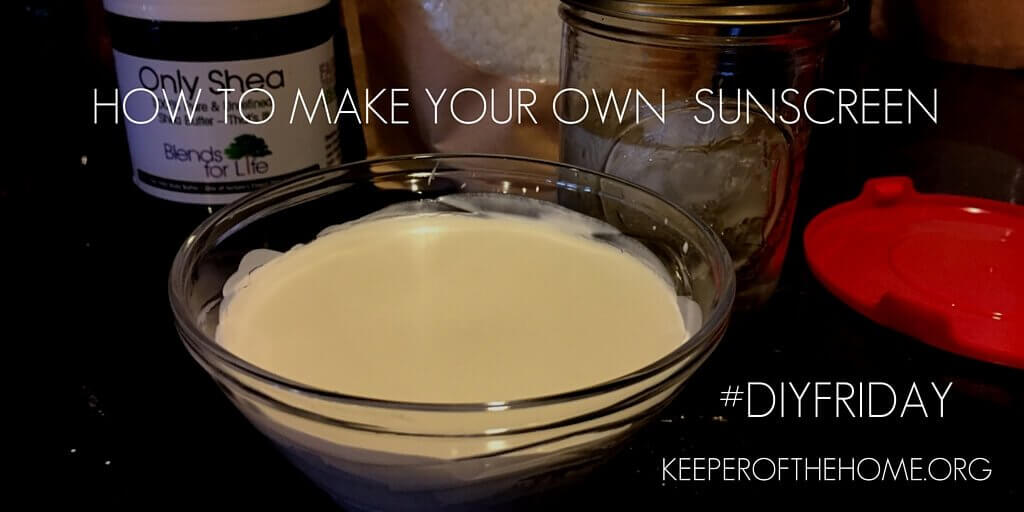
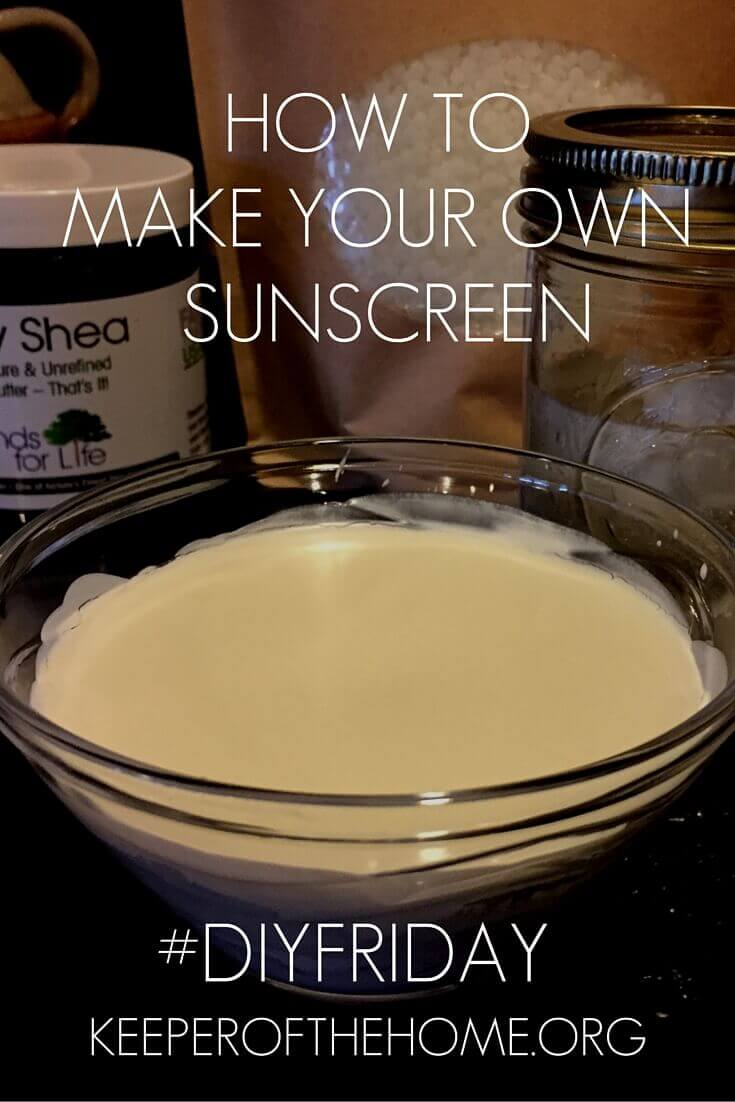
Have you ever wanted to make your own sunscreen? I had some hesitation, but it turns out that it’s easy and nourishing for your skin…not to mention quite a bit less expensive!


By Ann Timm


Making your own sunscreen just sounds, well, ew. I don’t usually shy away from making skin care products, like a sugar scrub we made a while back that left my skin feeling like silk, but I have to admit I was slightly overwhelmed at the idea of mixing anything with zinc. I just imagined those thick white zinc lines that guys put under their eyes and thought, NO.


However, and you probably already know this, zinc oxide is really the safest option when it comes to protecting your skin with sunscreen.


Did you know that zinc is also good for your skin for a number of other reasons, too? Zinc has been used for centuries to treat many skin conditions ranging from rosacea to warts, infections and even eczema and psoriasis.


And don’t forget, it’s an important mineral that our bodies need. We get it naturally in our diet from foods like certain meats, dairy, seafood, nuts, seeds, and even quinoa and chocolate. (As if we ladies needed one more reason to grab the chocolate!)


Our skin takes a beating every day and there are many factors that contribute to the damage that is caused. The sun’s UV rays, air pollution, chemicals in our personal care items, poor diet, not enough water intake, even stress and lack of exercise can all contribute! Believe it or not, zinc is one of the minerals that our bodies need to manage it all. Plus, zinc oxide offers broad-spectrum protection against damaging UVA and UVB rays when applied directly to the skin.


Do we really need to use sunscreen?


On a regular day-to-day basis our family does not use any sunscreen. We prevent sunburns by wearing appropriate clothing and building up our bodies own natural defenses spending lots of time outdoors in the spring and during the mornings.


We rarely burn unless we spend an abnormal amount of time in the sun, for example while swimming or working in the yard. Speaking of that, I’ll be working in the yard this weekend now that it is finally starting to thaw out. I need to prepare my garden beds for planting and pull all those weeds that are creeping in!


Just in time for all of the outdoor spring cleaning I need to do I decided to try making this homemade sunscreen. I want to avoid the nasty chemicals like:


  • Oxybenzone (found in 65% of sunscreens) – a hormone disrupting chemical
  • Retinol palmitate (a form of Vitamin A – fine in the body, but probably harmful on skin)
  • Methoxycinnamate or Octinoxate
  • Padimate O/PABA
  • Nano or Micronized mineral particles

Especially that oxybenzone with my already hormone-wacky body! So I chose to nourish my skin instead with shea butter, coconut oil, beeswax, zinc oxide, and essential oils. These are natural ingredients that I already use on my skin and include in other skin care products that I make. Adding the zinc oxide provides more nourishment and also that barrier against the sun’s rays.


Tto learn more about what to avoid and what to look for, I highly recommend the EWG Sunscreen Guide.


In particular, take a look at the sunscreens that rated the best, and then some articles on sunscreen safety and efficacy.


Here’s how to make your own all natural sunscreen:


Here’s the recipe to make your own all natural sunscreen:


Print

Instructions


  1. I set up a makeshift double boiler by setting a glass bowl over a pot of water at a low boil.
  2. Add the beeswax, shea butter, and coconut oil to the bowl. The beeswax may take longer to melt, but be patient. ��
  3. Stir the oils and beeswax frequently until melted.
  4. Remove from heat.
  5. Add the zinc oxide and stir together until smooth.
  6. I added about 10 drops of lavender essential oil to mine, but feel free to leave this step out completely. Note: not all essential oils are safe for use in the sun, please do your research if you choose to add them to a sunscreen.
  7. Pour mixture into a glass container that you can seal with a lid and let cool.
  8. You're done!

It’s that easy!


Note that you want to clean your bowl and spoon right away. I very carefully used the boiling water from the pot and everything came clean just fine.


You can see from the video that the homemade sunscreen easily blends into my skin without leaving that sticky white residue that I imagined! It felt just like any nourishing body butter that I usually make and naturally provides about an SPF of 30. Win-win!


Do you use sunscreen? Have you ever made your own sunscreen?


Here's how you can make your own sunscreen...and have it as a safe, healthy, all natural alternative to what's sold in stores.
Disclosure: This post contains affiliate links. When you buy through our links, we earn a small commission, which helps to keep this site going so that we can continue to offer free and useful content, so thanks!
How to Make Your Own Sunscreen Lotion

Stocking Your Summer Medicine Cabinet (Plus 23 recipes)

Original article and pictures take keeperofthehome.org site

пятница, 6 декабря 2013 г.

How To Make Your Own Popcorn Flavor Shakers (7 Varieties!)

How To Make Your Own Popcorn Flavor Shakers (7 Varieties!)

Two Christmases ago, we surprised our boys with this Vintage Popcorn Machine. It’s been super fun for family movie nights – but especially fun to use when we invite friends over.

popcorn machine

I’ve had it on my to-do list since then to make fun flavor shakers to go with our popcorn. (Not that coconut oil and sea salt aren’t amazing in and of themselves.)


Finally, I got the shakers made for my kids to enjoy a year later – in time for Christmas this year. Then it took another three months to type this out to share with you. Time flies when you’re eating popcorn.


So if anyone understands that it might take you until 2019 to make these, it will be me. But if you happen to find a few minutes before then, do try to whip these up. It doesn’t take long, I promise. (Neither does washing windows, but do I ever get around to that? No. Let’s stop talking about that and eat some popcorn, want to?)


popcorn-shaker-collection2

The beauty of these Popcorn Flavor Shakers is that they taste just as good, if not better than, the commercial ones you can buy at the store. But of course, when we make our own we will save money and include only healthy ingredients.

You may find it helpful to blend these ingredients together to make a fine powder for easier sprinkling.


7 Popcorn Flavor Shaker Recipes


Taco


2 Tablespoon dried minced onion

1 Tablespoons chili powder

2 teaspoons onion powder

1 teaspoon garlic powder

1 teaspoon paprika

1 teaspoon sea salt

1/2 teaspoon cumin


Ranch


2 Tablespoons dried minced onions

3 teaspoon parsley flakes

1 teaspoon salt

1/4 teaspoon garlic powder


(These ingredients are the same as my Ranch Dressing Mix, so if you have that on hand, simply blend it and pour it into a shaker.)


Barbecue


3 teaspoons smoky paprika

1 teaspoon sucanat or brown sugar

1/2 teaspoon garlic powder

1/2 teaspoon onion powder

1/2 teaspoon chili powder

1/2 teaspoon sea salt


Hot Chocolate


2 Tablespoons cocoa powder

3 Tablespoons sucanat or brown sugar

1/4 teaspoon sea salt


Salted Caramel


3 Tablespoons sucanat or brown sugar

1/4 teaspoon sea salt


Cinnamon Sugar


3 Tablespoons sucanat or brown sugar

1 teaspoon ground cinnamon

1/4 teaspoon sea salt


Pizza


1½ teaspoon garlic powder

1 Tablespoon onion powder

2 teaspoon oregano

1 Tablespoon dried parsley

2 teaspoons sea salt

1 teaspoon pepper


make-your-own-popcorn-flavor-shakers

Want a printable that includes the shaker labels and easy recipe reference? Join our free newsletter list (we have a lot of fun together!) and I’ll send it to you!


popcorn-shakers2

If you’re already on my Heavenly Homemaker’s Newsletter List, I sent you an email yesterday with these goodies attached. :)


Original article and pictures take heavenlyhomemakers.com site

вторник, 3 декабря 2013 г.

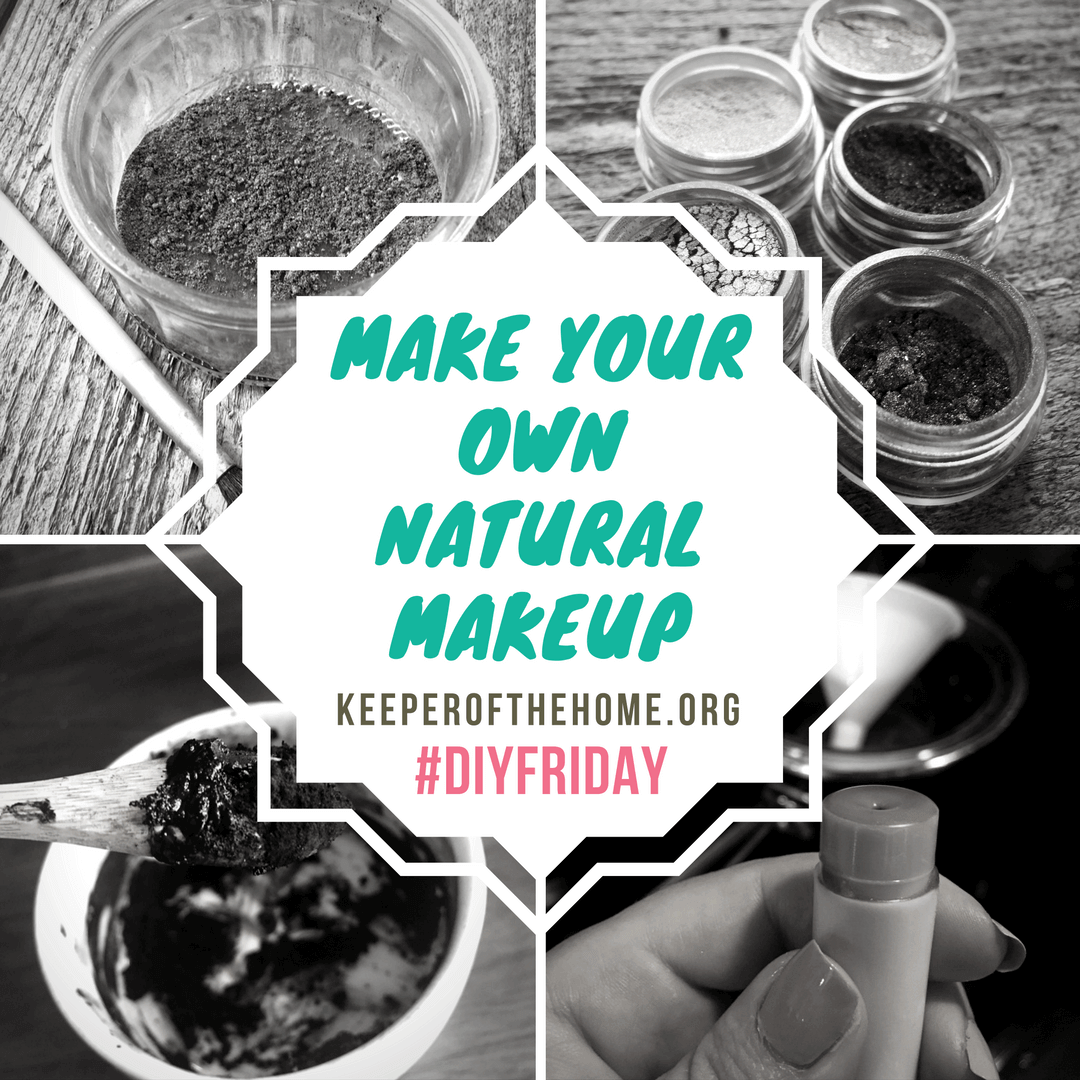
How to Make Your Own Natural Makeup #DIYFriday (with Video)

How to Make Your Own Natural Makeup #DIYFriday (with Video)

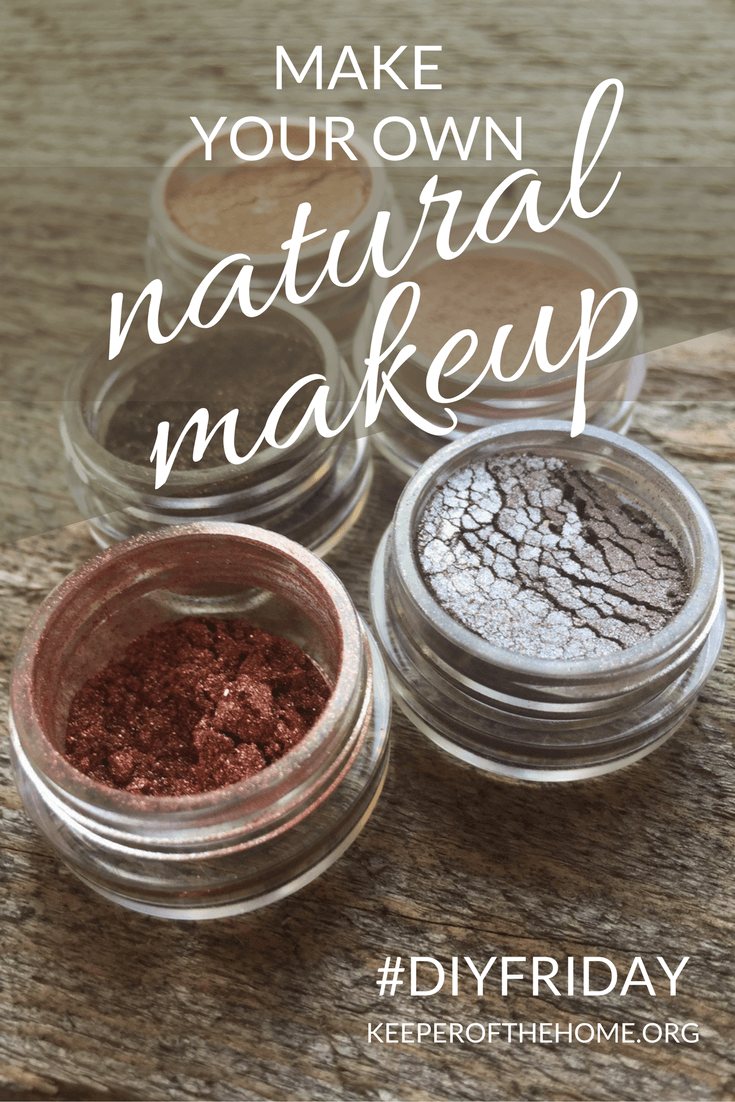
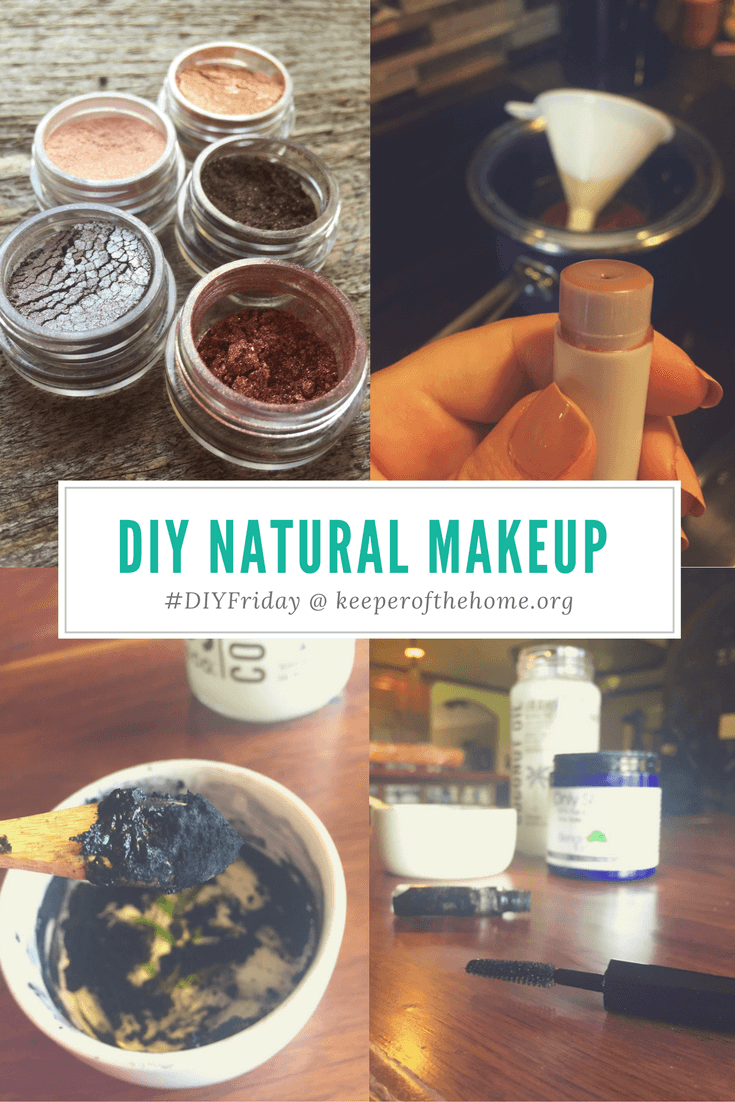
Not so long ago, I discovered that you can make your own natural makeup at home. As it turns out, it’s not even that hard: it’s a DIY project that turns into a fun girls’ day for us. We are using mica powder, zinc oxide, and activated charcoal to make our own natural mascara, lip tints, and powders. Basically they are ground minerals that are naturally occurring in the earth. The bonus is that minerals can be beneficial to your skin.


Not so long ago, I discovered that you can make your own natural makeup at home. As it turns out, it’s not even that hard: it’s a DIY project that turns into a fun girls’ day for us.


Perhaps it’s my crafty nature or maybe its my incessant desire as a mother to protect my family and keep them healthy that has had me searching for safe skin products, especially for myself and my daughters.


I don’t mean to leave out the men in my family, but let’s be honest! We women use dozens more products than our male counterparts! Skin, hair, nails, eyes, more skin…and there they are, good with one soap that does it all and maybe, maybe, a moisturizer.


My girls use body soap, facial cleanser, shampoo, conditioner, facial lotion, body lotion, concealer, foundation, powder, blush, eyeliner, primer, eye shadow, mascara…oh my goodness…breathe…body spritzers, hair spray, gel, mousse, nail polish…and the list goes on…


Not so long ago, I discovered that you can make your own natural makeup at home. As it turns out, it's not even that hard: it's a DIY project that turns into a fun girls' day for us. We are using mica powder, zinc oxide, and activated charcoal to make our own natural mascara, lip tints, and powders. Basically they are ground minerals that are naturally occurring in the earth. The bonus is that minerals can be beneficial to your skin.
How could we use all these products and never question what effect they have on our systems, not to mention our pockets?

And with four females in our home, we have quite a few allergies to products applied to the skin.


We get lots of questions about how to add color to DIY makeup like lip balms, mascara, eye shadows, and blush or cheek stains AND whether or not they work, so we thought we’d show you just how easy it is.


Not only is it fun to be able to play around with different colors, especially when you have teenage girls, but if you’re trying avoid all the junk and unnecessary toxins that go in to most store-bought cosmetics, this is also a great way to know exactly what’s going into your skin products.


If you have skin allergies or sensitive eyes, this can be especially important for you. There are many natural products that you can use to create beautifully colored makeup: cacao, dried roots like beets, and even juice from berries!


One of my favorite mascaras is a blackberry mascara by 100% Pure. It has this slight hint of a deep purple and I love it! In fact, my daughter has it hidden somewhere in her bathroom!


Using fruit can be messy and stain more than just your makeup, so I leave that kind of coloring to the pros and I’m happy to buy it from them!


Not so long ago, I discovered that you can make your own natural makeup at home. As it turns out, it's not even that hard: it's a DIY project that turns into a fun girls' day for us. We are using mica powder, zinc oxide, and activated charcoal to make our own natural mascara, lip tints, and powders. Basically they are ground minerals that are naturally occurring in the earth. The bonus is that minerals can be beneficial to your skin.

In today’s DIY video, we are using mica powder, zinc oxide, and activated charcoal. Basically they are ground minerals that are naturally occurring in the earth. The bonus is that minerals can be beneficial to your skin.


But just like other fine powders, be careful that you don’t get them directly into your eyes or inhale them. My daughter Cassandra says, “Save the heavy sniffing for your essential oils and have fun!”


If you want to read more on what might be lurking in your beauty products, read this great summary about avoiding toxins in beauty products.


Interested in more natural skincare DIY posts? Don’t miss our DIY natural body scrub and other natural skincare tips and our DIY natural lip balm post.


From my experience there are pros and cons to making your own natural products. These aren’t as easy peasy as, say, essential oil blends. So before you jump in, make sure you are prepared with everything you need!


Not so long ago, I discovered that you can make your own natural makeup at home. As it turns out, it's not even that hard: it's a DIY project that turns into a fun girls' day for us. We are using mica powder, zinc oxide, and activated charcoal to make our own natural mascara, lip tints, and powders. Basically they are ground minerals that are naturally occurring in the earth. The bonus is that minerals can be beneficial to your skin.
Your ingredients might include colors made from:

  • mica powder
  • cacao powder
  • activated charcoal
  • dried and ground vegetable root like beets, or other fruits and vegetables
  • spices from your cabinet, though be careful not to use something spicy!

Base products to help powders stick together and stay smooth:


  • cosmetic clay

Before you start, get supplies together like:


  • small bowls
  • stirring sticks
  • containers to mix and keep your products in

Keep in mind that some of these products will be messy. Create a work space that is mess friendly and clean up as soon as you finish.


Not so long ago, I discovered that you can make your own natural makeup at home. As it turns out, it's not even that hard: it's a DIY project that turns into a fun girls' day for us. We are using mica powder, zinc oxide, and activated charcoal to make our own natural mascara, lip tints, and powders. Basically they are ground minerals that are naturally occurring in the earth. The bonus is that minerals can be beneficial to your skin.

I found that pouring the boiling water that I use to melt some of these base ingredients works really well at melting them off of the glass bowls and mixing utensils once I’m done. Just use hot pads and please pour carefully!


And wait! Don’t forget a camera to capture the moments, especially if you are making this quality time with a girl in your life!


How to Make Your Own Natural Mascara and Eye Liner


The creative side of me does love mixing the colors with oils, butters, and waxes, watching the finished product emerge and laughing with my daughters as we play around with different colors or “help” each other apply makeup.


I tend to make small batches of cosmetics that are only used for a short amount of time, because the shelf life isn’t going to be long.


As with any products that you use on your face, be careful around your eyes.


Not so long ago, I discovered that you can make your own natural makeup at home. As it turns out, it's not even that hard: it's a DIY project that turns into a fun girls' day for us. We are using mica powder, zinc oxide, and activated charcoal to make our own natural mascara, lip tints, and powders. Basically they are ground minerals that are naturally occurring in the earth. The bonus is that minerals can be beneficial to your skin.
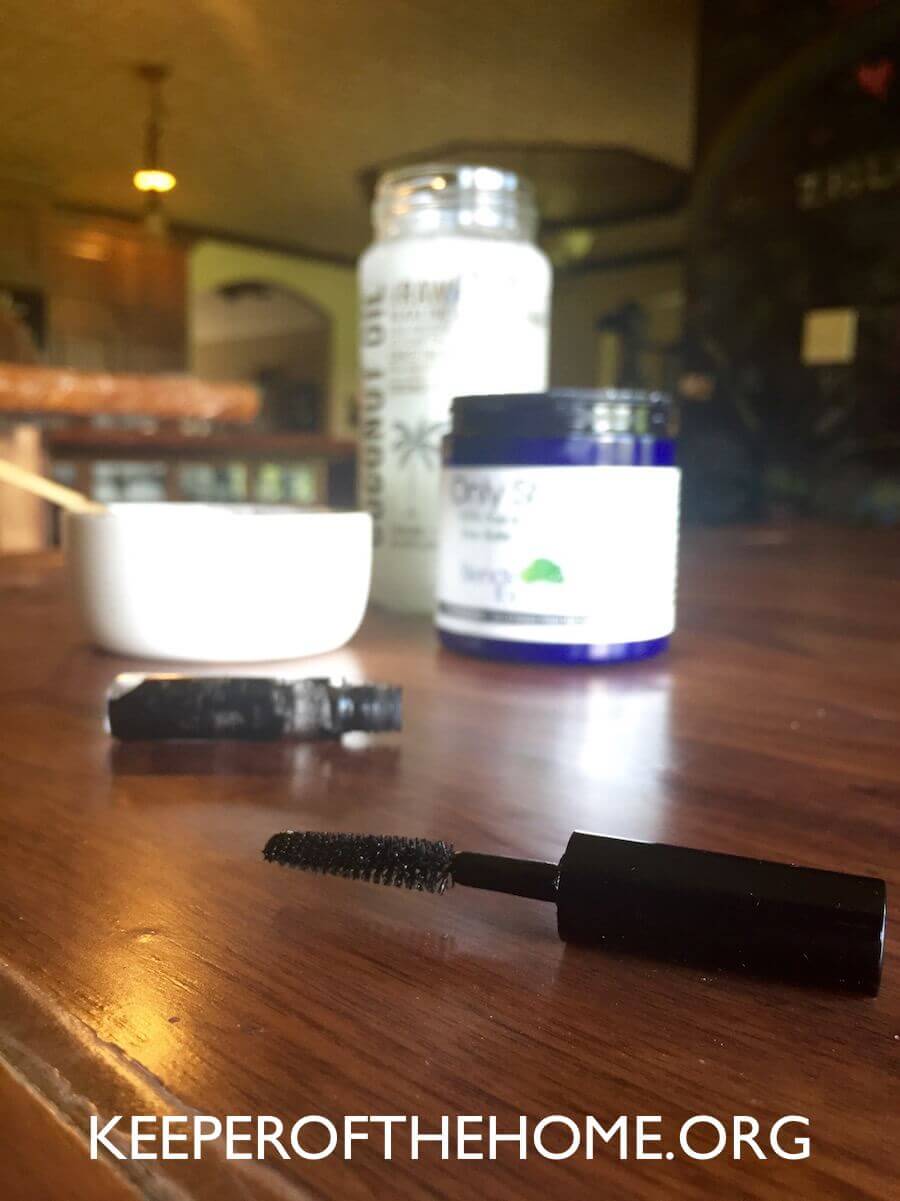
Mascara is pretty simple to make.

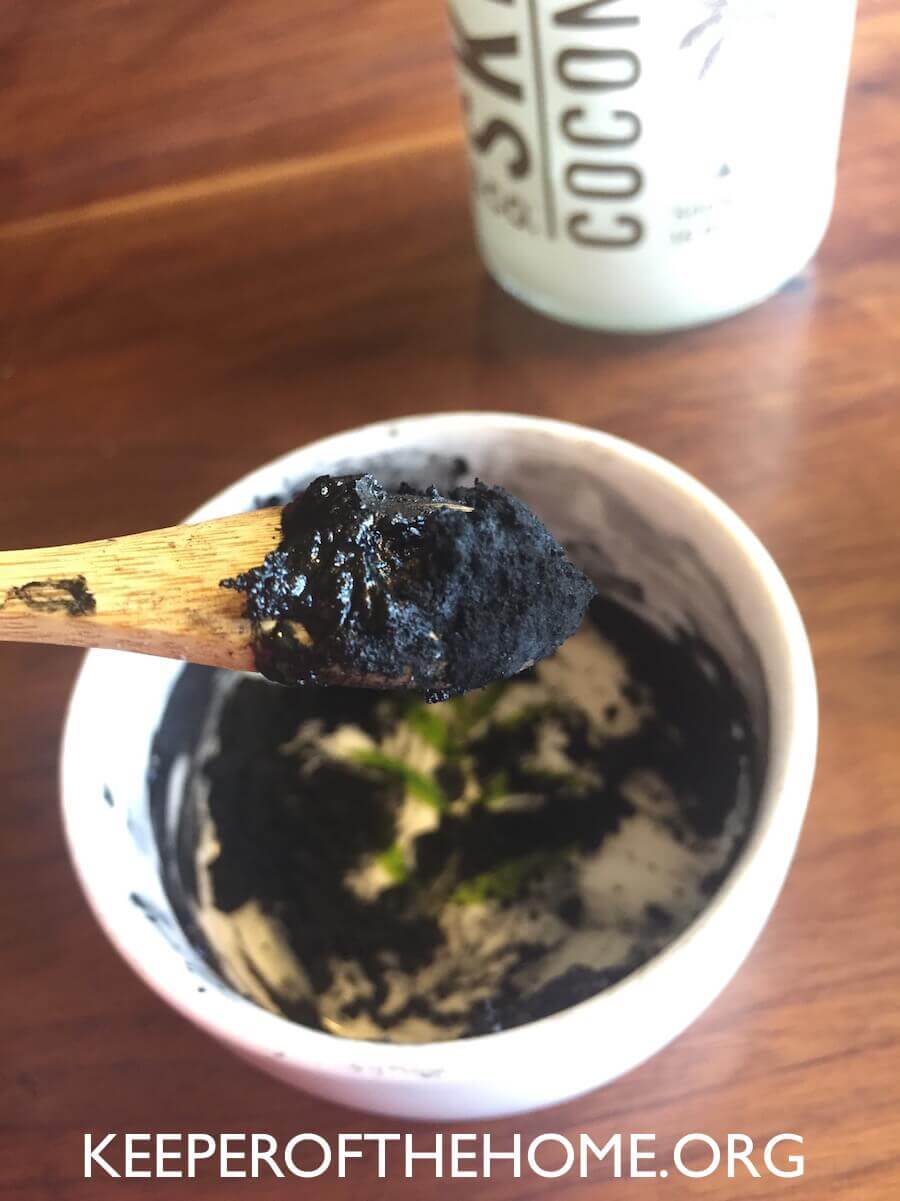
I love dark lashes so I use activated charcoal, but you could mix in cacao powder to lighten the color, or just go with straight cacao powder if you like the lighter shades.


You can even add sparkle with a bit of shimmery mica powder.


Mix in some shea butter or coconut oil until it’s smooth and thick.


Start with very small amounts and work until you get it smooth.


Then add cosmetic clay to harden so the mascara stays on your lashes.


Note: my daughter and I simply used the shea butter and coconut oil with the activated charcoal to make our mascara and it applied beautifully, looked smooth, and lengthened the lashes. It did last several hours, but it smeared slightly on her cheeks and eyelids. Adding the clay will help with that.


You can use this method for eye liner as well.


Not so long ago, I discovered that you can make your own natural makeup at home. As it turns out, it's not even that hard: it's a DIY project that turns into a fun girls' day for us. We are using mica powder, zinc oxide, and activated charcoal to make our own natural mascara, lip tints, and powders. Basically they are ground minerals that are naturally occurring in the earth. The bonus is that minerals can be beneficial to your skin.
How to Make Your Own Natural Eye Shadow, Blush, and Bronzers

We had the most fun with these, as you can see from the video! The colors you can make are endless, so get creative.


Not so long ago, I discovered that you can make your own natural makeup at home. As it turns out, it's not even that hard: it's a DIY project that turns into a fun girls' day for us. We are using mica powder, zinc oxide, and activated charcoal to make our own natural mascara, lip tints, and powders. Basically they are ground minerals that are naturally occurring in the earth. The bonus is that minerals can be beneficial to your skin.

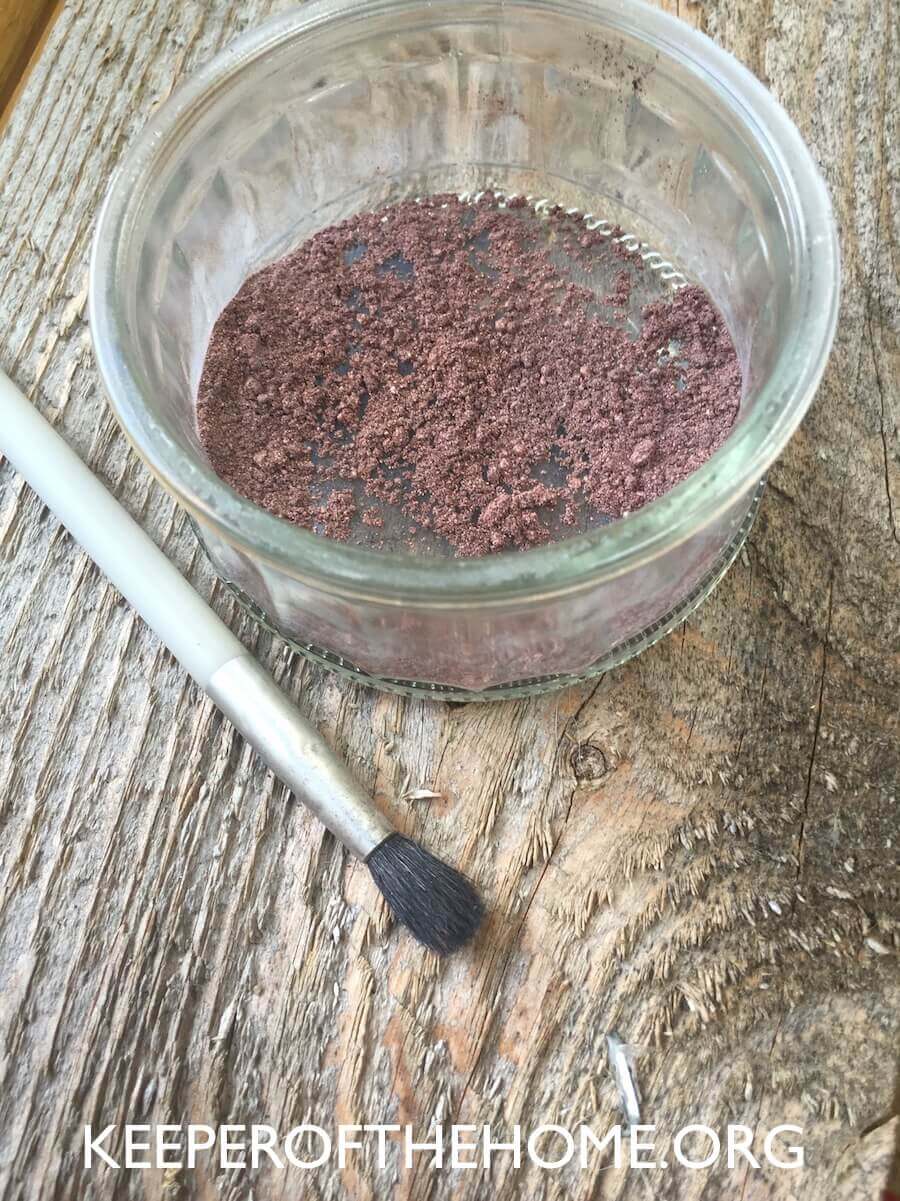
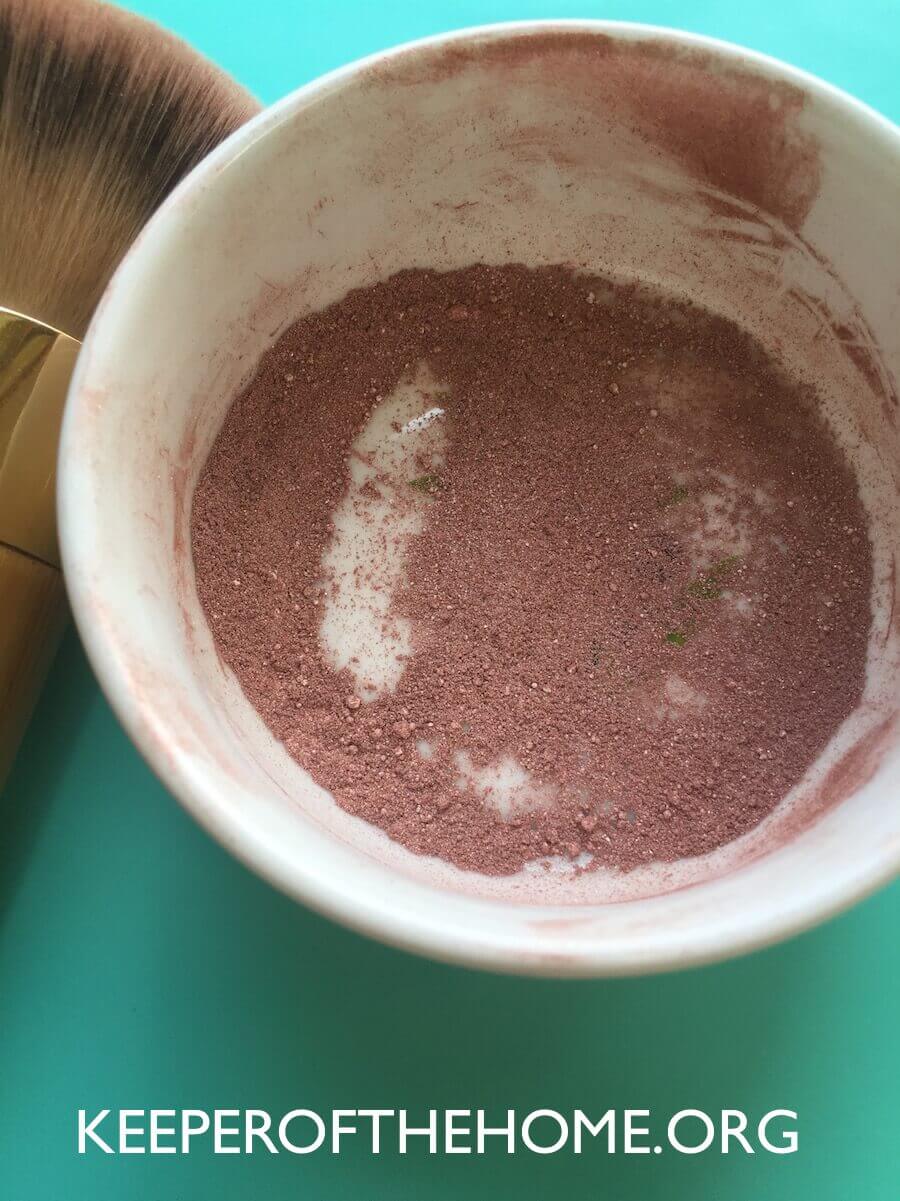
Our powders were mixed with zinc oxide powder as a base. The amounts you make and use are really up to you. Start with a little and add more until you find a color you love. Use a cosmetic brush and apply lightly…or liberally!


Now, for the video of our adventures:


Do you make your own natural makeup? What tips and tricks do you have to share?


Disclosure: This post includes affiliate links. Thank you for supporting our work and mission!


Original article and pictures take keeperofthehome.org site